
Related Manuals for tepro Keansburg


Summary of Contents for tepro Keansburg
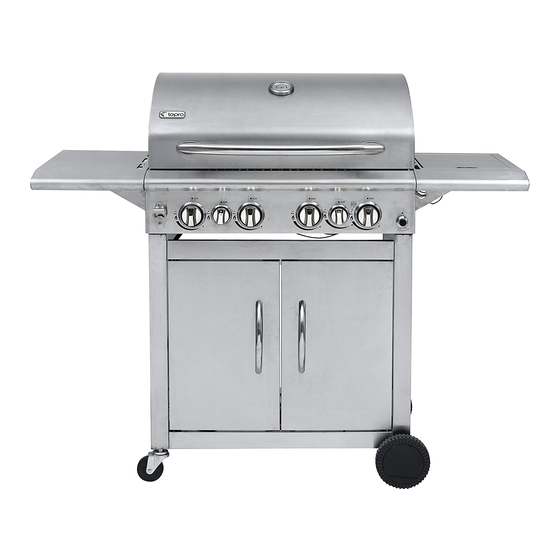
- Page 1 Instruction Manual GAS GRILL „KEANSBURG“ Version 2017, Art. Nr. 3149UK P160162_TEPRO_3149UK_Keansburg_20161011.indd 1 11/10/16 10:40 AM...
- Page 2 P160162_TEPRO_3149UK_Keansburg_20161011.indd 2 11/10/16 10:40 AM...
-
Page 3: Table Of Contents
Content Before using the grill ..........................4 Scope of delivery ..........................4 Intended use ............................4 For your safety ..........................4 - 5 Signal symbols ..........................4 General safety instructions ....................... 4 Safety instructions ..........................5 Assembly ............................6 - 13 Preparation ............................6 Required tools ............................6 Assembling the BBQ ........................ -
Page 4: Before Using The Grill
Before using the grill Fasteners 1/4“x12mm screw 29 After unpacking and before every use, check whether the item shows any signs of damage. 5/32“x10mm screw 32 Should this be the case, do not use the item, but notify your 1/4“ spring-lock washer 13 retailer. -
Page 5: Safety Instructions
Safety instructions Danger Risks to children! While playing, children can become caught in the Danger Fire hazard! packaging film and choke. Parts of the BBQ become very hot during operation – Do not let children play with the packaging films. and can cause fires. -
Page 6: Assembly
Assembly Step 3 Preparation Danger Risk of injury! Failure to follow these instructions can lead to prob- lems and risks while using the BBQ. – Follow all of the assembly instructions listed here. required tools 1 x Phillips screwdriver 1 x adjustable spanner Assembling the BBQ 1. - Page 7 Step 5 Step 7 Fasten the side supports (O) to the legs using screws BB. Insert the castor wheel with lock (I1) into the rear left leg and the castor wheel (H1) into the front left leg. Fit wheel (S) onto the axle (U). Step 6 Insert the axle (U) through the holes on the end of the right leg.
- Page 8 Step 9 Step 11 Fasten the door handles (A1) to the left and right door (Y, Z) using screws AA. Place the burner unit (F) on the assembled wagon. Step 12 Step 10 Attach door (Y) to the bolt in the left side of the base plate. Push in the upper bolt (see detailed image) and slide the door under the front cross support (X) until it clicks into place.
- Page 9 Step 13 Step 15 Screw the side burner support angles (M, N) beneath the side burner unit (L) using screws BB. Loosen the retaining screws for the side burner unit (L) on the right side of the burner unit (see detailed image) and hook in the side burner unit.
- Page 10 Step 17 Step 19 Loosen the retaining screws on the left side of the burner unit (see detailed image) and hook in the left side tray (G). Retighten the retaining screws. Step 18 Fasten the side burner unit (L) and the left side tray (G) control panel using screws BB.
- Page 11 Step 21 Step 23 Insert the side burner (K) from above into the opened side bur- ner unit. Align the Venturi tube with the valve. Make sure that the valve tip is inserted fully into the Venturi tube and is aligned properly.
- Page 12 Step 25 Step 28 Place the warming rack (A), the BBQ grates (B) and the BBQ garte inlay (B2) in the burner unit. Place the side burner attach- Insert the motor (K1) into the motor holding clamp. ment (J) in the side burner unit. Step 27 Step 26 Slide the drip tray (V) from behind under the burner unit.
-
Page 13: Insert The Battery
Insert the battery Step 29 The grill requires a battery for automatic ignition. A 1.5V, AA battery is required (not included!). Remove the battery compart- ment cover located between the temperature knobs and insert a 1.5V, AA battery into the battery compartment. Heed correct po- larity (+ / -). -
Page 14: Mounting The Gas Hose
Before grilling Mounting the gas hose • Depending on national regulations, there are two ways to • Wash off possible rough production residues using warm wa- connect the gas hose to the grill. First take the protective cap ter; in doing so, avoid the use of cleaning agents or dishwash- off the gas connection if present. -
Page 15: Maintenance And Cleaning
Grilling with the grill spit If the burner does not light within 5 seconds, turn the regulator to off. Wait 5 minutes for any gas to dissipate Use the horizontal burner only when grilling with the grill spit. and then repeat the above steps. If the burner still does You will achieve the best results if you grill with the lid closed at not light, ignite the grill manually as described in the user low heat. - Page 16 • Use a brush, spatula or sponge to remove any food residue from the grill base. Then wash again with warm soapy water. Rinse with clean water and dry. • Clean all interior and exterior surfaces with warm soapy water. •...
-
Page 17: Troubleshooting
Troubleshooting Technical data Product: Art. No. 3149UK, Gas grill „Keansburg“ Problem Possible cause Proposed solution Weight: approx. 36,5 kg Burner will not – LPG cylinder is empty – Replace with a full LPG ignite cylinde Total dimensions: approx. 133,8 x 57,5 x 116,5 cm –... -
Page 18: Service
The gas grill should be maintenanced by a professional once a year. Please contact us using the below email address (distributor) for assistance with service questions. Subject to technical modifications and typographical errors. Distributing company tepro Garten GmbH Carl-Zeiss-Straße 8/4 D-63322 Rödermark, Germany Email: info@tepro-gmbh.de oder backoffice@tepro-gmbh.de Website: www.tepro-gmbh.de Email: info@tepro-gmbh.de oder... -
Page 19: Matching Accessories (Not Included In The Delivery Scope)
(not included in the delivery scope) Available over-the-counter and online. Cast Iron BBQ Grate Insert – For inserting into the grate in the grate system, tepro Item number 8571 – Cast iron BBQ grate, approx. Ø 30.5 cm P160162_TEPRO_3149UK_Keansburg_20161011.indd 19 11/10/16 10:40 AM... - Page 20 Cast Iron Pan Insert tepro Item number 8573 – For inserting into the grate in the grate system – Cast iron pan, approx. Ø 31.7 x 3.5 cm Pizza Stone Insert tepro Item number 8572 – For inserting into the grate in the grate system –...
- Page 21 Further matching accessories (not included in the delivery scope) Universal covering hood - large 8605 tepro Item number – Made from high-quality, durable, polyester fabric 300 x 250D – with water-repellent PVB coating – resistant to UV radiation – side vents –...
- Page 22 P160162_TEPRO_3149UK_Keansburg_20161011.indd 22 11/10/16 10:40 AM...
- Page 23 P160162_TEPRO_3149UK_Keansburg_20161011.indd 23 11/10/16 10:40 AM...
- Page 24 P160162_TEPRO_3149UK_Keansburg_20161011.indd 24 11/10/16 10:40 AM...
Need help?
Do you have a question about the Keansburg and is the answer not in the manual?
Questions and answers