Seat Toledo Manual
Hide thumbs
Also See for Toledo:
- Owner's manual (259 pages) ,
- Owner's manual (250 pages) ,
- Owner's manual (53 pages)

Related Manuals for Seat Toledo


Summary of Contents for Seat Toledo
- Page 1 Related videos (valid for: TOLEDO) ››› ››› General instructions and settings page 9 Navigation page 58 Telephone management system ››› ››› Radio mode page 30 page 79 (PHONE) » ››› ››› Media mode page 39 Full Link page 18...
- Page 2 Related videos (valid for: ATECA) ››› ››› General instructions and settings page 9 Navigation page 58 Telephone management system ››› ››› Radio mode page 30 page 79 (PHONE) ››› ››› page 39 page 18 Media mode Full Link...
-
Page 3: Table Of Contents
Full Link* ....... SEAT Media Control ..... . -
Page 4: Overview Of The Unit (Valid For: Toledo)
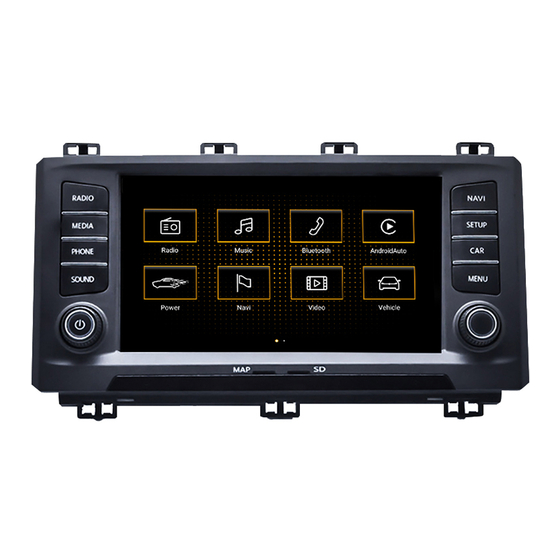
Overview Overview Overview of the unit (valid for: TOLEDO) Fig. 1 Overview of the controls ››› ››› ››› ››› page 30 page 39 page 67 page 10 ››› ››› ››› ››› page 9 page 79 page 74 page 13 ›››... -
Page 5: Overview Of The Unit (Valid For: Ateca)
Overview Overview of the unit (valid for: ATECA) Overview of the controls Fig. 2 ››› ››› ››› ››› page 30 page 39 page 18 page 10 ››› ››› ››› ››› page 9 page 79 page 74 page 13 ››› ››› ›››... -
Page 6: Main Menus
Overview Main menus Summary of the menus. Fig. 3... - Page 7 Overview ››› ››› ››› page 30 page 79 page 67 Radio Telephone Traffic ››› ››› ››› RADIO main menu page 30 Pairing page 81 Traffic information (TP) page 35 ››› ››› ››› page 31 ® page 80 page 67 RDS radio data services Bluetooth...
-
Page 8: Introduction
Introduction Introduction ● Select volume settings that allow you to WARNING easily hear signals from outside the vehicle Connecting leads for external devices may at all times (e.g. emergency services sirens Safety instructions relating to the In- obstruct the driver. and horns). -
Page 9: General Instructions For Use
Introduction Introduction CAUTION Do not insert 8 cm single CDs or irregu- – larly shaped CDs or DVDs. The Infotainment system can be damaged by If the setup is changed, this may change the Do not insert DVD-Plus discs, Dual Discs –... - Page 10 Introduction Switch on and Switch off ● On some vehicles with ParkPilot, the vol- Note ume of the audio source is automatically low- In grid mode, the 6.5" screen displays only 8 To manually switch the Infotainment system ered when reverse gear is selected. You can icons in the main menu.
- Page 11 Introduction on the multifunction steering wheel upward Operation of the function buttons and These buttons are operated by briefly press- ››› Booklet Instruction Manual. ing the screen or by pressing and holding. the instructions on the screen Lowering the volume: Turn the volume con- The function buttons appear in the instruc- trol ...
- Page 12 Introduction Mark list entries using the setup button and Display and function buttons: operation and ef- Display and function buttons: operation and ef- open them fect fect ● Turn the setup button to mark the entries The scroll bar is shown on the right and its Press to close a pop-up window or an input ×...
- Page 13 Introduction Input masks with on-screen keypad Input windows for selecting a saved entry Icon and function text: operation and effect (e.g. selection of a destination address) Scroll bar, the size of which depends on the It is only possible to select a sequence of let- number of matching entries.
- Page 14 Introduction ››› Additional displays and display op- Fig. 11 if any parameters have not been Function Function set or if the NEVER function button has not tions button been pressed. To go to the previous or next parameter The displays appearing on the screen may to set.
-
Page 15: Voice Control
Introduction Voice control voice control main screen will be displayed, ● Activate voice control / VOICE ››› Fig. 12, (the main screen will appear in the Give the Help command in the language ● format selected in Voice control settings established in the System setup , and fol-... - Page 16 Introduction IMPORTANT: The system will ONLY recognise When you activate voice control you are tak- PLAY MORE LIKE THIS Play more like this ››› a command when the symbol is displayed en to the main screen Fig. 12 where the as “active”...
-
Page 17: Voice Control Settings
Introduction Voice control settings HOME ADDRESS Home address LAST DESTINATIONS Last destinations Press the Infotainment button ● MENU open the main menu System setup Navigate to Forename Sur- NAVIGATE TO CONTACTS name ● Press the function button to access SETUP the system setup. -
Page 18: Connectivity
SEAT provides for this vehicle. MirrorLink ® ● ● To make full use of SEAT Apps, you must ac- From the SETTINGS menu > Data transfer for tivate the option , “Data transfer for Setup SEAT apps, there is a checkbox to acti- ●... - Page 19 SEAT cannot be held liable for any damage ● caused to the vehicle as a result of the use of applications that are of poor quality or are...
-
Page 20: Requirements
® – MirrorLink 1.1 or higher – Some of the apps certified by SEAT or the CCC must be installed on the device. – Check smartphone compatibility. Android Auto™: www.android.com/auto/ – Android 5.0 (Lollipop) or higher – Install Android Auto™ app –... -
Page 21: Activation Of Full Link
In the main menu for the Full Link setup, device. Fig. 17 Full Link Setup Check that the vehi- select Activate data transfer for SEAT apps cle and device USB Have the USB port replaced at a ››› Fig. connections are not SEAT Authorised Service. -
Page 22: Pairing Portable Devices
Function button: function Note : allows the exchange of infor- ● In order to use Android Auto™ technology Data transfer for SEAT apps mation between the vehicle and applications authorised it is necessary to download the Android Full Link menu Fig. -
Page 23: Mirrorlink
Connectivity ® MirrorLink on the portable device on the Infotainment Function button: function system screen. Press to close the open apps. Then To avoid distracting the driver while driving, press the apps to be closed or the CLOSE APPS only specially adapted applications can be function button to close all Close all ›››... -
Page 24: Apple Carplay
To return to the basic contents of the Infotain- must be done while the vehicle is stationary. ment system, press the icon. requirements must be met: SEAT Once the first pop-up window about accept- ● Make sure that you do not have Apple ●... - Page 25 Connectivity To return to the basic contents of the Infotain- ment system, press the Return to SEAT button. Note Some mobile devices require a change in the USB connection mode in order to use Android Auto™. ● Make sure that your mobile is in “Media Transfer Protocol (MTP)”...
-
Page 26: Frequently Asked Questions
SEAT model? No, that is not possible. Where can I find more information about Full Link? If in doubt, please refer to the Innovation/Connectivity sections of our website: www.seat.es or www.seat.com, or send your query to seat-responde@seat.es... -
Page 27: Seat Media Control
Infotainment Sys- tem, depending on the country and the Introduction You can obtain information about technical equipment: requirements on the SEAT website or at SEAT 3 Only available for the model: Navi System Plus dealerships. ● Navigation destinations. - Page 28 Data transmission may incur charges. Due The Infotainment System can use the WLAN Mobile hotspot function button and activate to the high volume of data exchanged, SEAT hotspot of an external wireless device to es- the checkbox. recommends the use of a flat rate mobile tablish an internet connection.
- Page 29 Connectivity Note Due to the large number of different wireless devices in existence, it is not possible to guarantee fault-free operation of all func- tions.
-
Page 30: Audio And Media Mode
Audio and Media Mode Audio and Media Mode RADIO main menu RADIO main menu function buttons Function button: function Radio Mode To change the group of memory buttons slide a finger over the memory buttons Related video from left to right or vice-versa BAND Allows you to select the frequency band. -
Page 31: Rds Radio Data Services
Audio and Media Mode Information and possible icons RDS radio data services (FM band) FM radio stations may occasionally or contin- uously broadcast different content on differ- Display: Meaning ent regional frequencies under the same sta- tion name (e.g. Station 3). View the frequency or the name of the sta- tion and, where applicable, the radio text. -
Page 32: Digital Radio Mode
Audio and Media Mode Station list order The DAB radio station that was last selected will be played if it can still be received at the Stations that are available at a certain time current location. are displayed on the station list screen ( STA- TION LIST function button). -
Page 33: Memory Buttons
Audio and Media Mode Automatic station tracking ● Switch to a similar station: This allows Screen view menu service providers to indicate alternative sta- DAB is currently not available in all areas. In The function buttons refer to the menu that tions with similar content. -
Page 34: Storing Station Logos
Audio and Media Mode In the RADIO main menu, you can store sta- Storing station logos Note tions from all available frequency wave- Not all stations are stored in the database Store automatically (only in FM and DAB lengths on the numbered function buttons. and therefore it is not always possible to as- mode) These function buttons are called “memory... -
Page 35: Scan Function
Audio and Media Mode Manually tuning in a station frequency. Storing stations Starting and stopping the scan function ››› Press and hold one of the arrow but- Press the Fig. 25 function Starting the scan Press the function button Station Settings tons on the left of the multifunction button to open the station list. -
Page 36: Settings
Audio and Media Mode If a station is selected without the func- Setup (FM, AM, DAB) Function button: function tion in FM mode, the radio tries to find sta- FM setup tions with this function in the background. If : To manually assign or delete the stored Station logos station logos to and from the memory buttons no station is found, this will be indicated half... - Page 37 Audio and Media Mode Function button: function Function button: function Function button: function : the unit always switches to the sta- : The TP function (traffic news station : All available stations on the selected fre- Automatic Traffic Program (TP) Station list ...
- Page 38 Audio and Media Mode Function button: function : this allows service provid- Switch to a similar station ers to indicate alternative stations with similar con- tent. This depends on the country and unit in question. Only available for the model: “Navi System Plus”...
-
Page 39: Media Mode
Media Mode Fig. 31 ● The infotainment system only plays undam- (Toledo) aged compatible audio files; other files are Copyright ignored. Audio and video files on data storage devices Consult the list of supported devices on the ●... - Page 40 Audio and Media Mode Valid for the model: Navi System Plus Requirements for playing in the unit Data storage device Audio files Video files Optical discs: – Maximum resolution 720 x 576 pixel and 25-30 fps – audio CD (up to 80 min). (frames per second).
- Page 41 Audio and Media Mode Valid for the model: Media System Plus/Navi System Data storage device Requirements for playing in the unit Audio files – Digital Audio specification. Optical discs: – MP2 (.mp2) and MP3 (.mp3) files with bit rates of between 32 and 320 kbit/s or variable bit rate. –...
-
Page 42: Playing Order
● SEAT assumes no liability for any deteriora- Playlists are not played automatically, in- ● and playlists to determine a certain tion or loss of files on data storage devices. - Page 43 Audio and Media Mode MEDIA main menu MEDIA main menu function buttons Function button: function Function button: function Play more like this. Creates a virtual playlist that includes Indicates the media source being played. tracks with a similar rhythm to the one be- Press to select another media source ing played if available using Gracenote ®...
-
Page 44: Changing The Media Source
Audio and Media Mode Messages and symbols on the MEDIA main Change the media source Display: Meaning menu There is no traffic news station available Display: Meaning ››› page Displays information about the artist name, ››› DAB not available page ... -
Page 45: Changing Tracks
Audio and Media Mode Changing track in the MEDIA main Controlling playback via the MEDIA main Function button: Media source menu menu ››› Internal CD/DVD drive page CD/DVD Action Function SD CARD 1 ››› SD memory card page Goes to the start of the cur- SD CARD 2 rent track. -
Page 46: Selecting An Album By Its Cover
Audio and Media Mode Selecting an album by its cover Selection of a track from a list of the track list. The track that is currently play- ››› ing is highlighted Fig. tracks ● Search through the track list and press the desired track. -
Page 47: Database View
Audio and Media Mode Database view Function button: function Function button: function Indicates the media source being explored. Repeat all tracks. If pressed it goes to the root folder of the Repeats all the tracks that are on the same device indicated on the icon. -
Page 48: Inserting Or Ejecting A Cd
Audio and Media Mode Insert or eject a CD or DVD Eject a CD or DVD Insert or eject a memory card ● Press button Depending on the features and the country, The CD or DVD in the drive will be ejected ●... -
Page 49: External Data Storage Device Connected To The Usb Port
Audio and Media Mode card from the system, the function button Further operation of the external data medi- Possible error messages after connecting an becomes inactive (grey colour). um (changing track, selecting tracks and external data storage device playback modes) is described in the appro- ●... -
Page 50: External Audio Source Connected To The Aux-In Multimedia Socket
Audio and Media Mode ● Press the function button. A quired with a 3.5 mm jack that is inserted in- Remove safely Operation Effect dropdown menu appears with the following to the AUX-IN socket of the vehicle. options: SD1 Card, SD2 Card*, USB1 and Stopping playback on the The infotainment system The connected external audio source is... - Page 51 Audio and Media Mode ® Starting Bluetooth audio transfer The available functions will depend on the ● Do not connect an external media player to ® Bluetooth Audio profile that the connected play music via Bluetooth ® and via the USB ●...
- Page 52 Audio and Media Mode imported from different data storage devices Unknown albums ● Press the function button. ■ DELETE to the jukebox and this used to play them. ■ Track. Activate the checkboxes to the right of the ● files or folders to be deleted.
- Page 53 Audio and Media Mode ● Music genre cation protocol, allowing the app to provide tem depends on the connected WLAN audio the system with the available media content. source and the application used. Title ● ● Video Conditions Note ● Non-playable files (an unsupported file has The Infotainment system does not provide ●...
- Page 54 Audio and Media Mode ● Press the Configuration function button DVD video mode The unit's DVD drive is configured to read the to configure the WLAN network. regional code for the region in which the ve- 3 Only available for the model: Navi System Plus hicle was originally sold.
- Page 55 Audio and Media Mode Video settings (DVD) Media settings Function button: function 3 Only available for the model: Navi System Plus Select the MEDIA main menu by pressing Use the arrow buttons to browse the DVD ● menu. Confirm the selection by pressing the Infotainment button.
-
Page 56: Images
Audio and Media Mode Images on the screen (e.g. with your thumb) and, Function button: function while continuing to press with your thumb, The image viewed was obtained via GPS lo- slide another finger (e.g. your index finger) calisation and upon pressing this function around it like a compass either clockwise (to ... - Page 57 Audio and Media Mode Function button: function : The full images are displayed on the screen. Full : To adjust the display time of the images Display time during a slideshow. : The active slideshow will be repeated Repeat slideshow ...
-
Page 58: Navigation
Up to date navigation da- Introduction When the Infotainment system is unable to ta can be acquired at a SEAT dealer. receive any data from GPS satellites (due to a General information dense tree canopy, underground car park),... - Page 59 If the Infotainment system is switched off, the saved. installation process is paused and will auto- The SD card is initially to be found inserted in SEAT recommends only using original SEAT ● matically resume when switched back on. SD card slot 2.
-
Page 60: New Destination
Press the button on the Infotainment : To modify or activate or deactivate the split VIEW system to open the last menu that was open ● SEAT recommends a CLASS 10 memory ››› ››› screen and show POI Fig. 48 page card for the use of navigation data. -
Page 61: Route Options
Navigation instruction “Start Route Guidance” a route to After starting route guidance Function button: function the given destination will start. : To enter the desired city or postcode. City Search : To enter the desired street name. Street Search for addresses and Points of Interest : To enter the desired house number. - Page 62 Navigation roads and at roundabouts, for example: “At Route criteria: Meaning Note the roundabout, take the second exit.” The quality of the navigation recommenda- Orange route: Shortest route to the destination, even if it A navigation announcement informs you tions given by the Infotainment system de- results in longer travelling time.
-
Page 63: My Destinations
Navigation My destinations (destination memory) ● Mark the Flagged destination in the Function button: function destination memory. : To delete a stored route. Delete ● Press the function button. Store : To edit and store a route. Edit The name can be changed in the following in- put window. -
Page 64: Points Of Interest (Poi)
Navigation Points of interest (POI) Available function buttons. Function button: function New dest. To add a new destination to the tour. : View of destinations stored manually Destination memory ››› and from imported vCards page 68, Importing Destina- To add a new destination from My des- vCards (electronic business cards). -
Page 65: View
Navigation Selecting a point of interest on the map Split screen Function button: function Function button: function Map display in three dimensions (bird's eye view). There are several points of interest in the area. Press this symbol to open a list of points of inter- Buildings are also displayed in three di- ... -
Page 66: Map Display
Navigation Function button: function Function button: function Function button: function : current vehicle position in coordinates and GPS (only when demo mode is active) To change the orientation of the map (north- Position Demo mode start status (satellite reception). facing or direction of travel). -
Page 67: Traffic Reports And Dynamic Route Guidance
Navigation Traffic reports and dynamic route Dynamic route guidance Symbol: Meaning guidance (TRAFFIC) In order for dynamic route guidance to func- tion, Dynamic route must be activated in : Traffic jam ››› the route options page : Accident If during route guidance a traffic report is re- ceived that affects the route being travelled, ... -
Page 68: Predictive Navigation
Navigation Predictive navigation Importing vCards (electronic business Importing Personal POI cards) Importing the Personal POI to a points of in- terest destination memory Importing vCards to the destination memory Insert the data storage device with the stor- ● ● Insert the data storage device with the stor- ed Personal POI or connect it to the Infotain- ed vCards or connect it to the Infotainment ›››... -
Page 69: Navigation With Images
Navigation Navigation with images Road sign indicators ● Pressing the function button Demo mode starts a “virtual route guidance” to the desti- The road sign indicators must be active in the nation you have entered. ››› menu page Navigation Setup ●... -
Page 70: Navigation Settings
Navigation Navigation settings Function button: function Function button: function : Routes re- : To modify saved destinations. Avoid routes requiring toll stickers (vignette) Manage memory Settings quiring toll stickers will be excluded from the calcula- : To select the sequential order of the en- Sort contacts tion whenever possible. -
Page 71: Navigation In Offroad Mode
Navigation Offroad Navigation Menu Function button: function Function button: function 3 Only available for the model: Navi System Plus : The selected petrol station : if demo mode is acti- Select preferred fuel station Define demo mode starting point mark will be shown before other points of interest in vated, a fictitious starting point for virtual route the search. - Page 72 Navigation Recording an Offroad tour points defined manually are shown on the Edit the name of the tour. map by a marker. Delete the tour. 3 Only available for the model: Navi System Plus Load tour Ending recording ●...
- Page 73 Navigation ● Starting off in a stored route is not detected Note by the system automatically. If an Offroad tour is being recorded, this is automatically stored if Offroad navigation is Setup discontinued. Function button: function : Reverses the direction of the stored Offroad tour. Invert : Starts the Offroad tour from the nearest point.
-
Page 74: Car Menu
CAR menu CAR menu ● VEHICLE STATUS ● Press the button on the Infotainment system. ● Press the function button and then VIEW Introduction to managing the Sport* select SPORT. CAR menu If the corresponding equipment is available, the information that appears in the Sport op- Car menu ›››... -
Page 75: Offroad
CAR menu A new lap timer recording is started by If the corresponding equipment is available, By pressing the button, informa- Consumers pressing on the surface of the digital lap the information that appears is the following: tion on the status of the vehicle's main con- timer sumption devices is obtained. -
Page 76: Ecotrainer
CAR menu the ignition is switched on to when it is Ecotrainer* If the corresponding equipment is available, switched off. the ECOTRAINER will provide information on driving style. The information on driving style 2. Since refuelling is only evaluated and displayed when mov- ing forward. -
Page 77: Vehicle Status
CAR menu Evaluation of efficient driving style ››› Symbols Fig. 68: Meaning The efficiency of the driving style is reflected The current vehicle speed is having a negative im- by different elements on the display. pact on fuel consumption. ››› Display Fig. - Page 78 CAR menu are indicative and may vary depending on the features.
-
Page 79: Telephone Management System (Phone)
Blue- call may be cut off and you may not be able to tooth ® products, ask your nearest SEAT deal- make even emergency calls. er or check on the internet. Fig. 71 Telephone man-... -
Page 80: Bluetooth
Telephone management system (PHONE) ››› ® in General information on page 79. They Bluetooth mobile telephone and the pacemaker, as mo- include, for example: bile phones may affect the functioning of Bluetooth ® technology allows a mobile tele- pacemakers. the vicinity of chemical pipelines and tanks ●... -
Page 81: Pairing
Telephone management system (PHONE) ® ● Audio profile (A2DP): Bluetooth profile for ● The Bluetooth function of the mobile tele- ● Press the button on the Infotain- PHONE transmitting audio signals with stereo quali- phone and the Infotainment system must be ment system. -
Page 82: Description Of The Telephone Management System
Telephone management system (PHONE) Description of the telephone ● Use your mobile telephone to enter and matically connect to the next mobile tele- confirm your PIN code, as indicated in the phone on the list of paired devices. management system display of the infotainment system. -
Page 83: Function Buttons
Telephone management system (PHONE) PHONE main menu ated from the User profile settings Function button: function ››› menu page To open the menu for SMS messages Telephone management can store a maxi- ››› page mum of 4 user profiles for mobile tele- phones. - Page 84 Telephone management system (PHONE) Display and symbols of the telephone ● Uncheck the checkbox: Hands-free ››› Display: Meaning Fig. 74 management system With the private mode activated the active View of stored telephone number or name. If audio and microphone become that of the the name stored in the phonebook has an as- ›››...
-
Page 85: Entering A Number
Press the function button to obtain Fig. 76 Enter telephone number menu. help in the event of breakdown. For this the network of SEAT deal- Open the Enter telephone number erships is available to you with menu their Mobile Service. -
Page 86: Phonebook
Telephone management system (PHONE) Phonebook Menu (contacts) pending on the volume of data to be transfer- Possible functions red, the process can take several minutes. It ››› may be necessary to confirm the data transfer Press the Fig. 77 function Search button to open the search window. -
Page 87: Short Messages (Sms)
Telephone management system (PHONE) If the mobile phone connected to the HFP Possible function buttons for the submenus Possible functions profile also supports the SMS profile, a new Function button: function Send an SMS Press the function button in the function button will appear in the top left- ... -
Page 88: Call List
Telephone management system (PHONE) Call Menu (call lists) If the name stored in the phonebook has an Display: Meaning assigned photo, it can be displayed on the ››› : Indicates the numbers dialled on speed dial button table on page Dialled numbers ... -
Page 89: Settings
Telephone management system (PHONE) ® Bluetooth settings User profile settings Possible functions In the PHONE main menu, press the In the PHONE main menu, press the Briefly press an assigned speed di- SETUP SETUP Dialling with al button from the PHONE main function button and then the func- function button and then the... - Page 90 Qi technolo- take care when removing it. gy, please check your mobile phone's user manual or visit the SEAT website. Note “Mobile Signal Amplifier” ●...
- Page 91 Telephone management system (PHONE) ● The charging time and the temperature vary in accordance with the device used. ● To avoid malfunction, ensure that the mo- bile phone is correctly placed on the pad. ● The maximum charging capacity is 5 W. ●...
-
Page 92: Setup
Data transfer for SEAT apps ● Press the Infotainment system but- MENU mation between the vehicle and SEAT applications. : To select the time source (GPS or Clock time source ton and then press the function but- These are not personal data. -
Page 93: Sound And Volume Settings
Setup ● Press the function button to open Sound Function button: function Function button: function the main Sound settings menu. : To adjust the WLAN mobile hotspot settings : To set the playback volume of the au- WLAN AUX volume ●... - Page 94 Setup Adjust the playback volume for external au- dio sources If you need to increase the playback volume for the external audio source, first lower the base volume on the Infotainment system. If the sound from the external audio source is too low, increase the output volume on the external audio source.
-
Page 95: Other Important Information
(Enhanced Other Network) Legal information Frequency modulation (ultra-short wave, UKW) Global Positioning System. SEAT hereby declares that the unit is in com- Global System for Mobile Communications pliance with the essential requirements and other relevant provisions of Directive Hands-Free Profile. -
Page 97: Index
Full Link ....... . 18 SEAT Media Control ..... . 27 Eject SEAT Media Control . - Page 98 Index Function buttons ......11 notes ........43 main menu Images .
- Page 99 Index MirrorLink ....... . 23 messages and symbols ....60 slider .
- Page 100 ......34 SEAT Media Control ......27 Pop-up windows .
- Page 101 Index voice control ......17 Station search ......35 select .
- Page 102 Index WLAN hotspot ......27 configure hotspot ......28 establishing wireless network connection .
Need help?
Do you have a question about the Toledo and is the answer not in the manual?
Questions and answers