Table of Contents
Advertisement
Quick Links
Advertisement
Table of Contents

Related Manuals for PrismCut P20

Summary of Contents for PrismCut P20
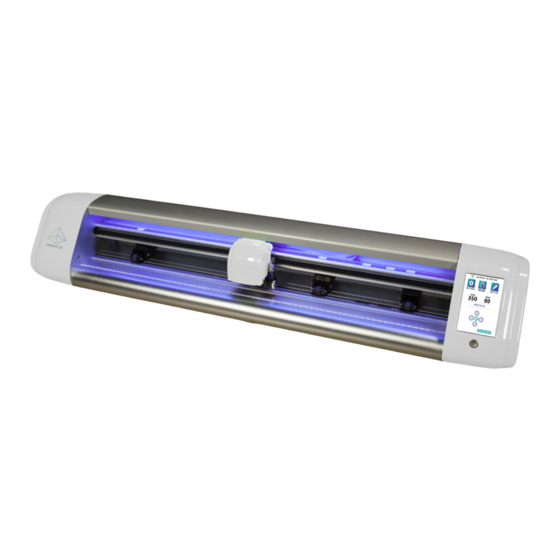
- Page 1 PrismCut Cutter/Plotter with WiFi USER MANUAL Version 1.6 Sept 20, 2019...
- Page 2 Do not use the optional accessories without first reading and understanding all the safety instructions for that accessory. Failure to do so may cause a hazard and injury to you or others. www.prismcut.com www.prismcut.com...
-
Page 3: Table Of Contents
Section 4 - MAINTENANCE AND TROUBLESHOOTING 4.1 Care and maintenance of your cutter......page 26 4.2 Calibration/Settings..............page 27 4.3 Troubleshooting cutter issues...........page 29 4.4 Warranty and support............page 31 Also, see PrismCut online video training to view the most current updates. www.prismcut.com/videos www.prismcut.com www.prismcut.com... -
Page 4: Section 1 - Getting Started
If you prefer to watch instead of read, you can find training videos that match the material presented in the manual at: www.prismcut.com/videos 1.2 Hardware setup Your PrismCut cutter/plotter ships with the following standard accessories: POWER CABLE BLADE HOLDER PEN & REFILL... - Page 5 If the top line of your cutter screen shows “HI-LINK_xxx” you are not yet connected to your home WiFi. Click on the SETTINGS icon and then go to the WIFI menu to connect the cutter to your home WiFi. www.prismcut.com www.prismcut.com...
-
Page 6: Understanding Vectorized Vs. Rasterized Images
Your PrismCut requires vectorized artwork. If you are using Vinyl Master or Sure Cuts a Lot as your design software program, new designs you create will be in vector format. -
Page 7: Connecting Your Cutter Via Wifi
WiFi using the same WiFi password you use to connect WiFi for other home devices. For advanced users, it is possible to configure the PrismCut to connect via point-to-point WiFi as might be the case if you are selling at an outdoor craft fair where there is no internet. This technique is discussed in section 3.9 of this manual and is intended for advanced users. -
Page 8: Software Installation: Sure Cuts A Lot (Mac)
Software Serial Number from the card. You will then be able to download the software. Install the software on your computer as you would any other software. Write down the email that you used for this activation as it may be needed in the future! www.prismcut.com www.prismcut.com... - Page 9 Tip: Press TEST button to verify your IP communications work If you do not see PrismCut as a selection under Model, look at the top line of your MAC screen and select Cutter->My Cutter->Manage Cutters and add PrismCut Click on Help->About Sure Cuts A Lot 4 Pro to ensure that your software version is 4.080 or higher.
-
Page 10: Software Installation: Vinyl Master (Windows Pc)
DO NOT LOSE THE CARD AND ACTIVATION CODE (PSN) - KEEP IN A SAFE PLACE Download Vinylmaster software at: https://fcws1.com/info/vmlinks.php After downloading, click on the file you downloaded. Follow the prompts to install the software On your Windows PC within VinylMaster software, click on shuttle icon and select Vinyl Spooler www.prismcut.com www.prismcut.com... - Page 11 In Connection Method section click on the pull down menu for Port Type and select Windows Port. (if you do not see PrismCut as a pull down menu option for Current Cutter, see Troubleshooting on page 30) In Connection tab Settings section click on the Configure button to open the TCP/IP Port Settings menu In TCP/IP Settings menu enter the IP address that appears at the top of your PrismCut cutter’s home screen...
-
Page 12: Section 2 - Making Your First Cut
The black arrows on the cutter are there to help identify the correct pinch roller positioning. Place the material to be cut in the PrismCut so that the rollers are at the edges and will not touch the design as it is being cut. In some cases, such as with wide jobs it cannot be avoided and rollers will go over the design, however this is typically not a problem even if the rollers touch the design. -
Page 13: Using The Pen Tool To Test Your Design
2.4 Understanding blades and the blade holder Your PrismCut ships with two 45 degree (red tip) and one 60 degree (blue tip) blades. For most needs the 45 degree (red tip) blade is best. 60 degree blades are only required for thicker materials or when a higher degree of precision is needed. -
Page 14: Speed And Force Settings
However be sure that the blade is able to cleanly cut all the corners. To help weeding, place the HTV on the warm (but not hot) bottom platen of a heat press which will help loosen the vinyl from the backer. www.prismcut.com www.prismcut.com... -
Page 15: Connecting Your Cutter Via Usb Cable
2.7 Connecting your PrismCut cutter via USB cable (optional) There is no need to connect your PrismCut via USB cable if you are already connecting via WiFi. USB is provided as a backup in case you are in an area that is not served by WiFi. -
Page 16: Section 3 - Advanced Techniques
This is as simple as pressing the Advanced Menu button at the bottom right of the PrismCut home screen. Perhaps more important, is knowing that you can always get back to the Basic Menu if you prefer a more minimalist approach to cutting. -
Page 17: Configuring Presets
Presets are stored speed/force settings that you can rename with the product names or job names you use most often. The PrismCut will display the name of the preset it is using so you know that the settings are exactly as you wanted them. -
Page 18: U-Disk (Cut From Thumb Drive Without Pc)
Once you have exported and saved your .PLT file to a thumb drive, connect the thumbdrive to the USB port of the PrismCut and click on the U-drive icon on the home screen of the PrismCut. Scroll to the desired filename and click on it to load it into the PrismCut memory. -
Page 19: Contour Cutting (Print And Cut With Reg Marks)
4 corners to help keep alignment straight over a very long job run length. It is even possible to use the RegMarkTracking in conjunction with Udisk so you can run repeat jobs without a PC being attached. www.prismcut.com www.prismcut.com... - Page 20 This Move Size slider to adjust distance is useful in cases where you of cut from image are cutting stickers or when you want distance between the image and the cutline. www.prismcut.com www.prismcut.com...
- Page 21 Tip: Click the preview button at the top of the screen to see what will actually be cut and what will be printed. This avoids unwanted surprises. www.prismcut.com www.prismcut.com...
- Page 22 Trace a contour around the outside of your image. The Trace settings allow you to adjust for poor contrast artwork. Note the “keep holes” checkbox which allows/denies contour cut lines inside the main outline. www.prismcut.com www.prismcut.com...
- Page 23 (as shown by the target icon in the below image). The cutter will then search for all registration marks, align itself and cut along the contour. www.prismcut.com www.prismcut.com...
-
Page 24: Using The (Optional) Embossing Tool
In your software, blade offset and overcut values should be set to zero when engraving. www.prismcut.com www.prismcut.com... -
Page 25: Using The (Optional) Laser Attachment
On your computer scan for available networks to find HI_LINK_XXXX and then connect to HI_LINK the same way that you would connect to your home router. The password for Point-to-Point is 12345678 The IP address for Point-to-Point is 192.168.16.254 www.prismcut.com www.prismcut.com... -
Page 26: Care And Maintenance Of Your Cutter
You may also need to clean out any old glue or adhesive tape so that the new replacement strip sits completely flat in the groove. You can order a new cutting strip from your local PrismCut dealer. Blades can get dull or chipped over time. In order to maintain precision cuts, it is recommended that you change to a fresh blade every 6 months, after any major use period or whenever the blade is dull, chipped or damaged. -
Page 27: Calibration/Settings
8) Repeat the process until the red cross matches the center of the square. CAUTION: Calibrating other functions such as SCALE and OFFSET will erase factory calibrations and should only be made under the guidance of a qualified technician. www.prismcut.com www.prismcut.com... - Page 28 Thin materials, and especially fabrics are best addressed with a 30° blade. Fabrics often require the use of starch or backing material to stiffen the fabric before cutting and/or using a brayer roller to get the fabric to stick and lay flat on the sticky part of the cutting mat. www.prismcut.com www.prismcut.com...
-
Page 29: Troubleshooting Cutter Issues
- Test the USB port on the computer with a different USB device - Make sure the connection settings on your computer show USB in the software - With computer on, remove and re-insert the USB cable to re-initialize the port www.prismcut.com www.prismcut.com... - Page 30 - When using the pen, etching tool or engraving tool overcut will be zero 10) I do not see PrismCut as a pull down menu option in Sure Cuts A Lot - This is likely due to not having the PrismCut Driver installed - For Sure Cuts A Lot 4 Pro, make sure you have version 4.080 or later installed...
-
Page 31: Warranty And Support
4.4 Warranty and Support - PrismCut comes with a limited 1 year warranty as provided by your dealer. In the USA, your warranty and support are provided by: USCutter offers a limited 1 year warranty on this cutter. Details of our standard warranty policy can be viewed on-line at the following link: www.uscutter.com/Warranty-And-Returns-Policy...
Need help?
Do you have a question about the P20 and is the answer not in the manual?
Questions and answers