Table of Contents
Advertisement
Quick Links
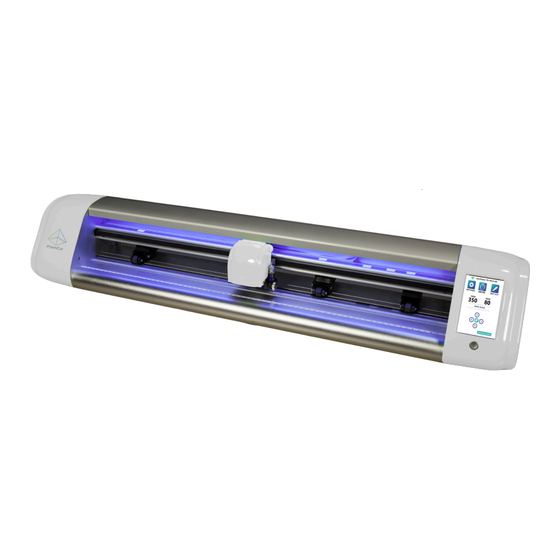
CARRIAGE HEAD (white)
moves the blade across cutting area
PINCH ROLLERS (black)
position pinch rollers under arrows
PINCH ROLLER LEVER
Up/Down pinch rollers
BLADE SETUP
Set blade depth to cut only
the material not the backer
KEY STEPS FOR GETTING OPTIMAL RESULTS
• Use a short blade depth. In most cases, the blade does not need to be extended more than 1/2 the thickness of a credit card. New
users tend to expose too much blade. The idea is to cut through just the top layer of the vinyl and to leave the backing layer with only
minimal scratches. This allows you to weed the top layer off the backing easily. If corners or small detail do not cut all the way through,
consider increasing the force before extending the blade depth. You only need to extend the blade depth or use the 60 degree (blue tip)
blade for thicker materials.
• Set a safe and reliable speed. A good starting value for speed is 400. When you have accumulated experience with the material you
are cutting and production time becomes a factor, you can look to increase the speed. Also, intricate jobs typically require lower speeds.
• Set the correct force. A good starting value for force is 70, then adjust force up or down depending on how thick/dense the material
is to be cut. With cutting mat and test material in place, use the the Test Cut icon on the cutter's main screen to cut a small square in
your test material to see that it cuts all the way through and can be weeded easily.
• Align the pinch rollers so that they are under the guide arrows. The pinch rollers must align with the gritted sections on the bottom
roller. Note that the small levers on top of each pinch roller should be set to the down position unless extra strong pressure is needed.
• The cutting mat is used when cutting materials that do not have their own backing. Place your material on the cutting mat so that
the pinch rollers roll on the mat, not the material. Move unused pinch rollers out of the way so they don't touch the parts of the material
being cut. Use a brayer roller to flatten your material on the sticky part of the cutting mat or tape the edges of thicker materials to the
cutting mat. For wider jobs it sometimes cannot be avoided and the pinch rollers will need to roll over areas of the material being cut,
however typically this is not a problem.
• When cutting long pieces of material it is important to carefully position the material so that it is completely straight and doesn't drift
to one side when cutting.
CONSULT THE USER MANUAL OR WATCH VIDEOS FOR ADDITIONAL TIPS
CONTROL PANEL
touch screen
BLADE HOLDER (silver)
POWER SWITCH
(caution: blade inside!)
USB CABLE PORT
connect to computer
only if not using WiFi
POWER PLUG
U-DISK SLOT
cut files without computer
Use 45 degree blade for
Use 60 degree blade for
most common uses
thicker materials
Cutter/Plotter with WiFi
Quick Start Guide
START HERE
NOTE: You do NOT need the USB cable if using WiFi. WiFi is recommended
Turn on Cutter for WiFi SETUP (follow prompts on cutter main display)
Connect to your home
WiFi using the same
WiFi password you
use for your tablet or
other home devices
YOU CAN ALSO ACCESS THE WiFi MENU BY PRESSING THE SETTINGS ICON
Quickstart Video: www.prismcut.com/videos
PrismCut
ver 1.7 - Oct 3, 2019
Advertisement
Table of Contents

Summary of Contents for PrismCut P28
- Page 1 Use a brayer roller to flatten your material on the sticky part of the cutting mat or tape the edges of thicker materials to the Quickstart Video: www.prismcut.com/videos cutting mat. For wider jobs it sometimes cannot be avoided and the pinch rollers will need to roll over areas of the material being cut, however typically this is not a problem.
- Page 2 The IP address on both the cutter and the computer must match in order for WiFi communications to work. f you do not see PrismCut as a model selection, on VinylMaster - Step 3 the very top line where you see File, Edit, Object, Path etc.


Need help?
Do you have a question about the P28 and is the answer not in the manual?
Questions and answers