Table of Contents
Advertisement
Advertisement
Table of Contents

Related Manuals for smith&nephew LEGION Cones


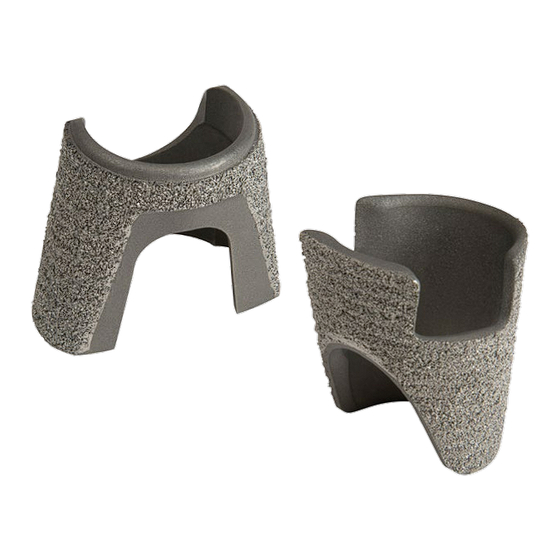
Summary of Contents for smith&nephew LEGION Cones
- Page 1 Surgical Technique...
-
Page 3: Table Of Contents
Tibial Cones without Offset Couplers ........20 Tibial Cones with Variable Positioning ........25 Indications The LEGION Cones System is intended to be used with the LEGION Revision and LEGION Hinge knee systems. The LEGION Cones are indicated for the following: 1. Rheumatoid arthritis 2. -
Page 4: Introduction
Cone’s internal diameter to maximize the Cone’s positional flexibility. The labeled sizes of the LEGION Cones are the functional internal diameters (ID). The IDs are relative to the functional diameters of LEGION Press-Fit Stems including the 1mm diametrically oversized cutting flutes. - Page 5 For Tibial Cones with Offset Couplers, the 2mm, 4mm and 6mm Offset Sleeves (Figure 3) are used. These sleeves mimic the positioning of the Offset Bushings in the LEGION RK and LEGION HK surgical techniques. In the Variable Positioning Technique, the 2mm, 4mm and 6mm Variable sleeves (Figure 4) are Figure 3 utilized to provide additional positioning...
-
Page 6: Cone Handle – Broach Assembly
Cone Handle – Broach Assembly On the bottom end of the Cone Handle, align the gold locking pin to the selected broach (Figure 7). Retract the gold slide (Figure 8a) and engage the Cone Handle with the Broach (Figure 8b). Rotate the Broach a ¼... -
Page 7: Cone Handle Alignment
Cone Handle Alignment The Cone Handle rotational alignment platform Figure 11 indicates the anterior direction for both LEGION™ Tibial and Femoral Cones (Figure 11a). Additionally, a LEGION Quick ConnecT-Handle and optional drop rod can be used for anterior alignment of the Cone Handle (Figure 11). - Page 8 Trial and Implant deployment The LEGION™ Cone Handle is designed to deploy Figure 13 Figure 14 both the Tibial and Femoral Cone Trials and Implants. Separate Tibial and Femoral Cone Impactor Heads (Figure 13, 14 respectively) are used with the LEGION Cone Handle to connect to and control orientation of the Tibial and Femoral Cone Trials and Implants.
- Page 9 If utilizing offset couplers, reference the below sizing guide and the following technique. Minimum Tibial Cone Size with Offset Couplers Note: The labeled sizes of the LEGION Cones are the functional internal diameters (ID). The IDs are relative to the functional diameters of LEGION Press-Fit Stems including the 1mm diametrically oversized cutting flutes.
- Page 10 Tibial Cones Surgical Technique continued Tibial Preparation Figure 16 Follow the standard surgical technique for either LEGION™ Revision (RK) or LEGION Hinge (HK) through tibial reaming, proximal resection, and tibial sizing and offset placement, noting stem/ reamer size, length and the offset amount and clocking orientation.
- Page 11 Initial Ream Figure 20 1. With the LEGION™ Reamer (or Trial Stem and Trial Stem Connection Rod) remaining in the canal, place the Initial Cone Reamer over the shaft of the Reamer (Figure 20) and ream to the short or long depth markings depending on Tibial Cone length desired.
- Page 12 Tibial Cones Surgical Technique continued Cone Sizing Figure 22 Figure 23 1. Invert and place the minimum size Tibial Cone Broach that covers the defect over the Reamer shaft (Figure 22). Tip: Ensure the anterior mark on the Cone Broach faces anterior (Figure 22a). 2.
- Page 13 Sequential Broaching Figure 26 1. With the LEGION™ Reamer (or Trial Stem and Trial Stem Connection Rod) remaining in the canal, place the Cone Handle with appropriate offset sleeve assembled with the 18mm Tibial Broach of the desired length, ‘Short’ or ‘Long’ , over the shaft of the Reamer (Figure 26).
-
Page 14: Surgical Technique Tibial Cones
Tibial Cones Surgical Technique continued Tibial Cone Trialing Figure 28 1. Remove the last Tibial Cone Broach from the Cone Handle, noting the broach size and Figure 29 length, and assemble the corresponding size Tibial Cone Impactor Head and Tibial Cone Trial (Figure 28). - Page 15 Tibial Cone Implantation Figure 31 1. To insure proper Cone Implant placement and orientation, insert the appropriate LEGION™ Reamer (or Trial Stem and Trial Stem Connection Rod Assembly) into the canal. Caution: Without LEGION Reamer or Trial Stem/Trial Stem Connection Rod in the canal, the final cone implant may be malaligned.
- Page 16 Tibial Cones Surgical Technique continued Cementing 1. If using a hybrid cementing technique, ensure Figure 33 a sufficient amount of cement is applied to Tibial Tray/Stem Implant construct to fill the area between the Cone’s internal diameter and the Tibial Tray/Stem Implant Assembly prior to insertion of the Tibial Tray/Stem Implant Assembly.
-
Page 17: Femoral Cones
Minimum Femoral Cone Size with Offset Couplers Note: The labeled sizes of the LEGION Cones are the functional internal diameters (ID). The IDs are relative to the functional diameters of LEGION Press- Fit Stems including the 1mm diametrically oversized cutting flutes. - Page 18 Femoral Cones Surgical Technique continued Femeral Preparation Figure 35 Follow the standard surgical technique for either LEGION™ Revision (RK) or LEGION Hinge (HK) through the femoral reaming (Figure 35) and distal resection, including Ream any distal wedge resections, noting stem/reamer size and length. Tip: Although distal hemi-augment resections can be performed using the Femoral Trials, completing these resection(s) prior to Cone...
- Page 19 Initial Ream Figure 37 1. With the LEGION™ Reamer (or Trial Stem and Trial Stem Connection Rod) remaining in the canal, place the Initial Femoral Cone Reamer over the shaft of the LEGION Reamer (Figure 37). Ream to the desired depth. Note: The minimum femoral depth mark on the Initial Reamer (Figure 44b) should be at or below the primary distal resection (Figure 37a).
- Page 20 Femoral Cones Surgical Technique continued Sequential Broaching continued Caution: If excessive force is used, fracture may occur. It is advised to broach in and out to relieve stresses on the bone. 4. With attention to rotation, lightly impact the Cone Handle Assembly with a mallet until the desired depth is reached.
- Page 21 Offset Assessment Figure 41 1. Utilizing the Femoral Cone Trial size deployed, reference the chart below for the maximum allowable offset. With the maximum offset limit in mind and the limited Offset Coupler orientation for LEGION™ Femoral Cones, 3 o’clock to 9 o’clock, return to the standard surgical technique for LEGION RK or LEGION HK (Figure 41).
- Page 22 Femoral Cones Surgical Technique continued Cone Trial Removal Figure 42 1. Insert the cone removal tool into the trial until the hooks are just past the proximal edge of the trial. Attach the T-Handle to the removal tool (Figure 42a) and rotate until the arms expand to grip the Cone Trial.
-
Page 23: Tibial Cones Without Offset Couplers
If not utilizing offset couplers, reference the below sizing guide and the following technique. Minimum Tibial Cone Size without Offset Couplers The labeled sizes of the LEGION Cones are the functional internal diameters (ID). The IDs are relative to the functional diameters of LEGION Press-Fit Stems including the 1mm diametrically oversized cutting flutes. - Page 24 Tibial Cones without Offset Couplers Surgical Technique continued Tibial Preparation Figure 45 Follow the standard surgical technique for either LEGION™ Revision (RK) or LEGION Hinge (HK) through tibial reaming, proximal resection, tibial sizing, and the tibial tray counterbore step(s) noting stem/reamer size and length. Tip: Hemi-wedge resections can be performed using the Distal Femoral Cutting Block (Figure 47).
- Page 25 Initial Ream Figure 49 1. With the LEGION™ Reamer (or Trial Stem and Trial Stem Connection Rod) remaining in the canal, place the Initial Cone Reamer over the shaft of the LEGION Reamer (Figure 49) and ream to the short or long depth markings depending on Tibial Cone length desired.
- Page 26 Tibial Cones without Offset Couplers Surgical Technique continued Tibial Cone Trialing Figure 52 1. Remove the last Tibial Cone Broach from the Cone Handle, noting the broach size and length, and assemble the corresponding size Tibial Cone Impactor Head and Tibial Cone Trial (Figure 52).
- Page 27 Tibial Cone Implantation Figure 54 1. To insure proper Cone Implant placement and orientation, insert the appropriate LEGION™ Reamer (or Trial Stem and Trial Stem Connection Rod Assembly) into the canal. Figure 55 Caution: Without LEGION Reamer or Trial Stem/Trial Stem Connection Rod in the canal, the final cone implant may be malaligned.
- Page 28 If not utilizing offset couplers, reference the below sizing guide and the following technique. Maximum Positional Freedom Note: The labeled sizes of the LEGION Cones are the functional internal diameters (ID). The IDs are relative to the functional diameters of LEGION Press-Fit Stems including the 1mm diametrically oversized cutting flutes.
- Page 29 Tibial Preparation Figure 58 Follow the standard surgical technique for either LEGION™ Revision (RK) or LEGION Hinge (HK) through tibial reaming, proximal resection, tibial sizing, and the tibial tray counterbore step(s) noting stem/reamer size and length. Tip: Hemi/wedge resections can be performed using the Distal Femoral Cutting Block (Figure 60).
- Page 30 Cone Offset Sleeve and Cone Handle Assembly. Note: The labeled sizes of the LEGION Cones are the functional internal diameters (ID). The IDs are relative to the functional diameters of LEGION Press-Fit Stems including the 1mm diametrically oversized cutting flutes.
- Page 31 Sequential Broaching Figure 64 1. With the LEGION™ Reamer (or Trial Stem and Trial Stem Connection Rod) remaining in the canal, place the Cone Handle with appropriate Variable Offset Sleeve assembled with the 18mm Tibial Broach at the desired length, ‘Short’ or ‘Long’ , over the shaft of the Reamer (Figure 64).
- Page 32 Variable Positioning of Tibial Cones without Offset Couplers continued Tibial Cone Trialing Figure 66 1. Remove the last Tibial Cone Broach from the Cone Handle, noting the broach size and Figure 67 length, and assemble the corresponding size Tibial Cone Impactor Head and Tibial Cone Trial (Figure 66).
- Page 33 Tibial Cone Implantation Figure 69 1. To insure proper Cone Implant placement and orientation, insert the appropriate LEGION Reamer (or Trial Stem and Trial Stem Connection Rod Assembly) into the canal. Caution: Without LEGION Reamer or Trial Stem/Trial Figure 70 Stem Connection Rod in the canal, the final cone implant may be malaligned.
- Page 34 Notes...
- Page 36 The following technique is for informational and educational purposes only. It is not intended to serve as medical advice. It is the responsibility of the treating physicians to determine and utilize the appropriate products and techniques according to their own clinical judgment for each of their patients.
Need help?
Do you have a question about the LEGION Cones and is the answer not in the manual?
Questions and answers