Table of Contents
Advertisement
FMC / FME Moisture Meter
Operating Instructions
Version 6.13
MOISTURE METERS
FEUCHTEMESSGERÄTE
HUMIDIMÈTRES
MEDIDORES DE HUMEDAD
MEDIDORES DE HUMIDADE
ALAT MENGUKUR KADAR AIR
PENGUKUR KADAR AIR
FUKTKVOTSMÄTARE
KOSTEUSMITTARIT
VOCHTMETERS
PCE Americas Inc.
711 Commerce Way
Suite 8
Jupiter
FL-33458
USA
From outside US: +1
Tel: (561) 320-9162
Fax: (561) 320-9176
info@pce-americas.com
www.pce-instruments.com/english
www.pce-instruments.com
PCE Instruments UK Ltd.
Units 12/13
Southpoint Business Park
Ensign way
Hampshire / Southampton
United Kingdom, SO31 4RF
From outside UK: +44
Tel: (0) 2380 98703 0
Fax: (0) 2380 98703 9
info@pce-instruments.com
Advertisement
Table of Contents

Related Manuals for PCE Instruments Brookhuis FMC


Summary of Contents for PCE Instruments Brookhuis FMC
- Page 1 PCE Americas Inc. PCE Instruments UK Ltd. 711 Commerce Way Units 12/13 Suite 8 Southpoint Business Park Jupiter Ensign way FL-33458 Hampshire / Southampton United Kingdom, SO31 4RF From outside US: +1 From outside UK: +44 Tel: (561) 320-9162 Tel: (0) 2380 98703 0...
- Page 2 Foreword Congratulations on your purchase of the FMC or FME microprocessor-controlled moisture meter. This meter is a Dutch quality product that will allow you to measure the moisture content of wood and construction materials. These operating instructions contain a number of important directions on how to use and handle the FMC and FME moisture meters.
-
Page 3: Notification
Operating Instructions FMC/FME moisture meter Notification The information in these operating instructions may be altered without prior notification. BROOKHUIS MICRO-ELECTRONICS B.V. CANNOT ACCEPT RESPONSIBILITY FOR ANY TECHNICAL OR PRINTING ERRORS OR OMISSIONS IN THIS DOCUMENT. MOREOVER, BROOKHUIS MICRO-ELECTRONICS B.V. CANNOT ACCEPT RESPONSIBILITY FOR ANY INCIDENTAL DAMAGE OR DAMAGE CAUSED BY FAULTY DELIVERY OR INAPPROPRIATE USE OF THIS MATERIAL. -
Page 4: Table Of Contents
Contents Foreword ..........................I Notification..........................II 1 Introduction........................1 2 Intended use........................2 3 Examples of use ........................3 4 Overview of the FMC/E moisture meter set..............4 Picture of the FMC/E moisture meter ...............4 The FMC/E moisture meter set components ............5 Optionally available accessories ................5 5 Starting up and settings....................6 Installing the battery ....................6 Setting up the FMC/E ....................7... -
Page 5: Introduction
1 Introduction These operating instructions explain how to operate and use the FMC and FME moisture meters. Since these instructions describe the operation of two types of meter, FMC/E is used to refer to a function in both the FMC and FME meters. If the function only applies to one of the meters, that particular type of meter is indicated. -
Page 6: Intended Use
Operating Instructions FMC/FME moisture meter 2 Intended use The meter may only be used for measuring the moisture content of non-movable materials. The purpose of the meter is to determine the moisture content of solid materials. Avoid using the instrument near highly magnetic, electromagnetic and electrostatic fields. -
Page 7: Examples Of Use
3 Examples of use The FMC/E can be used in various applications. The table below shows some of these applications. FMC/FME Measuring moisture in wood Measuring moisture in construction materials Measuring moisture wood chippings and dust, coffee beans, etc. Measuring moisture paper, veneer, sawdust, etc. -
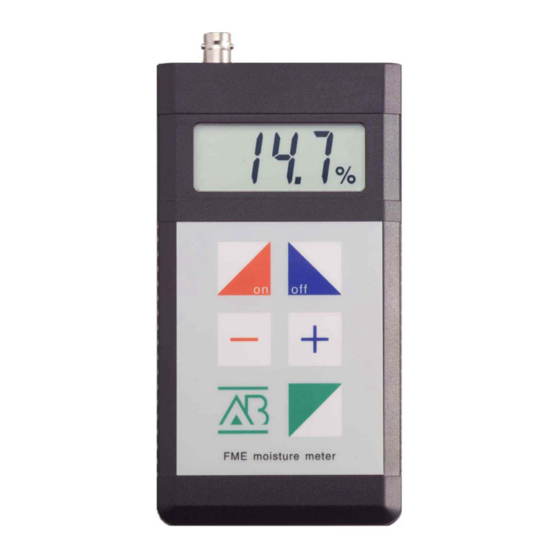
Page 8: Overview Of The Fmc/E Moisture Meter Set
Operating Instructions FMC/FME moisture meter 4 Overview of the FMC/E moisture meter set This chapter describes the various components of the FMC/E, as well as optionally available components. Picture of the FMC/E moisture meter The components of the FMC/E are shown in Figure 4-1 below. Connectors for measuring electrode (FMC/E) and temperature sensor (FME) -
Page 9: The Fmc/E Moisture Meter Set Components
The FMC/E moisture meter set components The FMC/E set consists of the following components: • An FMC or FME moisture meter. • An ABS instrument case. • A measuring electrode. • A measuring cable. • A spanner (for the hammer probe and hand probe). •... -
Page 10: Starting Up And Settings
Operating Instructions FMC/FME moisture meter 5 Starting up and settings This chapter describes the operations required to start up the FMC/E. Installing the battery The battery compartment is at the back of the FMC/E, as shown in Figure 5-1 Figure 5-1 Open the battery compartment by gently pressing down the groove in the lid and then lifting it up. -
Page 11: Setting Up The Fmc/E
Setting up the FMC/E Before measuring can start, the measuring electrode has to be connected and the meter set for the material and temperature in question. Depending on the type of electrode, sections 5.2.1 to 5.2.4 contain instructions for connecting the electrode. 5.2.1 Connecting the Ram electrode / handle electrode Install the battery as described in section 5.1 Unscrew the swivel nut from the electrode with the spanner... -
Page 12: Connecting The Universal Electrode
Operating Instructions FMC/FME moisture meter 5.2.2 Connecting the universal electrode Install the battery as described in section 5.1 Unscrew the plastic nut from the holder. Place the electrode in the holder and push it until it locks in position. Tighten the plastic nut on the holder. Insert the measuring cable connector into the back of the holder. -
Page 13: Connecting The Cup Electrode
5.2.3 Connecting the cup electrode Install the battery as described in section 5.1 Attach the measuring cable plug to the FMC/E connector. Make sure the groove in the plug slides over the tips of the connector. Turn the plug’s metal housing clockwise until it locks into the connector. - Page 14 Operating Instructions FMC/FME moisture meter Drill two holes in the material being measured using the concrete drill supplied. The holes should be approximately 25 cm apart. Sprinkle graphite powder on the measuring pin contact sockets. Insert the measuring pins and contact sockets into the holes. Turn the measuring pins clockwise until they are secured in the material being measured.
-
Page 15: Setting The Fmc/E
Setting the FMC/E Turn on the FMC/E by pressing the <ON> key. The display will now show (example) If the electrode is not in the material or not connected, the value in the meter display will flash. Press the <MENU> key. The display will now show (example) The value displayed is the material setting last used. -
Page 16: Precautions And Instructions
Operating Instructions FMC/FME moisture meter Precautions and instructions The insulated measuring pins should be hit into a depth of 1/3 of the wood thickness. The meter measures the resistance between the two measuring pins. Cracks, resin channels, knots, etc. may affect the moisture measurement. -
Page 17: Functions
6 Functions This chapter contains an overview of the special functions of the FMC/E. Automatic temperature correction The temperature is automatically corrected while the FME is being set. The temperature sensor must be connected before the meter is readied for use. Insert the temperature sensor plug into the connection on the FME until it clicks into place. - Page 18 Operating Instructions FMC/FME moisture meter The stored measurement values can be retrieved as follows: Press the <–> key to retrieve the measurement values stored in the memory. The display will now show Press the <–> key again to retrieve measurement values stored previously in the memory.
-
Page 19: Calibration Check
Calibration check The calibration of the FMC/E can be checked using the reference resistance (optional, see section 4.3). Ready the FMC/E for use as described in section 5.2. Press the <MENU> key. The display will now show (example) Press the <+> or <–> key to zero the FMC/E. The display will now show Press the <MENU>... -
Page 20: Accessing The Version Number
Operating Instructions FMC/FME moisture meter Accessing the version number Keep the <+> key pressed when turning on the FMC/E. The display will now show (example) Setting ˚C or ˚F and switch-off time Press the <ON> key to turn on the meter. Keep the <MENU>... - Page 21 The setting Pn0 means the pin code setting is switched off. Pn1 means the pin code setting is switched on. If the < - > is not pressed the setting “˚C or ˚F and switch-off time” will appear. (see chapter 6.7) Press the <...
-
Page 22: Specifications
Operating Instructions FMC/FME moisture meter 7 Specifications • Resistance moisture measuring • Measuring range 5~99% (for wood) • Measuring range 0~99% (for construction materials) • Measuring accuracy 0.2% (on reference material) (FMC 0,3%) • Resolution 0.1% • Memory function for up to 50 measurement values (FME only) •... -
Page 23: Index
Index 9 Volt battery ........6 Memory clear ........14 Accessing the serial number.....15 Memory of the FME ......13 Accessing the version number..16 Notification ......... II Accessories ........5 Overview of the FMC/E set ....4 Battery check........15 Pin code........... 16 Calibration check ......15 Retrieving stored values .... -
Page 24: Declaration Of Conformity
Declaration of conformity Brookhuis Micro-Electronics BV Institutenweg 15 7521 PH Enschede The Netherlands declare under our sole responsibility that the product Brookhuis FMC / FME moisture meter complete with: Brookhuis Measuring probe Brookhuis Measuring cable Brookhuis Measuring pins Brookhuis Temperature probe (optional)
Need help?
Do you have a question about the Brookhuis FMC and is the answer not in the manual?
Questions and answers