
Related Manuals for BIG ASS FANS E7


Summary of Contents for BIG ASS FANS E7
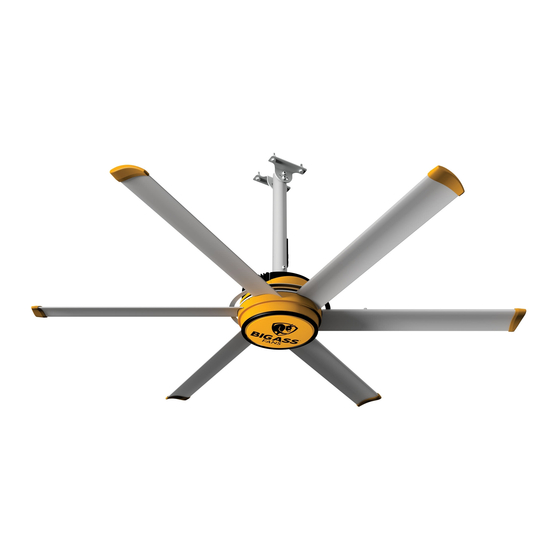
- Page 1 INSTALLATION GUIDE E7, E10, E12 For help, call 1-877-BIG-FANS or visit www.bigassfans.com...
- Page 2 Installation Checklist Did a structural engineer approve the mounting structure? See page 5 for Big Ass Fans-approved mounting structures. Are you familiar with the function and use of the safety cable? See page 12 for information on properly securing the safety cable.
- Page 3 Installation Guide E7, E10, E12 Installation Guide: October 2018 Rev. G 10/11/2018 Conforms to ANSI/UL STD 507–Electric Fans Conforms to CSA C22.2 No.113–Fans & Ventilators Contact Information Customer Service Manufacturing Warranty Returns 2348 Innovation Drive 2251 Innovation Drive 2251 Innovation Drive...
- Page 4 WARNING: To reduce the risk of fire, electric shock, and injury to persons, Big Ass Fans must be installed with Big Ass Fan supplied controllers that are marked (on their cartons) to indicate the suitability with this model. Other parts cannot be substituted.
-
Page 5: Table Of Contents
Contents Introduction Important Safety Information Thank You About this Fan Pre-Installation Parts Included Tools Needed Fan Diagram Preparing the Work Site Installing the Fan 1. Select Proper Angle Irons 2. Pre-drill Angle Irons 3. Secure Angle Irons (if span is longer than 8 ft) 4a. - Page 6 Contents Warranty Warranty Policy WWW.BIGASSFANS.COM ©2015 DELTA T LLC ALL RIGHTS RESERVED...
-
Page 7: About This Fan
Introduction About this fan Technical specifications Model Diameter Input power Minimum circuit size Rated current 110–125 VAC, 50/60 Hz, 1 10 A 5.5 A Φ 7 ft (2.13 m) 200–240 VAC, 50/60 Hz, 1 10 A 3.4 A Φ 110–125 VAC, 50/60 Hz, 1 10 A 6.0 A Φ... -
Page 8: Parts Included
1. One extra of each piece of hardware is included except for the Safety Cable Hardware, Angle Iron Hardware, and Guy Wire Hardware. 2. Guy wires are designed to constrain the fan’s lateral movement. Big Ass Fans recommends using guy wires if the fan is exposed to high winds or similar conditions or if the fan is close to any building fixtures. -
Page 9: Tools Needed
3. The CAT5 cable connects the wall controller to the fan. One end plugs into the wall controller, and the other end plugs into the controller input cable. See pages 22–23 for wiring details. A longer CAT5 cable can be used if needed (customer-supplied). Tools needed Big Ass Fans recommends gathering the following tools prior to beginning installation. Mechanical installation Electrical installation... -
Page 10: Fan Diagram
Pre-Installation (cont.) Fan diagram Refer to the diagram below to identify the fan components. Note: The safety cable is not pictured below; however, it is an important part of the installation. A. Upper mount. Secures the fan to the mounting structure. B. -
Page 11: Preparing The Work Site
Pre-Installation (cont.) Preparing the work site The fan should only be installed according to the instructions described in this manual. Consult a structural engineer for installation methods not covered in this manual. When surveying the work site, keep the following mechanical and electrical guidelines in mind. Mechanical •... -
Page 12: Select Proper Angle Irons
Verifying the stability of the mounting structure is the sole responsibility of the customer and/or end user, and Big Ass Fans hereby expressly disclaims any liability arising therefrom, or arising from the use of any materials or hardware other than those supplied by Big Ass Fans or otherwise specified in these installation instructions. -
Page 13: Pre-Drill Angle Irons
Installing the Fan (cont.) 2. Pre-drill angle irons Drill two Ø 7/16” (1.1 cm) holes exactly 5-1/2” (14 cm) apart in the centers of two angle irons. Measure the distance between the mounting points of the roof structure that the angle irons will span. Measure the same distance on the angle irons, and drill Ø... -
Page 14: 4A. Fasten Single Angle Irons To Roof Structure Mounting Points
Fasten the angle irons to the roof structure mounting points at each end with customer-supplied Grade 8 hardware as shown. Tighten the hardware so that it is snug, but do not torque until the fan has been mounted to the angle irons. Note: Big Ass Fans recommends orienting the angle irons so that the horizontal legs are facing each other. -
Page 15: 4B. Fasten Double Angle Irons To Roof Structure Mounting Points
Installing the Fan (cont.) 4b. Fasten double angle irons to roof structure mounting points CAUTION: The angle irons must be fastened to the roof structure at each end. Fasten the angle irons to the roof structure mounting points at each end with customer-supplied Grade 8 hardware as shown. Tighten the hardware so that it is snug, but do not torque until the fan has been mounted to the angle irons. -
Page 16: Route Wiring And Safety Cable Into Extension Tube
Safety Cable 6. Attach upper mount and upper mounting brace (to extension tube) Note: To facilitate installation, Big Ass Fans recommends that the extension tube is horizontal with Upper the rectangular access hole facing up during this step. Wiring and the and safety cable are not Mounting shown in the illustrations. -
Page 17: Attach Upper Mount (To Angle Irons)
Installing the Fan (cont.) 7. Attach upper mount (to angle irons) Secure the upper mount (with extension tube and upper mounting brace already attached) directly to the angle irons using the Mounting Hardware as shown. Consult the diagrams below for distances between the angle irons. Tighten the hardware so that it is snug, but do not torque. -
Page 18: Secure Safety Cable (To Angle Irons)
Installing the Fan (cont.) 8. Secure safety cable (to angle irons) WARNING: The safety cable is a crucial part of the fan and must be installed correctly. If you have any questions, call Customer Service. To secure the safety cable to the angle irons: 1. -
Page 19: Attach Main Fan Unit (To Extension Tube)
Installing the Fan (cont.) 10. Attach main fan unit (to extension tube) CAUTION: The main fan unit is heavy. Use caution when raising it. CAUTION: Be careful not to pinch the fan wiring between the extension tube and main fan unit during installation. CAUTION: Do not discard the main fan unit packaging and foam. -
Page 20: Connect Power And Wall Controller Wiring
Installing the Fan (cont.) Tighten all hardware securing the angle irons to the roof structure (Angle Iron Hardware) to 40 ft·lb (54.2 N·m) using a 3/4” or 19 mm wrench and a torque wrench with a 3/4” or 19 mm socket. Angle Iron Hardware (single angle irons) Angle Iron Hardware (double angle irons) 12. -
Page 21: Install Cover Plate Assembly
Installing the Fan (cont.) 13. Install cover plate assembly Plug the remaining male wiring harness from the fan into the female wiring harness on the cover plate assembly as shown. Ensure all wiring is tucked inside the extension tube, and then attach Cover Plate the cover plate assembly to the extension tube using the Cover Plate Assembly... -
Page 22: Install Lower Cover
Installing the Fan (cont.) 15. Install lower cover WARNING: Disconnect power to the fan before installing the lower cover mounting bracket and lower cover. Attach the lower cover to the lower cover mounting bracket using the Lower Cover Hardware as shown. Loosely attach all eight (8) screws, and then tighten them. -
Page 23: Attach Guy Wire Clamps
Installing Guy Wires Guy wires are designed to constrain the fan’s lateral movement. Big Ass Fans recommends using guy wires if you are installing the 4-ft (1.2 m) extension tube, if the fan is exposed to high winds or similar conditions, or if the fan is close to any building fixtures. -
Page 24: Attach Locking Carabiners To Guy Wire Clamps
Installing Guy Wires (cont.) 2. Attach locking carabiners to guy wire clamps Secure the four (4) locking carabiners to the guy wire clamps as shown. Securely tighten the carabiners. 3. Attach beam clamp The guy wire should be at a 45° angle from the extension tube (see the illustrations on the following page). -
Page 25: Route Guy Wire Through Gripple
Installing Guy Wires (cont.) 4. Route guy wire through Gripple ® Route the guy wire through the Gripple and the carabiner on the guy wire clamp, and then back through the Gripple as shown below. ® Do not tighten the Gripple until the remaining guy wires have been installed. Note: To back the guy wire out of the Gripple, insert the small tool included with the Gripple set or a 0.050"... -
Page 26: Attach Airfoil Tips (To Airfoils)
Installing Airfoils Big Ass Fans recommends wiring the fan (page 22) before installing the airfoils. WARNING: Disconnect power to the fan before installing the airfoils. 1. Attach airfoil tips (to airfoils) Attach the airfoil tips to the airfoils using the Airfoil Tip Hardware as shown. Securely tighten the screws using a 3 mm Allen wrench. -
Page 27: Attach Airfoils (To Main Fan Unit)
Installing Airfoils (cont.) 3. Attach airfoils (to main fan unit) WARNING: Disconnect power to the fan before installing airfoils. Attach the six (6) airfoil retainers using the Airfoil Hardware. Moving clockwise around the fan hub, position the airfoil retainers as shown. -
Page 28: Power Requirements
WARNING: Exercise caution and common sense when powering the fan. Do not connect the fan to a damaged or hazardous power source. Do not attempt to resolve electrical malfunctions or failures on your own. Contact Big Ass Fans if you have any questions regarding the electrical installation of this fan. -
Page 29: Wiring: Fire Signal Relay
Wiring the Fan (cont.) Wiring: Fire signal relay WARNING: To reduce the risk of electric shock, wiring should be performed by a qualified electrician! Incorrect assembly can cause electric shock or damage the motor and the controller! Hazard of electrical shock! CAUTION: Installation work and electrical wiring must be done by qualified person(s) in accordance with all applicable codes and standards. -
Page 30: Dimensions
Mounting the Wall Controller Mount the wall controller so that the fan it controls is visible from the controller location. Install the controller on a flat surface that is readily accessible, free from vibration, and where there is adequate distance from foreign objects or moving equipment. The controller can be surface-mounted to a wall or mounted to a customer-supplied junction box. -
Page 31: Operating The Wall Controller
Changing the fan direction Big Ass Fans recommends operating the fan in the forward (FWD) direction. The fan should be rotating counterclockwise when viewed from below. To reverse the direction of the fan, remove power from the fan. Select the direction of the fan using the fan direction selector switch located on the fan’s cover plate assembly. -
Page 32: Heating Season
Heating season In spaces with higher ceilings, E7, E10, and E12 fans return heat from the ceiling to floor level more efficiently than smaller ceiling fans. For maximum energy savings, the fan should be operated continuously during the heating season and should not be operated in reverse (clockwise). -
Page 33: Annual Preventive Maintenance
Preventive Maintenance WARNING: Before servicing or cleaning unit, switch power off at the service panel and lock the service disconnecting means to prevent power from being switched on accidentally. When the service disconnecting means cannot be locked, securely fasten a prominent warning device (such as a tag) to the service panel. WARNING: When service or replacement of a component in the fan requires the removal or disconnection of a safety device, the safety device is to be reinstalled or remounted as previously installed. - Page 34 Notes...
-
Page 35: Annual Maintenance Checklist
Annual Maintenance Checklist Fan Model: Fan Model: Fan Model: Serial #: Serial #: Serial #: Location: Location: Location: Date Initials Date Initials Date Initials... -
Page 37: General Troubleshooting
Troubleshooting WARNING: When servicing or replacement of a component in the fan requires the removal or disconnection of a safety device, the safety device is to be reinstalled or remounted as previously installed. CAUTION: Use this unit only in the manner intended by the manufacturer. If you have questions, contact the manufacturer. WARNING: Before servicing or cleaning unit, switch power off at the service panel and lock the service disconnecting means to prevent power from being switched on accidentally. -
Page 38: Electrical Troubleshooting
Troubleshooting (cont.) Electrical troubleshooting Fan status LED definitions The fan direction selector switch and fan status LED are located on the cover plate assembly at the bottom of the fan’s extension tube. Fan Direction Selector Switch Cover Plate Assembly Fan Status LED Note: For information on changing the fan direction, see page 25. -
Page 39: Replacing Fuses
Troubleshooting (cont.) Replacing fuses WARNING: Ensure power is disconnected before replacing fuses. CAUTION: Do not touch the fan’s electronics unless necessary! To replace the fuses on the main fan unit, remove the electronics cover from the fan as shown. The electronics cover is attached to the fan with four (4) screws. - Page 41 Big Ass Fans, Big Ass Fans Affiliated Companies in Australia, or a Big Ass Fans Authorized Dealer. This Limited Warranty is subject to all provisions, conditions, limitations, and exclusions described within this document.
- Page 42 “Labor” below. 6. If we ask you to ship the fan back to Big Ass Fans for repairs or replacement, we will prepay the shipping and insurance for factory installed fans during the first 12 months after the warranty becomes effective;...
- Page 43 If the manufacturer of such component determines that there was no defect and therefore refuses to cover it under warranty, Big Ass Fans likewise will not warranty such item unless Big Ass Fans determines that the failure of such electrical or electronic component was the result of a defect of design, workmanship, or material within some other part of the products.
- Page 44 WARRANTIES OF MERCHANTABILITY OR FITNESS FOR PARTICULAR PURPOSE, AND OF ALL OTHER OBLIGATIONS AND LIABILITIES ON BIG ASS FANS’ PART, AND BIG ASS FANS NEITHER ASSUMES NOR AUTHORIZES ANY PERSON TO ASSUME FOR IT ANY OTHER LIABILITY IN CONNECTION WITH THE SALE OF THE PRODUCTS. NO OTHER WARRANTY, EXPRESSED...
- Page 48 ESS-INST-41-MUL-01 REV. G 10/11/2018 2251 Innovation Drive, Lexington, KY 40511 1 (877) BIG-FANS | WWW.BIGASSFANS.COM...
Need help?
Do you have a question about the E7 and is the answer not in the manual?
Questions and answers