Table of Contents
Advertisement
EN
ENGLISH
PREMIUM SHALLOW
WELL JET PUMP
RJS-PREM Series
Owner's Manual
Table of Contents
Before Getting Started ................................................................. 2
Installation Checklist..................................................................... 3
Introduction ...................................................................................4
Voltage Setting Instructions ........................................................4
Materials and Tools Needed ......................................................... 5
Important Information ................................................................. 5
Quick Installation Guide ...............................................................6
Plug Descriptions and Socket Sizes .............................................6
Detailed Installation Instructions ................................................ 7
Typical Installations ......................................................................9
Pump to Tank Installation ...........................................................10
THIS PUMP IS DUAL VOLTAGE AND FACTORY SET FOR 230 VOLTS.
Wiring Instructions .......................................................................11
Priming the Pump .......................................................................12
SEE VOLTAGE SETTING INSTRUCTIONS TO SET FOR 115 VOLTS.
Maintenance .................................................................................13
Troubleshooting ...........................................................................14
Replacement Parts ......................................................................15
redlionproducts.com
Limited Warranty .........................................................................16
Advertisement
Table of Contents

Related Manuals for red lion RJS-PREM Series


Summary of Contents for red lion RJS-PREM Series
-
Page 1: Table Of Contents
ENGLISH PREMIUM SHALLOW WELL JET PUMP RJS-PREM Series Owner’s Manual Table of Contents Before Getting Started ..............2 Installation Checklist..............3 Introduction ...................4 Voltage Setting Instructions ............4 Materials and Tools Needed ............5 Important Information ..............5 Quick Installation Guide ...............6 Plug Descriptions and Socket Sizes ..........6... -
Page 2: Before Getting Started
BEFORE GETTING STARTED Read and follow safety instructions. Refer to product data plate(s) for additional operating instructions and specifications. This is the safety alert symbol. When you see this symbol on your pump or in this manual, look for one of the following signal words and be alert to the potential for personal injury or property damage if ignored: DANGER warns about hazards that will cause serious personal injury, death or major property damage if ignored. -
Page 3: Installation Checklist
INSTALLATION CHECKLIST This checklist has been provided for your convenience. If a step was missed, ensure power has been shut off at the breaker and completely relieve pressure from the water system before continuing to work on the system. WARNING 75 PSI PRESSURE RELIEF VALVE RECOMMENDED This pump is capable of producing high pressure. -
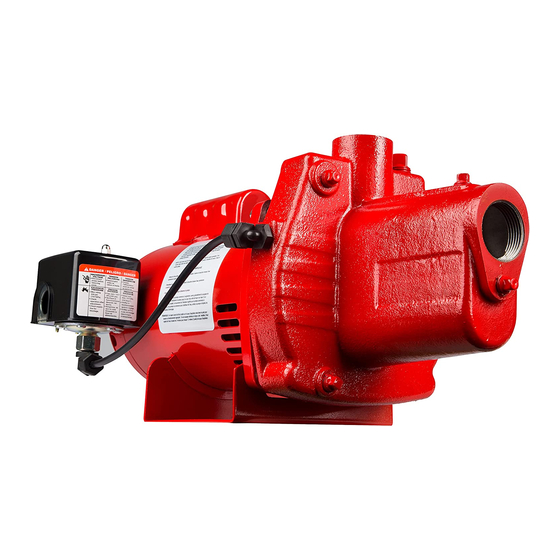
Page 4: Introduction
INTRODUCTION Orange Brown The shallow well jet pump is ideal for the supply of fresh water to rural Voltage Change Device homes, farms, and cabins. This pump is suitable for installations where the vertical distance from the pump to the water level does not exceed 25 ft (7.6 m), including drawdown (less at high altitudes). -
Page 5: Materials And Tools Needed
MATERIALS AND TOOLS NEEDED IMPORTANT INFORMATION MATERIALS NEEDED JOINING PIPE FITTINGS Follow the fitting guidelines below for all attachments unless Pipe Joints otherwise specified. • One roll of PTFE tape • One can PVC primer PVC PIPE FITTINGS • One can PVC cement When joining two PVC joints together (such as joining an adapter to a •... -
Page 6: Quick Installation Guide
QUICK INSTALLATION GUIDE ( Replacing an Existing Pump) This quick installation guide assumes you will be cutting the existing pump free from the plumbing. More detailed instructions are provided in the Detailed Installation Instructions. WARNING DO NOT RUN THE PUMP BEFORE PRIMING IT; THE SEAL AND IMPELLER COULD BE PERMANENTLY DAMAGED Ensure power has been shut off at the breaker 8. -
Page 7: Detailed Installation Instructions
DETAILED INSTALLATION INSTRUCTIONS WARNING DO NOT RUN THE PUMP BEFORE PRIMING IT; THE SEAL AND IMPELLER COULD BE PERMANENTLY DAMAGED Before proceeding, ensure power has been shut off at the breaker. If this is replacing an existing pump, completely relieve pressure from the water system before working on the water system. - Page 8 DETAILED INSTALLATION INSTRUCTIONS DRIVEN WELL (with check valve and well point) 1. Drive the well point into the ground according to the instructions 8. A pressure gauge is not supplied with the pump. It should be included with the well point. It must be deep enough to bore installed into the 1/8"...
-
Page 9: Typical Installations
TYPICAL INSTALLATIONS Relief Valve Tank Tank Priming Plug Priming Plug Pressure Gauge (optional) Relief Valve Vent Plug Pressure Gauge (optional) Drain Vent Plug Drain Plug Clean-Out Plug Drain Plug Suction Clean-Out Plug Suction Vent Vent Well Seal Well Seal Well Casing Well Casing Foot Valve Foot Valve... -
Page 10: Pump To Tank Installation
PUMP TO TANK INSTALLATION Check the tank pre-charge with a tire gauge. It should be equal to Red Lion® recommends using pre-charged diaphragm tanks. Instructions 2 psi below the pressure switch cut-in setting (the pressure at which for connecting the pump to a diaphragm tank have been provided for the pump will start). -
Page 11: Wiring Instructions
WIRING INSTRUCTIONS WARNING ELECTRICAL PRECAUTIONS All wiring, electrical connections, and system grounding must comply with the National Electrical Code (NEC) and with any local codes and ordinances. Employ a licensed electrician. WARNING RISK OF ELECTRICAL SHOCK Before servicing motor-operated equipment, shut off the power at the main electrical panel and disconnect the power supply from motor and accessories. Use safe working practices during servicing of equipment. -
Page 12: Priming The Pump
PRIMING THE PUMP WARNING DO NOT RUN THE PUMP BEFORE PRIMING IT. THE SEAL AND IMPELLER COULD BE PERMANENTLY DAMAGED. You will need enough water to fill the suction line(s) and casing. NOTE: Priming time depends on the distance from the water source to the pump (5–15 minutes). USING AN INLINE CHECK VALVE USING A FOOT VALVE 1. -
Page 13: Maintenance
MAINTENANCE WARNING RISK OF ELECTRICAL SHOCK Before servicing motor-operated equipment, shut off the power at the main electrical panel and disconnect the power supply from motor and accessories. Use safe working practices during servicing of equipment. Remove the cap (5) and insert a screwdriver to prevent the shaft PERFORM INSPECTIONS MONTHLY from turning while unscrewing the impeller (6). -
Page 14: Troubleshooting
TROUBLESHOOTING Problem Possible Cause Problem Possible Cause No power to pressure switch due to blown fuses, Leaks in suction or discharge line. open switches or loose connections. Motor will not start Foot valve, suction line, impeller or nozzle are partially plugged. Pump pressure switch not closed. -
Page 15: Replacement Parts
REPLACEMENT PARTS Item # Item Description Where Used Contents 305584001 Case Kit All RJS-PREM Models 305584002 Seal Plate Kit All RJS-PREM Models 305584003 Nozzle/Venturi Kit RJS-50-PREM 3, 7, & 8 305584004 Nozzle/Venturi Kit RJS-75-PREM 3, 7, & 8 305584005 Nozzle/Venturi Kit RJS-100-PREM 3, 7, &... -
Page 16: Limited Warranty
LIMITED WARRANTY For warranty consideration, the Red Lion® Brand (hereafter “the Brand”) warrants that the products specified in this warranty are free from defects in material or workmanship of the Brand. During the time periods and subject to the terms and conditions hereinafter set forth, the Brand will repair or replace to the original user or consumer any portion of this product which proves defective due to materials or workmanship of the Brand.
Need help?
Do you have a question about the RJS-PREM Series and is the answer not in the manual?
Questions and answers