
Related Manuals for Phonocar VM190


Summary of Contents for Phonocar VM190
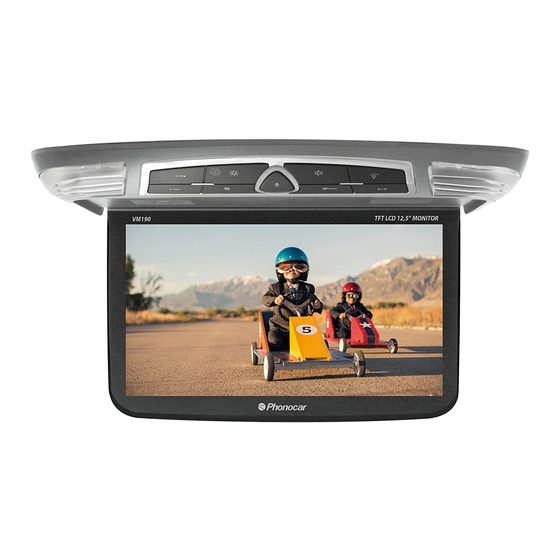
- Page 1 MONITOR - DVD VM190 ISTRUZIONI DI MONTAGGIO ASSEMBLING INSTRUCTIONS INSTRUCTIONS DE MONTAGE MONTAGEANLEITUNG INSTRUCCIONES PARA EL MONTAJE...
- Page 2 ITALIANO............................ENGLISH ............................Accessori in dotazione Accessories supplied in package • Accessoires en dotation Zubehör im Lieferumfang enthalten • Accesorios en dotación n. 1 Telecomando con batteria Remote-control unit with battery Télécommande avec batterie Fernsteuerung, mit Batterie n. 1 Cavo alimentazione Current Cable Câble alimentation Stromkabel...
- Page 3 Eventuali componenti difettosi dovranno essere riconsegnati al rivenditore o inviati presso il centro assistenza Phonocar, via F.lli Cervi, 167/C - 42100 Reggio Emilia - Tel. 0522.941621. All products contained in this catalogue have a warranty according to the law. When warranty is applicable, the defect parts are repaired free of charge.
- Page 4 Condizioni di garanzia • Warranty • Clauses de garantie Garantie-Bedingungen • Condiciones de garantias Serie N° Nome/First name/Prènom/Vorname/Nombre Cognome/Surname/Nom/Nachname/Apellido Indirizzo/Adress/Adresse/Anschrift/Dirección Nazione/Country/Pays/Land/Pais Città/City/Ville/Ort/Ciudad Data d’acquisto/Purchase Date/Date d’achat/Kaufdatum/Pecha compra Serie N° Allegare documento d’acquisto/Enclose purchase document/Joindre le document d’achat/Kauf-Nachweis bitte beilegen/Adjuntar documento de compra...
-
Page 5: Table Of Contents
INDICE Precauzioni di sicurezza............Schema di collegamento . -
Page 6: Precauzioni Di Sicurezza
Precauzioni di sicurezza Allo scopo di operare in sicurezza osservare attentamente le seguenti precauzioni: • Installare i dispositivi all’interno dell’auto in posizioni che non ostacolino le normali operazioni di guida e che non interferiscano con i dispositivi di sicurezza del veicolo (ABS, Air-bag, etc.). •... -
Page 7: Schema Di Collegamento
Schema di collegamento VM190 BIANCO/WHITE AUDIO IN 1 L ROSSO/RED AUDIO IN 1 R GIALLO/YELLOW VIDEO IN 1 BIANCO/WHITE AUDIO OUT L ROSSO/RED AUDIO OUT R GIALLO/YELLOW VIDEO OUT ALIMENTAZIONE PRINCIPALE ROSSO/RED + 12V MAIN POWER SUPPLY NERO/BLACK GROUND GIALLO/YELLOW... -
Page 8: Installazione
Installazione... -
Page 9: Installazione
Installazione ATTENZIONE: Non installare l’unità in zone che possono ostacolare la visuale. • Utilizzare esclusivamente le viti fornite nella dotazione. • Fissare al tetto la piastra metallica, facente funzione da supporto all’unità. • Agganciare l’unità alla piastra fissata al tetto mediante le 4 viti fornite nella dotazione. Il fissaggio dell‘unità... -
Page 10: Indentificazione Comandi
Identificazione comandi... -
Page 11: Impostazioni Modalità Tv
Identificazione comandi Ricevitore telecomando I/R Aumenta/Diminuisce volume e valori nel MENU’ regolazioni Accede al MENU’ di regolazione Luminosità / Contrasto / Saturazione / Formato immagine / Lingua Trasmissione FM / Rotazione immagine / Auto spegnimento / Reset Trasmettitore ad infrarossi Scorre i canali memorizzati in modalità... -
Page 12: Sostituzione Pila Telecomando
Funzioni telecomando POWER POWER MUTE DISPLAY ANGLE SUBTITLE AUDIO RETURN MODE MENU‘ SETUP MODE ENTER MENU‘ PROG DISPLAY VOL- VOL+ STOP SLOW REPEAT REPEAT ZOOM Sostituzione pila telecomando CR 2025... -
Page 13: Funzioni Telecomando
Funzioni telecomando 1. POWER Accensione/Spegnimento. 2 . MUTE Elimina l’audio. 3. TFT DISPLAY Visualizza lo stato corrente sul display (DVD, TV, AV1, AV2, VGA) 4. EJECT Tasto espulsione disco. 5. TAST. NUM. Tasti di digitazione numerica. 6. ANGLE Cambia l’angolo di visione nei DVD se presente sul supporto. 7. -
Page 14: Usb-Sd Card: Note E Compatibilità
USB - SD CARD: note e compatibilità ATTENZIONE: Le funzioni di lettura di USB e SD Card si attivano SOLTANTO se è presente un disco all‘interno dell‘unità DVD. 1 Caricamento SD/MMC Card Inserire la SD/MMC Card nella fessura L’ETICHETTA rIVOLTA VErSO IL BASSO (vedi disegno). -
Page 15: Memorizzazione Della Posizione Di Lettura
DVD inserito. il formato appropriato (4:3LB, 4:3PS o 16:9) a se- conda del DVD inserito. Selezionando AUTO il VM190 selezionerà automa- Premere il tasto SETUP per uscire dal menù ticamente il formato in base al DVD inserito. - Page 16 Impostazioni di Setup Posizionarsi nel riquadro con le quattro stelle tra- Spostarsi con i tasti cursore del telecomando ( mite i tasti cursore e digitare la vecchia password ) e selezionare con il tasto ENTER l’impostazione (nell’impostazione di fabbrica la password è nulla), da modificare (Language, Audio, Subtitle, Menù).
-
Page 17: Riproduzione Files Mp3/Avi/Mpg
Impostazioni di Setup Premere il tasto SETUP per uscire dal menù. LINGUAGGIO MENù DEL DISCO Spostarsi con i tasti cursore in basso e posizionarsi sulla linea Disc Menù. Premere ENTER e selezionare successivamente la lingua desiderata. Premere il tasto SETUP per uscire dal menù. Riproduzione files Mp3 / AVI / MPG Inserendo un disco nel lettore DVD, la riproduzione si avvia automaticamente e sullo schermo compare il menù... -
Page 18: Cause E Rimedi Ai Problemi D'installazione
Cause e Rimedi ai problemi d’installazione problema Causa rimedio Non compare nessuna im- Il cavo di alimentazione non é con- Verificare le connessioni del cavo magine sullo schermo. nesso correttamente o il fusibile é alimentazione o sostituire il fusibile. guasto. Verificare la selezione della sorgente Commutare tra video interno e video... -
Page 19: Caratteristiche Tecniche
Caratteristiche tecniche GENErALI Alimentazione ............................12V DC Tensione di prova ......................13.2V negative ground Uscite Pre-Amplificate ....................2 CH 1V Rms (10KΩ) Segnale Video ....................PAL/NTSC/AUTO 1±0,2V(75Ω) Trasmettitore ...........................IR integrato Modulatore Audio FM integrato: ....frequenze selezionabili 87.8-87.9-88.1-8.3-88.5-88.8-89 MHz Porta VGA per connessione PC: ................risoluzione 800x480 - 60Hz Porta USB: ...................... - Page 21 INDEX Precautions ..............Connection scheme .
- Page 22 Precautions To operate under security, please carefully observe the following precautions: • Install the appliances inside the car, in a position leaving free space for the normal car-driving operations and the security-devices situated within the car (ABS, Air-Bag etc.). • Use system at a temperature between 0 and +55°C. •...
- Page 23 Connection scheme VM190 WHITE AUDIO IN 1 L RED AUDIO IN 1 R YELLOW VIDEO IN 1 WHITE AUDIO OUT L RED AUDIO OUT R YELLOW VIDEO OUT MAIN POWER SUPPLY RED + 12V BLACK GROUND YELLOW + 12V LIGHT...
- Page 24 Installation...
- Page 25 Installation ATTENTION: Do not install in areas which could compromise the driver’s visibility • Do not use screws other than those supplied within the package • Install the metal-plate, supposed to hold the Unit, on the car-ceiling • Fix the monitor to the plate mounted on the ceiling, by using the 4 supplied screws. Please make sure that the unit is solidly installed on the car-ceiling.
- Page 26 Functions...
- Page 27 Functions I/R Receiver window Increase/Decreaser the volume and the menù regulations values To enter the regulation-menù for BRIGHTNESS/CONTRAST/HUE/SATURATION/IMAGE FORMAT LANGUAGE/FM TRANSMITTER/ROTATION IMAGE (?)/AUTOPOWER DOWN/RESET Infrared trasmitter Scrolling of the channels memorized in TV-mode. Scrolling within the Setting-Menu. Switch from DVD/TV/AUX1/AUX2/VGA Power ON/OFF Done Led Light ON/OFF Eject the inserted disc...
- Page 28 Remote control functions POWER POWER MUTE DISPLAY ANGLE SUBTITLE AUDIO RETURN MODE MENU‘ SETUP MODE ENTER MENU‘ PROG DISPLAY VOL- VOL+ SLOW STOP ZOOM REPEAT REPEAT Changing the remote control battery CR 2025...
- Page 29 Remote control functions 1. POWER Switch-on/Switch-off. 2 . MUTE Eliminates Audio. 3. TFT DISPLAY Visualizes the current mode on the display (DVD, TV, AV1, AV2, VGA) 4. EJECT Eject Disc 5. TAST. NUM. Number selection-keys. 6. ANGLE Change watching-angle with DVDs, if supported. 7.
- Page 30 USB - SD CARD: remarks and compatibility ATTENTION: USB and/or SD-CARD reading-functions get activated ONLY in the presence of a disc inside the DVD-player. 1 Insert SD/MMC-Card Insert the SD/MMC-Card with its label showing upward. The Player will automatically reproduce the contents of such card, while the display will indicate READ-CARD.
- Page 31 Memory of the reproduction-position By switching-off the DVD-player or the car-engine while playback is in course, or by changing the video- source, reproduction will resume from the interrupted position. Interruption-memory will be cancelled when disc is ejected or by pressing RESET. USB and SD-Cards do not offer this reproduction memory.
- Page 32 Setup-Regulations Use the cursors to move to the location contain- The monitor will show the SET-UP-menu. ing the four stars. Digit the old Password (in the Move with the remote-control keys ( 34 ) and select Factory Setup the password is VOID). Now digit with ENTER-key the function required (Language, the new password you wish to adopt.
- Page 33 Setup-Regulations Press SETUP to leave the menu. LANGUAGE OF DISC MENU Use cursors to move to the bottom and go to the line disc Menu. Press ENTER and select the required language. Press SETUP to leave the menu. Reproduction of Mp3 / AVI / MPG By inserting a disc into the DVD-player, reproduction will start automatically and screen will show the Track-menu.
- Page 34 Causes and remedies to installation problems problema Causa rimedio Display does not show The current-supply cable may not Consequently, check the current- anything have been inserted correctly or the supply cable or replace the fuse fuse may be defect. Check selected video-source Select internal or external video, in relation to the source.
- Page 35 Technical specifications MAIN FEATUrES Current-Supply…………..12V DC Test-Tension……………..13.2V negative ground Pre-amplified Exits……….2 CH !V Rms (10KOhm) Video-Signal……………...PAL/NTSC/AUTO 1+/- 0.2V (75 Ohm) Transmitter………………..IR integrated Integrated FM Audio-Modulator ……selectable frequencies 87.8-87.9–88.1–8.3–88.5-88.8-89 MHz VGA-port for PC-connection……….. resolution 800 x 480 – 60 Hz USB-port……………………………..supports format USB 2.0 SD-Card-port…………………………supports SD-card/MMC-card max.
- Page 36 S.pA. - Via F.lli Cervi, 167/C - 42100 reggio Emilia (Italy) - Tel. ++39 0522 941621 - Fax ++39 0522 942452 www.phonocar.com - e-mail:info@phonocar.it FrANCE Vente et Assistance assurées par le Fabricant italien Tél/Fax N° Vert 0800.90.43.99 www.phonocar.fr • e-mail:info@phonocar.it DEUTSCHLAND 71711 - MURR - Rudolf Diesel Strasse, 13 - Tel.
Need help?
Do you have a question about the VM190 and is the answer not in the manual?
Questions and answers