Table of Contents
Advertisement
Quick Links
Owner's Manual
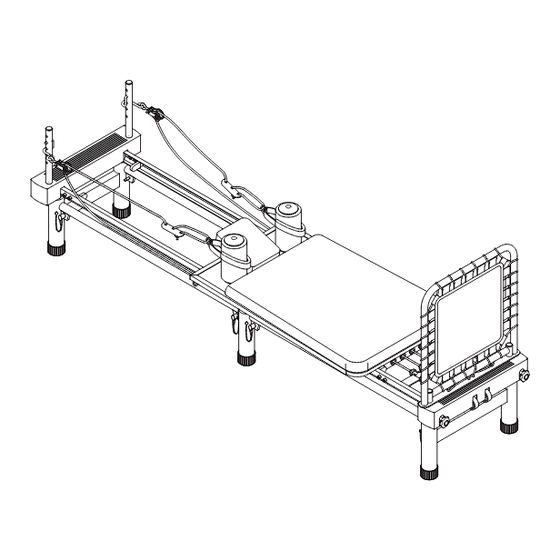
Product May Vary Slightly From Pictured.
CAUTION:
Weight on this product should not exceed 300 lbs.
This Product is Distributed Exclusively by
2040 N Alliance Ave, Springfield, MO 65803
www.staminaproducts.com
Customer Care
1 (800) 375-7520
WARNING
!
Exercise can present a
h e a l t h r i s k . C o n s u l t a
physician before beginning
any exercise program with
this equipment. If you feel
faint or dizzy, immediately
d i s c o n t i n u e u s e o f t h i s
equipment. Serious bodily
i n j u r y c a n o c c u r i f t h i s
equipment is not assembled
and used correctly. Serious
bodily injury can also occur
if all instructions are not
followed. Keep others and
pets away from equipment
when in use. Always make
sure all bolts and nuts are
securely tightened prior to
each use. Follow all safety
instructions in this manual.
When calling for parts or
service, please specify
the following numbers :
Model#: 55-4700B
S/N: _____________
United States and/or
International patents apply
and/or are pending. See
www.staminaproducts.com
for details.
STAMINA PRODUCTS
MADE IN CHINA
© 2018 Stamina Products, Inc.
2018, 08
Advertisement
Table of Contents

Related Manuals for AeroPilates Premier Studio 55-4700B


Summary of Contents for AeroPilates Premier Studio 55-4700B
- Page 1 Owner's Manual WARNING Exercise can present a h e a l t h r i s k . C o n s u l t a physician before beginning any exercise program with this equipment. If you feel faint or dizzy, immediately d i s c o n t i n u e u s e o f t h i s equipment.
-
Page 3: Table Of Contents
7. Keep children away from the AeroPilates® Premier Studio. Do not allow children to use or play on the AeroPilates® Premier Studio. Keep children and pets away from the AeroPilates® Premier Studio when it is in use. - Page 4 ONLINE TELEPHONE MAIL customer.care@staminaproducts.com 1 (800) 375-7520 (417) 889-8064 Stamina Products, Inc. www.staminaproducts.com ATTN: Customer Care 2040 N Alliance Ave Springfield, MO 65803 CUSTOMER CARE HOURS: facebook.com/StaminaProducts Monday-Thursday, 7:30 AM-5:00 PM, Central Time facebook.com/AeroPilates Friday, 8:00 AM-3:00 PM, Central Time...
-
Page 5: Before You Begin
It's a proven fact that a regular exercise program can improve your physical and mental parts. If you have any questions or problems with the parts included with your AeroPilates® Premier health. Too often, our busy lifestyles limit our time and opportunity to exercise. The AeroPilates®... -
Page 6: Equipment Warning, Caution & Notice Labels
EQUIPMENT WARNING, CAUTION & NOTICE LABELS This chart is provided to help identify the warning, caution, and notice labels on the AeroPilates® Premier Studio. Please take a moment to familiarize yourself with all of the warning, caution, and notice labels. -
Page 7: Hardware Identification Chart
HARDWARE IDENTIFICATION CHART This chart is provided to help identify the hardware used in the assembly process. Place the washers or the ends of the bolts or screws on the circles to check for the correct diameter. Use the small scale to check the length of the bolts and screws. -
Page 8: Assembly Instructions
ASSEMBLY INSTRUCTIONS Place all parts from the box in a cleared area and position them on the floor in front of you. Remove all packing materials from your area and place them back into the box. Do not dispose of the packing materials until assembly is completed. - Page 9 ASSEMBLY INSTRUCTIONS STEP 2 Remove your AeroPilates® Premier Studio from its packaging, placing the product on its side with the LOCKING PIN(35) side upward. Remove the LOCKING PIN(35) and unfold the MAIN FRAME ASSEMBLY separating the half that has the attached LOCKING PIN(35). When completed, the frame should form a “V”...
- Page 10 FRONT FRAME(1) and press the cover securely into place. STEP 6 Make sure that the threaded holes in the FOOTBAR(5) are facing toward the end of the AeroPilates® Premier Studio as shown in the illustration. Insert the FOOTBAR(5) into the mounting holes located in the FRONT COVER(3) and FRONT FRAME(1).
- Page 11 ASSEMBLY INSTRUCTIONS STEP 7 Remove the paper covering from the foam tape inside the REAR COVER(4). Place the REAR COVER(4) over the REAR FRAME(2) and press the cover securely into place. STEP 8 Insert the PULLEY RISERS(25) into the mounting holes in the REAR COVER(4) and REAR FRAME(2). Insert the PULLEY RISERS(25) all the way to the bottom, align the threaded holes in the PULLEY RISERS(25) with the holes in the REAR FRAME(2), and lock the PULLEY RISERS(25) in position with the LOCKING KNOBS(26).
- Page 12 REAR STAND(55). The FRONT STAND(53) is wider than the REAR STAND(55). The footbar end of your AeroPilates® Premier Studio will fit into the top of the FRONT STAND(53) and the headrest end of your AeroPilates® Premier Studio will fit into the REAR STAND(55).
-
Page 13: Operational Instructions
OPERATIONAL INSTRUCTIONS LOAD ADJUSTMENT The resistance of the PLATFORM(7) can be adjusted by Slots securing the TENSION CORDS(10) in the slots on the FRONT FRAME(1). You can achieve various levels of resistance by securing different numbers of the TENSION CORDS(10) in the slots. - Page 14 OPERATIONAL INSTRUCTIONS HEADPAD ADJUSTMENT AND USE The HEADPAD(60) is designed to support the natural curve of your neck. It can be used to provide comfort, support and postural alignment for reformer exercises that are performed while lying on your back. Do not use the HEADPAD(60) for exercises that require you to lift your hips higher than your head.
- Page 15 OPERATIONAL INSTRUCTIONS CUSTOMIZING ROPE LENGTH Ideal rope length will vary depending on your height and limb length. To determine your ideal rope length, begin by placing the hand/foot straps over the shoulder rests as shown below. Adjust the ropes so they are taut.
- Page 16 OPERATIONAL INSTRUCTIONS PULLEY HEIGHT ADJUSTMENT Standard Setting- the top hole The standard height setting for the reformer pulleys is the top setting. At the top setting, the pull of the ropes provides the most support and feedback for the body. Place your pulleys at the top setting to most easily achieve proper form and to engage the core muscles.
- Page 17 34 pounds TENSION CORD SELECTION The AeroPilates® workout wall chart and workout DVDs indicate which cords to use for each exercise. TENSION CORD REPLACEMENT To replace or add a tension cord, first carefully release the platform and tip your machine on its side. Untie the knot that secures the cord you are replacing and simply pull it out.
- Page 18 OPERATIONAL INSTRUCTIONS PLATFORM ROLLER REPLACEMENT To replace a platform roller, first remove the platform by releasing the cords and sliding the platform all the way back to the top end or rear frame of the machine. Tip your machine on its side, bend the machine at the hinge, and simply slide the platform off the frame.
-
Page 19: Storage
2. It is recommended that two people be available to move the AeroPilates® Premier Studio. 3. To move the AeroPilates® Premier Studio: First, attach one of the TENSION CORDS(10) in the slot on the FRONT FRAME(1) to prevent the PLATFORM(7) from moving. Second, grasp the FRONT and REAR FRAME(1, 2) to remove the AeroPilates®... -
Page 20: Conditioning Guidelines
CONDITIONING GUIDELINES How you begin your exercise program depends on your physical condition. If you have been inactive for several years or are severely overweight, start slowly and increase your workout time gradually. Increase your workout intensity gradually by monitoring your heart rate while you exercise. Remember to follow these essentials: Have your doctor review your training and diet programs. -
Page 21: Warm-Up And Cool-Down
WARM-UP and COOL-DOWN Warm-Up The purpose of warming up is to prepare your body for exercise and to minimize injuries. Warm up for two to five minutes before strength training or aerobic exercising. Perform activities that raise your heart rate and warm the working muscles. Activities may include brisk walking, jogging, jumping jacks, jump rope, and running in place. -
Page 22: Product Parts Drawing
PRODUCT PARTS DRAWING BACK FRONT... -
Page 23: Parts List
PARTS LIST PART# PART NAME Front Frame Rear Frame Front Cover Rear Cover Footbar Foam Sleeve Platform Roller Roller Spacer Tension Cord Support Bushing Stop Bushing Platform Cushion Headrest Foam Pad Tube Foam Pad Foam Cap Rope Pinch Point Caution Label Hand/Foot Strap Furry Grip Pulley Set... - Page 24 Cardio Rebounder Bungee Cord Front Stand Middle Stand Rear Stand Connection Bar Endcap Large Washer (2 3/8” diameter) Pull Pin Headpad Caution Label Serial Decal Combination Wrench Socket Wrench Manual Workout Chart AeroPilates Basic Workout Package (DVD) AeroPilates Primer (DVD)
-
Page 25: Warranty
LIMITED WARRANTY MODEL 55-4700B WARRANTY Stamina Products, Inc. (“Stamina”) warrants to the original purchaser that this product will be free from defects in materials and workmanship that arise under normal use, service, proper assembly and proper operation in accordance with product warnings/instructions for a period of 90 days on the parts and three years on the frame from the date of the original purchase from an authorized retailer. -
Page 26: Notes
NOTES... -
Page 27: Fax/Mail Ordering Form
TO CONTACT CUSTOMER CARE For your convenience, Stamina’s customer care representatives can be reached by email at customer.care@staminaproducts. com or by phone at 1-800-375-7520 (in the U.S.). Our customer care representatives are available Monday through Thursday from 7:30 a.m. until 5:00 p.m., and Friday 8:00 a.m. until 3 p.m. Central Time. ONLINE TELEPHONE MAIL...
Need help?
Do you have a question about the Premier Studio 55-4700B and is the answer not in the manual?
Questions and answers
Is there a good YouTube video for this model for assembly?