Table of Contents

Related Manuals for Pioneer XDP-30R


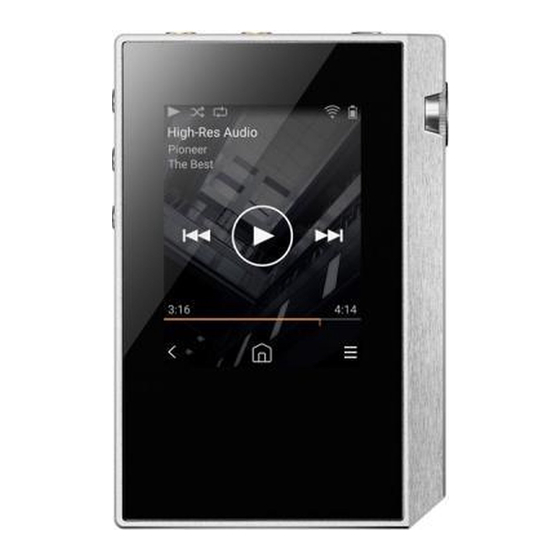
Summary of Contents for Pioneer XDP-30R
- Page 1 XDP-30R HIGH RESOLUTION AUDIO PLAYER 取扱説明書 Instruction Manual Mode d’emploi Manual de instrucciones Manuale di istruzioni Bedienungsanleitung Grundläggande bruksanvisning Руководство по эксплуатации 使用手冊 使用手册 En En...
-
Page 2: Table Of Contents
> Before Start > Part Names > Initial Setup > Playback etup upp ement r n orm tion t er Table o Contents Before Start e ore t rt hat s in the bo ............. 3 P rt Part Names ............. niti etup Turning the po er on and initial settings .... -
Page 3: Hat S In The Bo
> Before Start > Part Names > Initial Setup > Playback etup upp ement r n orm tion t er hat s in the bo 1. Main unit (1) 2. micro USB cable (1) 3. Protective ilm (1) This protects the main unit. Peel o the temporar ilm on the displa irst then attach this ilm. -
Page 4: Part Names
> Before Start > Part Names > Initial Setup > Playback etup upp ement r n orm tion t er Part Names Part Names 1. Status bar 2. Librar : Tap to displa the tracks copied rom our computer (P1 ). ... - Page 5 > Before Start > Part Names > Initial Setup > Playback etup upp ement r n orm tion t er hold to ast- or ard through the track. displa ed. You can turn the po er o b tapping Yes . 1 .Pla /pause ( ) button To turn the displa on or o...
-
Page 6: Niti Etup
> Before Start > Part Names > Initial Setup > Playback etup upp ement r n orm tion t er Turning the po er on and initial settings Initial Setup niti etup t rt utom ti 1. The batter is not charged at the time o purchase. Charge the unit ith the supplied micro USB cable be ore use. - Page 7 > Before Start > Part Names > Initial Setup > Playback etup upp ement r n orm tion t er the connections are complete. Set the pass code used to protect this unit. hen ou set a in t e pu utton 2nd Step : Wi-Fi pass code the pass code screen is displa ed hen the...
-
Page 8: Cop Ing Music Ith X-Dap Link
Per orm the ollo ing procedure hen the unit is on. 1. Start our computer and do nload the installer or X- DAP Link rom the ollo ing site. http:// p.pioneer-audiovisual.com/support/av pc/compo/ dap/ -daplink/do nload/ Double-click setup.e e to install. Follo the on-screen instructions to install. - Page 9 > Before Start > Part Names > Initial Setup > Playback etup upp ement r n orm tion t er 3. Start X-DAP Link. The ollo ing t pes o screens are on the iTunes version. For details see the operating .
- Page 10 > Before Start > Part Names > Initial Setup > Playback etup upp ement r n orm tion t er I the cop destination as selected b clicking 4 click Pla list name. The pla list ou created is added to the Mix_05 Artist B Best Mix...
- Page 11 > Before Start > Part Names > Initial Setup > Playback etup upp ement r n orm tion t er 5. Drag and drop the music iles ou ant to add to the pla list to the pla list ou have created. 1.
- Page 12 > Before Start > Part Names > Initial Setup > Playback etup upp ement r n orm tion t er hen backing up is complete the date and time o the . Select the storage destination to restore the pla list ile at backup and the pla list ile are added to the le t o the 6 then click O at 7.
-
Page 13: Dragging And Dropping To Cop Music
> Before Start > Part Names > Initial Setup > Playback etup upp ement r n orm tion t er Dragging and dropping to cop music You can cop music iles stored on our computer to the built-in storage on this unit or dragging and dropping to a micro SD card in this unit then listen to the music through the Librar (P1 ). -
Page 14: Listening To Music Rom The Librar
> Before Start > Part Names > Initial Setup > Playback etup upp ement r n orm tion t er Listening to music rom the Librar Best Mix_01 Library Best Mix Artist B Artist B Best Mix Folders 10Songs / 46:27 MP3 44.1 kHz/PCM 44.1 kHz 16bit Library Best Mix_01... - Page 15 > Before Start > Part Names > Initial Setup > Playback etup upp ement r n orm tion t er reen status bar on the screen hen this is on. 12.The track being pla ed is added to the reen A reen B pla list (P1 ).
-
Page 16: Creating A Pla List
> Before Start > Part Names > Initial Setup > Playback etup upp ement r n orm tion t er Creating a pla list Playlists Best Mix Add to Playlist Library Artist B Folders New Playlist New Playlist 10Songs / 46:27 Best Mix_01 Playlists 3:23... -
Page 17: Using Net Ork Services
> Before Start > Part Names > Initial Setup > Playback etup upp ement r n orm tion t er Using net ork services Online Library Online Line Balanced You can use net ork services such as pla . Radio. TuneIn Radio DEE ER and TIDAL b 0 To return to the preceding screen tap To displa a radio station registered in M... -
Page 18: Connecting Bluetooth
> Before Start > Part Names > Initial Setup > Playback etup upp ement r n orm tion t er ® Connecting BLUETOOTH Settings Bluetooth Wi-Fi Bluetooth Library Online Paired Devices : Bluetooth Not Paired Line Balanced Brightness Available Devices : Balanced Output Select Device 1 Line Out Mode... -
Page 19: Line Out
> Before Start > Part Names > Initial Setup > Playback etup upp ement r n orm tion t er Line Out Library Online Line Balanced You can connect a headphone ampli ier or D/A converter or e ample that has line input. -
Page 20: Usb Output
> Before Start > Part Names > Initial Setup > Playback etup upp ement r n orm tion t er USB Output Library Online Line Balanced OTG Cable You can connect a headphone ampli ier or damage the plug or ack i ou tr to D/A converter or e ample that has a USB insert it the rong a . -
Page 21: A N E Etup
> Before Start > Part Names > Initial Setup > Playback etup upp ement r n orm tion t er arious settings Advanced Setup to make settings or i-Fi and BLUETOOTH settings or audio output pass code settings so t are updates and a variet o other settings. 1. - Page 22 S nc Added Songs: Select to s nchronize onl tracks that have been added. can be reduced even hen BLUETOOTH is on. Enable (de ault value) : To enable connection ith Pioneer DuoRemote App . Disable : To disable connection ith Pioneer DuoRemote App .
- Page 23 > Before Start > Part Names > Initial Setup > Playback etup upp ement r n orm tion t er music iles copied to the internal storage and settings data are all deleted. ou enter the rong pass code three times a message appears asking i ou ant to initialize the unit s settings.
-
Page 24: Audio Ad Ust
> Before Start > Part Names > Initial Setup > Playback etup upp ement r n orm tion t er Audio Ad ust to set to our pre erred sound ualit . 1. Tap in the home screen. 2. Tap the item ou ant to set. Audio Adjust u tom oun Custom Sound... - Page 25 > Before Start > Part Names > Initial Setup > Playback etup upp ement r n orm tion t er ou change the lock range and the sound is interrupted ad ust to the Normal or ends.
-
Page 26: Customizing The Home Screen
> Before Start > Part Names > Initial Setup > Playback etup upp ement r n orm tion t er Customizing the Home screen B pressing and holding the buttons in the home screen o this unit ou can change the buttons displa ed to ones or eatures ou pre er. -
Page 27: So T Are Update
> Before Start > Part Names > Initial Setup > Playback etup upp ement r n orm tion t er So t are Update e up un tion on t i unit to up tin t e irm re i et or This unit has unctionalit to update the so t are over a There are t o methods or updating the irm are: via... - Page 28 > Before Start > Part Names > Initial Setup > Playback etup upp ement r n orm tion t er PC and unzip. 3. Cop all unzipped iles and olders to the root older o a micro SD card. 0 Make sure to cop the unzipped iles. .
-
Page 29: Supplementar In Ormation
> Before Start > Part Names > Initial Setup > Playback etup upp ement r n orm tion t er Supplementar In ormation Supplementary Information Due to so t are updates a ter ou make our purchase or so t are changes during production o the product there ma be additions or changes to the settings and operation available compared to hat is in the instruction manual. -
Page 30: Entering Te T
> Before Start > Part Names > Initial Setup > Playback etup upp ement r n orm tion t er Entering te t Others 1. Moves the cursor. 2. Enters a space. 3. Tap to enter te t. . Removes a character on the le t o the cursor. 5. -
Page 31: General Speci Ications
> Before Start > Part Names > Initial Setup > Playback etup upp ement r n orm tion t er General Speci ications Di p ontinuou p time 2. -inch 2 0 320 dot resolution Times sho n are a guide. Pla back times depend on settings. -
Page 32: Cautions Or Use
> Before Start > Part Names > Initial Setup > Playback etup upp ement r n orm tion t er Cautions or use oper tion e ome un t the ollo ing procedure: 1. Tap in the home screen. 0 The issue ma be i ed b restarting this unit. Press and 2. - Page 33 > Before Start > Part Names > Initial Setup > Playback etup upp ement r n orm tion t er i en e n em r ® The Bluetooth ord mark and logos are registered trademarks o ned b Bluetooth SIG Inc. ®...
- Page 34 (Europe) © 2017 Onkyo & Pioneer Innovations. All rights reserved. © 2017 Onkyo & Pioneer Innovations. Tous droits de reproduction et de traduction réservés. http://pioneer-audiovisual.com/privacy/ “Pioneer” is a trademark of Pioneer Corporation, and is used under license. SN 29403055C...
Need help?
Do you have a question about the XDP-30R and is the answer not in the manual?
Questions and answers