Atlas Copco GA 18 Instruction Book
Hide thumbs
Also See for GA 18:
- Instruction book (170 pages) ,
- User manual (45 pages) ,
- Instruction book (39 pages)
Table of Contents
Advertisement
Quick Links
Advertisement
Table of Contents

Related Manuals for Atlas Copco GA 18


Summary of Contents for Atlas Copco GA 18
- Page 1 INSTRUCTION BOOK API451763 GA 18...
- Page 3 Atlas Copco GA 18 API451763 Instruction book Original instructions COPYRIGHT NOTICE Any unauthorized use or copying of the contents or any part thereof is prohibited. This applies in particular to trademarks, model denominations, part numbers and drawings. This instruction book is valid for CE as well as non-CE labelled machines. It meets the requirements for instructions specified by the applicable European directives as identified in the Declaration of Conformity.
-
Page 4: Table Of Contents
Instruction book Table of contents Safety precautions......................6 ........................... 6 AFETY ICONS ......................6 ENERAL SAFETY PRECAUTIONS ................... 7 AFETY PRECAUTIONS DURING INSTALLATION ....................8 AFETY PRECAUTIONS DURING OPERATION ................9 AFETY PRECAUTIONS DURING MAINTENANCE OR REPAIR General description...................... 12 ..........................12 NTRODUCTION ............................ - Page 5 Instruction book 3.10 ................37 ALLING UP OUTLET AND DEW POINT TEMPERATURES 3.11 ......................38 ALLING UP RUNNING HOURS 3.12 ......................38 ALLING UP MOTOR STARTS 3.13 .......................39 ALLING UP MODULE HOURS 3.14 ......................40 ALLING UP LOADING HOURS 3.15 ........................40 ALLING UP LOAD RELAY 3.16 ....................
- Page 6 Instruction book Operating instructions....................61 ..........................61 NITIAL START ..........................64 EFORE STARTING ............................64 TARTING .......................... 64 URING OPERATION ........................66 HECKING THE DISPLAY ............................67 TOPPING ........................67 AKING OUT OF OPERATION Maintenance........................69 ....................69 REVENTIVE MAINTENANCE SCHEDULE ..........................71 IL SPECIFICATIONS ......................72 TORAGE AFTER INSTALLATION ..........................
- Page 7 Instruction book ....................84 OTOR OVERLOAD RELAY SETTINGS ..........................85 RYER SWITCHES .................... 85 EFERENCE CONDITIONS AND LIMITATIONS GA 15 GA 22..................85 OMPRESSOR DATA FOR UP TO Instructions for use...................... 87 Guidelines for inspection.....................88 Pressure equipment directives................... 89 Declaration of conformity.................... 90 API451763...
-
Page 8: Safety Precautions
Instruction book Safety precautions Safety icons Explanation Danger to life Warning Important note General safety precautions 1. The operator must employ safe working practices and observe all related work safety requirements and regulations. 2. If any of the following statements does not comply with the applicable legislation, the stricter of the two shall apply. -
Page 9: Safety Precautions During Installation
Instruction book 9. If compressed air is used in the food industry and more specifically for direct food contact, it is recommended, for optimal safety, to use certified Class 0 compressors in combination with appropriate filtration depending on the application. Please contact your customer center for advice on specific filtration. -
Page 10: Safety Precautions During Operation
Instruction book 12. The electrical connections must correspond to the applicable codes. The machines must be earthed and protected against short circuits by fuses in all phases. A lockable power isolating switch must be installed near the compressor. 13. On machines with automatic start/stop system or if the automatic restart function after voltage failure is activated, a sign stating "This machine may start without warning"... -
Page 11: Safety Precautions During Maintenance Or Repair
Instruction book 6. Keep all bodywork doors shut during operation. The doors may be opened for short periods only, e.g. to carry out routine checks. Wear ear protectors when opening a door. On machines without bodywork, wear ear protection in the vicinity of the machine. 7. - Page 12 Instruction book 3. Use only genuine spare parts for maintenance or repair. The manufacturer will disclaim all damage or injuries caused by the use of non-genuine spare parts. 4. All maintenance work shall only be undertaken when the machine has cooled down. 5.
- Page 13 Instruction book Also consult following safety precautions: Safety precautions during installation Safety precautions during operation. These precautions apply to machinery processing or consuming air or inert gas. Processing of any other gas requires additional safety precautions typical to the application which are not included herein. Some precautions are general and cover several machine types and equipment;...
-
Page 14: General Description
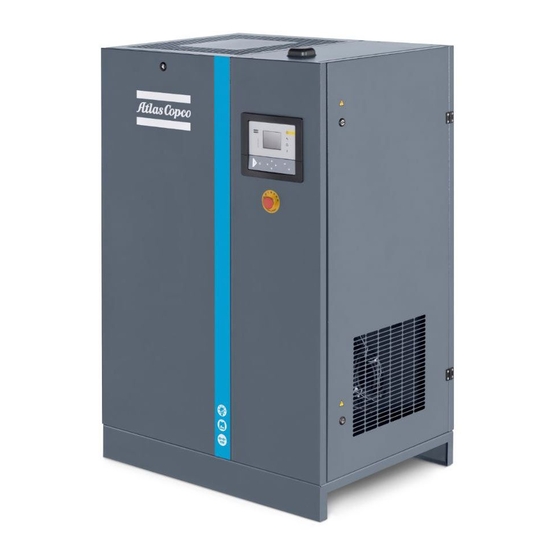
Instruction book General description Introduction GA 15, GA 18 and GA 22 are single-stage, oil-injected screw compressors driven by an electric motor. The compressors are air-cooled. GA Pack GA Pack are enclosed in a sound-insulated bodywork. The compressors are controlled by the ®... - Page 15 Instruction book Front view, GA 15 up to GA 22 Floor-mounted Full-Feature Reference Name Air filter Air outlet valve Air cooler Oil cooler Dryer Elektronikon regulator Motor Condensate trap (GA Pack) Oil filter Oil separator cartridge Oil separator tank Emergency stop button API451763...
-
Page 16: Air Flow
Instruction book Air flow Flow diagrams Flow diagram, GA Pack API451763... - Page 17 Instruction book Flow diagram, GA Full-Feature Reference Description Intake air Air/oil mixture Wet compressed air Condensate Dried compressed air API451763...
-
Page 18: Oil System
Instruction book Description Air drawn through filter (AF) and open inlet valve (IV) into compressor element (E) is compressed. Compressed air and oil flow into the oil tank (OT). The air is discharged through outlet valve (AV) via minimum pressure valve (Vp) and air cooler (Ca). During loaded operation, minimum pressure valve (Vp) keeps the pressure in the separator tank (OT) above a minimum value, required for lubrication. - Page 19 Instruction book References Description Compressed air flow towards the condensate trap (Pack units). Compressed air flow to the air dryer (compressors with integrated dryer) Intake air Air/oil mixture Wet compressed air Description In oil tank (OT) most of the oil is removed from the air/oil mixture by centrifugal action. The rest is removed by oil separator (OS).
-
Page 20: Cooling System
Instruction book Cooling system Flow diagram Cooling system References Description Intake air Air/oil mixture Wet compressed air Description The cooling system comprises air cooler (Ca) and oil cooler (Co). On air-cooled compressors, the cooling air flow is generated by fan (FN). API451763... -
Page 21: Condensate System
Instruction book Condensate system Condensate drains Condensate drains, Pack units Condensate drain, Full-Feature units Pack units have a condensate trap (MT) downstream the air cooler. The condensate trap is provided with a manual drain outlet (Dm) and an automatic drain outlet (Da). On Full-Feature units, the dryer is equipped with an electronic drain (1). -
Page 22: Regulating System
Instruction book Regulating system Flow diagram Regulating system (loaded condition) Loading When the net pressure is below the loading pressure, solenoid valve (Y1) is energised. Results: • The space above unloading valve/blow-off valve (UV) is connected with the oil separator tank pressure (1) via the solenoid valve. -
Page 23: Electrical System
Instruction book Air output is stopped, the compressor runs unloaded. Electrical system General Also consult sections Electrical diagrams Electrical connections. The electrical system comprises following components: Electric cubicle on GA 15 up to GA 22, typical example Reference Designation F1/2/3 Fuses F4/5/6 Fuses... -
Page 24: Electrical Diagrams
Instruction book Reference Designation Terminal strip (motor) X103/X108 Connectors Earth terminal Electrical diagrams The complete electrical diagram can be found in the electric cubicle. API451763... - Page 25 Instruction book Text on drawing Reference Designation Customer’s installation Option All other voltages except 440-460 V - 60 Hz Remote start/stop Motor protection Emergency stop Remote emergency stop Supply of dryer All other voltages Designations used Typical references used in the electric diagram of the compressor: Reference Compressor Dryer...
-
Page 26: Air Dryer
Instruction book Reference Compressor control module Blocking relay Auxiliary relay, star contactor Auxiliary relay, delta contactor Auxiliary relay, load/unload Auxiliary relay, dryer Auxiliary relay, general shutdown Start Stop Reference Optional equipment Electronic water drain Timer drain Phase sequence relay Main switch Anti-condensation heaters Air dryer Description... - Page 27 Instruction book Refrigerant circuit Refrigerant compressor (1) delivers hot, high-pressure refrigerant gas which flows through condenser (2) where most of the refrigerant condenses. The liquid refrigerant flows through dryer/filter (8) to capillary tube (7). The refrigerant leaves the capillary tube at evaporating pressure. The refrigerant enters evaporator (4) where it withdraws heat from the compressed air by further evaporation at constant pressure.
-
Page 28: Elektronikon I Regulator
Instruction book Elektronikon I regulator Elektronikon I regulator Control panel Introduction In general, the Elektronikon regulator has following functions: • Controlling the compressor • Protecting the compressor • Monitoring components subject to service • Automatic restart after voltage failure (made inactive) Automatic control of the compressor The regulator maintains the net pressure between programmable limits by automatically loading and unloading the compressor. -
Page 29: Control Panel
The regulator has a built-in function to automatically restart the compressor when the voltage is restored after voltage failure. This function is deactivated in compressors leaving the factory. If desired, the function can be activated. Consult the Atlas Copco Customer Centre. If activated, and provided the regulator was in the automatic operation mode, the compressor will automatically restart when the supply voltage to the module is restored. -
Page 30: Display
Instruction book Ref. Name Function Reset key Key to reset the service timer, a shut-down condition, etc or to return to a previous display. Enter key Key to select or validate a parameter, to open a sub-display. Voltage on LED Indicates that the voltage is switched on. -
Page 31: Pictographs Used On The Screen
Instruction book The display also shows all measured and programmed parameters, see section Scrolling through all screens. Pictographs used on the screen Pictographs Pictograph Description Compressor status LOAD (during loaded running, the horizontal arrow flashes). Compressor status UNLOAD. LOAD and UNLOAD indication. Element outlet temperature. -
Page 32: Shut-Down Warning
Instruction book The screen shows that the compressor is running loaded (the horizontal arrow flashes) and that the outlet pressure is 6.8 bar(e). Always consult Atlas Copco if <test> appears on the display. Also consult section Scrolling through all screens. - Page 33 Instruction book Warning screen, element outlet temperature flashing ˚C The screen shows that the temperature at the outlet of the compressor element is 111 ˚C. • It remains possible to scroll through other screens (using keys 3 and 5) to check the actual status of other parameters.
-
Page 34: Shut-Down
Instruction book Shut-down Description The compressor will be shut down in case: • The temperature at the outlet of the compressor element exceeds the shut-down level • Of error of the outlet pressure sensor • Of overload of the drive motor •... -
Page 35: Service Warning
Instruction book Motor overload • In the event of motor overload, the compressor will be shut-down, alarm LED (4) will flash, automatic operation LED (5) will go out and the following screen will appear: Main screen with shut-down indication, motor overload flashing •... -
Page 36: Scrolling Through All Screens
4000 running hours interval. • If using mineral oil instead of Atlas Copco Roto-injectfluid, the service timer has to be decreased. See section Preventive maintenance schedule. • After servicing, reset the service timer. See section Calling up/resetting service timer. - Page 37 <P.08> Selection for function: Automatic restart See section Activating automatic restart after voltage failure (active or not, only for after voltage failure Atlas Copco) <P.09> Selection between Y-D or DOL starting See section Selection between Y-D or DOL starting <P.10>...
- Page 38 Instruction book Protections Designation Related topic screen <Pr.01>, <Pr. Protections screens See section Calling up modifying protection 02>, <Pr.03> settings Test screen Designation Related topic <t.01> Display test See sections Test screens <t.02> Safety valve test See sections Test screens Menu flow Simplified menu flow API451763...
-
Page 39: Calling Up Outlet And Dew-Point Temperatures
Instruction book 3.10 Calling up outlet and dew-point temperatures Control panel Starting from the Main screen: • Press arrow key (2), the outlet temperature will be shown: ˚C The screen shows that the outlet temperature is 83 ˚C. • For Full-Feature compressors: Press arrow key (2), the dew-point temperature will be shown: ˚C The screen shows that the dew-point temperature is 3 ˚C. -
Page 40: Calling Up Running Hours
Instruction book 3.11 Calling up running hours Control panel Starting from the Main screen: • Press arrow key (2) until <d.01> is shown and then press enter key (1): <x 1000 hrs> 11.25 The screen shows the unit used <x1000 hrs> and the value <11.25>: the running hours of the compressor are 11250 hours. -
Page 41: Calling Up Module Hours
Instruction book • Press arrow key (2) until <d.02> is shown and then press enter key (1): <x1000> 10.10 This screen shows the number of motor starts times 1000 (times 1 or if <x1000> lits up times 1000). The number of motor starts is 10100. 3.13 Calling up module hours Control panel Starting from the Main screen:... -
Page 42: Calling Up Loading Hours
Instruction book 3.14 Calling up loading hours Control panel Starting from the Main screen: • Press arrow key (2) until <d.04> is shown and then press enter key (1): <hrs> 1755 The screen shows the unit used <hrs> (or <x1000 hrs>) and the value <1755>: the loading hours of the compressor are 1755 hours. -
Page 43: Calling Up/Resetting Service Timer
Instruction book • Press arrow key (2) until <d.05> is shown and then press enter key (1): <x1000> 10.10 This screen shows the number of unload to load actions (times 1 or if <x1000> lits up times 1000). The number of unload to load actions is 10100. 3.16 Calling up/resetting service timer Control panel Starting from the Main screen:... -
Page 44: Selection Between Local, Remote Or Lan Control
Instruction book Resetting the service timer After servicing, see section Service warning, the timer has to be reset: • Scroll to register screen <d.06> and press enter key (2). • The reading (e.g. 4000) will appear. • Press enter key (2), if a password is set enter the password. The reading will flash (indicating that resetting is possible). -
Page 45: Calling Up Modifying Node Id For Lan Control
Instruction book 3.18 Calling up modifying node ID for LAN control Control panel Starting from the Main screen: • Press arrow key (2) until <P.02> is shown and then press enter key (1). The actually used node ID is shown. •... -
Page 46: Modifying Pressure Band Selection
Instruction book • Press enter key (1) on desired pressure band. The load level of the selected pressure band appears, key (2) can be used to scroll to the unload level. Loading pressure Unloading pressure • Press enter key (1) to modify the load level (value starts blinking). A password may be required. -
Page 47: Calling Up/Modifying Service Timer Setting
Instruction book Pb.1 • Press key (2) to modify the active pressure band. Press enter key (1) to confirm or reset key to cancel. 3.21 Calling up/modifying service timer setting Control panel Starting from the Main screen: • Press arrow key (2) until <P.05> is shown and then press enter key (1): the setting of the service timer is shown in <hrs>... -
Page 48: Calling Up/Modifying Unit Of Pressure
• Press enter key (1) to program the new unit of pressure and press reset key to return to the parameter screens. 3.24 Activating automatic restart after voltage failure Description This parameter, accessible in screen <P.08>, can only be modified after entering a code. Consult Atlas Copco if this function should be activated. API451763... -
Page 49: Selection Between Y-Dor Dol Starting
(1). The actually used starting mode is shown <Y-d> for Y-D (star-delta) or <doL> for DOL (direct-on line). • This parameter can only be modified after entering a code. Consult Atlas Copco if the parameter is to be changed. -
Page 50: Calling Up Modifying Minimum Stop Time
Instruction book <s> • This screen shows the load delay time 10 and the unit <s> seconds. To modify this value press enter key (1). • An optional password may be required, the value starts blinking and arrow keys (2) and (3) can be used to modify the value. -
Page 51: Activating Password Protection
Instruction book 3.28 Activating password protection Control panel Important settings such as the setting of the service timer, pressure band setting, control mode settings,... can be protected by a password. Starting from the Main screen: • Press arrow key (2) until <P.12> and press enter key (1): <PASS>... -
Page 52: Calling Up Modifying Protection Settings
Instruction book 3.29 Calling up modifying protection settings Protections A number of protection settings are provided. The protection screens are numbered <Pr.>, the pictograph shown with the protection screen indicates the purpose of the protection. Possible combinations are <Pr.> followed by a number and one of the next pictographs: Pictograph Designation <Pr.>... -
Page 53: Test Screens
Instruction book Press arrow key (2) until <Pr.> followed by a number and the element outlet temperature is shown and then press enter key (1): <˚C> <Pr.01> <AL-H> • The warning level for the high temperature warning level <AL-H> and the high temperature shut-down level <Sd-H>. -
Page 54: Programmable Settings
Safety valve test In the test screen <t.02> a safety valve test is provided. The safety valves can only be tested after entering a code. Consult Atlas Copco if the safety valves are to be tested. 3.31 Programmable settings Parameters: unloading/loading pressures for compressors without built-in refrigeration dryer... - Page 55 (shut-down level) Service warning Also see section Preventive maintenance schedule. Consult Atlas Copco if a timer setting has to be changed. The intervals must not exceed the nominal intervals and must coincide logically. See section Calling up/modifying service timer. Terminology...
-
Page 56: Installation
Instruction book Installation Dimension drawings GA 15 up to GA 22 Floor-mounted Pack API451763... - Page 57 Instruction book GA 15 up to GA 22 Floor-mounted Full-Feature Type GA 18 GA 18 Full- Pack Feature Weight of Floor- mounted version (kg) Ref. Name Compressor air inlet Motor and cooling air inlet Compressed air outlet API451763...
-
Page 58: Installation Proposal
Instruction book Ref. Name Motor and compressor cooling air outlet Electrical cable entry Dryer cooling air inlet Dryer cooling air outlet Automatic drain Installation proposal Compressor room example API451763... - Page 59 If frost might occur, the appropriate measures should be taken to avoid damage to the machine and its ancillary equipment. In this case, and also if operating above 1000 m (3300 ft), consult Atlas Copco. Moving/lifting Floor-mounted unit: the compressor can be moved by a lift truck.
-
Page 60: Electrical Connections
(X108). See section Electrical system to locate the connector. • LAN control: The compressor is controlled via a local network. Consult Atlas Copco. Have the modifications checked by Atlas Copco. Stop the compressor and switch off the voltage before connecting external equipment. -
Page 61: Pictographs
Instruction book Pictographs Pictographs GA 15 up to GA 22 Reference Designation Warning: before connecting compressor electrically, consult Instruction book for motor rotation direction Torques for steel (Fe) or brass (CuZn) bolts Warning: suction Lightly oil gasket of oil filter, screw filter on and tighten by hand (approx. half a turn) Consult the instruction book before carrying out maintenance Warning: voltage Warning: hot parts... - Page 62 Instruction book 1. Read the instruction book. Drain the condensate to reduce the risk of corrosion. 2. Drain the vessel daily by opening the manual drain valve. 3. Inspect the vessel wall-thickness yearly and note down the inspection date. API451763...
-
Page 63: Operating Instructions
Instruction book Operating instructions Initial start-up Safety The operator must apply all relevant Safety precautions. Procedure For the location of the air outlet valve and the drain connections, see sections Introduction Condensate system. Motor and gear casing transport fixtures API451763... - Page 64 Instruction book Position of oil level sight-glass Electric cubicle API451763...
- Page 65 Instruction book Location of the sheet Consult the sections Electric cable size,Installation proposal Dimension drawings The following transport fixtures, painted red, must be removed: • Bolts (1) • Bushes (2) Check that the electrical connections correspond to the applicable codes and that all wires are clamped tight to their terminals.
-
Page 66: Before Starting
Instruction book Before starting Procedure Check the oil level, top up if necessary. See section Initial start-up. Starting Procedure For the position of the air outlet valve and the drain connections, see sections Introduction Condensate system Control panel of Elektronikon I Step Action Open the air outlet valve. - Page 67 Instruction book Checking the oil level When the automatic operation LED (8) is lit, the regulator is automatically controlling the compressor, i.e. loading, unloading, stopping of the motors and restarting! Control panel, Elektronikon I Regularly check the oil level. To do this, press the stop button (9). Three minutes after stopping, sight-glass (Gl) should be between 1/4 and 3/4 full.
-
Page 68: Checking The Display
Instruction book Air filter Especially if the compressor is installed in a dusty environment, inspect the air filter element regularly. Replace when necessary. See also Preventive maintenance schedule for periodic replacement instructions. Drains Regularly check that condensate is discharged during operation. See section Condensate system. -
Page 69: Stopping
Instruction book Stopping Elektronikon regulator Control panel of Elektronikon I Procedure Step Action Press stop button (9). Automatic operation LED (8) goes out and the compressor stops after a programmed number of seconds of unloaded operation (programmed stop time). To stop the compressor in the event of an emergency, press emergency stop button (10). - Page 70 Instruction book Step Action Switch off the voltage and disconnect the compressor from the mains. Unscrew the oil filler plug only one turn to permit any pressure in the system to escape. Shut off and depressurise the part of the air net which is connected to the outlet valve. Disconnect the compressor air outlet pipe from the air net.
-
Page 71: Maintenance
Service kits For overhauling or carrying out preventive maintenance, service kits are available (see section Service kits). Service contracts Atlas Copco offers several types of service contracts, relieving you of all preventive maintenance work. Consult your Atlas Copco Customer Centre. API451763... - Page 72 When servicing, replace all removed gaskets, O-rings and washers. Intervals The local Atlas Copco Customer Centre may overrule the maintenance schedule, especially the service intervals, depending on the environmental and working conditions of the compressor. The longer interval checks must also include the shorter interval checks.
-
Page 73: Oil Specifications
Oil specifications It is strongly recommended to use genuine Atlas Copco Lubricants. They are the result of years of field experience and research. See section Preventive maintenance schedule for the advised replacement intervals and consult the Spare Parts list for part number information. -
Page 74: Storage After Installation
Instruction book Roto-Inject Fluid Atlas Copco's Roto-Inject Fluid is a specially developed lubricant for use in single stage oil- injected screw compressors. Its specific composition keeps the compressor in excellent condition. Roto-Inject Fluid can be used for compressors operating at ambient temperatures between 0 ˚C (32 ˚F) and 40 ˚C (104 ˚F). - Page 75 Instruction book waste collection point. Refer to local regulations for directions on how to dispose of this product in an environmental friendly manner. API451763...
-
Page 76: Adjustments And Servicing Procedures
Instruction book Adjustments and servicing procedures Drive motor General Keep the outside of the electric motor clean for efficient cooling. If necessary, remove dust with a brush and/or compressed air jet. Bearing maintenance The motor bearings do not need to be regreased during their normal service life. Air filter Location of air filter Air filter, GA 15 up to GA 22... -
Page 77: Oil And Oil Filter Change
Instruction book 2. For minimum downtime, replace the dirty element by a new one. 3. Discard the element when damaged. Procedure 1. Stop the compressor. Switch off the voltage. 2. On Pack units: remove the side panel. On Full-Feature units: remove the front panel. 3. - Page 78 Instruction book Procedure Oil system components of GA 15 up to GA 22 1. Run the compressor until warm. Stop the compressor. Close the air outlet valve and switch off the voltage. Depressurise the compressor by opening manual drain valve(s) (Dm, Dm1). Wait a few minutes and depressurise the air receiver/oil tank (OT) by unscrewing oil filler plug (FC) just one turn to permit any pressure in the system to escape.
-
Page 79: Oil Separator Change
Instruction book Oil separator change Warning The operator must apply all relevant Safety precautions. Procedure Oil system components of GA 15 up to GA 22 1. Run the compressor until warm. Stop the compressor, close the air outlet valve and switch off the voltage. -
Page 80: Safety Valves
• Next, clean with an air jet in the reverse direction to normal flow. Use low pressure air. If necessary, the pressure may be increased up to 6 bar(e) (87 psig). • If it is necessary to wash the coolers with a cleaning agent, consult Atlas Copco. Safety valves... - Page 81 Instruction book When handling refrigerant, all applicable safety precautions must be observed. Please be specifically aware of the following points: • Contact of refrigerant with the skin will cause freezing. Special gloves must be worn. If contacted with the skin, the skin should be rinsed with water. On no account may clothing be removed.
-
Page 82: Problem Solving
Instruction book Problem solving Warning Before carrying out any maintenance, repair work or adjustment, press the stop button, wait until the compressor has stopped, press the emergency stop button and switch off the voltage. Close the air outlet valve, open the manual drain valve. Depressurise the compressor by opening the oil filler plug (FC) one turn. - Page 83 Oil cooler clogged Clean cooler Bypass valve malfunctioning Have valve tested Air cooler clogged Clean cooler Compressor element out of order Consult Atlas Copco Customer Centre Faults and remedies, dryer For all references hereafter, consult section dryer. Condition Fault Remedy...
- Page 84 Instruction book Condition Fault Remedy Evaporator pressure too high See below Condenser pressure too high See below Condenser pressure too high Fan control switch out of Replace or too low order Fan blades or fan motor out of Check fan/fan motor order Ambient temperature too high Check and correct;...
-
Page 85: Technical Data
Instruction book Technical data Readings on display Elektronikon I regulator Important The readings mentioned below are valid under the reference conditions (see section Reference conditions and limitations). Reference Reading Air outlet pressure Fluctuates between programmed unloading and loading pressures. Compressor element 55-65 ˚C (99-117 ˚F) above cooling air temperature. -
Page 86: Motor Overload Relay Settings
Recommended cable size Type Approval Recommended wire Recommended wire Main section (2) section (3) fuses (A) (4) GA 18 CSA/UL 4 x AWG2 4 x AWG1 GA 18 CSA/UL 4 x AWG3 4 x AWG2 GA 18 CSA/UL 4 x AWG6... -
Page 87: Dryer Switches
Compressor data for GA 15 up to GA 22 Reference conditions All data specified below apply under reference conditions, see section Reference conditions and limitations. GA 18 125 psi Frequency Maximum (unloading) pressure bar(e) Maximum (unloading) pressure, Full-Feature units bar(e) 8.85... - Page 88 Instruction book 125 psi Temperature of air leaving outlet valve (approx.), Full-Feature units ˚C Pressure dew-point, Full-Feature units ˚C Nominal motor power Dryer power at full load, Full-Feature units Dryer power at unloaded operation Refrigerant type, Full-Feature units R404A Refrigerant quantity, Full-Feature units Oil capacity 7.25 Sound pressure level, Pack and Full-Feature (according to ISO 2151 (2004))
-
Page 89: Instructions For Use
Instruction book Instructions for use Oil separator vessel This vessel can contain pressurized air. This can be potentially dangerous if the equipment is misused. This vessel must only be used as a compressed air/oil separator tank and must be operated within the limits specified on the data plate. -
Page 90: Guidelines For Inspection
Instruction book Guidelines for inspection Guidelines On the Declaration of Conformity / Declaration by the Manufacturer, the harmonised and/or other standards that have been used for the design are shown and/or referred to. The Declaration of Conformity / Declaration by the Manufacturer is part of the documentation that is supplied with this compressor. -
Page 91: Pressure Equipment Directives
Instruction book Pressure equipment directives Components subject to 97/23/EC Pressure Equipment Directive Compressor type Part number Description PED class GA 15 up to GA 22 0832 1000 77 Safety valve 0830 1009 87 0832 1000 78 Safety valve 0832 1002 23 0832 1000 79 Safety valve 0832 1002 25... -
Page 92: Declaration Of Conformity
Instruction book Declaration of conformity Typical example of a Declaration of Conformity document (1): Contact address: Atlas Copco Airpower n.v. P.O. Box 100 B-2610 Wilrijk (Antwerp) Belgium (2): Applicable directives (3): Standards used On the Declaration of Conformity / Declaration by the Manufacturer, the harmonized and/or other standards that have been used for the design are shown and/or referred to. - Page 94 COMMITED TO SUSTAINABLE PRODUCTIVITY We stand by our responsibilities towards our customers, towards the environment and the people around us. We make performance stand the test of time. This is what we call — Sustainable Productivity. www.atlascopco.com...
Need help?
Do you have a question about the GA 18 and is the answer not in the manual?
Questions and answers
How many standard cubic meter/h
The Atlas Copco GA 18 produces approximately 101–105 CFM (cubic feet per minute). Converting this to standard cubic meters per hour (SCMH):
1 CFM ≈ 1.699 SCMH
101 CFM ≈ 171.7 SCMH
105 CFM ≈ 178.4 SCMH
So, the standard cubic meter per hour rating for the Atlas Copco GA 18 is approximately 172–178 SCMH.
This answer is automatically generated