Table of Contents
Advertisement
Quick Links
Advertisement
Table of Contents

Subscribe to Our Youtube Channel
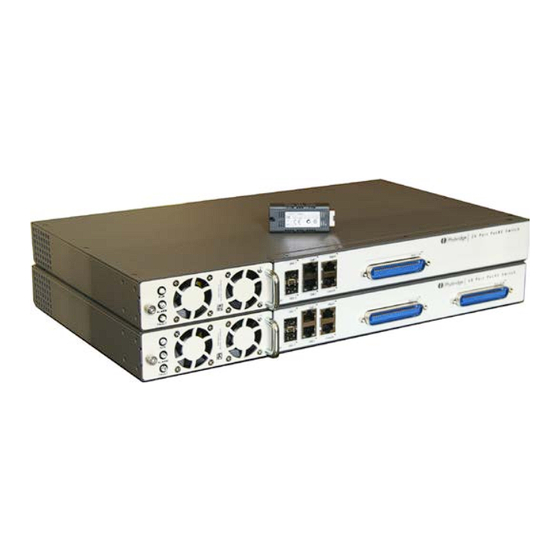
Related Manuals for Phybridge NVT PoLRE Series


Summary of Contents for Phybridge NVT PoLRE Series
- Page 1 ® PoLRE Switch User Guide Version 3.1.5...
- Page 2 Copyright © 2013 Phybridge Inc. All Rights Reserved. PoLRE is a registered trademark of Phybridge Inc. Chrome is a trademark of Google Inc. Firefox is a registered trademark of Mozilla Inc. Phybridge Inc. Corporate Headquarters 2115 South Service Road West...
-
Page 3: Table Of Contents
C O N T E N T S Contents 1. Overview ........................ 1 About this Guide ........................1 About the Simple Network Manager ....................1 Browser Requirements ......................1 Software Version ........................2 Logging into the Switch ......................2 Managing Multiple Switches ......................2 2. - Page 4 C O N T E N T S 5. Admin Page ......................25 About the Admin Page ......................25 Admin > Setup ........................25 System Settings ......................... 26 Import/Export Configuration ....................27 Firmware Update ....................... 27 Rebooting the system ......................28 Admin >...
-
Page 5: 1 . O V E R V I E W
1 . O V E R V I E W A b o u t t h i s G u i d e 1 . O v e r v i e w About this Guide This user guide provides instructions to manage, control and monitor the switch using the Simple Network Manager. -
Page 6: Software Version
1 . O V E R V I E W S o f t w a r e V e r s i o n Software Version The current version of the switch software is 3.1.5. Logging into the Switch Access to in-band management is through the gigabit uplink ports. -
Page 7: 2 . S Y S T E M P A G E
2 . S Y S T E M P A G E A b o u t t h e S y s t e m P a g e 2 . S y s t e m P a g e About the System Page The System page provides high-level switch details, allowing you to monitor and control the system. -
Page 8: System Overview
2 . S Y S T E M P A G E S y s t e m > O v e r v i e w System Overview Provides an overview of the switch statistics. Model Model. Product Number Product number. -
Page 9: Ethernet Port Status
2 . S Y S T E M P A G E S y s t e m > O v e r v i e w Ethernet Port Status Provides the uplink and downlink port status; allows you to control power to the downlink ports. Viewing port status A downlink port summary is shown above the port boxes. -
Page 10: Thresholds And Exceptions
2 . S Y S T E M P A G E S y s t e m > P e r f o r m a n c e Thresholds and Exceptions Provides maximum or minimum thresholds for key indicators such as CPU load, memory, power consumption and temperature. -
Page 11: Cpu Load
2 . S Y S T E M P A G E S y s t e m > P e r f o r m a n c e CPU Load Legend shows the current CPU load. This value represents the number of processes waiting in queue; in a healthy environment, CPU load should not be consistently above 1.0. -
Page 12: Power (Watts)
2 . S Y S T E M P A G E S y s t e m > P e r f o r m a n c e Power (Watts) Legend shows the current total power consumption. Use the legend to identify the free power availability and manage it accordingly. -
Page 13: System > Network Stats
2 . S Y S T E M P A G E S y s t e m > N e t w o r k S t a t s System > Network Stats Provides real-time activity of each of the uplink and downlink ports. GbE1 and ports 1 to 24 are shown on the left;... - Page 14 2 . S Y S T E M P A G E S y s t e m > N e t w o r k S t a t s P h y b r i d g e N V T P o L R E S w i t c h U s e r G u i d e...
-
Page 15: 3 . E T H E R N E T P A G E
3 . E T H E R N E T P A G E A b o u t t h e E t h e r n e t P a g e 3 . E t h e r n e t P a g e About the Ethernet Page The Ethernet page allows you to configure the switch network interface and manage uplink and downlink ports. -
Page 16: Configure Gbe Interface
3 . E T H E R N E T P A G E E t h e r n e t > U p l i n k P o r t s Configure GbE Interface Use to configure the switch network interface. Modify any of the fields Address, Mask,... -
Page 17: Configure Ip Route
3 . E T H E R N E T P A G E E t h e r n e t > D o w n l i n k P o r t s • The management port IP address and the uplink port IP address should never be on the same subnet. -
Page 18: Viewing Dongle Information
3 . E T H E R N E T P A G E E t h e r n e t > D o w n l i n k P o r t s Ports 1-24 and Ports 25-48 Used to manage the downlink ports. - Page 19 3 . E T H E R N E T P A G E E t h e r n e t > D o w n l i n k P o r t s Control power to the port. Click to turn the power on or off. Click TURN ON ALL PORTS TURN OFF ALL PORTS...
- Page 20 3 . E T H E R N E T P A G E E t h e r n e t > D o w n l i n k P o r t s P h y b r i d g e N V T P o L R E S w i t c h U s e r G u i d e...
-
Page 21: Vlan Page
4 . V L A N P A G E A b o u t t h e V L A N P a g e 4 . V L A N P a g e About the VLAN Page The VLAN page simplifies the management of VLANs, reducing the potential for error. -
Page 22: Adding A Vlan
4 . V L A N P A G E V L A N > V L A N T a b l e NOTE: WHITE BACKGROUND Port is not a member. BLUE BACKGROUND Port is a member. BLACK TEXT Port is a PVID. -
Page 23: Editing A Vlan
4 . V L A N P A G E V L A N > V L A N T a b l e To assign ports to the VLAN, click the VLAN and click EDIT. The VLAN to PORT tab appears with the VLAN panel open. You can now assign ports to the VLAN (see "VLAN >... -
Page 24: Vlan > Vlan To Port
4 . V L A N P A G E V L A N > V L A N T o P o r t VLAN > VLAN To Port Use to assign ports to VLANs. You can add/remove individual ports from a VLAN or you can add/remove all ports at once. -
Page 25: Removing Ports From A Vlan
4 . V L A N P A G E V L A N > V L A N T o P o r t Click ADD. The added ports now have a shaded background. Click SAVE CHANGES. Removing ports from a VLAN Click one or more ports in the VLAN panel. -
Page 26: Vlan > Assign Pvid
4 . V L A N P A G E V L A N > A s s i g n P V I D VLAN > Assign PVID Use to assign the primary VLAN ID to ports. VLANs created in the VLAN Table tab can be used for PVID tagging. -
Page 27: Pvid Table
4 . V L A N P A G E V L A N > A s s i g n P V I D PVID Table Static panel showing each port's PVID. Each port has only one PVID. By default, every port is assigned the system default VLAN as the PVID. - Page 28 4 . V L A N P A G E V L A N > A s s i g n P V I D P h y b r i d g e N V T P o L R E S w i t c h U s e r G u i d e...
-
Page 29: 5 . A D M I N P A G E
5 . A D M I N P A G E A b o u t t h e A d m i n P a g e 5 . A d m i n P a g e About the Admin Page The Admin page allows you to configure switch settings, control services, configure servers, view the switch event log, and use the command line interface. -
Page 30: System Settings
5 . A D M I N P A G E A d m i n > S e t u p System Settings Use to configure basic switch settings. After modifying a setting, click APPLY. The updates will be applied immediately to the switch. -
Page 31: Import/Export Configuration
5 . A D M I N P A G E A d m i n > S e t u p Import/Export Configuration You can import or export the current switch configuration. This allows you to download the existing configuration, make changes, and then upload the new configuration. -
Page 32: Rebooting The System
5 . A D M I N P A G E A d m i n > S e t u p Current Displays currently installed version number. Firmware Version Server Displays most recent URL connection. User Enter only if required. (If User ID and Password had been set up). Click CONNECT. ID/Password Select You can selectively install any package that is available. -
Page 33: Admin > Services
5 . A D M I N P A G E A d m i n > S e r v i c e s Admin > Services P h y b r i d g e N V T P o L R E S w i t c h U s e r G u i d e... -
Page 34: Services
5 . A D M I N P A G E A d m i n > S e r v i c e s Services Use to control all the services for the switch including TELNET, HTTP, LOG, LLDP, NTP, STP and SNMP. Enable Click to enable/disable a service. -
Page 35: Network Time Protocol
5 . A D M I N P A G E A d m i n > S e r v i c e s Network Time Protocol Use to configure multiple NTP servers. To add a server, enter the IP address and click ADD. To remove a server, select a server from the list and click REMOVE. -
Page 36: Simple Network Management Protocol
5 . A D M I N P A G E A d m i n > L o g Simple Network Management Protocol Use to modify the simple network management protocol. To change the receiver IP address, enter the address and click APPLY. To enable/disable the receiver, click the Enable Receiver checkbox. -
Page 37: Selecting The Number Of Events To Display
5 . A D M I N P A G E A d m i n > L o g Selecting the number of events to display In the Get last list, select the number of events to display on the Log tab. You can enter a value or use the arrows to increase/decrease the value in increments of 10. -
Page 38: Downloading The Log File
5 . A D M I N P A G E A d m i n > L o g Downloading the log file Click DOWNLOAD LOG FILE to save a copy of the log file shown on the Log tab. The filename for the exported file uses the convention <hostname>.log (example: switch.log). -
Page 39: Admin > Terminal
5 . A D M I N P A G E A d m i n > T e r m i n a l Admin > Terminal The Terminal tab provides you with a command line interface you can use to configure the switch and diagnose switch issues. -
Page 40: Using The Command Line Interface
5 . A D M I N P A G E A d m i n > T e r m i n a l Using the Command Line Interface Double-click in the Command field to see a list of available commands. Click a command in the list to select it. -
Page 41: 6 . C O M M A N D L I N E I N T E R F A C E
6 . C O M M A N D L I N E I N T E R F A C E C o m m a n d R e f e r e n c e 6 . C o m m a n d L i n e I n t e r f a c e Command Reference The following commands can be used in the command line interface in Admin >... - Page 42 6 . C O M M A N D L I N E I N T E R F A C E C o m m a n d R e f e r e n c e Command Purpose Usage Usage Notes pal-...
- Page 43 6 . C O M M A N D L I N E I N T E R F A C E C o m m a n d R e f e r e n c e Command Purpose Usage Usage Notes pal-...
- Page 44 6 . C O M M A N D L I N E I N T E R F A C E C o m m a n d R e f e r e n c e Command Purpose Usage Usage Notes pal-set-...
- Page 45 6 . C O M M A N D L I N E I N T E R F A C E C o m m a n d R e f e r e n c e Command Purpose Usage Usage Notes pal-set-sys-...
- Page 46 6 . C O M M A N D L I N E I N T E R F A C E C o m m a n d R e f e r e n c e Command Purpose Usage Usage Notes pal-set-sys-...
- Page 47 6 . C O M M A N D L I N E I N T E R F A C E C o m m a n d R e f e r e n c e Command Purpose Usage Usage Notes pal-show-...
- Page 48 6 . C O M M A N D L I N E I N T E R F A C E C o m m a n d R e f e r e n c e Command Purpose Usage Usage Notes pal-show-...
- Page 49 6 . C O M M A N D L I N E I N T E R F A C E C o m m a n d R e f e r e n c e Command Purpose Usage Usage Notes pal-show-...
-
Page 50: Upgrade Procedure
6 . C O M M A N D L I N E I N T E R F A C E U p g r a d e P r o c e d u r e Upgrade Procedure Use the command line interface in Admin >... -
Page 51: Displaying The Current Installed Version
6 . C O M M A N D L I N E I N T E R F A C E U p g r a d e P r o c e d u r e Displaying the current installed version When performing an incremental upgrade, you will need to know the current installed version of firmware on the unit so the next upgrade can be installed. -
Page 52: Upgrade Recovery And Full Version Install
6 . C O M M A N D L I N E I N T E R F A C E U p g r a d e P r o c e d u r e Upgrade recovery and full version install It is recommended that all upgrades are done using the incremental method.
Need help?
Do you have a question about the NVT PoLRE Series and is the answer not in the manual?
Questions and answers