Table of Contents
Advertisement
Advertisement
Table of Contents

Subscribe to Our Youtube Channel
Related Manuals for Phybridge CLEER 24


Summary of Contents for Phybridge CLEER 24
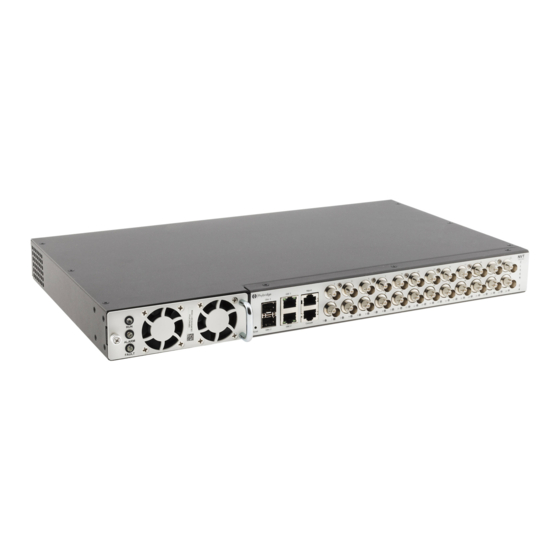
- Page 1 ® CLEER 24 Switch User Guide Version 3.3.0...
- Page 2 Copyright © 2014 Phybridge Inc. All Rights Reserved. CLEER24 is a registered trademark of Phybridge Inc. Chrome is a trademark of Google Inc. Firefox is a registered trademark of Mozilla Inc. Phybridge Inc. Corporate Headquarters 2115 South Service Road West...
-
Page 3: Table Of Contents
C O N T E N T S Contents 1. Overview ...................... 1 About this Guide ......................1 About the Simple Network Manager ..................1 Browser Requirements ....................2 Software Version ......................2 Logging into the Switch ....................2 Managing Multiple Switches ..................... 2 2. - Page 4 C O N T E N T S VLAN > Assign PVID ..................... 24 PVID Table ......................25 Viewing port PVID details for a VLAN ................25 Adding or modifying a port PVID................... 25 Refreshing VLAN information ..................26 5. Admin Page ....................27 About the Admin Page ....................
-
Page 5: 1 . O V E R V I E W
1 . O V E R V I E W A b o u t t h i s G u i d e 1 . O v e r v i e w About this Guide This user guide provides instructions to manage, control and monitor the switch using the Simple Network Manager. -
Page 6: Browser Requirements
1 . O V E R V I E W B r o w s e r R e q u i r e m e n t s Browser Requirements The Simple Network Manager supports the following web browsers: ... -
Page 7: 2 . S Y S T E M P A G E
2 . S Y S T E M P A G E A b o u t t h e S y s t e m P a g e 2 . S y s t e m P a g e About the System Page The System page provides high-level switch details, allowing you to monitor the system in real-time. -
Page 8: System Overview
2 . S Y S T E M P A G E S y s t e m > O v e r v i e w System Overview Provides an overview of the switch statistics. Model Model. Product Number Product number. -
Page 9: Ethernet Port Status
2 . S Y S T E M P A G E S y s t e m > O v e r v i e w Ethernet Port Status Provides the uplink and downlink port status; allows you to control power to the downlink ports. A downlink port summary above the port boxes indicates how many adapters are available and how many are connected to endpoints. -
Page 10: Controlling Power To Downlink Ports
2 . S Y S T E M P A G E S y s t e m > O v e r v i e w Port status can be easily identified by the colour and shading of the port box and number. Colour Port Status Port is available with power;... -
Page 11: System > Performance
2 . S Y S T E M P A G E S y s t e m > P e r f o r m a n c e System > Performance All panels provide current values and the last two minutes of historical data; values are updated in real- time. -
Page 12: Cpu Load
2 . S Y S T E M P A G E S y s t e m > P e r f o r m a n c e CPU Load Legend shows the current CPU load. This value represents the number of processes waiting in queue; in a healthy environment, CPU load should not be consistently above 1.0. -
Page 13: Power (Watts)
2 . S Y S T E M P A G E S y s t e m > P e r f o r m a n c e Power (Watts) Legend shows the current total power consumption. Use the legend to identify the free power availability and manage it accordingly. -
Page 14: System> Log
2 . S Y S T E M P A G E S y s t e m > L o g System> Log Use to view the system log with real-time updates. You can also add markers to the log and download the log file. -
Page 15: Adding Markers To The Log
2 . S Y S T E M P A G E S y s t e m > L o g Adding markers to the log You can add markers to mark particular points in the log. For example, you could use markers to mark the start and end points of certain events you would like to monitor. - Page 16 2 . S Y S T E M P A G E S y s t e m > L o g P h y b r i d g e C L E E R S w i t c h U s e r G u i d e...
-
Page 17: 3 . E T H E R N E T P A G E
3 . E T H E R N E T P A G E A b o u t t h e E t h e r n e t P a g e 3 . E t h e r n e t P a g e About the Ethernet Page The Ethernet page allows you to monitor the health of the network, configure the switch network interface, and manage uplink and downlink ports. - Page 18 3 . E T H E R N E T P A G E E t h e r n e t > U p l i n k P o r t s P h y b r i d g e C L E E R S w i t c h U s e r G u i d e...
-
Page 19: Configure Gbe Interface
3 . E T H E R N E T P A G E E t h e r n e t > U p l i n k P o r t s Configure GbE Interface Use to configure the switch network interface. Modify any of the fields Address, Mask, Broadcast,... -
Page 20: Configure Ip Route
3 . E T H E R N E T P A G E E t h e r n e t > U p l i n k P o r t s Notes: If the IP address is changed, the new IP address will be required to log back into the box via the management port. -
Page 21: Ethernet > Downlink Ports
3 . E T H E R N E T P A G E E t h e r n e t > D o w n l i n k P o r t s Ethernet > Downlink Ports IMPORTANT Changes that you apply are temporary. -
Page 22: Viewing Port Information
3 . E T H E R N E T P A G E E t h e r n e t > D o w n l i n k P o r t s Viewing port information The following information is shown for each port: Port number. -
Page 23: Downloading The Mac Address Table
3 . E T H E R N E T P A G E E t h e r n e t > D o w n l i n k P o r t s Number of link-down events (these occur when the adapter goes through a link transition). - Page 24 3 . E T H E R N E T P A G E E t h e r n e t > D o w n l i n k P o r t s P h y b r i d g e C L E E R S w i t c h U s e r G u i d e...
-
Page 25: Vlan Page
4 . V L A N P A G E A b o u t t h e V L A N P a g e 4 . V L A N P a g e About the VLAN Page The VLAN page simplifies the management of VLANs, reducing the potential for error. -
Page 26: Adding A Vlan
4 . V L A N P A G E V L A N > V L A N T a b l e NOTE WHITE BACKGROUND — Port is not a member. BLUE BACKGROUND — Port is a member. BLACK TEXT —... -
Page 27: Setting The Default Vlan
4 . V L A N P A G E V L A N > V L A N T o P o r t Setting the default VLAN The default VLAN is used for ports not assigned to any other VLAN. VLAN 1 is the system default; however, you can select a different default VLAN if desired. -
Page 28: Viewing Vlan Port Details
4 . V L A N P A G E V L A N > A s s i g n P V I D Viewing VLAN port details Each VLAN is shown as a separate panel. Click the panel header (the VLAN number) to expand the panel. A table with all ports is shown. -
Page 29: Pvid Table
4 . V L A N P A G E V L A N > A s s i g n P V I D PVID Table Static panel showing each port's PVID. Each port has only one PVID. By default, every port is assigned the system default VLAN as the PVID. -
Page 30: Refreshing Vlan Information
4 . V L A N P A G E V L A N > A s s i g n P V I D Click to save your changes. Refreshing VLAN information VLAN information on this tab is not updated in real-time. Click REFRESH to update the information (for example, to see any changes made by other users). -
Page 31: 5 . A D M I N P A G E
5 . A D M I N P A G E A b o u t t h e A d m i n P a g e 5 . A d m i n P a g e About the Admin Page The Admin page allows you to configure switch settings, control services, configure servers, and use the command line interface. -
Page 32: System Settings
5 . A D M I N P A G E A d m i n > S e t u p System Settings Use to configure basic switch settings. After modifying a setting, click APPLY. The updates will be applied immediately to the switch. -
Page 33: Import/Export Configuration
5 . A D M I N P A G E A d m i n > S e t u p Import/Export Configuration You can import or export the current switch configuration. This allows you to download the existing configuration, make changes, and then upload the new configuration. -
Page 34: Installing A New Package
5 . A D M I N P A G E A d m i n > S e t u p Current Firmware Displays currently installed version number. Version Server Displays most recent URL connection. User ID/Password Enter only if required. (If User ID and Password had been set up). Click CONNECT. Installing a new package Select any package that is available. -
Page 35: Admin > Services
5 . A D M I N P A G E A d m i n > S e r v i c e s Admin > Services Services Use to control all the services for the switch including TELNET, HTTP, LOG, LLDP, NTP, STP and SNMP. Enable Click to enable/disable a service. -
Page 36: Remote Log Server
5 . A D M I N P A G E A d m i n > S e r v i c e s Click to start or stop a service. Note that the start or shutdown of services is not instantaneous and may take up to one minute. -
Page 37: Simple Network Management Protocol
5 . A D M I N P A G E A d m i n > S e r v i c e s CAUTION Enabling STP in a live network will cause service disruptions to end users while the network is converging. To avoid impacting users, enabling of STP should be conducted outside of core hours or during a scheduled maintenance period. -
Page 38: Admin > Terminal
5 . A D M I N P A G E A d m i n > T e r m i n a l Admin > Terminal The Terminal tab provides you with a command line interface you can use to configure the switch and diagnose switch issues. -
Page 39: Adding Notes To The Switch
5 . A D M I N P A G E A d m i n > T e r m i n a l You can now do the following: Modify the text in the results area (make changes, delete text, add comments, copy and paste, etc.). - Page 40 5 . A D M I N P A G E A d m i n > T e r m i n a l P h y b r i d g e C L E E R S w i t c h U s e r G u i d e...
-
Page 41: 6 . C O M M A N D L I N E I N T E R F A C E
6 . C O M M A N D L I N E I N T E R F A C E C o m m a n d R e f e r e n c e 6 . C o m m a n d L i n e I n t e r f a c e Command Reference The following commands can be used in the command line interface in Admin >... - Page 42 6 . C O M M A N D L I N E I N T E R F A C E C o m m a n d R e f e r e n c e Command Purpose Usage Usage Notes <IP>...
- Page 43 6 . C O M M A N D L I N E I N T E R F A C E C o m m a n d R e f e r e n c e Command Purpose Usage Usage Notes pal-set-...
- Page 44 6 . C O M M A N D L I N E I N T E R F A C E C o m m a n d R e f e r e n c e Command Purpose Usage Usage Notes pal-set-...
- Page 45 6 . C O M M A N D L I N E I N T E R F A C E C o m m a n d R e f e r e n c e Command Purpose Usage Usage Notes <HOSTNAME>...
- Page 46 6 . C O M M A N D L I N E I N T E R F A C E C o m m a n d R e f e r e n c e Command Purpose Usage Usage Notes pal-set-sys-...
- Page 47 6 . C O M M A N D L I N E I N T E R F A C E C o m m a n d R e f e r e n c e Command Purpose Usage Usage Notes <RANGE>...
-
Page 48: Upgrade Procedure
6 . C O M M A N D L I N E I N T E R F A C E U p g r a d e P r o c e d u r e Command Purpose Usage Usage Notes pal-show-... -
Page 49: Displaying The Current Installed Version
6 . C O M M A N D L I N E I N T E R F A C E U p g r a d e P r o c e d u r e IMPORTANT Exporting the switch configuration file is recommended before performing an upgrade. For details, see "Admin >... -
Page 50: Upgrade Recovery And Full Version Install
6 . C O M M A N D L I N E I N T E R F A C E U p g r a d e P r o c e d u r e Example usage: # pal-pkg configure http://192.168.0.10 upgrade pal- To verify the upgrade server and switch are now configured properly for upgrade, issue the... -
Page 51: 7 . T R O U B L E S H O O T I N G
7 . T R O U B L E S H O O T I N G 7 . T r o u b l e s h o o t i n g Most issues can be identified from the initial System > Overview page. ...
Need help?
Do you have a question about the CLEER 24 and is the answer not in the manual?
Questions and answers