Table of Contents
Advertisement
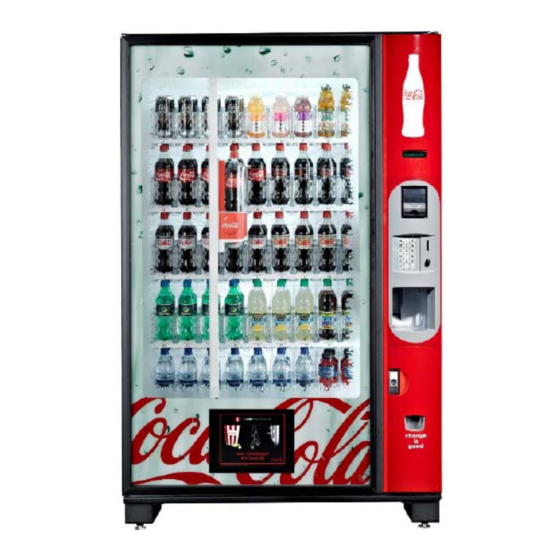
Glassfront Vender
Models DN5800-4, DN5800-E4, DN3800-4, DN3800-E4
Production 8900-0001BH & higher
Tier 2
Manufactured by
Operation
Service
Parts
Troubleshooting
Manual
Crane Merchandising Systems
P.O. Drawer 719
Williston, SC 29853-0719
803-266-5001
fax: 803-266-5049
Visit us on the web:
www.dixienarco.com
803,904,660.11
Advertisement
Table of Contents

Related Manuals for Crane Merchandising Systems BevMAX 4 Series


Summary of Contents for Crane Merchandising Systems BevMAX 4 Series
- Page 1 Glassfront Vender Models DN5800-4, DN5800-E4, DN3800-4, DN3800-E4 Production 8900-0001BH & higher Tier 2 Operation Service Parts Troubleshooting Manual Crane Merchandising Systems P.O. Drawer 719 Manufactured by Williston, SC 29853-0719 803-266-5001 fax: 803-266-5049 Visit us on the web: www.dixienarco.com 803,904,660.11...
-
Page 2: Table Of Contents
Table of Contents GENERAL INFORMATION .................. 3 Vender Safety Precautions....................3 Product Identification ......................3 Physical Characteristics ......................3 INSTALLATION & SETUP................3 - 9 Receiving Inspection ......................3 Unpacking the Vender ....................3 - 4 Electrical Requirements.......................4 Ground the Vender ......................4 - 5 Installation &... - Page 3 Bill Acceptors ........................48 Control Board........................48 All Coins Rejected Flow Chart...................49 All Bills Rejected Flow Chart .....................50 Incorrect Change Dispensed Flow Chart ................51 Selection Will Not Vend Flow Chart...................52 Ice / Frost on Evaporator Flow Chart.................53 Condensate on Outside of Product Door Flow Chart ............53 Compressor Will Not Stop Flow Chart................53 Compressor Will Not Start Flow Chart ................54 Machine Not Cooling Flow Chart..................55...
-
Page 4: General Information
The next 4 digits (yyyy) identify the Crane Merchandising Systems. Although the terms of manufacturing run that the vender was built in. The sale are FOB shipping point, which requires the... -
Page 5: Electrical Requirements
boards are removed there is 3” (76.2 mm) from base ELECTRICAL POWER NEEDED flange to the floor with the leveling legs screwed all Refer to the cabinet serial number plate to determine the way in. the correct voltage and frequency for the machine. In Once the vender is unpacked, check the “B”... -
Page 6: Installation & Setup Instructions
INSTALLATION AND SETUP DO NOT REMOVE THE INSTRUCTIONS GROUND PIN ON THE PLUG OR IN ANY WAY BYPASS, MODIFY, MANUAL LOCK DEFEAT, OR DESTROY THE Open the service door on the right side using the key GROUNDING SYSTEM OF THE provided in the coin return cup, or if shipped with a VENDING MACHINE locking clip, remove the clip and install the lock. -
Page 7: Placing The Vender On Location
Coke BevMax 5800-4/3800-4 equipment manufactured by Crane Merchandising Systems is designed to work properly in a temperature range of INSTALLING PRICE LABELS 75°F to 90°F (23°C to 32°C) in still air 65% R.H. non- Pricing labels included in the literature package kit. -
Page 8: Coin Changers And Other Accessories
product pusher. Contact your graphics supplier to LOADING THE VENDER purchase as needed. CAN/BOTTLE DRINK TRAYS The BevMax 4 5800-4/3800-4 Vender does not COIN CHANGERS & OTHER require spacers or shims to vend most packages. Load product in each column one package at a time ACCESSORIES insuring that the package being loaded is in front of The vender can have an MDB coin changer installed... -
Page 9: Keypad
coin mechanism, digital display, and all logic functions inserted through the rear most portion of the front in the vender. knuckle assembly and connects to a gear box below the tray. When a selection is made, the plunger pushes the lever toward the back of the tray. At the KEYPAD same time the front knuckle is opened into a flat The keypad is located on the front of the service door. -
Page 10: Belt Tension Adjustment
in to the cabinet. A 7/16” wrench or socket is needed to adjust the bolt. BELT TENSION ADJUSTMENT COMPONENTS The belt tensioning adjustment components have been designed to ease adjusting belts when needed. The X Belt Idler Tensioning Assembly in the upper left hand corner of cabinet now includes a thumb screw. -
Page 11: Coca-Cola Evs Bevmax 4 Programming
“Cash Counters”, “Sales Counters”, and “Error COCA-COLA Codes” routines for instructions to move through BevMax 4 the menus. (70x.x1 Software) PROGRAMMING METHOD PROGRAMMING MENU NORMAL MODE: “Error Codes” - ERROR ROUTINE In normal mode, on power up display will show This function allows you to enter the error software installed in vender, then change to readout routine. - Page 12 Codes” if there are no Error Codes. Press key Mechanism” if all vend mech Error Codes have not been cleared. If all vend mech Error Codes number 1 will return to “Error Codes”. have been cleared the next error mode will be displayed, or “No Error Codes”...
- Page 13 - “Not Cooling”, indicating the cooling system has “Remote Vend Mech” - Remote Vend failed to decrease temperature 1 F per Mechanism (USD) Error. hour while the compressor is running. Press key number 4 and the display shows one of the - “Health Timer”...
- Page 14 to scroll through the test routines available. Press key * “Password Entry” - PASSWORD number 1 to return to “Test Modes”. ROUTINE “Test Vend” - Vend Testing This function allows you to enter the following routines This function allows you to test vend each column. which are not accessible until the operator enters a Press key number 4 and the display will show password, which is set as 4-2-3-1.
- Page 15 this time will scroll through the available selection vend display will show “#.##” or current price set. Press counters. Example: Display flashes “Sales Sel A1” then key “2” to increase the vend price or key “3” to “145”. This is 145 interval vends counted for selection decrease the vend price.
- Page 16 see this value, the “Display Price” feature on the sequentially. EXE coin mech must be turned on. “Option 5” Combined groups of 2 & 3 = Note: If no price is programmed in the EXE coin Selection grouping per tray will be mech for the requested price line, or if the “Display assigned columns 1 &...
- Page 17 and “Config 1 1”. Press key number 4 with the “Config 5 0”. Press key number 4 and “Config 5 display flashing the setting you wish to use. #” will be displayed, with the “#” flashing. Press Press key number 1 to return to “Config 1”. key numbers 2 or 3 to scroll between “Config 5 Press key number 2 to scroll to “Config 2”.
- Page 18 number 2 or 3 to scroll between Config 10 0 or currency (coin or bill) that can be accepted and Config 10 1. Press key number 4 with the without having enough change to pay back the display flashing the setting you wish to use. full amount.
- Page 19 made. *”Time Programming” – TIME AND DATE - “Australia”, Australian rules - Set forward ROUTINE 1 hour at 1:00 am on the first Sunday in This function is used to set the year, month, date, and October; Set backward 1 hour at 1:00 am hour (military 24 hour clock).
- Page 20 wish to use. Press key number 2 to scroll to you wish to use. Display will return to “XXXXXX#”. Press key number 2 to scroll to “Start”. the next day to set or press key number 1 to “Start Time” - Start Energy Conservation This function is used to set the days and time to return to “Start Day”.
- Page 21 Press key number 2 or 3 to scroll between Press key number 2 or 3 to scroll between “Enable Degrees F and Degrees C. Press key number 0” and “Enable 1”. Press key number 4 with the 4 with the display blinking the setting you wish display blinking the setting you wish to use.
- Page 22 Press key number 2 to scroll to “Selection”. Press key number 2 to scroll to “Selection”. “Selection” - Selection to Be Affected By Blocking “Selection” - Selection to Be Affected By Blocking This function is used to set selection(s) which will This function is used to set selection(s) which be blocked during certain periods of the day.
- Page 23 temperature doesn’t reach 41º F (5º C) or less scroll to the key number you desire to change. Press key number 4 with the key number after the 15 minute period the controller will issue showing you wish to change (i.e. Select A1 #) a “Health Code”...
- Page 24 Press key number 2 or 3 to scroll through the override This function is used to override “Refrigeration”, if routines available. Press key number 1 to return to it is being used. “Refrigeration 0” = disabled and “Over-ride Switch”. “Refrigeration 1” = enabled. Press key number 4 and “#”...
- Page 25 Press key number 2 to increase, or 3 to decrease the number in single digit increments. NOTE: A rate of “0” disables the USD. All other rates, #, will cause a vend command every #’th local vend. Press key number 4 with the display showing the vend rate you wish to use and the display will return to “Vend Rate”.
-
Page 26: Quick Reference Menu Items
Coca-Cola BevMax 4 (70x.x1 Software) Programming Method Quick Reference Menu Prompts Select Button 1: Abort/Cancel (will return to previous menu prompt or to normal door open mode). Select Button 2: Scroll Up (forward in menu). Select Button 3: Scroll down (backward in menu). Select Button 4: Enter/Save/Clear (allows you to enter a specific prompt, save what you have programmed, or clear the error). - Page 27 Coca-Cola BevMax 4 (70x.x1 Software) BevMax Setup Programming Method Quick Reference Menu Prompts Coke Factory Setup Coke Factory Setup View PL Value BevMax Setup Enable EXE – cont’d. Quick Payback Set Model Number Test Modes Test Vend Coke Factory Setup (factory testing Test Sel Switch Set Prc/Tmpr 4 Test...
-
Page 28: Dixie-Narco Factory Diagnostics Programming
Models are 3800-4, 5800-4, 3800-E4, 5800-E4. The Dixie-Narco Factory Setup display will display save? A = = Y, Clear = no. Menus - BevMax Setup/Test Press the key at the correct model to save setting. Note: Program the model 5800-4 for all Domestic Modes/Satellite (137/937) BevMax 4 &... - Page 29 switch on left side of Y motor assembly, red light is Coke Factory Setup for home switch for picker cup plunger. Press the Cup Test – Turns Delivery Cup Sensor On & Off: number 4 key and the display will show a set of This sub menu will be used to test the operation of numbers (i.e.
-
Page 30: Programming
is what activates the switch. The motor must Export) & E4 (4 shelf Export) are used in export actually drive the picker out and it must be all BevMax 4 5800-E4 venders 8900-0001BH and the way out in order for the switch to detect it higher. - Page 31 a. At power up, the current software version Coke Factory Setup will be displayed. To manually program Update Software – Allows for manual software the control board with the new software, loading as needed: press the service switch on the control This submenu allows the service technician to board to enter service menus.
- Page 32 Test Display – Display Test: Coke Factory Setup This function allows you to test all segments in the Sold Out Enable- Should be “ON” display. Press key number 4 and a row of lower Press key 4 to enter menu, Use Vend Sensor, “ON” case letters “a”...
-
Page 33: Major Component Description
current state of “Golden-Eye Policy Drop” or scroll to next menu item. “Golden-Eye Policy Home”. Home = motor will Satellite (137/937) Setup always return to the home position after a product Combo Vend Discnt En – Enable the Combo drop failure and Drop = motor will rotate one Vend Discount that has been set: complete revolution, pause, then stop upon This sub menu is used to enable and disable the... -
Page 34: General Maintenance
water, any mild general purpose, non-abrasive General Maintenance cleaner and a soft towel. Never lubricate the The most important facets of proper care and gasket and always check for cracking or maintenance of your machine are the electrical deformities which may cause leaks. Replace if power supplied to it, leveling, and cleanliness of the necessary. -
Page 35: Update Software
bent, pinched, or twisted in such a INSTALLING EPROMS CONTROL way as to prevent the flow of BOARD. condensate. Periodically inspect the drain pan, drain tube, and drain hose EPROM Removal: for alignment and the presence of a. Power down the Vender. Ground dirt, debris, mold, and mildew. -
Page 36: Controller Connections
P10A BevMax 4 DN5800-4/5800-E4 DN3800-4/3800-E4 J11A J12A BEVMAX 4 DN5800-4/3800-4/5800-E4/3800-E4 MDB/EXE CONTROLLER CONNECTIONS CONNECTION CONNECTION DESCRIPTION CONNECTION CONNECTION DESCRIPTION Power from AC Fuse Distribution Box Cup Signal & Y Encoder X Motor & Encoder J11A Keypad Product Port J12A Temp Sensor Display Multi Drop Bus Relays... -
Page 37: Troubleshooting
BEVMAX 4 5800-4/3800-4 TROUBLESHOOTING “XY” ISSUES 1. Selection will not vend. a. Does a different selection vend? i. Perform TEST VEND in TEST MODE to ensure proper selection vends. ii. Check Custom Space-To-Sales has been enabled. 1. Check STS configuration in Menu and verify that the selection in question has a column assigned to it. - Page 38 b. Plunger Hits Chassis. i. Check tray is level and secured to tray supports. ii. Check harness connections. iii. Check X motor (bottom right). iv. Check belt tension. Look for the belt to slip. v. Check shelf adjust in DN Factory Diagnostics BevMax Setup Coke Factory Setup Set Shelf Offset.
- Page 39 6. Product Will Not Load From Delivery Cup Assembly To Port Assembly. a. Perform TEST MODE/TEST VEND to test movement. b. Check belt tension. c. Check Service Wall Port Door Assembly is securely installed. d. Check the vend mechanism alignment. e.
-
Page 40: Xy Not Working Flow Chart
XY not P1 connected to Is vender plugged in? working control board? Plug in Vender. Are P3 & J3 connected Go to Test to control board? Mode/Test Vend. Plug in connector. Visual check. Where is picker cup located? HOME NOT HOME Check door switch working? Manually RED light is... -
Page 41: Plunger Home Flow Chart
Plunger Home = Red light Check X Home = Visual check. Where is picker cup Yellow light. located? HOME NOT HOME In DN Factory Diagnostics BevMax Cycle plunger multiple times to Setup Coke Factory Setup Position test ensure proper operation. press “0”... -
Page 42: Axis Home Flow Chart
X Axis Home = Yellow light Does the Vend Mech move in the downward position? Check Y Home = Green Light Manually activate the switch and light cycles on and off. Manually move cup to A9 and pull the left door switch (PI) out. -
Page 43: Y Axis Home Flow Chart
Y Axis Home = Green light Check All Home LED’s are on. Manually activate the switch and light cycles on and off. Manually move cup to A9 and pull the left door switch (PI) out. Check, repair, or replace switch or harness. -
Page 44: Xy Slams To Top/Right Or Left Flow Chart
XY Slams to Top/ Right 0r Left Go to Diagnostics Do a test vend with door closed. Do the Encoder counts increase & decrease when moving the Manually move XY manually? Pull the left door Picker Cup to A9 switch out.. position? Press the “4”... -
Page 45: Picker Cup Not Working Flow Chart
Is vender plugged P1 connected to control Picker Go to Test board? Mode/Test Cup not working Plug in Plug in Visual check. Where is picker cup located? Is plunger below target? Is plunger touching target? Is plunger Go to “Set Shelf Offset”. touching shelf Check left door switch (PI) working? Red LED is off... -
Page 46: Picker Cup At Wrong Location Y Axis Flow Chart
CUP AT WRONG LOCATION HIGH/LOW or Y AXIS Is shelf setting correct? Go to DN Factory Diagnostics BevMax Setup Coke Factory Setup Set Shelf Offset. Check encoder counts. Send to home, does home switch light come on? Send cup to “A9” position. -
Page 47: Picker Cup At Wrong Location X Axis Flow Chart
CUP AT WRONG LOCATION LEFT /RIGHT or X AXIS Go to DN Factory Diagnostics BevMax Setup Coke Factory Setup Set Shelf Offset. Check encoder counts. Send to home, does home switch light come on? See XY not working. Send cup to home position. -
Page 48: Delivery Port Door Flow Chart
DELIVERY PORT DOOR WORKS IN PORT TEST BUT NOT IN SALES MODE Close door and do a test vend. Does it work? Open service door. Pull left door switch (PI) out and do a test vend. Does it work? Check, repair, and replace door switch components: Go to Port Test, manually... -
Page 49: Coin Acceptance
COIN ACCEPTANCE ISSUES PROBLEM CAUSE Coins Returned to Customer 1. Price set to zero. 1. Set price in programming. With No Credit Issued 2. Coin Jam in Mech 2. Clear Jam and Test 3. Flight Deck Dirty 3. Clean Flight Deck 4. -
Page 50: All Coins Rejected Flow Chart
These charts are intended as a guide to isolate and correct most problems you might encounter. Should your machine show ‘OUT OF SERVICE”, go in the TEST MODE and press “B” to list errors. ALL COINS ARE REJECTED 49 of 104... -
Page 51: All Bills Rejected Flow Chart
ALL BILLS ARE REJECTED All bills are rejected. Main Power OFF / Apply power Disconnected. Check fuses and Blown Fuse replace if necessary. List errors to determine Machine is Out Of cause of Out Of Service. Service. Refer to programming for error explanations. -
Page 52: Incorrect Change Dispensed Flow Chart
INCORRECT CHANGE DISPENSED 51 of 104... -
Page 53: Selection Will Not Vend Flow Chart
SELECTION WILL NOT VEND Use “DN Factory Diagnostics” to check plunger arm, replace if necessary. 52 of 104... -
Page 54: Ice / Frost On Evaporator Flow Chart
ICE / FROST ON EVAPORATOR Ice / frost on evaporator. Condensate drain Clear drain. plugged. Check product door Air leak. seal and cable openings in cabinet. CONDENSATE ON OUTSIDE OF PRODUCT DOOR Condensate on outside of product door. Machine in direct Move machine. -
Page 55: Compressor Will Not Start Flow Chart
COMPRESSOR WILL NOT START Compressor will not start. Close service Service door open. door. Plug compressor in Compressor is outlet on face of unplugged. AC distribution box. Defective door interlock Replace switch. Check power Low voltage. source. Defective thermostat. Replace. Defective starting component (capacitor, Replace. -
Page 56: Machine Not Cooling Flow Chart
MACHINE NOT COOLING Machine not cooling. Dirty or clogged Clean. condenser. Defective thermostat. Replace. Check rear screen for obstructions. Ensure rear of Check rear screen for obstructions. Ensure rear Restricted airflow. cabinet is at least 3.25" (82.6 mm) of cabinet is at least 4” (10cm) from wall. from wall. -
Page 57: Electrical Diagrams & Schematics
BevMax 4 5800-4/3800-4 Domestic Block Diagram Motor Power Interrupt Switch X Motor X Home Switch Door Switch Lamp E Lock Door Relay Lamp Y Motor E lock Aux. E Lock Lamp Power Y Home Switch / EXE Cup Motor Ballast Plunger in Relay Control 120 VAC... -
Page 58: Block Diagram Export
BevMax 4 5800-E4/3800-E4 Export Block Diagram X/Y Power Interrupt Switch X Motor Lamp X Home Switch Door Switch E Lock Door Relay Lamp Y Motor E lock Aux. E Lock Lamp Power Y Home Switch MDB / Ballast Cup Motor Plunger in 220 VAC Relay Control (24 VDC) -
Page 59: Vender Wiring Diagram Cabinet (Domestic & Export)
BevMax 4 5800-4/5800-E4 Cabinet Diagram (Domestic & Export) Y Motor Y Motor Board 80492421 80492532 Limit Switch 80410131 80492926 - DN3800 narrow 80492923 – DN 5800 wide 80492374 To P14/P8 control board CR0013743 Cup Home Sw. 80410131 Picker Out Sw. 80410132xx1 BevMax 4 Wiring Picker Home Sw. - Page 60 BevMax 4 5800-4/3800-4/5800-E4/3800-E4 Cabinet Diagram (Domestic & Export) Door Door Switch Switch 80492824 80492823 80492836xx1 80492926 - DN3800 narrow To Door 80492923 – DN 5800 wide To P3/P6 Y Motor board To Coin Mech To DEX 80492827 80492825 Jack 5800-4 Control Board 80492870 To X Motor 80492853...
-
Page 61: Vender Wiring Diagram Door (Domestic & Export)
BevMax 4 5800-4/3800-4/5800-E4/3800-E4 Door Diagram (Domestic & Export) 80492836xx1 To Cabinet 80492475xx1 To Cabinet To MDB Port Peripherals Motor Display Electronic Port Board 80492386 lock 80492511 IRDA Port Auxiliary Lock Power Keypad Vend Sensor Board 80410121 80492851 BevMax 4 Wiring Diagrams Pg 2 of 3 803,889,17x.x1 Exp. -
Page 62: Vender Wiring Diagram Power & Fluorescent Lighting W/ Jst (Domestic Only)
BevMax 4 5800-4/3800-4 Domestic Power & Fluorescent Lighting Diagram With JST Connectors 80492852 80492844 80492819 Ballast Ballast 80440126 80440125 Relays (3) 80420026 Light, fan, & AC Distribution Box compressor Transformer 80492514xx1 Lamp 80492842 To Cabinet Light relay To Evaporator Fan Choke Fan relay BLK/BRN... -
Page 63: Vender Wiring Diagram Power & Fluorescent Lighting (Export Only)
BevMax 4 5800-4/3800-4 Export Power & Fluorescent Lighting Diagram Ballast 80440134 80492883 80492881xx1 80492819 80492883 80492882 Ballast Relays (3) 80440135 80420026 Light, fan, & 80492885 compressor AC Distribution Box 80492884 Transformer Lamp 80492868 80492842 To Cabinet Light relay To Evaporator Fan 80492843 Fan relay BLK/BRN... -
Page 64: Vender Wiring Diagram Power & Led Lighting (Export Only)
BevMax 4 5800-E4/3800-E4 Export Power & LED Lighting Diagram 80420026 LED Relay To Cabinet Power 80492886 Module 9985055 Relays (4) 80420026 380303 Light, fan, LED, & AC Distribution Box compressor 80492868 80492887 Transformer LED Lite Lite 9985061 80492842 To Cabinet Light relay 80492819 80492843... -
Page 65: Vender Wiring Diagram Power & Led Lighting (Domestic Only)
BevMax 4 5800-4/3800-4 Domestic Power & LED Lighting Diagram 80420026 LED Relay To Cabinet Power 80492886 Module Relays (4) 9985055 80420026 80492888 Light, fan, 380303 LED, & compressor AC Distribution Box 80492887 80492514xx1 Lite Transformer LED Lite 9985061 80492842 To Cabinet Light relay 80492819 80492843... -
Page 66: Domestic Compressor Parts Diagram
BevMax 4 5800-4/3800-4 Compressor Parts Diagram Domestic Compressor Parts BevMax 4 5800-4/3800-4 65701270 Domestic Refrigeration Kit Item Part # Description 80250289 Compressor, Embracco FFU130HAX 115/60 (EM# 513200620) 80240217 Bracket, Capacitor FFU130HAX (EM#US-2255008) 80240213 Overload, Compressor FFU130HAX (EM#513554617) 80240214 Cover, Electrical Component FFU130HAX (EM#13555028) 80240216 Relay, Compressor Start FFU130HAX (EM#213516051) 80240218... -
Page 67: Export Compressor Parts Diagram
BevMax 4 5800-E4/3800-E4 Compressor Parts Diagram Export Compressor Parts BevMax 4 5800-E4 65701290 Export Refrigeration Kit Item Part # Description CR0004162 Compressor, Export CR0004863 Starting Relay, Danfoss CR0004865 Cord, Relief Compressor Danfoss CR0004174 Capacitor, Compressor Start 80μF,Danfoss CR0004172 Cover, Electrical Component FFU130HAX (EM#13555028) R134A Freon (9.5oz or .269kg) 66 of 104... -
Page 68: Domestic Ac Distribution Box J2 Port Test Voltages
BevMax 4 5800-4/3800-4 AC Distribution Box Domestic AC Box Shown Defrost Control Connector Domestic Test Voltages 9 Pin J2 Output Power Connector lead to Pin lead to Domestic Reading 24 (26 to 30) VAC secondary of transformer 24 (26 to 30) VAC secondary of transformer ground 110 VAC Hot not switched for 1 lamp assy. -
Page 69: Export Ac Distribution Box J2 Port Test Voltages
Export BevMax 4 5800-E4/3800-E4 AC Distribution Box Export AC Box Shown Defrost Control Connector Export Test Voltages 9 Pin J2 Output Power Connector lead lead Export Reading to Pin 24 (26 to 30) VAC secondary of transformer 24 (26 to 30) VAC secondary of transformer ground 240 VAC Hot not switched for 1 lamp assy. -
Page 70: Parts List And Diagrams
Washers, Bolts, & Misc. Hardware ............103 – 104 Special Note: Crane Merchandising Systems Dixie-Narco part numbering has changed. Many of the 11 digit numbers are now 8 digit numbers. The last 3 digits were dropped in the new numbering system. An example of this is 800,102,970.01 is now 80010297. - Page 71 70 of 104...
-
Page 72: Machine Front View
MACHINE FRONT VIEW 71 of 104... - Page 73 MACHINE FRONT VIEW DN5800-4 DN3800-4 ITEM PART DESCRIPTION DN5800-E4 DN3800-E4 Door Assembly, Glass (does not include decals) 80010595 80010596 Gasket, Glass Door 80010297 80010298 Top Hinge Glass Door 65700036 Same Carriage Bolt – ¼ - 20 x 1 1/4 80020243 Same Hex Nut –...
-
Page 74: Cabinet Detail Product Area
CABINET DETAIL PRODUCT AREA 73 of 104... - Page 75 CABINET DETAIL PRODUCT AREA DN5800-4 DN3800-4 ITEM PART DESCRIPTION DN5800-E4 DN3800-E4 Cabinet Assembly, Generic 65706020 CR0002684 Left Tray Mount Bracket, 2 piece prior to 9133DH (All) 64707005 Same Left Tray Rail, 2 piece (5 shelf) prior to 9133DH (E4) 657,070,03x.x3 Same Left Tray Rail, 2 piece (5 shelf) prior to 9133DH (Export) CR0004428...
-
Page 76: Cabinet Detail Service Door Area
CABINET DETAIL SERVICE DOOR AREA 75 of 104... - Page 77 CABINET DETAIL SERVICE DOOR AREA DN5800-4/3800-4 DN5800-4/3800-4 DN5800-E4/3800- DN5800-E4/3800- ITEM PART DESCRIPTION Prior to s/n s/n 9191BI & 9191BI higher Coin Mech Housing Assembly 647,001,00x.x3 Lower Coin Chute Assembly 80182342 Same Lower Coin Chute Part of #2 Same Lower Coin Chute Cover Part of #2 Same Cash Box Clip...
-
Page 78: Xy Motor Picker Unit
XY MOTOR PICKER UNIT 77 of 104... - Page 79 XY MOTOR PICKER UNIT DN5800-4 DN3800-4 ITEM PART DESCRIPTION DN5800-E4 DN3800-E4 XY Delivery System CR0002183 CR00027472 Assembly Cover Y Belt CR0001797 Same Y Motor Cover Top 80182329 Same X Motor Cover Bottom 80182328 Same X Bottom Belt Cover (Ramp) CR0002585 65707007 Harness, X Motor –...
-
Page 80: Delivery (Picker) Cup Assembly
DELIVERY (PICKER) CUP ASSEMBLY 79 of 104... - Page 81 DELIVERY (PICKER) CUP ASSEMBLY DN5800-4 DN3800-4 ITEM PART DESCRIPTION DN5800-E4 DN3800-E4 Assembly Delivery (Picker) Cup Assembly w/ Sensor was 64708270 80182497 Same Cup Base Board (Picker Cup Board with sensor) 3/26/08 & after 80492916 Same was 80492765 Cup/Port Motor Assembly 80450161 Same Cup Motor Cam...
-
Page 82: Service Door Outside
SERVICE DOOR (OUTSIDE) 81 of 104... - Page 83 SERVICE DOOR (OUTSIDE) ITEM PART DESCRIPTION No Knock Out Knock Out Milled Knockout Service Door Assembly, Gray (need to order item 23 separately) Same Same Service Door Assembly, Black (need to order item 23 separately) Same Same Weld Assembly Service Door CR0001802 Same Same...
-
Page 84: Service Door Inside
SERVICE DOOR (INSIDE) 83 of 104... - Page 85 SERVICE DOOR (INSIDE) DN3800-4 DN5800-4 ITEM PART DESCRIPTION DN3800-E4 DN5800-E4 Display Lens, Blue (part of top bezel assy) Screw, Nylon Circuit Board Support CR0002205 Same Assembly Display (Noritake) 80492386 Same Rod, Latch Bar 64705003 Same Door Harness 804,928,36x.x1 Same Extended Coin Return Cup Assembly 80182429 Same Hex Nut, ½...
-
Page 86: Gate Tray Detail
GATE TRAY DETAIL 85 of 104... - Page 87 GATE TRAY DETAIL DN5800-4 DN3800-4 ITEM PART DESCRIPTION DN5800-E4 DN3800-E4 Tray Assy., 9 Column 65700510 Tray Assy., 7 Column CR0013718 Chassis Tray, Tall Gate CR0004077 was 647,070,89x.x3, 647,071,50x.x3 Chassis Tray, Tall Gate CR0004139 Double Gate Assembly Kit (gate & 2 screws) was 64701110 65701260 Same Double Gate Assembly was 80182018...
-
Page 88: Ac Distribution Box
AC DISTRIBUTION BOX Export AC Box Export AC Box Prior to run 8905BH 8905BH & higher board board relays relays Defrost Control Connector _______________________________________________________________________________________________ Domestic AC Box Domestic AC Box 8905BH & higher Prior to run 8905BH board board relays relays Defrost Control... - Page 89 AC DISTRIBUTION BOX DN5800-4 DN5800-E4 ITEM PART DESCRIPTION DN3800-4 DN3800-E4 Domestic Export Assembly AC Distribution Box, BevMax 4 65707070 657,070,90x.x3 Transformer, 120V / 24V, 60 Hz, 8A Domestic 804,925,14x.x1 Transformer, Export 80492868 Outlet, 15 Amp, Grounded W662 Receptacle, Panel Mount IEC 320 80491114 Power Inlet Plug 80491362...
-
Page 90: Lighting - Fluorescent
LIGHTING - Fluorescent DN5800-4/3800-4 DN5800-E4/3800-E4 ITEM PART DESCRIPTION Domestic Export Horizontal (Upper) Light Assembly (1 Lamp) 65701210 65701130 Ballast Assembly, T8 Electronic 110V/60Hz (Horizontal Lamp) 80440126 80440134 – 2 pin connector Lamp Cover (22.6”) & End Caps 80190477 Same Light Harness, 120 Volt – 1 Lamp T8 (Upper Light Assy.) 80492852 804,928,84x.x1 Lamp Holder, T8 Bi Pin - Leviton 23653 (Horizontal) -
Page 91: Lighting - Led
LIGHTING - LED DN5800-4/3800-4 DN5800-E4/3800-E4 ITEM PART DESCRIPTION Domestic Export Horizontal (Upper) Light Assembly (1 Lamp) LED 65701160 Same LED Module Assembly (does not include power supply switch 65701180 Same mod line – 24vDC) was 65701190 Harness, Relay extension, 5800-4 with LED’s 80492886 Same Lamp Assy., T5 600MM, 30 LED’s 24vDC... -
Page 92: Refrigeration Unit Plastic Evap Box Fin & Tube Condenser
REFRIGERATION UNIT BevMax 4 (with Plastic Evap Box - 9539-0032DJ and higher) 91 of 104... - Page 93 REFRIGERATION UNIT BevMax 4 (with Plastic Evap Box - 9539-0032DJ and higher) DN5800-4/3800-4 DN5800-E4/3800-E4 ITEM PART DESCRIPTION Domestic Export Refrigeration Unit, 115V/60Hz Domestic Kit (Plastic Evap Box) 65701270 Refrigeration Unit, 230V/50Hz Export Kit (plastic Evap Box) 65701290 Compressor Assy. FFU130HAX , 115V/60Hz Domestic 80250289 Compressor, Domestic (Embracco 513200620) 80250288...
-
Page 94: Refrigeration Unit Metal Evap Box Fin & Tube Condenser
REFRIGERATION UNIT BevMax 4 with Metal Evap Box prior to 9539-0032DJ 93 of 104... - Page 95 REFRIGERATION UNIT BevMax 4 (with Metal Evap Box prior to 9539-0032DJ) DN5800-4/3800-4 DN5800-E4/3800-E4 ITEM PART DESCRIPTION Domestic Export Refrigeration Unit, 115V/60Hz Domestic Kit was 65704000 65701270 Refrigeration Unit DN2028 C Kit, 230V/50Hz Export Kit CR0004811 Compressor Assy. FFU130HAX , 115V/60Hz Domestic 80250289 Compressor, Domestic (Embracco 513200620) 80250288...
-
Page 96: Electronics
ELECTRONICS Executive 4 pin interface added. Coke BevMax 4 EXE Control Boards 95 of 104... - Page 97 ELECTRONICS DN5800-4 DN3800-4 ITEM PART DESCRIPTION DN5800-E4 DN3800-E4 BevMax 4 Control Board Service Kit 64700780 Same (Note: refer to CMS Tech Notice M097.# for older vender kits) BevMax 4 Control Board Service Kit – Indonesia only 65700390 Same Standoffs, .8 – 32 x 5/8 (was 80100175) 80190380 Same EPROM, Firmware, BevMax 4 Board...
-
Page 98: Harnesses
HARNESSES 97 of 104... - Page 99 HARNESSES DN5800-4 DN3800-4 ITEM PART DESCRIPTION FROM/TO DN5800-E4 DN3800-E4 Black & grey hrns 12 pin flat black plug to P2 of board, 4 pin white plug to port motor, 7 pin flat white plug to port board. Black hrns 10 pin flat white plug to PJ11 of board, 10 pin flat black plug to Harness, Door Bundle 44”...
- Page 100 99 of 104...
-
Page 101: Labels / Decals / Misc
LABELS / DECALS / MISC. Note: Graphics change frequently. Contact your Crane Merchandising Systems Representative for current graphic parts & part numbers. DN5800-4 DN3800-4 ITEM PART DESCRIPTION DN5800-E4 DN3800-E4 Vender Lag Bracket Kit 627,020,60x.x4 Same Thermometer 80140155 Same Price Sheet .35 – 1.10... -
Page 102: Screws & Nuts
Screws (diagrams are for shape reference only) not available not available 101 of 104... - Page 103 SCREWS ITEM PART NUMBER PART NAME AND DESCRIPTION 80030446 Screw, Phil Pan Head 1/4 - 20 x 1 ¼" 80030422 Screw, Phil Pan #8 - 32 x 3/8" 80030418 Screw, Phil Pan w/out washer self drilling, #8 - 18 x 1/2" 80030434 Screw, Phil Pan Swage Form #8 - 32 x 1/4"...
- Page 104 NUTS, WASHERS, BOLTS, & MISC. HARDWARE (diagrams are for shape reference only) not available not available not available 103 of 104...
-
Page 105: Washers, Bolts, & Misc. Hardware
WASHERS, BOLTS, & MISC. HARDWARE ITEM PART # PART NAME AND DESCRIPTION ITEM PART # PART NAME AND DESCRIPTION 80080156 Hex Nut, #10 - 32 90110054 Pop Rivet, Black 1/8" 80080157 Hex Nut, 1/4 - 20 80110081 Pop Rivet, Steel (Zinc Plated) 1/8" 80080154 Hex Nut, #8 - 32 80110079...
Need help?
Do you have a question about the BevMAX 4 Series and is the answer not in the manual?
Questions and answers