Advertisement
Quick Links
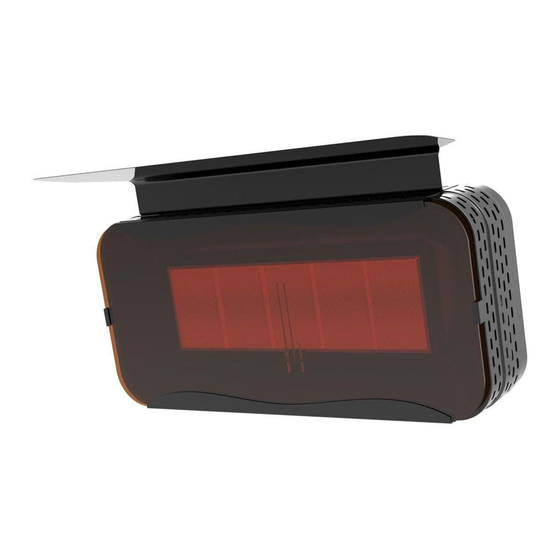
SOLARIS
RADIANT CERAMIC HEATERS
OPERATION, INSTALLATION AND MAINTENANCE MANUAL
DANGER
If you smell gas:
1. Shut off the gas to the appliance.
2. Extinguish any open flame.
3. If odour continues, keep away from he appliance
and immediately call your gas supplier or your
fire department.
Do not store or use gasoline or other flammable
vapour and liquids in the vicinity of this or any other
appliance.
WARNING
Improper installation, adjustment, alteration, service
or maintenance can cause injury or property
damage.
Read the instructions thoroughly before installing or
servicing this equipment.
WARNING
FOR OUTDOOR USE ONLY
PROPANE GAS / NATURAL GAS
THIS APPLIANCE MUST NOT BE INSTALLED OR
USED INDOORS.
APPLIANCE IS TO BE PROTECTED FROM RAIN
AND WIND
Gasmate® is a registered trademark of:
Sitro Group Australia Pty Ltd www.gasmate.com.au
Aber Living, N.Z. www.gasmate.co.nz
Important: Retain these instructions for future use.
SOLARIS DELUXE
RH200
SOLARIS
RH205
03719 10/18
Advertisement
Troubleshooting

Subscribe to Our Youtube Channel
Related Manuals for Gasmate SOLARIS Series


Summary of Contents for Gasmate SOLARIS Series
- Page 1 THIS APPLIANCE MUST NOT BE INSTALLED OR USED INDOORS. APPLIANCE IS TO BE PROTECTED FROM RAIN AND WIND Gasmate® is a registered trademark of: Sitro Group Australia Pty Ltd www.gasmate.com.au Aber Living, N.Z. www.gasmate.co.nz Important: Retain these instructions for future use.
-
Page 2: Product Overview
Table of Contents Important Safety Rules Product Overview Installation Servicing Operation Instructions 7-11 RH200 Auto Electrical Diagram RH200 Automatic Ignition Overview 13-14 Safe Appliance Locations Troubleshooting Spare Parts 17-18 Installation, Operation and Maintenance Instructions IMPORTANT SAFETY RULES This appliance shall not be installed or used 11. -
Page 3: Gas Requirements
PRODUCT OVERVIEW Prior to Installation and Assembly of your appliance, the following must be reviewed. Compliance with the following should result in satisfactory heater operation. This instruction manual should be retained for future reference. The installation must conform with local codes or authority having jurisdiction. - Page 4 This appliance must be protected from exposure to rain and wind. SPECIFICATIONS Gas type NATURAL GAS Manufactured by Gasmate AGA Approval No. Gas Consumption 35 MJ/h 35 MJ/h Gas Type Propane Gas (LPG) Only Natural Gas Gas Pressure 2.75 KPA...
- Page 5 INSTALLATION AND SERVICING ESSENTIAL INFORMATION HEATER ASSEMBLY The warranty to the product will be voided if any NOTE: Recommended clearances must be component of the patio heater is tampered with, or maintained. altered. * Remove transit protection material. To have these units altered or serviced by an unauthorised person may render the product inefficient, and at worst dangerous.
- Page 6 INSTALLATION AND SERVICING RADIANT CERAMIC HEATER IMPORTANT This appliance must only be used in a well ventilated Minimum Clearances from Combustible area. *Combustible materials are considered to be wood, Surfaces*: compressed paper, plant fibres, plastic or other materials Care should be taken to ensure that the heater is not that are capable of being ignited and burned.
- Page 7 INSTALLATION AND SERVICING LEAK TESTING THE PRODUCT IMAGE 1 A gas leak test must be done after assembly and before operating the appliance. Procedure as follows: If the product is installed on Natural Gas, the hose & regulator must be connected to both the heater and mains supply.
- Page 8 RH200 SOLARIS DELUXE HEATER – OPERATING INSTRUCTIONS START - TURNING THE HEATER ON IMAGE 1 Before operating this appliance: IMPORTANT It is imperative that you ensure that the gas installation and power installation has been carried out in accordance with the manufacturers guidelines in this instruction manual.
- Page 9 RH200 SOLARIS DELUXE HEATER – OPERATING INSTRUCTIONS Ignition Failure: If the heater fails to ignite, then turn the power off at the power point. IMPORTANT - Wait 10 seconds, then turn the power back on Popping Noise: at the power point. If the heater fails to When turning the heater on and off, there will be ignite after 6 attempts, refer to the troubleshooting a slight popping noise which is normal when the...
- Page 10 RH205 SOLARIS HEATER – OPERATING INSTRUCTIONS START - TURNING THE HEATER ON IMAGE 1 Before starting this appliance: IMPORTANT It is imperative that you ensure that the gas installation and power installation has been carried out in accordance with the manufacturers guidelines in this instruction manual.
- Page 11 RH205 SOLARIS HEATER – OPERATING INSTRUCTIONS IMAGE 4 Ignition Failure: If the heater fails to ignite after 6 attempts, refer to the troubleshooting guide in the back of the instruction manual for further guidance or alternatively contact the Sitro Service Team on 1300 174 876 (Mon –...
-
Page 12: Electrical Diagram
RH200 SOLARIS DELUXE AUTO ELECTRICAL DIAGRAM WIRING DIAGRAM - HONEYWELL CONTROL, HONEYWELL GAS VALVE ELECTRICAL DIAGRAM NOTE: THIS DIAGRAM IS SPECIFICALLY FOR THE RH200 AND IS NOT APPLICABLE FOR THE RH205... - Page 13 OPERATION DATA - Directions for use HONEYWELL CONTROL BOX • Automatic controls are safety devices and shall not The following operation sequence is valid only where the be opened. The manufacturer’s responsibility and components are installed according to the manufactures guarantee are invalid if the control is unduly opened.
- Page 14 RH200 SOLARIS DELUXE AUTO ELECTRICAL DIAGRAM OPERATION DATA - HONEYWELL VALVE The VK series gas control have been specially developed for application in domestic appliances. The Honeywell Gas Valve is a multi-functional control which incorporates an adjustable direct acting pressure regulator. It is designed for operation on 220~240V AC 50Hz.
- Page 15 SAFE APPLIANCE LOCATIONS This appliance shall only be used in an above ground open-air situation with natural ventilation, without stagnant areas, where gas leakage and products of combustion are rapidly dispersed by wind and natural convection. Any enclosure in which the appliance is used shall comply with the following: An enclosure with walls on all sides, but at least one permanent opening at ground level and no overhead cover (see Example 1).
-
Page 16: Trouble Shooting
TROUBLESHOOTING, CLEANING AND MAINTENANCE TROUBLE SHOOTING Fault Causes Remedy Action Main burner (Tiles) (a). Air in gas line Purge gas line Contact Licenced Gas Installer will not light (b). Blockage in gas line Trace back and clear Contact Licenced Gas Installer (c). - Page 17 IMPORTANT The following parts must be installed by a licenced installer. Failure to follow this direction can be dangerous and will void the warranty! RH200 SOLARIS PARTS LIST DESCRIPTION PART# Ceramic Tile Assembly 91 RH200CTA Ion Sensor 91 RH200IS Natural Gas Injector 91 RH200INJ Auto Gas Valve &...
- Page 18 IMPORTANT The following parts must be installed by a licenced installer. Failure to follow this direction can be dangerous and will void the warranty! RH205 SOLARIS PARTS LIST DESCRIPTION PART# Ceramic Tile Assembly 91 RH200CTA Natural Gas Injector 91 RH200INJ Propane Injector for Converting to LPG 91 RH200PINJ On/Off Cord...
- Page 19 NOTES...
- Page 20 For any queries or assistance call Customer Service (Australia Only) 1300 174 876 Hours of operation: Monday to Friday 8am - 5pm EST Do not return to place of purchase. Keep your purchase receipt, this will be required to make any claims under the 12 month warranty.
Need help?
Do you have a question about the SOLARIS Series and is the answer not in the manual?
Questions and answers