Table of Contents
Advertisement
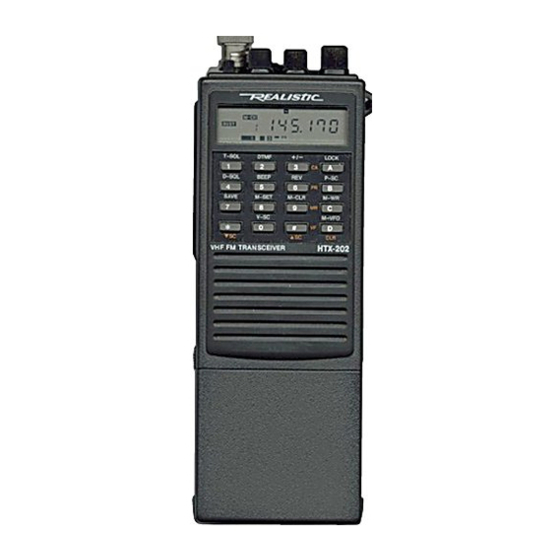
HTX-202
(190-1120)
GENERAL
Frequency Range:........................................144.000-148.000MHz
Frequency Step:....................................5/10/15/20/25/50/100KHz
Frequency Stability:.............................................+/- 10ppm
Antenna Impedance:......................................50 Ohms Unbalanced
Speaker:............................................................8 Ohms
Microphone:.......................................condenser Mic. 1.2 Kohms
Channel Display:..............................................LCD 8 digits
Operating Temperature:.......................14 F to 140 F (-10 C to 60 C)
Size:......................2 9/16 X 4 5/8 X 1 7/8 Inches (65 X 117 X 37mm)
Weight:.................................................1 lbs 3 oz. (540g)
Supply Voltage:
Alkaline Battery Pack:..........................................9V DC
Ni-Cad Battery Pack (600 mAh):................................7.2V DC
External Power Jack:..................................7.2 to 13.8 VDC
DC Adapter...............................................Cat. No. 273-1653
Regulated Power Supply...................................Cat. No. 220-0120
Vehicle Battery Power:...................................Cat. No. 270-1533
NOTE: This unit also has a Lithium Battery as a backup battery to keep
stored options in memory. Only Radio Shack authorized repair
centers can replace this battery.
RECEIVER
Intermediate frequency
1st IF:......................................................21.4 MHz
2nd IF:........................................................455KHz
Sensitivity:
12dB SINAD:.....................................................0.2uV
20 dB NQ:......................................................0.35uV
Squelch sensitivity;
Specifications
Faxback Doc. # 15723
Advertisement
Table of Contents

Related Manuals for Realistic HTX-202


Summary of Contents for Realistic HTX-202
- Page 1 HTX-202 (190-1120) Specifications Faxback Doc. # 15723 GENERAL Frequency Range:........144.000-148.000MHz Frequency Step:........5/10/15/20/25/50/100KHz Frequency Stability:..........+/- 10ppm Antenna Impedance:........50 Ohms Unbalanced Speaker:............8 Ohms Microphone:........condenser Mic. 1.2 Kohms Channel Display:..........LCD 8 digits Operating Temperature:.......14 F to 140 F (-10 C to 60 C) Size:......2 9/16 X 4 5/8 X 1 7/8 Inches (65 X 117 X 37mm)
- Page 2 Threshold:............0.1uV Tight:..........10 dB above threshold Spurious response attenuation:........80dB Inter-modulation attenuation:.........70dB Adjacent channel rejection (25KHz):........70dB Modulation acceptance Bandwith:........8KHz Hum and Noise:............50dB Audio output power(10% THD): 7.2V DC:............0.3W 9V DC:............0.5W 12V DC:............1W 13.8V DC:............1W Audio distortion:............2% Audio response:..........-6dB/oct Current drain: Stand-by without power save:........35mA Stand-by power save:..........25mA CTCSS Sensitivity:..........0.15uV...
- Page 3 The above specifications are nominal. An individual unit's performance might vary from these specifications. Features The Radio Shack HTX-202 Two-Meter Handheld Transceiver offers both the newly licensed Tech and the experienced amateur some of the most advanced features ever presented in a handheld transceiver.
- Page 4 lets you set a Sub-audible tone that your transceiver must receive to open squelch. Touch-Tone Page - lets you set a sequence of up to five touch-tones your transceiver must receive to sound an alert tone to open the squelch. 16-Digit DTMF Memory Sequences - lets you transmitt all touch tones (0-9, #, *, and A-D).
- Page 5 preparation You can operate your transceiver from any of the following sources: Rechargeable power pack (supplied with charger) Six alkaline AA batteries (using the supplied alkaline pack) Vehicle battery power (using optional adapter) OPERATING FROM THE RECHARGEABLE POWER PACK You can use the supplied rechargeable power pack to power your transceiver.
-
Page 6: Using Alkaline Batteries
NOTES: Nickel-cadmium batteries deliver more power if you occasionally let them completely discharge. To do this, use the transceiver until BATT appears on the display when you push the PTT. Then fully charge the batteries. If you do not occasionally do this, the batteries temporarily lose the ability to deliver full power. - Page 7 3. Press the battery holder into the battery holder case. When power is low, BATT appears when you press PTT. Be sure to use six fresh AA alkaline batteries. Never mix different types of batteries, and never mix old and new batteries. OPERATING FROM VEHICLE BATTERY POWER You can operate the transceiver from vehicle battery using a DC power cord (Radio Shack Cat.
- Page 8 Follow these steps to power the transceiver from the 1-amp, 12 volt DC adapter. 1. Connect the barrel plug with the tip set to positive. 2. Insert the adapter's barrel plug into the transceiver's EXT DC jack. CAUTION: Never insert the adapter's barrel plug into the rechargeable power pack's CHARGE jack.
-
Page 9: Backup Battery
4. Melt a small amount of solder onto the other end of the wire. Then, connect the red lead to the power supply's + terminal and connect the black lead to the power supply's - terminal. 5. Plug in the power supply and turn it on. Use the meter to confirm you have correctly wired the power connector so that the tip is + and the case is -. -
Page 10: Connecting The Antenna
programs. CONNECTING THE ANTENNA Your transceiver comes with a flexible antenna. You must connect an antenna to your transceiver before you transmit. The transceivers BNC antenna connector is easy to connect other types of antennas. Radio Shack stores sell a 5/8 wave magnetic mount antenna for mobile operation (Cat. No. -
Page 11: Using An External Speaker
connect an external microphone, the internal microphone does not work, but the internal PTT is not affected. If your microphone has a 3/32 inch(2.5 mm) submini plug, plug the microphone cable into the transceiver's MIC jack. USING AN EXTERNAL SPEAKER In a noisy area, an external speaker, positioned in the right place, might provide more comfortable listening. -
Page 12: Using The Light
transceiver. 1. Turn off the transceiver. 2. Press and hold down F+CLR. Then, turn on the transceiver. USING THE LIGHT Press L on the side of the transceiver to turn on the display light for about 5 seconds. To turn the light off sooner, press L again. The light stays on until you press L or turn off the transceiver. -
Page 13: Scanning For Active Frequencies
1. Turn on the transceiver. 2. Press VF. 3. Use the keypad to enter the last four digits of the frequency. For example, to enter 146.940, press 6940. NOTES: If you make a mistake, press CLR and repeat this step. The transceiver rounds the last digit down to 0 or 5. -
Page 14: Receiving Transmissions
Scan limits: 144 MHz to 148 MHz To stop scanning, press \/SC, /\SC, CA, PR, VF, or turn off the transceiver. SCANNING FOR A VACANT FREQUENCY In some areas where the 2-meter band is being used heavily, you might have trouble quickly finding a frequency not being used. -
Page 15: Locking The Keypad
2. Select the desired frequency. 3. If + or - is on the display, repeatedly press F & + / - until neither symbol appears. 4. Press LOW POWER so that the button is down. In this position, your transceiver transmits at about 1 watt. 5. -
Page 16: Using Memory Channels
SETTING THE KEY ENTRY BEEP Each time you press a key, the transceiver sounds a beep. To turn off the beep, press F+BEEP. The key beep does not sound this and subsequent key presses. To turn on the key beep, press F+BEEP again. REVERSING THE OFFSET To reverse the transmit and receive frequencies when you are operating duplex, press F+REV. - Page 17 press F+T-SQL so that T-SQL appears on the display. NOTE: If you turn on T-SQL you must correctly set both the transmit subaudible tone as described in steps 8 through 11. 5. Press and hold down F+M-WR for at least 1 second. The transceiver stores the tuned frequency in the calling-frequency memory, plus the frequency separation (for duplex operation) and subaudible transmit and receive tones.
- Page 18 frequency memory display. To use the calling frequency memory, press CA at any time. The transceiver immediately goes to the calling frequency and sets the transmit frequency, subaudible tones, and tone squelch to the settings you programmed. To return to the previous settings, press CA again. USING THE PRIORITY-FREQUENCY MEMORIES The transceiver has three priority-frequency memories.
-
Page 19: Clearing Memories
To continuously scan the three priority frequency memories, press PR. Then, press and hold down /\SC or \/SC at least 1 second, NOTE: You must store more than one priority frequency in memory to continuously scan priority-frequency memories. USING THE STANDARD MEMORIES Your transceiver has 12 standard memories into which you can store frequently-accessed frequencies for quick access. - Page 20 Follow these steps to clear a memory. 1. Press PR or MR and select the memory you want to clear. 2. Press F+M-CLR to clear the settings stored in the current memory. NOTE: You cannot clear Standard Memory 1 or the calling-frequency memory.
- Page 21 Your transceiver has a configuration menu that lets you modify operation settings. Each of the following sections explain how and when to use each configuration menu and select options. 1. Press VF. 2. Press F+M-SET. The first menu item appears. 3.
-
Page 22: Input Frequency
repeaters receive at a frequency 600 kHz lower or higher than they retransmit (repeat) on. For example, if a repeater's input frequency is 146.340 MHz, its output frequency is 146.949 MHz. The following is a list of the most commonly used repeater pairs. INPUT FREQUENCY OUTPUT FREQUENCY 146.O7 MHz... - Page 23 ---------------- ---------------- | tc oFF | | rc oFF | ---------------- ---------------- To set a subaudible transmit tone, follow the steps in "Understanding Configuration Menu" to display tc. Then, rotate TUNE to select the subaudible tone. If you do not want to transmit a subaudible tone, rotate TUNE to select OFF.
-
Page 24: Setting Scan Options
225.7 34 233.6 35 241.8 36 250.3 37 SETTING SCAN OPTIONS Several configuration menu items control how your transceiver operates when you scan frequencies or memories. The following sections describe to set the frequency step rate, the scan condition, the scan delay duration, and the scan limits. - Page 25 To change the resume condition, follow the steps in "Understanding the Configuration Menu" to display Sc. Then, rotate TUNE to select the resume condition. NOTE: The resume option does not affect the priority scan. Priority scan always resumes scanning after the carrier drops. SETTING THE DELAY DURATION When you set the scan resume condition to cr (carrier), the transceiver resumes scanning after the carrier drops.
- Page 26 To set the transceiver to save power press F+SAVE so that SAVE appears on the display. In the power-save mode, the transceiver turns on the receiver for about 32 milliseconds to check for any activity, and then turns off the receiver for the time you set with the power-save configuration setting.
- Page 27 "Understanding the Configuration Menu" to display Lb. Then, rotate TUNE to select 4, 8, 12, or 16 seconds. USING TOUCH-TONE FEATURES Your transceiver has a built-in 16-key touch-tone encoder. You can manually send touch tones, or send tones from one of the five DTMF memories.
- Page 28 NOTE: To enter a D, press D twice. TRANSMITTING A DTMF MEMORY SEQUENCE To send a DTMF memory sequence, press and hold down PTT. Then, press D followed by the DTMF memory number you want to transmit (1-5). The transceiver transmit the tones. The transceiver has two DTMF memory sequence transmit speeds.
- Page 29 TUNE to select on. You should also set this option to on if you expect an auto reply from an auto patch or another HTX-202 or other transceiver that has this feature. Care and Maintenance Your HTX-202 2-Meter Handheld Transceiver is an example of superior design and craftsmanship.
- Page 30 authorization to operate the transceiver. If your transceiver is not performing as it should, take it to your local Radio Shack store. Error Codes Your transceiver has two error code displays. Refer to the following for an explanation of each error code. Er1: INTERNAL RAM ERROR Er1 indicates the transceiver has detected an error in its battery-backed up operation memory.
- Page 31 external antenna. When pressing f/3, it only comes up with a negative offset. In order to come up with a positive offset, check the offset by entering VFO mode and pressing function/8. The display reads os and a number. That number is normally 600.
- Page 32 rotate tune to set frequency. you can set tones to off for receive subaudible tone frequency press star twice rotate tune for ddsired frequency then press push to talk which returns to memory display...
Need help?
Do you have a question about the HTX-202 and is the answer not in the manual?
Questions and answers