Maxxair MAXXFAN Deluxe Series Installation Instructions, Information And Operating Manual
Hide thumbs
Also See for MAXXFAN Deluxe Series:
Advertisement
Available languages
Available languages
Quick Links
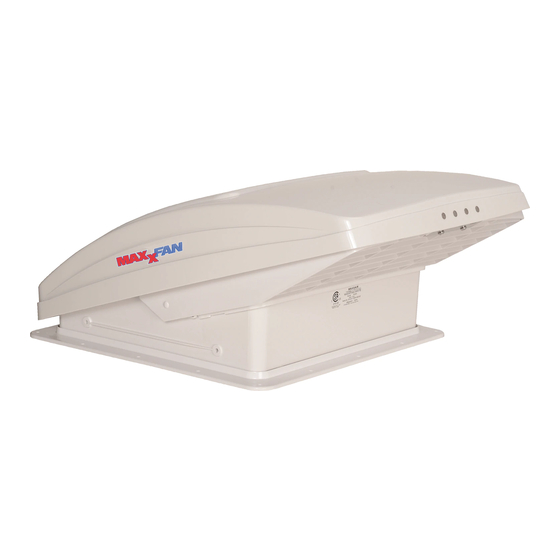
MAXXFAN
INSTALLATION INSTRUCTIONS,
INFORMATION AND OPERATING GUIDE
5100KI • 6200KI • 6200KIT • 7000KI • 7500KI • 7500KIT
5100KI40 • 6200KI40 • 6200KI40T • 7000KI40 • 7500KI40 • 7500KI40T
READ AND SAVE THESE INSTRUCTIONS
NOTE: Refer to supplied Operating Instructions regarding the model you have purchased.
The MAXXFAN installs into a standard RV roof opening of 355mm x 355mm for KI models
and 400mm x 400mm for KI40 models.
To determine if your roof opening is correctly sized, simply remove the interior ceiling garnish
trim ring of your existing roof vent and measure the ceiling opening or verify the opening is
large enough by sliding the MAXXFAN interior garnish trim ring into the opening.
Due to the EXHAUST / INTAKE LOUVERS that face the rear of the vehicle, the MAXXFAN
requires a roof area clear of obstructions such as air conditioners, storage boxes, etc. for at
The MAXXFAN is designed for a minimum roof thickness of 25 mm to a maximum of
90mm. If your roof thickness is less than 25 mm, build additional thickness at the ceiling
opening using wood or other suitable material.
The MAXXFAN is designed for a nominal 12 Volt DC system and requires a circuit capable
to use will accommodate the additional load.
electrical connections.
WARNING!
in the manner intended by AIRXCEL, INC. Should you have questions, please contact
your AIRXCEL/MAXXAIR Distributor.
FOR MAXXFAN
P/N: 11D90001KI
®
Deluxe MODELS
Use the proper gauge stranded wire for
08-2017
®
Advertisement

Subscribe to Our Youtube Channel
Related Manuals for Maxxair MAXXFAN Deluxe Series


Summary of Contents for Maxxair MAXXFAN Deluxe Series
- Page 1 The MAXXFAN is designed for a nominal 12 Volt DC system and requires a circuit capable to use will accommodate the additional load. Use the proper gauge stranded wire for electrical connections. WARNING! in the manner intended by AIRXCEL, INC. Should you have questions, please contact your AIRXCEL/MAXXAIR Distributor. P/N: 11D90001KI 08-2017...
- Page 2 If your fan fails to operate or NOTE: The MAXXFAN needs reset, contact your AIRXCEL / MAXXAIR Distributor for assistance or solicit the aid of an electrical technician. (+) must be connected to the vehicle 12 volt (+) positive supply.
- Page 3 Handheld AIRXCEL.com or contact your Remote Control. Mount the cradle to your wall using the (2) #6 screws provided. Remote may be placed AIRXCEL / MAXXAIR Distributor. into the wall cradle for storage.
-
Page 4: Year Limited Warranty
Warranty does not include “Acts of God,” failure due to misuse, improper installation or accidental / incidental damages. Please call your AIRXCEL / MAXXAIR Distributor if you have any questions or need assistance. Please have your original sales receipt and MAXXFAN Serial Number readily available. -
Page 5: Serial Number Label
INFORMATION AND OPERATING GUIDE ® FOR MAXXFAN Deluxe MODELS 5100KI • 6200KI • 6200KIT • 7000KI • 7500KI • 7500KIT 5100KI40 • 6200KI40 • 6200KI40T • 7000KI40 • 7500KI40 • 7500KI40T KNOB, VENT LID OPEN/CLOSE Manual Opening Models Pull to unlock prior to turning. Rotate Knob clockwise to Close Vent Lid;... -
Page 6: Keypad Controls
KEYPAD CONTROLS MAXXFAN ® Deluxe MODELS 5100KI • 6200KI • 6200KIT 7000KI • 7500KI • 7500KIT 5100KI40 • 6200KI40 • 6200KI40T 7000KI40 • 7500KI40 • 7500KI40T each key press ON/OFF: Use this key to fan and the lid will stay in the position you selected. On Automatic Opening IN/OUT: Use this key to reverse the direction of the fan, the fan will slow down and pause for two (2) seconds before resuming operation in the opposite... - Page 7 REMOTE CONTROL OPERATING GUIDE WIRELESS REMOTE CONTROL FOR ® MAXXFAN Deluxe MODELS 7000KI • 7500KI • 7500KIT • 7000KI40 • 7500KI40 • 7500KI40T FAN ON & POWER OFF - Press this button: • To start the fan Display Screen • •...
- Page 8 Le MAXXFAN est conçu pour un système 12 Volt CC nominale et nécessite un circuit capable fo fournir un minimum de 5 ampères la l’MAXXFAN. Assurez-vous que le circuit électrique que vous AVERTISSEMENT! utilisez l’équipement uniquement tel que prévu par AIRXCEL, INC. Si vous avez des questions, contactez votre distributeur AIRXCEL/MAXXAIR.
- Page 9 à nouveau. Si votre ventilateur ne fonctionne pas ou doit par une étiquette marquée (+) doit être connecté à la borne être reprogrammé, sollicitez l’assistance de votre Distributeur positive d’alimentation à 12 volt (+). AIRXCEL/MAXXAIR ou demandez l’aide d’un électricien.
- Page 10 AIRXCEL.com ou contactez essayez votre ventilateur. La télécommande est livrée avec votre Distributeur AIRXCEL / MAXXAIR. un socle mural pour télécommande. Montez le socle sur votre mur en vous servant des deux (2) vis Nº 6 fournies. La...
- Page 11 Appelez votre Distributeur AIRXCEL / MAXXAIR si vous avez des questions ou si vous avez besoin d’assistance. Ayez toujours les originaux de vos factures de vente et le numéro de série du MAXXFAN à...
- Page 12 MANUEL D’INFORMATION ET D’UTILISATION ® POUR LES MODELES MAXXFAN Deluxe 5100KI • 6200KI • 6200KIT • 7000KI • 7500KI • 7500KIT 5100KI40 • 6200KI40 • 6200KI40T • 7000KI40 • 7500KI40 • 7500KI40T BOUTON, OUVERTURE/FERMETURE DU COUVERCLE D’ÉVENT Modèles à ouverture manuelle Pour les modèles sans télécommande (NON- REMOTE) tirer sur le bouton pour le déverrouiller avant de tourner.
-
Page 13: Commandes Du Clavier
COMMANDES DU CLAVIER POUR ® LES MODELES MAXXFAN Deluxe 5100KI • 6200KI • 6200KIT 7000KI • 7500KI • 7500KIT 5100KI40 • 6200KI40 • 6200KI40T 7000KI40 • 7500KI40 • 7500KI40T REMARQUE : Les touches émettront un bip chaque fois qu’elles sont appuyées ON/OFF : (MARCHE/ARRÊT) Utilisez cette touche pour démarrer le ventilateur ou pour l’arrêter. - Page 14 MANUEL D’UTILISATION DE LA TÉLÉCOMMANDE TÉLÉCOMMANDE SANS FIL POUR LES MODELES ® MAXXFAN Deluxe 7000KI • 7500KI • 7500KIT • 7000KI40 • 7500KI40 • 7500KI40T FAN ON & POWER OFF (VENTILATEUR EN MARCHE & ALIMENTATION COUPÉE) - Appuyez sur ce bouton: •...
Need help?
Do you have a question about the MAXXFAN Deluxe Series and is the answer not in the manual?
Questions and answers