
Related Manuals for Memmert HPP 108


Summary of Contents for Memmert HPP 108
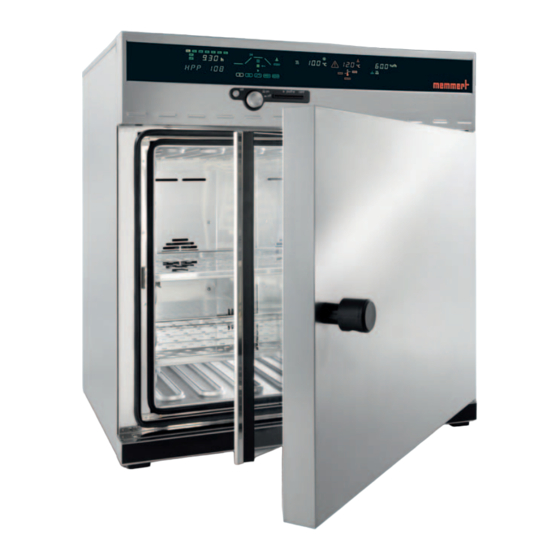
- Page 1 Constant Climate Chamber with Peltier technology HPP 108 Operating Instructions page 1...
-
Page 2: Table Of Contents
Contents ..................................2 General notes and safety notes ............................ 4 Transport ................................4 Installation facilities (accessories) ..........................5 Subframe ................................5 Stackable version .............................. 5 Initial start-up ..............................6 Oven load ................................6 Technical data ................................7 4.1 Working range of the HPP units ..........................9 Material quality .............................. - Page 3 Memory card: MEMoryCard XL........................... 41 20.1 Programming the MEMoryCard XL from the climatic chamber ................41 20.2 Programming the MEMoryCard XL from a PC with the climatic chamber ............41 20.3 Programming the MEMoryCard XL from a PC using the read-write unit ............41 20.4 Documentation on memory card MEMoryCard XL .....................
-
Page 4: General Notes And Safety Notes
General notes and safety notes You have purchased a technically fully proven product which has been produced in Germany with the use of high-grade materials and the application of the latest manufacturing techniques; it has been factory tested for many hours. In addition we guarantee the supply of spare parts over 10 years. -
Page 5: Installation Facilities (Accessories)
Generally it is essential to have adequate air ventilation around the oven. Model HPP 108 is mounted on castors. The front castors pivot and can be locked. In order to ensure the stability of the oven the front castors must always be set facing towards the front. -
Page 6: Initial Start-Up
Please note that the MEMMERT ovens described here are not explosionproof (they do not conform to the Industrial Association Specification VBG 24) and are therefore not suitable for drying, evaporating and burning-in of paints, enamels or similar materials whose solvents may produce an inflammable mixture with air. -
Page 7: Technical Data
Technical data USB-Schnittstelle parallele Schnittstelle Anschlusskabel Model HPP 108 Chamber width A [mm] Chamber height B [mm] Chamber depth C [mm] Oven width D [mm] Oven height E [mm] Oven depth F [mm] Chamber volume [litre] Weight [kg] 66/70 Power [W] Max. - Page 8 Ambient conditions • Ambient temperature HPP: 16ºC to 28ºC • rH 70% max., no condensation • Overvoltage category: II • Contamination level: 2 temperature • temperature is measued with Pt100 in 4-wire circuit • Setpoint range 0°C to 70°C • setting accuracy: 0,1°C •...
-
Page 9: Working Range Of The Hpp Units
4.1 Working range of the HPP units The temperature-humidity diagram of the humidity chamber HCP indicates the range of temperature and humidity within which continuous condensation-free operation is possible. Temperature-humidity working range Memmert HPP 108 Temperatur-Feuchte Arbeitsbereich Memmert HPP 108 Temperature °C Temperatur °C... - Page 10 USB interface for computer-supported temperature programmes and for reading the internal report memory • MEMMERT software “Celsius“ for remote operation of oven via a PC and for reading the report memory inside the controller • A pre-formatted blank MEMoryCard XL with 32 kB storage capacity, reprogrammable for up to 40 ramp segments and additionally 135 hours report memory at 1 minute intervals •...
-
Page 11: Material Quality
Controller protected by a 100 mA fuse (200 mA on 115 V) • When connecting a MEMMERT oven to the electrical supply you have to observe any local regulations which apply (e.g. in Germany DIN VDE 0100 with FI protection circuit) 4.5 Note on EMC (electromagnetic compatibility) -
Page 12: Oven Construction And Operation
Oven construction and operation close 5.1 Operating the door close The door is opened by pulling on the door handle. The door is closed by the door handle being pushed in. open 5.2 Setting the temperature Hold down the SET key and set the temperature setpoint with the push/turn control. After the SET key has been released the display briefly flashes the temperature setpoint. -
Page 13: Controls And Indications
5.3 Controls and indications alarm indication time manipulation prevention display (User-ID-Card) temperature heating cooling sounder Programme display operation monitor temperature indication STERI DEFRO IN 1 IN 2 IN 1 IN 2 °C °C loop AUTO PRINT SETUP push card warning water chip card humidity steam... -
Page 14: Selecting The Operating Mode
Selecting the operating mode PRINT SETUP Normal Weekly Printer Basic settings Programme operation programmer operation After holding down the SET key (approx. 3 sec), the current operating mode flashes on the display. A different operating mode can be selected with the push/turn control while the SET key is being held down. -
Page 15: Normal Operation
Normal operation PRINT SETUP In this operating mode the oven operates continuously. The settings for operating the oven can be selected. The settings act directly on the operation of the oven. °C AUTO By rotating the push/turn control the following parameters can be selected and can be altered as described in the Section „Setting the parameters“:... -
Page 16: Setting Example "Normal Operation
8.1 Setting example “Normal operation“ The climatic chamber has to heat up to 50°C at 70% fan speed. The monitor function has to operate at 51°C. temperature relative humidity °C (rh) % temperature monitor time time 1. Select operating mode “Normal operation“ PRINT SETUP After holding down the SET key (approx. -
Page 17: Weekly Programmer
Weekly programmer PRINT SETUP In this operating mode the weekly programmer is activated and the oven switches on and off automatically at the programmed times. While the weekly programmer is in the OFF phase the oven is in standby mode. Heating and fan are switched off, the controller display is dimmed and shows the clock time. -
Page 18: Programming Example "Weekly Programmer
9.1 Programming example “Weekly programmer“ The oven (IPP500) has to switch on at 07.30 hrs from Mo to Fr (workday group) and switch off at 18.00 hrs. In addition it has to operate on Saturday from 10.00 to 14.00 hrs. 1. -
Page 19: Programme Operation
10 Programme operation SETUP PRINT In this operating mode, up to 40 freely programmable temperature-time ramps can be set. Rotating the press/turn control while holding down the SET key selects the following parameters in sequence after released the SET key: - a new programme can be programmed or an existing programme can be edited EDIT... - Page 20 STERI DEFRO IN 1 IN 2 °C °C loop AUTO PRINT SETUP Duration of first ramp segment Range: 1 minute to 999 hours. STERI DEFRO IN 1 IN 2 °C °C loop AUTO PRINT SETUP Setpoint temperature / temperature at the end of the ramp segment Range: 0°C to 70°C.
-
Page 21: Closure Commands For Ramp Segments
10.1 Closure commands for ramp segments NEXT Follow-on with next programme segment. SPWT (T) Wait until the setpoint temperature is reached. The oven only starts the next programme segment when the programmed setpoint temperature has been reached, even if the programmed heating SET-POINT WAIT time has already elapsed. -
Page 22: Programming Example Programme Operation
10.2 Programming example programme operation The climatic chamber has to heat up as quickly as possible to 50°C on Monday at 08.00 hrs with a vel. humidity of 70%rh. The climatic chamber has to hold this temperature for 45 minutes, followed by cooling down in one hour to 37°C with a vel humidity of 50%rh. - Page 23 5. Select duration of first ramp segment Turn the push/turn control further clockwise until the time of the first ramp segment is flashing. Hold down the SET key and set the time 00:01 using the push/turn control. 6. Select temperature of first ramp segment Turn the push/turn control clockwise until the temperature display is ˚C flashing.
- Page 24 13. Select duration of third ramp segment Mit dem Drück/Using the push/turn control select the time indication Hold down the SET key and set the time 01:00 using the push/turn control. 14. Select temperature of third ramp segment °C Turn the push/turn control clockwise until the temperature display is flashing.
-
Page 25: Print
11 Printer PRINT PRINT SETUP All IPP / ICP incubators are fitted as standard with a parallel printer interface, as used on personal computers. This parallel printer interface on the back of the oven is suitable for connecting conventional PCL3- compatible ink jet printers which are provided with a parallel printer interface (e.g. -
Page 26: Setup
12 Basic oven settings SETUP PRINT SETUP In this operating mode it is possible to make the basic settings of the oven. Clock time, date, day, year, and settings of sounder, of address assignment, monitoring units, heater power and calibration are set here. The following parameters can be selected by turning the push/turn control, and altered as described in the Section „Setting the parameters“:... -
Page 27: Real-Time Clock
Calibration correction for user-calibration (see section 17) Exit setup mode = store all settings and exit SETUP mode 12.1 Real-time clock The real-time clock is set in SETUP and includes date and clock time. The real-time clock serves for documentation according to GLP. Date and clock time are marked in the report print. -
Page 28: Temperature Monitor And Protection Devices
13 Temperature monitor and protection devices The monitor temperature is measured with a separate PT100 temperature sensor inside the chamber. The monitor unit provides protection for the oven load as well as protection for oven and its surroundings. visual alarm symbol audible alight: TB alarm... -
Page 29: Adjustable Temperature Monitor (Tww) Protection Class 3.3 To Din 12 880
The manually adjusted monitor temperature of the electronic overtemperature protection is monitored by an adjustable temperature monitor (TWW) Protection Class 3.1 to DIN 12880. The choice of temperature monitor is selected in SETUP. (see the menu item Tolerance margin ASF in Section „Basic oven settings”) 13.1.3 Adjustable temperature monitor (TWW) Protection Class 3.3 to DIN 12 880 If the manually set monitor temperatur MAX is exceeded, the TWW takes over the control of the temperature and starts to control at the monitor temperature. -
Page 30: Automatic Temperature Monitor (Asf) Auto
13.1.5 Automatic temperature monitor (ASF) AUTO A monitoring device which automatically follows the selected temperature setpoint. The tolerance margin of the ASF is set in SETUP (see the menu item Tolerance margin ASF in the Section „Basic oven settings SETUP“). Automatic temperature monitor Using the push/turn control select the AUTO symbol. - Page 31 Going outside tolerance margin = ASF alarm Going outside the selected tolerance margin of the setpoint (in the example 50°C +/-10°C), for example through opening the oven door during operation, triggers the alarm. AUTO Triggering the ASF alarm is indicated by flashing -symbol.
-
Page 32: Active Humidity Control (%Rh)
Setpoint changed = ASF de-activated automatically If the temperature setpoint is altered, the automatic temperature monitor is automatically de-activated temporarily (see in the example the setpoint is changed from 50°C to 25°C) until the tolerance margin of the new temperature setpoint is reached (see in the example below: the ASF is re-activated at 25°C +/-10°C). -
Page 33: Audible Alert Signals
15 Audible alert signals The interval sound indicates a fault in the temperature control system or the humidifying system. It is triggered in the following cases: Fault in the temperature control system: Tb activ - temperature limiter activated if the temperature limiter operates (see section 12.1) hi-alarm - overtemperature alarm activated if the overtemperature protection operates (see section 12.2.3) -
Page 34: Calibration
16 Calibration User-calibration of oven and controller, with three calibration temperatures selected by the user. CAL1 temperature calibration at low temperature CAL2 temperature calibration at medium temperature CAL3 temperature calibration at high temperature Either a positive or a negative calibration correction can be applied to each selected calibration point. General calibration instructions: Select the required calibration temperature in SETUP and set the corresponding calibration correction to 0.0°C. - Page 35 Note: If all calibration corrections are set to 0.0°C the factory calibration is restored! calibration correction calibration point1 calibration temperature adjustment range -4.9 °C to +4.9 °C ˚C ˚C calibration correction calibration point 2 calibration temperature adjustment range -4.9 °C to +4.9 °C ˚C ˚C calibration correction...
-
Page 36: Humidity
Humidity User-calibration of the unit at the controller, using two humidity points: RH 20 Humidity calibration at 20% relative humidity RH 90 Humidity calibration at 90% relative humidity Either a positive or a negative calibration correction can be applied to each selected calibration point. General calibration instructions: Select the required calibration humidity in SETUP and set the corresponding calibration correction to 0.0 °C. - Page 37 calibration humidity calibration correction 20%rh adjustment range -5.0 % to +5.0 % STERI DEFRO IN 1 IN 1 IN 2 IN 2 °C °C loop AUTO PRINT SETUP calibration humidity calibration correction 90%rh adjustment range -5.0 % to +5.0 % STERI DEFRO IN 1...
-
Page 38: Communication Interface For The Pc
18 Communication interface for the PC 18.1 Communication interface USB The oven is provided as standard with a USB-interface according to USB spezification. Using this interface it is possible to control the oven from the PC and to produce reports. This is done using the “Celsius“... - Page 39 DIN 12-9001. Using this interface it is possible to control the oven from the PC and to produce reports. This is done using the “Celsius“ software. For this purpose the oven has to be assigned a unique device address in sub-menu SETUP, option ADDRESS; This is the address through which the PC communicates with the oven.
-
Page 40: Report Memory
19 Report memory The controller continuously records all relevant measurements, settings and error messages at 1-minute intervals. The internal report memory is arranged as a ring memory, i.e. the new data always overwrite the oldest report data. The report function can not be switched off but remains active at all times. The data are stored in the controller, protected against any manipulation. -
Page 41: Memory Card: Memorycard Xl
20 Memory card: MEMoryCard XL A temperature programme with up to 40 ramps can be programmed on the MEMoryCard XL. Programming can take place directly on the controller or through the PC program “Celsius”. For improved clarity it is recommended that extensive programmes are prepared graphically on the PC. Where a MEMoryCard XL is programmed, it can be read only on the same oven type for which it has been programmed. -
Page 42: Documentation On Memory Card Memorycard Xl
Note: The programme remains stored on the MEMoryCard XL after the card has been removed from the unit. It can however be overwritten at any time by the PC using “Celsius”. Details on programming the MEMoryCard XL with PC and „Celsius“ can be found in the Celsius Operating Manual and in the Online Help. -
Page 43: User-Id-Card (Available As Optional Extra)
21 User-ID-Card (available as optional extra) Name: _____________________ access authority _____________________ card The User-ID-Card stores the serial number of the oven and a unique user number in encrypted format. The User-ID-Card therefore functions only in the oven with the corresponding serial number. Each log-on via the User-ID-Card is documented in the internal flash memory. -
Page 44: Maintenance
Silicone grease, and to check that the hinge screws are tight. A well-closing door is essential on an oven. On Memmert ovens, tight closure of the door is ensured by a seal on the oven and another one on the door. In continuous operation the flexible sealing material may take a permanent set. -
Page 45: Cleaning Hpp Incubators
In case there is a fault on the oven, please get in touch with an authorised service organisation or contact the MEMMERT customer service department. (see section 25) In case of queries always specify model and serial number (on the rating label) -
Page 46: Supply Failure
25 Supply failure Supply failure in operating mode “Normal operation“ After a supply failure the operation is continued with the set parameters. The instant and duration of the supply failure are documented in the record memory. Supply failure in operating mode “Weekly programmer“ After a supply failure the operation is continued with the set parameters. -
Page 47: Ce Conformity Declaration
26 CE Conformity Declaration Standard ovens HPP are safety-approved and bear the test marks: This product is subject to the Directive 2002/96/EC by the European Parliament and the EU Council of Ministers which concerns Waste Electrical and Electronic Equipment (WEEE). This product has been put on the market after 13 August 2005 in countries which have already incorporated this Directive into National Law. - Page 48 EC Declaration of Conformity Manufacturer´s name and address: MEMMERT GmbH + Co. KG Äußere Rittersbacher Straße 38 D-91126 Schwabach Product: Constant-Climate-Chamber Type: HPP … Sizes: Nominal voltage: AC 230 V 50 / 60Hz alternative AC 115 V 50/60 Hz The designated product is in conformity with the European EMC-Directive...
-
Page 49: Address
27 Address MEMMERT GmbH+Co.KG PO Box 17 20 91107 Schwabach Germany Phone: (+49) (0)9122 / 925-0 Fax:: (+49) (0)9122 /14585 E-mail: sales@memmert.com Internet: www.memmert.com Customer service: Phone: (+49) (0)9122 / 925-143 (+49) (0)9122 / 925-126 E-mail: service@memmert.com When contacting customer service, always quote the product serial number on the oven label. -
Page 50: Index
28 Index accessories 9 HOLD 19 ramp segments 19 address 46 refrigeration unit 36 alarm indication 11 RS485 35 alarm symbol 26, 28 indications 11 ASF 29 initial start-up 5 automatic defrost 36 installation facilities 9 segment closure command 19 automatic temperature monitor 29 Interior lighting 12 SETPOINT WAIT 19... -
Page 51: Note
Note ____________________________________________ ____________________________________________ ____________________________________________ ____________________________________________ ____________________________________________ ____________________________________________ ____________________________________________ ____________________________________________ ____________________________________________ ____________________________________________ ____________________________________________ ____________________________________________ ____________________________________________ ____________________________________________ ____________________________________________ ____________________________________________ ____________________________________________ ____________________________________________ ____________________________________________ ____________________________________________ ____________________________________________ ____________________________________________ ____________________________________________ page 51... - Page 52 09.04.2008 HPP englisch D10621 page 52...
Need help?
Do you have a question about the HPP 108 and is the answer not in the manual?
Questions and answers