Camera control unit/networked media interface board/12g-sdi extension kit/st 2110 interface kit (170 pages)
Summary of Contents for Sony VFH-990
Page 1
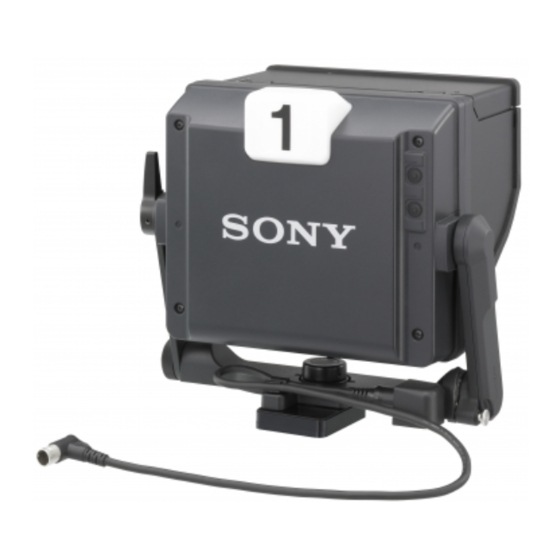
HD ELECTRONIC VIEWFINDER HDVF-C950W OUTDOOR HOOD VFH-990 MAINTENANCE MANUAL 1st Edition Serial No. 100001 and Higher...
Page 2
! WARNING This manual is intended for qualified service personnel only. To reduce the risk of electric shock, fire or injury, do not perform any servicing other than that contained in the operating instructions unless you are qualified to do so. Refer all servicing to qualified service personnel.
Table of Contents Manual Structure 2. Setting Menu Purpose of this manual ............3 (E) 2-1. Setting Menu ............2-1 (E) Relative manual ..............3 (E) 2-2. TOP Menu ............... 2-2 (E) 2-3. OPERATION Menu ..........2-3 (E) 2-4. SERVICE Menu ............2-3 (E) 1.
Manual Structure Purpose of this manual This manual is the maintenance manual for HD Electronic Viewfinder HDVF- C950W. This manual describes the information items necessary when the unit is supplied and installed, items that premise the service based on the components parts such as service overview, electrical alignment, spare parts lists, block diagram and schematic diagrams, assuming use of system and service engineers.
Section 1 Service Overview 1-1. Board Layout 1-2. Matching Connectors and Cables Use the included VF connection cable when connecting to the camera for installation or servicing. SW-1299 1-2-1. Cable Input/Output Signals LE-317 LE-315 The VF connection cable input/output signals are as follows.
1-2-2. VF Connecting Cable . VF (20-pin Male) This cable is used for connecting the main unit to the camera. 1-830-631-11 (External view) Signal Specifications VF side CAMERA side S-DATA IN/OUT TTL level No connection POWER OFF ON : OPEN OFF : GND TTL level COLOR/MONO...
1-3. Circuit Overview PR-292 board RE-237 board The PR-292 board consists of the video amplifier circuit, The voltage comparison circuit (IC2) supplies power to A/D conversion circuit, video processing circuit, clock each control IC (IC3, IC6, IC7) when the input voltage generation circuit, tally control circuit, and micro computer.
BOOT: 1.00 used. FPGA : 1.00 . The PLD internal data is managed on the Sony database server as a Project file (E_xxx_xxx_xx_xx). . The standard connector (EPR connector) for writing PLD internal data on the board is equipped. “EPR” is displayed on the board.
Page 12
Used equipment . PLD download tool (Sony part No. : J-7120-140-A) Cable to connect PC and the device . PC Computer with a parallel port. Computer with PLD Download Tool installed. For the supported OS and operating environment, refer to “Download Tool Operation Manual (Device Writing Volume)”.
In this case, a dedicated VF connection cable and the corresponding camera settings are needed. Contact your nearest SONY Office/Service Center for details. No setting change is required when connecting the device to the EXT I/O (20P) connector of HDC-F950.
1-7. Removal/Installation of Main Parts 1-7-1. Removing LCD Module When installing the dustproof cushions, install new dustproof cushions. Dustproof cushions (H), (V), conductive fabric tape Rear cover assembly 1. Remove the four screws and remove the rear cover assembly. B3 x 8 2.
Page 15
7. Remove the four screws and remove the LCD unit. Bezel assembly Standard tightening torque : 25 x 10 N.m (2.5 kg.cm) B2.6 x 5 LCD unit 8. Remove the two screws and remove the GND terminal Dustproof cushions (V) and the EMC cover in the direction of arrow.
1-7-2. Removing the LE-317 Board PR-292 board 1. Remove the rear cover assembly. Dowel for LE-317 board (Refer to Section 1-7-1 step 1.) LE-317 board 2. Remove the bezel assembly. (Refer to Section 1-7-1 steps 2 to 5.) 3. Remove the two screws and remove the LE-317 board from the board-to-board connector of the PR-292 board.
1-7-4. Removing the RE-237 Board PR-292 board 1. Remove the rear cover assembly. (Refer to Section 1-7-1 step 1.) 2. Remove the bezel assembly. (Refer to Section 1-7-1 steps 2 to 5.) RE-237 board 3. Remove the three screws and remove the RE-237 board.
1-7-6. Removing the LE-316 Board 1. Remove the rear cover assembly. LE-316 board (Refer to Section 1-7-1 step 1.) 2. Remove the bezel assembly. (Refer to Section 1-7-1 steps 2 to 5.) Protection panel 3. Remove the four screws. Raise the protection panel in the direction of arrow A, and remove the LED bracket LED bracket and the LE-316 board in the direction of arrow B.
1-7-7. Removing the SW-1298 Board BTP2.6 x 6 SW-1298 board, SW bracket 1. Remove the rear cover assembly. (Refer to Section 1-7-1 step 1.) 2. Remove the bezel assembly. (Refer to Section 1-7-1 steps 2 to 5.) 3. Remove the RE knob and the hexagon nut from the bezel assembly.
1-8. Extending the Circuit Board Fixture required: PR/RE extension assembly Life of flexible card wire will be significantly shortened if it is folded. Be very careful not to fold the flexible card wire. 1-8-1. Service Position Groove of the LCD bracket (L) 1.
Replace the components with Sony parts whose part (Caution: Some printed circuit boards may not come number appear in the manual published by Sony. If the printed with the lead free mark due to their particular size.) components are replaced by any parts other than the specified ones, this may cause a fire or electric shock.
Section 2 Setting Menu 2-1. Setting Menu Basic operations 1. Display the menu The setting menu is used for selecting and adjusting all of Press the MENU switch to display the OPERA- the parameters. TION menu. Setting menu configuration 2. Select the menu page With the “?”...
2-2. TOP Menu The TOP menu displays all of the menu items. Displaying the TOP Menu 1. Set the control knob on the front to the following settings. 1 CONTRAST knob : 99 (Turned fully clockwise) 2 BRIGHT knob : _99 (Turned fully counter- clockwise) 3 PEAKING knob : 100 (Turned fully clockwise)
Page 25
2-3. OPERATION Menu The OPERATION menu contains the setting items required when the camera operator is using the device. For more information, refer to the operation manual that comes with this device. 2-4. SERVICE Menu The SERVICE menu contains items required for maintaining the View Finder, such as electrical align- ment, HOURS METER, and self-diagnosis function.
Page 26
In this case, a dedicated VF connection cable and the corresponding camera settings are needed. Contact your nearest SONY Office/Service Center for details. No setting change is required when connecting the device to the EXT I/O (20P) connector of HDC-F950.
Page 27
Page Menu Items Setting Function DIAGNOSIS EEPROM Display only Indicates the self-diagnosis status for EEPROM (IC606) in the PR board : Normal ACCSS : Communication error DATA : Saved data error Display only Indicates the self-diagnosis status for the LCD panel : Normal ACCSS : Communication error CLOCK...
Menu Settings . HDVS camera HDC1500, HDW-F900R, or equivalent . AC adaptor Configure the following settings for the switch, control, Sony AC-DN10 or equivalent and menu settings for making adjustments in this section 3-1-3. Connection unless otherwise directed. HDVS camera...
3-2. Inverter Power Supply Voltage 3-4. Color Temperature Adjustment Adjustment 1. Follow steps (1) to (4) below to perform the ADJUST Adjust the INVERTER POWER so that the inverter power BIAS. supply voltage meets specifications. (1) Set the controls to the following settings. 1 BRIGHT knob : _99 (Turned fully Setting MENU...
3-5. Brightness Final Adjustment (3) Switch the ADJUST GAIN R/G/B and adjust them so that the color temperature in the center of the screen meets specifications. 1. Set the controls and menus to the following settings. 1 BRIGHT knob : 99 (Turned fully clockwise) 2 CONTRAST knob : 99 (Turned fully clockwise) During this adjustment, either R, G, or B should 3 MENU...
Therefore, specified parts should be used in the case of replacement. 2. Standardization of Parts Some repair parts supplied by Sony differ from those used for the unit. These are because of parts common- ality and improvement. Parts list has the present standardized repair parts.
Front and Main BTP2.6 x 6 BTP2.6 x 6 BTP2.6 x 6 BTP2.6 x 6 K4 x 8 PSW3 x 6 PSW3 x 6 PS2 x 5 PS2.5 x 5 Part No. SP Description Part No. SP Description A-1137-282-A s MOUNTED CIRCUIT BOARD, LE-315 3-364-941-01 s SCREW (+B) (2.6X5), NYLOK A-1137-283-A s MOUNTED CIRCUIT BOARD, LE-316 3-676-244-11 s COVER, SW...
Page 36
Tilt Table Block P2 x 3 PRECISION WAVE E3.0 WAVE SUPPLIED ACCESSORY P2 x 3 P2 x 3 PRECISION PRECISION B4 x 8 B4 x 8 HDVF-C950W...
Page 37
Tilt Table Block Part No. SP Description A-7612-405-D s SHOE ASSY, V EDGE X-2149-579-1 s SHAFT(L) ASSY, ARM LIFT X-2149-580-1 s PLATE ASSY, PIN X-2149-581-1 s SHAFT ASSY, PAN 1-964-354-11 s HARNESS, SUB (VF CONNECTION) 2-888-261-01 s LEVER,PAN LOCK 2-888-264-01 s SHAFT (L), TILT 2-888-265-01 s SHAFT (R), TILT 2-888-266-01 s COVER (L), ARM 2-888-269-01 s SHEET, PAN...
4-3. Electrical Parts List ------------ ------------ LE-315 BOARD LE-317 BOARD ------------ ------------ Ref. No. Ref. No. or Q’ty Part No. SP Description or Q’ty Part No. SP Description A-1137-282-A s MOUNTED CIRCUIT BOARD, LE-315 A-1137-284-A s MOUNTED CIRCUIT BOARD, LE-317 1-764-088-21 o PIN, CONNECTOR (PC BOARD) 3P 1-126-399-21 s CAP, CHIP ELECT 10MF (5X5.7) 1-126-399-21 s CAP, CHIP ELECT 10MF (5X5.7)
Page 39
------------ PR-292 BOARD (PR-292 BOARD) ------------ Ref. No. Ref. No. or Q’ty Part No. SP Description or Q’ty Part No. SP Description A-1211-827-A s MOUNTED CIRCUIT BOARD, PR-292 C214 1-112-777-11 s CAP, CERAMIC 0.01MF X7R 1005 6-706-771-01 s IC CY22395FZXC-T1 C216 1-164-840-81 s CAP, CHIP CERAMIC 1PF CK 1005 3pcs...
Page 40
(PR-292 BOARD) (PR-292 BOARD) Ref. No. Ref. No. or Q’ty Part No. SP Description or Q’ty Part No. SP Description C278 1-100-907-11 s CAP,CERAMIC 0.1MF X7R 1005 C367 1-112-691-11 s CAP, CERAMIC 22MF R 3225 C279 1-112-691-11 s CAP, CERAMIC 22MF R 3225 C368 1-100-907-11 s CAP,CERAMIC 0.1MF X7R 1005 C280...
Page 41
(PR-292 BOARD) (PR-292 BOARD) Ref. No. Ref. No. or Q’ty Part No. SP Description or Q’ty Part No. SP Description C452 1-100-907-11 s CAP,CERAMIC 0.1MF X7R 1005 C524 1-100-907-11 s CAP,CERAMIC 0.1MF X7R 1005 C453 1-100-907-11 s CAP,CERAMIC 0.1MF X7R 1005 C525 1-100-907-11 s CAP,CERAMIC 0.1MF X7R 1005 C454...
Page 42
(PR-292 BOARD) (PR-292 BOARD) Ref. No. Ref. No. or Q’ty Part No. SP Description or Q’ty Part No. SP Description C653 1-100-907-11 s CAP,CERAMIC 0.1MF X7R 1005 8-759-564-49 s IC TC7W53FU(TE12R) C700 1-107-420-21 s CAP, CHIP ELECT 47MF IC10 6-706-478-01 s IC TC7SET08FU(T5RSOJF) C701 1-107-420-21 s CAP, CHIP ELECT 47MF IC11...
Page 43
(PR-292 BOARD) (PR-292 BOARD) Ref. No. Ref. No. or Q’ty Part No. SP Description or Q’ty Part No. SP Description 1-416-344-21 s COIL, CHOKE 10UH 1-218-990-81 s CONDUCTOR, CHIP (1005) 1-414-394-41 s INDUCTOR (SMD) 2.2UH 1-208-887-81 s RES, CHIP 1.0K (1005) 1-414-394-41 s INDUCTOR (SMD) 2.2UH 1-208-887-81 s RES, CHIP 1.0K (1005) 1-416-344-21 s COIL, CHOKE 10UH...
Page 44
(PR-292 BOARD) (PR-292 BOARD) Ref. No. Ref. No. or Q’ty Part No. SP Description or Q’ty Part No. SP Description R114 1-218-990-81 s CONDUCTOR, CHIP (1005) R234 1-208-927-81 s RES, CHIP 47K (1005) R115 1-220-878-81 s RES, CHIP 22 (1005) R235 1-208-927-81 s RES, CHIP 47K (1005) R116...
Page 45
(PR-292 BOARD) (PR-292 BOARD) Ref. No. Ref. No. or Q’ty Part No. SP Description or Q’ty Part No. SP Description R295 1-208-887-81 s RES, CHIP 1.0K (1005) R404 1-208-887-81 s RES, CHIP 1.0K (1005) R296 1-208-887-81 s RES, CHIP 1.0K (1005) R405 1-208-855-81 s RES, CHIP 47 (1005) R297...
Page 46
(PR-292 BOARD) (PR-292 BOARD) Ref. No. Ref. No. or Q’ty Part No. SP Description or Q’ty Part No. SP Description R619 1-208-911-81 s RES, CHIP 10K (1005) R687 1-208-911-81 s RES, CHIP 10K (1005) R620 1-208-935-81 s RES, CHIP 100K (1005) R700 1-208-911-81 s RES, CHIP 10K (1005) R621...
Page 47
------------ (PR-292 BOARD) RE-237 BOARD ------------ Ref. No. Ref. No. or Q’ty Part No. SP Description or Q’ty Part No. SP Description RB504 1-234-371-21 s RES, NETWORK 47 (1005X4) A-1211-828-A s MOUNTED CIRCUIT BOARD, RE-237 RB505 1-234-371-21 s RES, NETWORK 47 (1005X4) RB506 1-234-371-21 s RES, NETWORK 47 (1005X4) 1-100-566-91 s CAP, CHIP CERAMIC 0.1MF B 1608...
Page 48
(RE-237 BOARD) (RE-237 BOARD) Ref. No. Ref. No. or Q’ty Part No. SP Description or Q’ty Part No. SP Description 1-100-566-91 s CAP, CHIP CERAMIC 0.1MF B 1608 1-419-524-21 s COIL, CHOKE 1-100-566-91 s CAP, CHIP CERAMIC 0.1MF B 1608 1-456-622-21 s COIL, CHOKE 1UH 1-100-390-21 s CAP, ELECT 180MF (6.3X6) 1-456-622-21 s COIL, CHOKE 1UH...
Page 49
(RE-237 BOARD) (RE-237 BOARD) Ref. No. Ref. No. or Q’ty Part No. SP Description or Q’ty Part No. SP Description 1-208-903-81 s RES, CHIP 4.7K (1005) 1-208-899-81 s RES, CHIP 3.3K (1005) 1-208-907-81 s RES, CHIP 6.8K (1005) 1-208-883-81 s RES, CHIP 680 (1005) 1-208-863-81 s RES, CHIP 100 (1005) 1-208-903-81 s RES, CHIP 4.7K (1005) 1-208-863-81 s RES, CHIP 100 (1005)
Page 50
------------- (RE-237 BOARD) SW-1298 BOARD ------------- Ref. No. Ref. No. or Q’ty Part No. SP Description or Q’ty Part No. SP Description R143 1-208-903-81 s RES, CHIP 4.7K (1005) A-1137-286-A s MOUNTED CIRCUIT BOARD, SW-1298 R144 1-208-927-81 s RES, CHIP 47K (1005) R145 1-208-931-81 s RES, CHIP 68K (1005) 1-100-907-11 s CAP,CERAMIC 0.1MF X7R 1005...
4-4. Packing Materials & Supplied Accessories Ref. No. or Q’ty Part No. SP Description 15pcs 1-566-360-21 s TERMINAL, SOLDERLESS (M) 1-830-631-11 s CORD,CONNECTION (VF) 2-236-956-02 s SCREW, STEP 2-697-741-01 s MANUAL, OPERATION 6pcs 3-080-203-41 s SREW(M2),LOCK ACE,P2 2pcs 3-167-513-01 o KNOB, RELEASE LEVER 3-546-614-01 s SPRING, COMPRESSION 3-701-440-21 s WASHER, 3.5 3-992-443-01 s SPRING,COMPRESSION...
Page 53
In addition, for semiconductors with ID Nos., refer to the separate CD-ROM titled “Semiconductor Pin Assignments” (Sony Part No. 9-968-546-xx) that allows searching for parts by semiconductor type or ID No. The semiconductors in the manual or on the CD-ROM are listed by equivalent types.
Page 79
The material contained in this manual consists of information that is the property of Sony Corporation. Sony Corporation expressly prohibits the duplication of any portion of this manual or the use thereof for any purpose other than the operation or maintenance of the equipment described in this manual without the express written permission of Sony Corporation.
Overall 4-2. Exploded Views VFH-990 SUPPLIED ACCESSORY B3 x 8 Part No. SP Description X-2149-576-1 s HOOD ASSY, INDOOR X-2149-578-1 s COVER ASSY, REAR 1-802-297-11 s MODULE, LCD 2-888-461-01 s SCREW, BINDING 2-888-472-01 s CUSHION (H), DUST PROTECTION 2-888-473-01 s CUSHION (V), DUST PROTECTION 2-888-490-01 s COVER, TILT SHAFT 3-364-941-01 s SCREW (+B) (2.6X5), NYLOK...
Page 82
Front and Main BTP2.6 x 6 BTP2.6 x 6 BTP2.6 x 6 BTP2.6 x 6 K4 x 8 PSW3 x 6 PSW3 x 6 PS2 x 5 PS2.5 x 5 Part No. SP Description Part No. SP Description A-1137-282-A s MOUNTED CIRCUIT BOARD, LE-315 3-364-941-01 s SCREW (+B) (2.6X5), NYLOK A-1137-283-A s MOUNTED CIRCUIT BOARD, LE-316 3-676-244-11 s COVER, SW...
Page 83
Tilt Table Block P2 x 3 PRECISION WAVE E3.0 WAVE SUPPLIED ACCESSORY P2 x 3 P2 x 3 PRECISION PRECISION B4 x 8 B4 x 8 HDVF-C950W...
Page 84
Tilt Table Block Part No. SP Description A-7612-405-D s SHOE ASSY, V EDGE X-2149-579-1 s SHAFT(L) ASSY, ARM LIFT X-2149-580-1 s PLATE ASSY, PIN X-2149-581-1 s SHAFT ASSY, PAN 1-964-354-11 s HARNESS, SUB (VF CONNECTION) 2-888-261-01 s LEVER,PAN LOCK 2-888-264-01 s SHAFT (L), TILT 2-888-265-01 s SHAFT (R), TILT 2-888-266-01 s COVER (L), ARM 2-888-269-01 s SHEET, PAN...
Need help?
Do you have a question about the VFH-990 and is the answer not in the manual?
Questions and answers