Table of Contents
Advertisement
Advertisement
Table of Contents

Related Manuals for Stabila LAR 300


Summary of Contents for Stabila LAR 300
- Page 1 Operating instructions...
-
Page 2: Table Of Contents
Contents Section Page • 1. Intended use • 2. Safety instructions for laser units • 3. Before first commissioning • 4. Components of the unit • 5. Battery insertion/replacement • 6. Commissioning • 7. Tilt function • 8.1 Automatic operation with tilt function •... -
Page 3: Intended Use
The STABILA LAR 300 rotation laser is an easy-to-use rotation laser for horizontal levelling and establishing plumb lines. The LAR 300 has a sealed enclosure (IP 65) for use on build- ing sites. It is self-levelling within a range of ± 5°. -
Page 4: Safety Instructions For Laser Units
Do not look into the direct or reflected beam. The STABILA laser goggles available for our laser units are not safety eyewear: their function is to improve the visibility of the laser beam. -
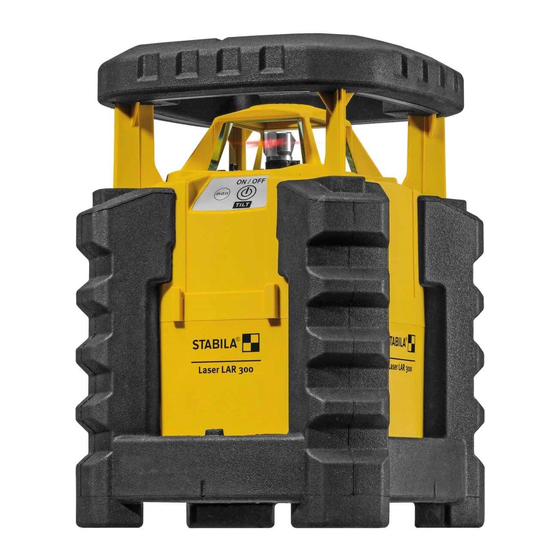
Page 5: Components Of The Unit
4. Components of the unit 1. Exit window Point laser/laser beam 2. Exit window Rotation beam 3. Button: ON/OFF/TILT 4. Button: Manual mode ON/OFF 5. White LED: Tilt function 6. Yellow LED: Battery low 7. Red LED: Overtemperature 8. Blue LED: Laser x-axis/display TILT + Manual 9. -
Page 6: Battery Insertion/Replacement
5. Battery insertion/replacement Open thebattery compartment lid (10) in the direction of the arrow and insert new batteries in the battery compartment as indicated by the symbol. Suitable rechargeable batteries can also be used. LED indicator: Yellow LED (6): Battery capacity low - Insert new battery Used batteries should be disposed of at 2x 1.5 V... -
Page 7: Commissioning
6. Commissioning Place the laser unit in the working position. To switch on the laser, press button (3). Holding this button for a longer period will switch the laser off again. Activating the self-levelling function causes the unit to level itself automatically. -
Page 8: Tilt Function
7. Tilt function The tilt function warns if any interference to the laser has occurred that may cause misalignment. This ensures that such interference does not go unnoticed. The white LED (5) lights up steadily when the tilt function is active. -
Page 9: Automatic Operation With Tilt Function
In “Automatic” operation, the laser unit levels itself automatically. Place the laser unit in the working position. To switch on, press button (3) once. The LAR 300 is in now in “Automatic operation with tilt function”. The automatic levelling process begins. Once levellin is complete, the beam stays on constantly and begins to rotate. -
Page 10: Automatic Operation With Relevelling
8.2 Automatic operation with relevelling In some working conditions (where shocks or vibrations affecting the surface occur, for example), the tilt function is disruptive. With automatic relevelling, on the other hand, the unit is readjusted each time it is knocked out of alignment. Press button (3) twice = once to switch on + once to deacti- vate the tilt function. -
Page 11: Manual Operation With Tilt Function
9.1 Manual operation with tilt function In manual operation, the laser plane is aligned by hand. Neither self-levelling nor relevelling is active. The unit does not level itself. If the tilt function is active, interference (shocks, vibrations) that could misalign the unit from its exact original setting do not go unnoticed. -
Page 12: Manual Operation Without Tilt Function
9.2 Manual operation without tilt function In manual operation without tilt function, automatic mode, the tilt function and relevelling are not active. The laser unit is aligned entirely by hand. The unit does not level itself. Place the laser unit in the working position. Press button (3) twice = once to switch on + once to deactivate tilt function. -
Page 13: Functions
10. Functions Rotation function The laser beam rotates through 360° around its axis. Horizontal Plumb-line function Transfers a determined point from the floor to the ceiling. To transfer a plumb line from a floor marking to the ceiling, the laser unit is aligned exactly with the cross mark with the 4 marking points (14). -
Page 14: Led Indicators
11. LED indicators LED lights up steadily Operation with tilt function --> “Tilt function” 30 seconds fine adjustment --> “Commissioning”, “Tilt function” LED flashes Operation without tilt function --> “Automatic operation with relevelling” --> “Manual operation” LED flashes quickly Battery capacity low -->... -
Page 15: Checking Accuracy
Be sure to adhere as closely as possible to the orientation of the unit as shown. 1. Place the LAR 300 on a horizontal surface or on a tripod at a distance of 5 or 10 m (25 or 50 ft) from a wall, with the operator panel towards the wall. -
Page 16: Technical Data
13. Technical data Laser type: Red diode laser, wavelength 635 nm Power output: < 1 mW, laser class 2 in accordance with IEC 60825-1:2014 This product compl. with the appl. requ. of 21CFR, parts 1040.10 and 1040.11. Self-levelling range: approx. ± 5° Levelling accuracy*: ±... - Page 17 Europe Middle and South America Australia Asia Canada Africa STABILA Messgeräte STABILA Inc. Gustav Ullrich GmbH P.O. Box 13 40 / D-76851 Annweiler 332 Industrial Drive Landauer Str. 45 / D-76855 Annweiler South Elgin, IL 60177 + 49 63 46 309 - 0 800-869-7460 info@de.stabila.com...
Need help?
Do you have a question about the LAR 300 and is the answer not in the manual?
Questions and answers