Table of Contents
Advertisement
Quick Links
Advertisement
Table of Contents

Related Manuals for BioCare Medical intelliPATH FLX


Summary of Contents for BioCare Medical intelliPATH FLX
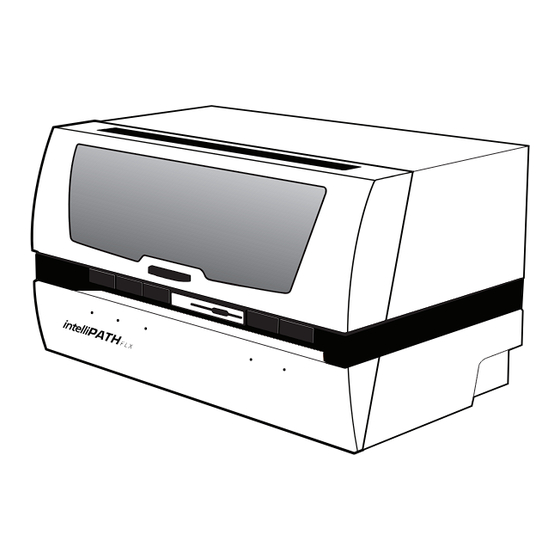
- Page 1 intelliPATH Manual ™ Automated Slide Stainer www.biocare.net...
- Page 2 Biocare Medical EMERGO EUROPE Prinsessegracht 20 Technical Support: 2514 AP The Hague 800-799-9499 Option 3 The Netherlands Customer Service: 800-799-9499 Fax: 925-603-8080 Corporate Office: 60 Berry Drive Pacheco CA 94553 www.biocare.net...
-
Page 3: Table Of Contents
Table of Contents Introduction ��������������������������������������������������������������������������������������������������������������������������������������������������������������������������� 1 Intended Use ................................1 About the intelliPATH ..............................1 Instrument Specifications ............................. 1 Instrument Components ............................... 2 Storage and Handling ..............................5 Waste Disposal ................................5 Instrument Disposal ..............................5 Installation Site Requirements ............................5 Environmental Conditions ............................. -
Page 4: Introduction
Warranty is not transferable to any other party should the equipment be resold or transferred by the customer to another party. To the extent permitted by law, Biocare Medical disclaims any liability for any incidental or consequential damages related to this equipment or for any warranty related services it performs. -
Page 5: Instrument Components
Instrument Components Mixing Vials System Door Wash Station Cold Spot Reagent Vials Z-Head Carboy Tubing Connections Slide Racks LED Indicators Power Switch Z-head Components 2D Matrix Scanner Reagent Probe Liquid Level Sensor Wash Nozzle Air Nozzle... - Page 6 Carboy Tubing Connections Fluid Level Buffer 2 Buffer 1 Sensors Overflow Waste Hazardous Deionized Waste Water Carboy Tubing Connector Fluid Level Sensor Connector Carboy Level Sensor Hub Carboy Connections DI Water (yellow) Hazardous Waste (black) Buffer 1 (blue) Buffer 2 (white) Waste (green)
- Page 7 Description of Parts Parts Description Slide racks The intelliPATH automated slide stainer includes five removable slide racks, each with a 10 slide capacity. They secure the slides firmly in a horizontal position at all times during the staining run. The slide racks can be removed from the instrument for loading slides, and then reinserted.
-
Page 8: Storage And Handling
State and Federal regulations. Installation Site Requirements Performance checks are conducted by the manufacturer prior to shipping. Biocare Medical field service personnel will unpack, or supervise the unpacking of the intelliPATH. Biocare field service personnel will verify the system performance to determine any deficiencies in operation as a result of shipping. -
Page 9: Environmental Conditions
The intelliPATH requires CLSI Type II water or equivalent (referred to as deionized water). Support To contact Biocare Medical Technical Support by telephone, please call 1-800-799-9499, Option 3. You may also email Technical Support at techsupport@biocare.net or submit a message online at www.biocare.net... -
Page 10: Safety Precations
Safety Precations The intelliPATH is designed for use with formalin-fixed tissue samples or non-infectious cell smears. Fresh (unfixed) tissue or cell smears may contain infectious organisms. Use only tissue sections or cell smears that have been fixed in a biocidal/virocidal/fungicidal fixative. Infectious sample use is limited to tissues/specimens that are specified on Biocare’s product datasheets. -
Page 11: Warning Symbols
Warning Symbols The following symbols may appear on the instrument label: Warning. Biohazardous materials may be present. Personal Protection is required CE marking Manufacturer Serial number Consult instructions for use (consult operating instruction) Electrical Earth Ground Main Power (ON/OFF) -
Page 12: Software Features & Functions
Software Features & Functions This chapter is intended to familiarize you with key software features, providing details of all operation Modules available to Administrative and Regular Users. User access There are two levels of access for users of the intelliPATH software: regular user and administrator. Users with Administrator privileges have access to all the screens available to regular users, but have some additional privileges. -
Page 13: Module Descriptions
Module Descriptions Module Description User Admin Stainer Application Program and run staining protocols. Manage cases, slide staining protocols, and slide stainer operations. Access Reagent Manager, Protocol Manager, Reagent Inventory, and User Manager. User Manager Create new user accounts and modify existing accounts. Reagent Manager Create new/modify existing reagents/steps. - Page 14 View Menu The View menu allows access to Display Error List, Run Time Estimates, and System View. LIS Menu (Contact Biocare Medical for LIS feature availability) The LIS menu includes Setup LIS Fields and Set LIS Folder. Help Menu The Help menu allows the user to view the product name, build and software version.
- Page 15 Stainer Tab The Stainer tab indicates the name of the instrument. When more than one instrument is connected to a computer, multiple tabs will appear. The red hexagon indicates an idle stainer (Figure A), the green arrows (Figure B) designate a stainer in process, and the green check (Figure C) indicates a completed staining run.
- Page 16 Operation Log The Operation Log documents the instrument name, serial number, software version, run name/number and operation mode. The Operation Log also displays all the operations performed by the instrument. As an operation is performed, the log is updated. Welcome Menu The Welcome menu displays the selected mode of operation: Open Mode Programming involves staining slides without labeling the slides or reagents.
-
Page 17: User Manager Module
User Manager Module This module is used to create new user accounts and to modify (edit or delete) existing accounts. Use the buttons at the bottom left side of the screen to add, delete, or edit users. User ID This must be unique. The system does not require a specific naming convention. The naming convention is at the discretion of the end user. -
Page 18: Reagent Manager Module
Reagent Manager Module The Reagent Manager module is used to create new or to modify existing reagents. Reagents set by Biocare Medical cannot be edited or modified by the end user. Reagent Groups, listed on the left side of the screen, are standard headings for IHC staining protocols. The following Reagent Groups are available in the intelliPATH software: Pre-Treatment, Block, Antibody, Negative Serum, Secondary, Tertiary, Chromogen, Counter Stain, Ancillary, and Mix. -
Page 19: Reagent Groups
Reagent Groups Pre-Treatment Group The Pre-Treatment reagent group includes enzymes and heat-induced epitope retrieval (HIER) solutions. This screen will allow the addition, modification, and deletion of pretreatment reagents. To add, delete, or modify a Pre-Treatment group, a Sub Group (Antigen Retrieval or Enzyme) must first be selected. - Page 20 Negative Serum Group The Negative Serum reagent group is utilized to assign negative controls associated with antibodies. This screen will allow the addition, modification, and deletion of negative control reagents. When a negative control is ordered for a particular antibody, a duplicate protocol will be assigned to the case utilizing the negative serum linked to the antibody.
- Page 21 Mixing Properties Specifies whether the mixing is performed Online (by the instrument during a run) or Offline (manually). Once Type is set to Mix, the Mixing Components link will be available in the top right corner of the Reagent Details box. Use the Mixing Components screen to designate the volume (in μl) of chromogen buffer and the volume (in μl) of chromogen substrate.
- Page 22 Ancillary Group The Ancillary reagent group includes all ancillary reagents not included in any other Reagent Group options. This screen will allow the addition, modification, and deletion of ancillary reagents. The option for mixing ancillary reagents is available in this group. Mix Group The Mix group is used to designate components of chromogens, enzymes, and ancillary reagents which will be used by the intelliPATH to perform on-board mixing of these reagents.
-
Page 23: Protocol Manager Module
Protocol Manager Module Use the Protocol Manger module to save, design, and manage protocols and detection templates. You can filter the list of protocols by Templates or Custom Groups. The filter will determine the subsequent links available on the screen: •... -
Page 24: System Setup Module
System Setup Module This module allows the Administrative user to set preference and default parameters. The system software settings can either be entered manually or be accessible from drop-down menus. The menu items are categorized , but they may also be alphabetized in ascending order. -
Page 25: System Parameters
System Parameters Reagent Calculation Set option to for software to calculate reagent volumes for loaded slides or checked slides. System View Displayed: Select False or True. Buffer Type Buffer or DI water selected for application at the end of the run. Buffer Interval Time in minutes between application of designated buffer or DI water at the end of a run. -
Page 26: Generate Reports Module
Generate Reports Module To generate a report highlight the desired report, then click on Generate Report. Report Types Description User Login Information States the user activities, including user ID and Login Date/Time. Reagent Usage Provides the total volume of all the reagents used for the various runs. Reagent Usage (by Catalog) Lists the total volume of reagent usage by catalog number for all runs. -
Page 27: System Cleanup Module
System Cleanup Module The System Cleaning module provides instructions for performing the instrument cleaning protocol. It is recommended that the instrument be cleaned after every 250 stained slides once a week. During the cleaning protocol, do not allow the Buffer and Water intake filters to touch unclean surfaces. 1. -
Page 28: Reagent Inventory Manager Module
Reagent Inventory Manager Module The Reagent Inventory Manager allows the user to enter and track reagent Lot, Expiration, Starting Volume, Current Volume, and Serial number to be used on the instrument. 1. From top of the window, select the reagent category of choice from Reagent drop- down menu. 2. -
Page 29: Administrative Program Preparation & Setup
Administrative Program Preparation & Setup Administrative users can follow the detailed steps in this chapter to incorporate or change users, passwords, reagents, and protocols on the instrument. Assign or modify users Only Administrative users can assign or modify user accounts. Regular Users can modify their own passwords. 1. -
Page 30: Modify Passwords
Modify a user account 4. To modify an account or password, select the appropriate account and press Delete or Edit button at the bottom left side of the screen. Modify passwords Users may change their password through the User Preference link. 1. -
Page 31: Assign Or Modify Reagents
Assign or modify reagents Only Administrative users can assign or modify Reagents in the Reagents Manager. Example Setup To better illustrate how to setup and perform a run, an example scenario is provided. You may use this tool as a quick-start procedure to familiarize yourself with the workflow process. - Page 32 2b. Block Group • Select Block from Reagent Group at the left side of the screen. • Select Peroxidazed 1 as your blocking reagent. • To add Peroxidazed 1, click the Add button. Enter the appropriate information in the Reagent Details section.
- Page 33 2d. Negative Serum Group • Select Negative Serum from Reagent Group at the left side of the screen. • Select the appropriate negative serum reagent. • To add a new negative serum, click the Add button. Enter the appropriate information in the Reagent Details section.
- Page 34 2g. Chromogen Group • Select Chromogen from Reagent Group at the left side of the screen. • Select iP Warp Red as your chromogen. • To add a new chromogen, click the Add button. • Enter the appropriate information in the Reagent Details section. Press Save. 2h.
-
Page 35: Assign Or Modify Protocols
Assign or modify protocol Only Administrative users can assign or modify Protocols in Protocol Manager. Example Setup To better illustrate how to setup and perform a run, an example scenario is provided. You may use this tool as a quick-start procedure to familiarize yourself with the workflow process. See product datasheet for protocol details. •... - Page 36 2b. From the Template Manager screen, add a new template by clicking the Add button. 2c. In the Create a New Template screen, enter your template name. Select From Existing Template (alternatively, you may create a blank template). Click Create to continue. 2d.
- Page 37 Adding the New Protocol to a Template 1. To link the new protocol to a template, select the template of choice from Templates in the Filter by drop-down menu, then click the Add button. 2. Enter the Protocol Name and click Create. 3.
- Page 38 Creating Custom Groups Filtering the Protocol List by Custom Groups provides access to the Group Manager link. The creation of Custom Groups allows the laboratory to create groups of Protocols utilized by the laboratory rather than having to scroll through the list of All Protocols.
- Page 39 4. To add protocols to a custom group, select the Group name on the left side of the Manage Protocol Groups screen. Click on the Add Protocols link. 5. The Filter By drop down menu, in the Select Protocol screen, allows selection of Protocols by Custom Groups or All Protocols.
-
Page 40: Before Starting A Run
Before Starting a Run This chapter contains general guidelines for preparing samples and the intelliPATH prior to starting your run. Tissue and Slide Preparation Deparaffinize tissue sections and wash in DI water. If applicable, ensure that the slides have been through the appropriate retrieval process. Hydrate in DI water and solvate in buffer prior to loading on the intelliPATH. -
Page 41: Prepare And Start A Run
Prepare and Start a Run Assuming that all the necessary reagents and protocols have already been entered in the instrument software by the Administrative user, Regular users can use chapter as guide to setup and begin their staining run. Important: Before starting this chapter, be sure to follow the instrument preparation section in Chapter 5. Specifically, ensure to turn on the instrument before logging into the intelliPATH software, otherwise, software will automatically open in demo mode, not allowing an actual run to start. -
Page 42: Select Stainer Application Module
Select Stainer Application Module 2. From the Module Selection Menu, select the Stainer Application Module. Press Execute to proceed. Select an Operation Mode 3. From Welcome to intelliPATH, select an Operation Mode (Open, 2D Matrix, Mixed, LIS). Open Mode Programming involves staining slides without labeling the slides or reagents. The software generates a Slide Layout Map, and a Reagent Layout Map for the user to follow. -
Page 43: Start Programming
Start Programming 4. Press Start Programming to continue. Prepare Cases 5. Prepare Case List (where Welcome to IntelliPATH was previously located) by selecting either of the links (Add a New Case, Import from Pending List, Import from Saved Lists, or Import from Recent Batches). 6. -
Page 44: Select Protocols
Select Protocols 8. On the upper left side of the Select Protocols window, select protocol filter from Filter By drop-down menu. Filter protocols by Custom Groups or All Protocols. 9. Highlight the protocol(s) on the left side of the screen. Click on the Add Protocols on the screen’s lower left side. - Page 45 12. In the window below, you have the option to Add a New Case (see button on lower left side of the screen). Otherwise, press Save & Close to proceed.
-
Page 46: Preview & Print Labels
Preview & Print Labels 13. From the bottom of the Prepare Case List window, preview the slide labels by first pressing the Preview button, followed by selecting Slide Labels at the bottom of the screen. 14. Preview the slide labels on the right side of the screen. To print the slide labels, click on Print Labels at the bottom right side of the screen. -
Page 47: Load & Map Slides
Load & Map Slides 15. Place labels on the slides and physically load the slides onto the instrument, after slides have been deparaffinized and retrieved if necessary. Alternatively, slides may be labeled prior to deparaffinization and retrieval. 16. Click on Load Slides. 16a. -
Page 48: Load & Map Reagents
Load & Map Reagents 17. From the bottom of the Prepare Case List window, click on Prepare Reagents. 18. Select the appropriate reagents or check the Select All to select all reagents to print reagent labels if needed. Click on Load Reagents in the bottom right side of the screen to load reagents. 18a. - Page 49 19. Click Next. 20. Verify Reagent levels by first checking the Reagent and Mixing vials are loaded as specified checkbox. Click on Verify Reagents. Upon reagent volume verification, press Proceed.
-
Page 50: Pre-Start Checklist
Pre-Start Checklist 21. Use the Pre-Start Checklist to verify that the required buffer carboys have been filled, hazardous and non- hazardous carboys have been emptied. Check all the carboy status categories in the Waste Carboy Status upon confirmation. 22. The Delayed Run checkbox on the top right side of the PreStart Checklist window allows the user to set a delayed start time for the run. - Page 51 Batch The Batch button allows the user to start a non-STAT run while the current run is in process. 1. Click on the Batch button on the top right corner of the intelliPATH Staining System window. 2. A dialog box appears, asking whether you want to “Do you want to Add more Slides?” Select Yes to proceed. 3.
-
Page 52: System Cleaning
System Cleaning When the intelliPATH software notifies operator that cleaning is necessary, follow on-screen instructions. This cleaning cycle should be performed at a minimum of once per week if the user has not reached the maximum slide count allowed. Daily •... -
Page 53: Troubleshooting
Troubleshooting Occasionally, you may encounter problems while obtaining stain results or performing associated procedures. This chapter describes the most commonly reported problems, and identifies the possible causes and solutions. If a problem persists, contact Technical Support immediately at 1-800-799-9499 Option 3. Provide details, such as the number of occurrences and associated conditions, and the condition and appearance of the slides. - Page 54 Fluid Handling Problem Possible Causes & Solutions Drops form on probe Multiple causes, call Technical Support with details on where drops appear on probe: When probe is moved from wash station to reagent vials? When moved from wash station to slide for rinse step? When moved from reagent vial to slides? When moved from slide to slide? Buffer not operating at...
- Page 55 Fluid Handling (continued) Problem Possible Causes & Solutions Reagent dosage uneven Cause: Buffer does not have the proper concentration of Tween-20. across slides Resolution: Adjust the buffer formula and prime the buffer pump. Repeat run. Cause: Air bubbles in the clear plastic tubing from reagent probe. Resolution: Call Technical Support for instructions on how to remove bubbles.
- Page 56 Mechanical Problem Possible Causes & Solutions Bent pipette Cause: Caps on vials were not removed. Z-head encountered an obstruction. Software will not proceed with caps on vials. Reads the volumes as zero. Resolution: Replace probe. Cause: Stainer out of calibration. Resolution: Contact technical support.
- Page 58 800.799.9499 60 Berry Drive Pacheco CA 94553 www.biocare.net 904-002-071817...
Need help?
Do you have a question about the intelliPATH FLX and is the answer not in the manual?
Questions and answers