Advertisement
Advertisement

Related Manuals for Signode PRHM-34


Summary of Contents for Signode PRHM-34
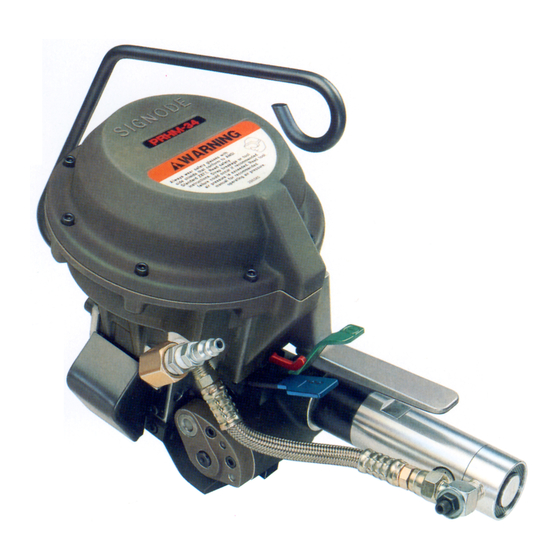
- Page 1 PRHM-34 PUSH TYPE POWER COMBINATION STRAPPING TOOL...
- Page 2 TRAINING This tool must not be used by persons not properly trained in its use. Be certain that you receive proper training from your employer. If you have any questions contact your Signode Representative. EYE INJURY HAZARD Failure to wear safety glasses with side shields can result in serious eye injury or blindness.
- Page 3 READ THESE INSTRUCTIONS CAREFULLY. FAILURE TO FOLLOW THESE INSTRUCTIONS CAN RESULT IN SERIOUS PERSONAL INJURY. Use correct Signode products for your application. If you need help contact your Signode Representative. Signode tools and machines are designed and warranted to work together with Signode strapping and seals.
-
Page 4: Table Of Contents
Major Components Signode tools and machines are designed and warranted to work together with Recommended Air Line Piping Signode strapping and seals. Use of non- Signode strap and seals and/or Maintenance manufactured or specified replacement parts may result in strap breakage or joint... -
Page 5: Major Components
MAJOR TOOL COMPONENTS... - Page 6 Exceeding the maximum allowable air pressure could result in serious personal injury. A filter-regulator-lubricator unit (Signode Part No. 173111) must be installed as close to the air tool as possible, preferably within 10 feet (3M).
- Page 7 95% or more of water right at the compressor. The remaining moisture is removed at the water leg in the piping system or in the filter, Signode Part No. 173111. Additional information is available in the Signode publication, "Air Supply Manual" p. 25, E-186038. If you have any questions, contact your local Signode Representative.
- Page 8 An air line dryer adjacent to the compressor. b. Use lubricant recommended by Signode. Signode has tested the use of anti-freezes, none work well in air tools; the tool will gum up when anti-freezes are introduced and will not function properly.
-
Page 9: Set-Up For Tool Operation
SET-UP FOR TOOL OPERATION OPERATION POSITIONS STRAP TENSION To work effectively, the PRHM-34 must be The PRHM-34 has been factory adjusted to properly oriented to the package. This draw at least 1400 lbs. (6230N) of tension at installation includes, in some cases, proper 90 psig (6.2 bar). -
Page 10: Operating Instructions
Hold the BOTTOM STRAP and pull back on the TOP STRAP to draw the loop loosely around the package. A gentle upward bend on the TOP STRAP will hold the loop in place while the PRHM-34 tool is being positioned. - Page 11 2. POSITIONING THE TOOL Squeeze the handle and the air motor together to create an opening between the feedwheel and the tensioner foot. Grasp the TOP STRAP and insert it sideways into the tool between the feedwheel and the tensioner foot. Make sure the strap end is in contact with the inside surface of the tensioner foot.
- Page 12 OPERATING INSTRUCTIONS, Continued 4. TENSIONING THE STRAP While standing to one side of the strap, press the tension lever (Green lever) all the way down. The catch link will then engage the tension lever holding it in the down position. The strap will tension around the package until the proper tension level has been reached, at which time the air motor will...
- Page 13 6. TOOL REMOVAL & JOINT INSPECTION Squeeze the handle and the air motor together to release the cut off strap end. Lift the PRHM-34 tool from the tie and closely inspect the joint to make sure the tool has properly notched the seal. Refer...
- Page 14 PART REMOVAL, REPLACEMENT & TOOL ADJUSTMENTS The following procedure fully describes the disassembly of the PRHM-34. The instructions can be reversed to assemble the tool. Please note that areas of the tool which require specific adjustments for reassembly will be explained as well.
- Page 15 PART REMOVAL, REPLACEMENT & TOOL ADJUSTMENTS, Continued STEP 5 - SEALER MECHANISM (For additional part information see pages 22, 23, 24, 25) 1. With the hanger and guard assembly removed from the tool, turn the tool upright and remove the eight cap screws (19) and washers (98) from the cover (9). Remove the cover and note the position of the diaphragm (17) with the number "20"...
-
Page 16: Troubleshooting
#7 SYMPTOM: Seal slipping into nose of tool. #1 SYMPTOM: INADEQUATE STRAP TENSION CAUSE REMEDY Improper strap being used. Check that Signode lubricated strap is used. Incorrect tool operating pressure. Check that air pressure is set between 70-90 psig (4.8-6.2 bar). - Page 17 #3 SYMPTOM: SEALING AND CUT-OFF IS INCOMPLETE CAUSE REMEDY Improper seals being used. Check that the proper Signode seals are being used (See page 4 of this manual). Incorrect tool operation pressure or A minimum of 70 psig (4.8 bar) is tension regulator set too low.
- Page 18 #6 SYMPTOM: LOWER STRAP SLIPPING THROUGH SEAL AND SEAL BUCKLES CAUSE REMEDY Improper seals being used. Check that the proper Signode seals are being used (See page 4 of this manual). Incorrect tool operating pressure or Decrease tension by adjusting tension regulator set too high.
-
Page 19: Declaration Of Conformity
It is hereby declared that the undermentioned machinery has been designed and constructed to comply with the health and safety requirements defined in EC Directive 89/292/EEC Machine Supplier: Signode, Division of ITW Ltd. Queensway, Fforestfach Swansea SA5 4ED Machine Description:... - Page 20 Glenview, Illinois plant, any tool which proves to not operate per functional specifications within the stated period. Signode reserves the right to replace any tool which proves not to operate per functional specifications with a new or like-new tool of the same model if in Signode's judgement such replacement is appropriate.
Need help?
Do you have a question about the PRHM-34 and is the answer not in the manual?
Questions and answers