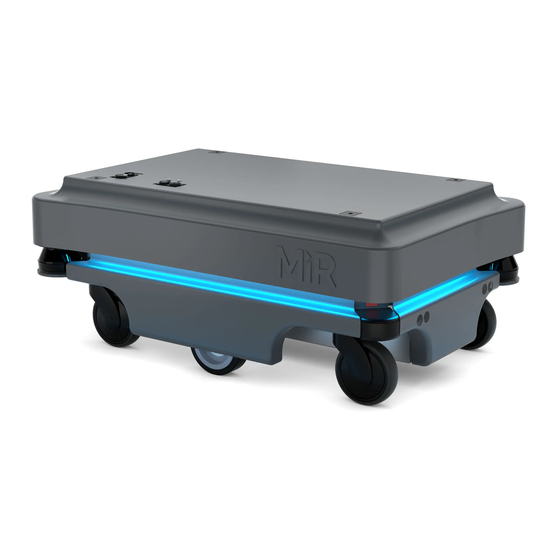
MIR 200 Quick Start Manual
With mir web interface 1.0
Hide thumbs
Also See for 200:
- User manual (173 pages) ,
- Operating manual (45 pages) ,
- Quick start manual (35 pages)
Table of Contents
Advertisement
Quick Links
Download this manual
See also:
User Manual
Advertisement
Table of Contents

Summary of Contents for MIR 200
- Page 1 October 2017 v.1.02017 v.1.2 with MiR Web Interface 1.0 Quick Start October 2017 v.1.3...
-
Page 3: About This Quick Start
1. The robot 2. Emergency stop box and external antenna 3. Charging cable MiR folder containing: • Printed documents: Quick start, CE declaration of conformity, mounting instructions for emergency stop • USB flash drive: Getting started video, MiR200™ User guide, CE declaration of conformity, other manuals. -
Page 4: Unpacking The Mir200
Unpacking the MiR200™ Unpacking the MiR200™ Step Action Remove pallet lid and take out folder with printed documents, USB flash and ESD kit. Remove the top foam, foam blocks on the sides and the pallet frames. Place the pallet cover as a ramp at the robot’s rear end. Keep the packaging for any future transportation of the robot. - Page 5 Unpacking the MiR200™ Step Action Grab the two rounded corners and carefully lift off the cover. Remove charging cable, emergency stop box and antenna from inside the robot. Emergency stop cable and antenna are stripped together. • • • MiR200™ Quick Start, Web Interface 1.0, October 2017 v. 1.3 •...
- Page 6 Powering up Powering up Step Action Connect the battery cable to the plug on top of Switch on the four relays placed in the corner by the the battery box. front laser scanner. Start with 32A main power, i.e. from the outer frame in. Before putting the cover back on, connect the two ESD cables that are attached to the robot frame, next to the loudspeaker, and inside the...
- Page 7 See also emergency stop mounting instruction in the enclosed MiR folder. If a top module is going to be mounted on top of the robot, the emergency stop must be placed in a position where it is easy to reach. See MiR200 User Guide.
- Page 8 Powering up Step Action Turn on the power switch. Press the reset button on the emergency stop when it has lit up. The robot lights up with a yellow running light for a short moment, then enters emergency The robot light now switches to yellow constant stop mode indicated by a constant red light.
-
Page 9: Getting Connected
On a PC or tablet, go to the WiFi menu, find the name of your robot and connect to it. Open a browser and go to mir.com. Press login in the upper right corner and enter the user name “Admin” and password “mir4you”. -
Page 10: Charging The Robot
Charging the robot Charging the robot The robot arrives with a charged battery and can drive for up to three hours before recharging is required. Step Action Turn off the robot on the button in the robot’s To avoid fast discharging, it is front left-hand corner. -
Page 11: Testing The Robot
Before using the robot, you are recommended to check that all components and processes inside the robot work as intended. 1. Log on to the MiR user interface, see Getting connected on page 7. Go to Service > Status > Diagnostics. -
Page 12: Shutting Down The Robot
Testing the robot Shutting down the robot Step Action Press the red emergency stop button. This will turn off the power to the motors Turn off the power switch. Wait for the light on the robot to turn off. This means that there is no more power going to the robot. -
Page 13: General Safety Notes
Risk of personal injury and/or damage to the robot. The maximum payload for the load on top of the robot is 200 kg 440 lbs kg. If exceeded, it may cause overturning, falling load and damage to the robot. See also Appendix . -
Page 14: Lithium Battery
Lithium battery • Indoor use only Risk of damage to the robot. The robot is made for indoor use only and should never be used outdoor. • Avoid small objects on the floor in the robot’s area Risk of property damage and/or minor damage to the robot. The robot cannot detect objects smaller than 50 mm and may overrun smaller objects. -
Page 16: Copyright And Disclaimer
In addition, the contents of the document is subject to change without prior notice. Every precaution has been taken in the preparation of this manual. Nevertheless, MiR assumes no responsibility for errors or omissions or any damages resulting from the use of the information contained.


Need help?
Do you have a question about the 200 and is the answer not in the manual?
Questions and answers