MIR MiRHook 200 Operating Manual
Hide thumbs
Also See for MiRHook 200:
- User manual (173 pages) ,
- Quick start manual (35 pages) ,
- User manual (61 pages)
Table of Contents
Advertisement
Quick Links
Advertisement
Table of Contents

Subscribe to Our Youtube Channel
Related Manuals for MIR MiRHook 200


Summary of Contents for MIR MiRHook 200
- Page 1 Operating guide (en) Date: 2019/08 Revision: v.2.0...
- Page 2 All rights reserved. No parts of this manual may be reproduced in any form without the express written permission of Mobile Industrial Robots A/S (MiR). MiR makes no warranties, express or implied, in respect of this document or its contents. In addition, the contents of the document are subject to change without prior notice.
-
Page 3: Table Of Contents
2. Safety 2.1. Safety message types 2.2. General safety precautions 2.3. Intended use 3. Product presentation 3.1. Main features of MiRHook 200 3.2. MiRHook 200 external parts 4. Getting started 4.1. In the box 4.2. Unpacking MiRHook 200 4.3. Mounting MiRHook 200 5. - Page 4 7.1. Regular weekly checks and maintenance tasks 7.2. Regular checks and replacements 8. Updating MiRHook 200 software...
-
Page 5: About This Document
Select Show Certificates to see the list of certificates for the robot. • Distributor site > How to http://www.mobile-industrial-robots.com/en/account/how-to/ This page contains how-to articles that describe how to perform specific tasks with MiR products. • Distributor site > Troubleshooting This page contains troubleshooting guides to solve common issues with MiR products. -
Page 6: Document History
2016-10- Appendix added: Updating the MiRHook 200 software. Chapter 1: Notice added about require- ments for light in the operation envir- onment. 2016-11- Description of driving space requirements changed MiRHook 200 Operating guide (en) 2019/08 - v.2.0 ©Copyright: Mobile Industrial... - Page 7 New version for MiR Robot Interface 2.0. MiRHook Major update throughout manual. 100 1.3 Includes both MiRHook 100 and MiRHook MiRHook 200. 200 1.2. 2019-08- Updated for hardware release 1.3. MiRHook 200 1.3 MiRHook 200 Operating guide (en) 2019/08 - v.2.0 ©Copyright: Mobile Industrial...
-
Page 8: Safety
2. Safety 2. Safety Read the information in this section before powering up and operating MiRHook 200. Pay particular attention to the safety instructions and warnings. NOTICE Mobile Industrial Robots disclaims any and all liability if MiRHook 200 or its accessories are damaged, changed or modified in any way. -
Page 9: General Safety Precautions
If you use Manual control with a smartphone to drive the robot, make sure that the phone is set to Flight Mode. An incoming call on the smartphone will interrupt control of the robot. MiRHook 200 Operating guide (en) 2019/08 - v.2.0 ©Copyright: Mobile Industrial... -
Page 10: Intended Use
MiRHook 200 is a partly completed machine as defined in the EU machinery directive and does not have a CE mark. A correctly installed MiRHook 200 is covered by the CE mark of MiR200. However, a CE marked product does not guarantee a CE marked setup. It is the responsibility of the integrator to safely commission MiRHook 200. - Page 11 2. Safety NOTICE Before commissioning MiRHook 200, it is important to make a risk assess- ment. Refer to the MiR200 User guide for more information. MiRHook 200 Operating guide (en) 2019/08 - v.2.0 ©Copyright: Mobile Industrial...
-
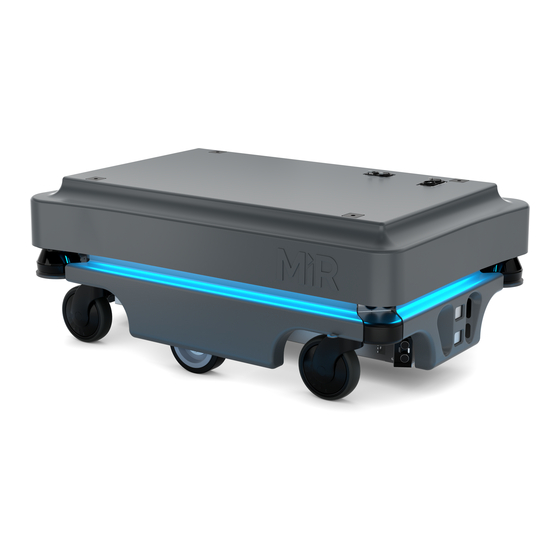
Page 12: Product Presentation
The MiRHook 200 robot identifies carts by QR markers and autonomously transports them as you define. MiRHook 200 can be incorporated into a fleet of MiR robots, and can be easily redeployed to meet changing requirements. - Page 13 • Safely maneuvers among people With MiRHook 200, you simply measure your cart and feed the data into the software. Built-in sensors, cameras and sophisticated software mean the robot with MiRHook 200 and a cart can safely maneuver around people and obstacles, and can even drive up ramps.
-
Page 14: Mirhook 200 External Parts
3. Product presentation 3.2. MiRHook 200 external parts This section presents the parts of MiRHook 200 that are visible on the outside. 3.1. MiRHook 200 external parts 1. 3D camera Reads QR codes on carts. 2. Gripper Attaches to the gripper bar on the cart to enable towing. -
Page 15: Getting Started
The MiRHook 200. 4 hex key bolts for mounting. MiRHook 200 document folder containing the printed documents. Printed documents: • MiRHook 200 Mounting guide. • CE declaration of incorporation. MiRHook 200 Operating guide (en) 2019/08 - v.2.0 ©Copyright: Mobile Industrial... -
Page 16: Unpacking Mirhook 200
Remove the shield and cut the cord that holds the hook attached to the pallet. Loosen the two highlighted screws and remove the four weights. Remove the two screws in the front of the hook. MiRHook 200 Operating guide (en) 2019/08 - v.2.0 ©Copyright: Mobile Industrial... -
Page 17: Mounting Mirhook 200
Remove the hook from the pallet. 4.3. Mounting MiRHook 200 The photos illustrate how to mount a MiRHook 200 (2) to a MiR200 (1). Remove the hook cover and lift the hook onto the robot fitting the frame holes above the four mooring holes on the robot. - Page 18 4. Getting started Mount the frame with the four bolts. Tighten the bolts with a torque of 47 (Nm) / [34.5 ft- lb]. MiRHook 200 Operating guide (en) 2019/08 - v.2.0 ©Copyright: Mobile Industrial...
- Page 19 Application hardware cable Emergency stop cable USB cable for top camera Antenna connector Place the cover on top of the hook frame. The cover is held in place with magnets. MiRHook 200 Operating guide (en) 2019/08 - v.2.0 ©Copyright: Mobile Industrial...
- Page 20 4. Getting started The hook is now mounted on the robot. MiRHook 200 Operating guide (en) 2019/08 - v.2.0 ©Copyright: Mobile Industrial...
-
Page 21: Commissioning
5.1. Front view of a cart (left), and side view of a cart (right). For the robot to be able to locate and identify carts, a QR-marker must be fixed on the front of the cart, see QR markers on page 29. MiRHook 200 Operating guide (en) 2019/08 - v.2.0 ©Copyright: Mobile Industrial... -
Page 22: Modifying The Gripper
The lower-gripper (2) can be modified to enable a greater gripper area thickness. This is done by removing the lower-gripper (3) and adding spacers to the mount- ing of the lower-gripper (4). 5.2. Parts included for gripper modification MiRHook 200 Operating guide (en) 2019/08 - v.2.0 ©Copyright: Mobile Industrial... -
Page 23: Space Requirements
Once a cart is attached to MiR200, the robot does not reverse when driving to another pos- ition, see Safety on page 8. As a result, its dynamic obstacle avoidance capabilities are some- MiRHook 200 Operating guide (en) 2019/08 - v.2.0 ©Copyright: Mobile Industrial... - Page 24 500 mm. Park a cart To park a cart, the robot needs at least 500 mm of space to either side of the cart. MiRHook 200 Operating guide (en) 2019/08 - v.2.0 ©Copyright: Mobile Industrial...
- Page 25 500 mm (the same required square area when turning a corner). This is shown in Figure 5.6. MiRHook 200 Operating guide (en) 2019/08 - v.2.0 ©Copyright: Mobile Industrial...
- Page 26 The following steps describe how the robot reverses and parks the cart at the cart position. 5.7. Position of the robot and cart before it parks to the cart position MiRHook 200 Operating guide (en) 2019/08 - v.2.0 ©Copyright: Mobile Industrial...
- Page 27 The robot places and picks up carts with an accuracy of 200 mm radius from the specified position and with an angle difference less than 10° relative to the specified position, as shown in Figure 5.8. MiRHook 200 Operating guide (en) 2019/08 - v.2.0 ©Copyright: Mobile Industrial...
-
Page 28: Safety Precautions When Operating With Carts
When driving with a cart, the maximum speed of the robot is 4 km/h. MiRHook 200 can move carts with a total payload (incl. the weight of the cart itself) of 500 kg when driving on a horizontal, flat and clean concrete surface with an incline of less than... -
Page 29: Qr Markers
1%. When driving on a surface with an incline at maximum 5%, the maximum payload is 300 5.5. QR markers A QR marker is needed for MiRHook 200 to identify the individual carts. The QR code con- tains the dimension of the marker and a unique name. The format is SizeUnit-Name. -
Page 30: Connecting To The Interface
NOTICE The username and password for the robot’s WiFi access point and for access- ing the web interface are in the MiR username and passwords document. The document is in the box with the robot. Follow these steps to connect to the robot interface: Using your laptop, tablet, or a phone, connect the WiFi access point of the robot. - Page 31 A new Hook icon now appears in the main menu. This is where all settings to prepare the robot for automatic pick up and delivery of carts are made. MiRHook 200 Operating guide (en) 2019/08 - v.2.0 ©Copyright: Mobile Industrial...
- Page 32 Under Hook actions, select Home and wait until the hook stops moving. Select Deactivate brake. Manually push the arm close to 0 degrees. Select Activate brake. Homing is now complete. MiRHook 200 Operating guide (en) 2019/08 - v.2.0 ©Copyright: Mobile Industrial...
-
Page 33: Planning
This chapter describes what needs to be considered before and during the installation of MiRHook 200 in the company. It is worth spending some time defining what tasks MiRHook 200 must do in the work envir- onment. The correct setup and thorough training of the users will result in a successful and safe installation of MiRHook 200. -
Page 34: Calibrate Cart
6.2. Calibrate cart The next step is to calibrate the relation between MiRHook 200 and the cart. In the Manual control menu under Hook, you must now enter values into the Change height field to define Entry and Lock heights for the Hook to use when docking to and gripping a cart. - Page 35 Change the height back to Entry height, and make sure the cart is still positioned over MiRHook 200. Now attach the QR-marker to the cart so that the camera on MiRHook 200 can see the QR-marker when MiRHook 200 is ready to grip the cart.
-
Page 36: Specific Cart Type
The next step is to set up a cart in the Robot interface: Go to Hook > Carts and select Create Cart. The following dialog is displayed: Select the cart type you created before. MiRHook 200 Operating guide (en) 2019/08 - v.2.0 ©Copyright: Mobile Industrial... -
Page 37: Setting Cart Positions In The Map
Edit icon for the chosen map. Once within the editor, follow these steps to create a cart position: Within the editor, select Positions in Object-type drop down menu. The following dialog is displayed: MiRHook 200 Operating guide (en) 2019/08 - v.2.0 ©Copyright: Mobile Industrial... -
Page 38: Creating A Cart Mission
This section shows how to include cart actions in your missions by showing the steps required to create a simple mission example. In the example, the goal is to pick up a cart at position MiRHook 200 Operating guide (en) 2019/08 - v.2.0 ©Copyright: Mobile Industrial... - Page 39 Select the following actions: • Within the Cart menu, select Pick up. • Within the Move menu, select Move. • Within the Cart menu, select Place. MiRHook 200 Operating guide (en) 2019/08 - v.2.0 ©Copyright: Mobile Industrial...
- Page 40 The mission is now ready. Select Save to save your mission. You can now add the mission to queue to see the robot execute the mission. MiRHook 200 Operating guide (en) 2019/08 - v.2.0 ©Copyright: Mobile Industrial...
-
Page 41: Maintenance
Push the battery switch button to remove power from the battery. • Turn off relays and unplug the battery. The following table contains the parts that you should check and the intervals when you should do that: MiRHook 200 Operating guide (en) 2019/08 - v.2.0 ©Copyright: Mobile Industrial... - Page 42 Read more in our How to guides on the Distributor site. Hook Check the gripper function and per- Check monthly. form a homing in the interface, Homing on page 32. MiRHook 200 Operating guide (en) 2019/08 - v.2.0 ©Copyright: Mobile Industrial...
- Page 43 Check if the safety markings made Check every six months, and the floor with for example, tape around cart replace as needed. pick-up and drop-off points are intact and visible. MiRHook 200 Operating guide (en) 2019/08 - v.2.0 ©Copyright: Mobile Industrial...
- Page 44 Download the latest version of MiR Software Robot / Hook / Fleet 2 version x.x.x. Connect your computer to the WiFi of the robot you would like to update. Access the robot's interface by going to the website mir.com in your preferred web browser and sign in.
- Page 45 It may take a few minutes for the package to successfully upload. NOTICE When updating MiR200 with an attached MiRHook 200, the Hook software must be updated first to ensure that the robot is compatible with the hook when uploading the software.
Need help?
Do you have a question about the MiRHook 200 and is the answer not in the manual?
Questions and answers