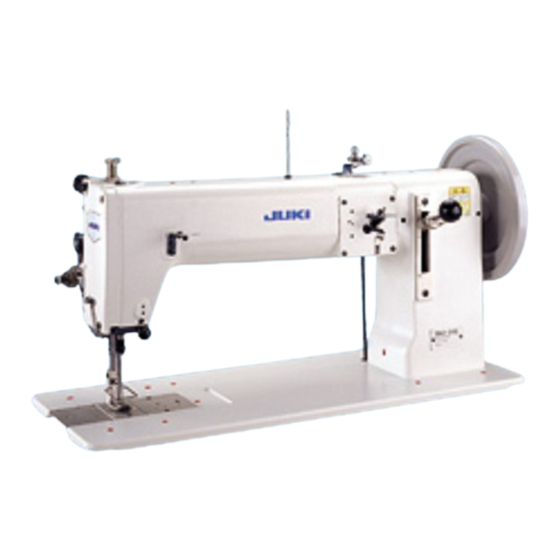
JUKI TNU-243 Instruction Manual
Hide thumbs
Also See for TNU-243:
- Specifications (2 pages) ,
- Handbook (257 pages) ,
- Handbook (272 pages)
Table of Contents
Advertisement
Quick Links
- 1 Lubrication
- 2 How to Wind a Bobbin Thread
- 3 How to Take out the Bobbin
- 4 Adjusting the Stitch Length and Reverse Stitching
- 5 How to Thread the Machine Head
- 6 Adjusting the Needle-To-Shuttle Relationship
- 7 The Feed Dog-To-Needle Relationship
- 8 Problems with Sewing and Corrective Measures
- Download this manual
See also:
Handbook
Advertisement
Table of Contents

Summary of Contents for JUKI TNU-243
- Page 1 TNU-243 INSTRUCTION MANUAL NOTE : Read safety instructions carefully and understand them before using. Retain this Instruction Manual for future reference. No.02 40095723...
- Page 3 TO ENSURE SAFE USE OF YOUR SEWING MACHINE For the sewing machine, automatic machine and ancillary devices (hereinafter collectively referred to as "machine"), it is inevitable to conduct sewing work near moving parts of the machine. This means that there is always a possibility of unintentionally coming in contact with the moving parts.
- Page 4 SAFETY PRECAUTIONS DANGER CAUTION ii ii...
- Page 5 iii iii...
- Page 6 iv iv...
- Page 7 Precautions to be taken so as to use the TNU-243 more safely 1. Keep your hands away from needle when you turn ON the power switch or while the machine is in operation. 2. Do not put your fi ngers into the thread take-up cover while the machine is operating.
- Page 8 4. Also to conform to the RoHS Directive 2011/65/EU 5. Relevant information on which should be transmitted in response to a reasoned request by the national authorities, by the electronic method or other according to the request. TNU-243 Model Description...
-
Page 9: Table Of Contents
CONTENTS SPECIFICATIONS ........................1 1. INSTALLING THE MACHINE ..................1 2. INSTALLING THE THREAD STAND ................2 3. INSTALLING THE HANDWHEEL ..................2 4. ADJUSTING THE BELT TENSION ................2 5. INSTALLING THE BELT COVER ..................2 6. ASSMBLING THE KNEE PRESS PLATE ..............3 7. CLEANING ........................3 8. -
Page 10: Specifications
Needle bar stroke 56 mm Lubricating oil JUKI New Defrix Oil No. 1 - Equivalent continuous emission sound pressure level (L ) at the workstation : Noise A-weighted value of 76.5 dB; (Includes K = 2.5 dB); according to ISO 10821- C.6.2 -ISO 11204 GR2 at 800 sti/min. -
Page 11: Installing The Thread Stand
2. INSTALLING THE THREAD STAND 3. INSTALLING THE HANDWHEEL 4. ADJUSTING THE BELT TENSION 5. INSTALLING THE BELT COVER WARNING : WARNING : To protect against possible personal injury due To protect against possible personal injury due to abrupt start of the machine, be sure to start to abrupt start of the machine, be sure to start the following work after turning the power off the following work after turning the power off... -
Page 12: Assmbling The Knee Press Plate
6. ASSMBLING THE KNEE PRESS PLATE 7. CLEANING WARNING : To protect against possible personal injury due to abrupt start of the machine, be sure to start the following work after turning the power off and ascertaining that the motor is at rest. 8. -
Page 13: How To Install The Needle
9. HOW TO INSTALL THE NEEDLE WARNING : To protect against possible personal injury due to abrupt start of the machine, be sure to start the following work after turning the power off and ascertaining that the motor is at rest. 10. -
Page 14: How To Install The Needle
12. HOW TO INSTALL THE NEEDLE WARNING : To protect against possible personal injury due to abrupt start of the machine, be sure to start the following work after turning the power off and ascertaining that the motor is at rest. 13. -
Page 15: Thread Tension
15. THREAD TENSION WARNING : To protect against possible personal injury due to abrupt start of the machine, be sure to start the following work after turning the power off and ascertaining that the motor is at rest. 16. THE THREAD TAKE-UP SPRING –... -
Page 16: Adjusting The Presser Foot Pressure
17. ADJUSTING THE PRESSER FOOT PRESSURE 18. ADJUSTING THE HEIGHT OF THE FEED DOG WARNING : To protect against possible personal injury due to abrupt start of the machine, be sure to start the following work after turning the power off and ascertaining that the motor is at rest. –... -
Page 17: Adjusting The Needle-To-Shuttle Relationship
19. ADJUSTING THE NEEDLE-TO-SHUTTLE RELATIONSHIP WARNING : To protect against possible personal injury due to abrupt start of the machine, be sure to start the following work after turning the power off and ascertaining that the motor is at rest. –... - Page 18 – 9 –...
-
Page 19: Adjusting The Walking Foot And Presser Foot
20. ADJUSTING THE WALKING FOOT AND PRESSER FOOT WARNING : To protect against possible personal injury due to abrupt start of the machine, be sure to start the following work after turning the power off and ascertaining that the motor is at rest. 21. - Page 20 – 11 –...
-
Page 21: Motor Pulley And Sewing Speed
50Hz 1,430 rpm φ 65 600 sti/min 60Hz 1,715 rpm φ 50 TNU-243 φ 154 50Hz 1,430 rpm φ 85 800 sti/min 60Hz 1,715 rpm φ 70 (Caution) The effective diameter of motor pulley is obtained by subtracting 5 mm from its outside diameter. - Page 22 Refer to "4. Adjusting the belt tension". – 13 –...
- Page 24 Please do not hesitate to contact our distributors or agents in your area for further information when neces- sary. Copyright Ⓒ 2011-2013 JUKI CORPORATION * The description covered in this instruction manual is subject to change for improvement of the commodity without notice.


Need help?
Do you have a question about the TNU-243 and is the answer not in the manual?
Questions and answers