
Related Manuals for JUKI TL-2020 PE


Summary of Contents for JUKI TL-2020 PE
- Page 1 Sewing machine for professional use TL-2020 PE INSTRUCTION MANUAL IMPORTANT: Read all safety regulations carefully and under- stand them before using your sewing machine. Retain this instruction manual for future reference.
-
Page 3: Safety Regulations
“IMPORTANT SAFETY INSTRUCTIONS” When using an electrical appliance, basic safety precautions should always be followed, includ- ing the following: Read all instructions before using this sewing machine. “DANGER ____ To reduce the risk of electric shock:” 1. The appliance should never be left unattended when plugged in. 2. - Page 4 Congratulations on your purchase of a JUKI sewing machine. Please be sure to read safety precautions in “To use the sewing machine safely” in the Instruction Manual before use to fully understand the functions and operating procedures of the sewing ma- chine so as to use the sewing machine for a long time.
- Page 5 WARNING For the combination of the material and the thread and needle, in particular, refer to the explana- tion table in “Replacement of the needle”. If the needle or thread does not match the material used such as in the case that an extra heavy- weight material (e.g., denim) is sewn with a thin needle (#11 or higher), the needle can break re- sulting in an unexpected personal injury.
-
Page 6: Règles De Sécurité
“NOTES DE SECURITE IMPORTANTES” Lorsque vous utilisez un appareil électrique, des précautions élémentaires doivent toujours être sui- vies, comme celles-ci. Lisez attentivement ces instructions avant d’utiliser cette machine à coudre. “DANGER ____ Pour réduire le risque d’électrocution:” 1. L’appareil ne doit jamais être laissé sans surveillance une fois branché. 2. - Page 7 Merci d’avoir fait l’achat d’une machine à coudre JUKI. Avant l’utilisation, veuillez lire les consignes de sécurité sous la section « Pour utiliser la machine à coudre en toute sécurité » du Manuel d’instructions, afin de comprendre parfaitement les fonc- tions et procédures d’utilisation de la machine à...
- Page 8 AVERTISSEMENT Pour combiner l’aiguille en fonction de la matière et du fil, reporter vous à la section «remplace- ment de l’aiguille» Si l’aiguille ou le fil n’est bien adapté au tissu, comme dans le cas d’un tissu très lourd (p. ex. du jean) cousu avec une aiguille mince (n° 11 ou supérieure), l’aiguille risquera de se casser et de causer une blessure.
-
Page 9: Table Of Contents
CONTENTS Safety regulations ·································· 1-3 Test sewing ········································ 21,22 Règles de sécurité ·································· 4-6 To turn OFF the thread trimming foot switch Reverse feed stitch Contents··················································7 Changing the sewing direction Specifications ···········································7 When making a knot on the reverse side of the Accessories ·············································8 material Principal Parts ··········································9... -
Page 10: Accessories
Accessories 1. Foot controller Foot switch stopper 3. Auxiliary table 4. Exclusive screwdriver 5. Screwdriver (small) 6. Cleaning brush 7. Bobbins (for 230V: 10pcs.) (for 120V: 4pcs.) 8. Oiler 9. Needles (HAx1) 10. Spool cap 11. Sewing machine cover 12. Power cord 13. -
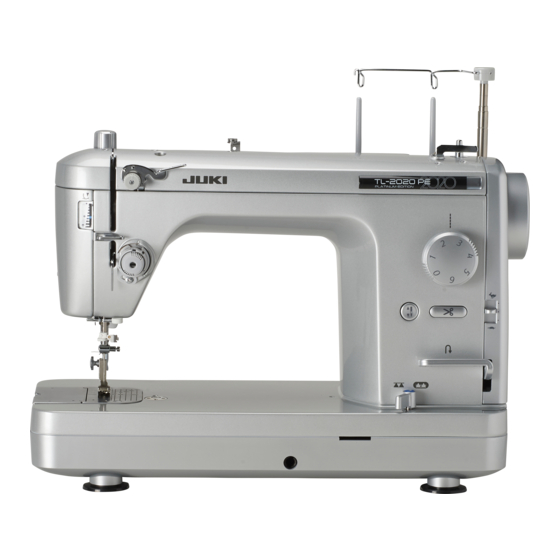
Page 11: Principal Parts
Principal Parts 1. Presser foot pressure regulator 2. Sub-tension knob 3. Indicator of the presser foot pressure regulator 4. Face plate cover 5. Manual thread cutter 6. Thread tension dial 7. Slide plate 8. Throat plate 9. Attachment mounting plate 10. -
Page 12: Name And Function Of Each Component
Name and Function of each component ■ Installing the auxiliary table Open legs of auxiliary table until they stop se- curely at the stopping position. Assemble auxiliary table to sewing machine body. Adjust the height of legs so that the top sur- face of auxiliary table is the same height of sewing machine body. - Page 13 Name and Function of each component ■ Installing the foot controller ❸ ❶ Insert the electric power cord plug into the corre- sponding inlet. ❶ ❷ Insert the foot controller plug into the corresponding inlet. ❸ Insert the power plug into the wall outlet. ❷...
- Page 14 Name and Function of each component ■ Power switch Turn ON when it is pressed on your side. Turn OFF when it is pressed on the other side. ■ Speed control knob Faster speed Maximum sewing speed can be freely set by the speed controller.
- Page 15 Name and Function of each component ■ Stitch length adjusting dial Mark Stitch length for normal stitching is 2 to 2.5 mm. (Adjusting range: 0 to 6 mm) ■ Needle up/down switch Every time the switch is pressed, the needle goes up or comes down.
- Page 16 Name and Function of each component ■ Presser foot pressure regulator and its Increase Decrease indicator Turning the presser foot pressure regulator adjusts the pressure of the presser foot. By turning the regulator pointer of the indicator goes up or comes down. ■...
-
Page 17: Winding The Bobbin
Winding the bobbin CAUTION: Turn OFF the power switch when opening the slide plate. Installing the thread guide ❹ ❶ Raise the support rod fully, turning slightly until the posi- tioning latches engage. ❶ ❷ Set the large spool over the anti vibration cone, or ❷... -
Page 18: Winding The Bobbin
Winding the bobbin Take out the bobbin from the bobbin case. Snap in the latch to let the bobbin come out of the bobbin case. Thread the bobbin winder guide. If the thread slips out of the bobbin winder guide, pass it through the hole located under the bobbin winder guide. -
Page 19: Adjusting The Bobbin Winder Guide
Winding the bobbin Loading the bobbin into the bobbin case. Snap in the bobbin case latch, and put the bobbin into the bobbin case so that the bobbin runs clock- wise. Passing the thread through the slit of the bobbin Thread case, continue passing it under the thread tension Thread tension spring... -
Page 20: Threading The Machine (Needle Thread)
Threading the machine 注意 CAUTION: Turn OFF the power switch when threading or passing thread. 意 Sub-tension knob ・ Pass the thread through the Thread space between the two ten- take-up sion disks. ・ The standard thread tension is achieved when the end face of the screw at the cen- ter of the knob is flush with the end face of the knob. -
Page 21: Automatic Needle Threader
Threading the machine ■ Automatic needle threader Lower the presser foot and lower needle threader lever. Bring the needle to the top position and lower the thread- ing lever. Pass the needle thread through the hook. Pass the needle thread from the opposite side to this side, and move the thread on the right-hand side until it comes in contact with the guide. -
Page 22: Drawing Up The Bobbin Thread
Threading the machine ■ Drawing up the bobbin thread Hold the end of the needle thread with your left hand. Press the needle up/down switch. Normally press two times, to make needle move down and then up. Bobbin thread is drawn out. Draw both the needle thread and bobbin thread for about 10cm. -
Page 23: Test Sewing
Test sewing CAUTION: Do not place anything on the foot controller which is set to the sewing machine. If you start sewing while the thread take-up is engaged in its ascending motion, the needle thread may slip out of the needle’s eye. Place the material Lower the needle. -
Page 24: To Turn Off The Thread Trimming Foot Switch
Test sewing ■ To turn OFF the thread trimming foot switch Reverse side Top side Fit the foot switch stopper in position. Foot switch stopper Securely fit the foot switch stopper by pressing four claws. ■ Reverse feed stitch (lock stitch) Push down the reverse feed stitch lever to sew reverse Approx. -
Page 25: Adjusting The Thread Tension
Increase justing screw * Adjust the needle thread tension in accordance with the bobbin thread tension. * The bobbin case is an exclusive JUKI part. Please consult the JUKI dealers when you purchase it. Decrease ■ Proper thread tension Improperly adjusted thread tension may... -
Page 26: And Needle
Adjusting the thread tension ■ Tabulated relationship between material, thread and needle Needle Material Thread (HAx1) Nylon Cupro Light-weight Georgette Synthetic thread #80-#90 No.9-11 materials Smooth Tricot Broadcloth Cotton thread #60-#80 Gingham Synthetic thread #80-#90 Medium-weight Light-weight jersey Synthetic thread #50-#60 No.11-14 materials Synthetic cloth... -
Page 27: Attaching The Needle
Adjusting the thread tension CAUTION: Turn OFF the power switch when replacing the needle. ■ Attaching the needle Tightens 1. Turn off power. 2. Lower the presser foot. Loosens 3. Move the needle bar up to the highest position of its stroke. -
Page 28: Maintenance And Lubrication
Maintenance and lubrication Be sure turn OFF the power to the sewing machine and disconnect the plug CAUTION: from the wall outlet when cleaning or lubricating the sewing machine. ■ Cleaning the feed dog and the hook ・ Turn off power. Remove the needle, the presser foot and the throat plate. -
Page 29: Introduction Of Optional Parts
■ Presser foot and throat plate for light-weight materials It is applicable to sew the light-weight ma- terial such as nylon, georgette, tricot, etc. ■ Throat plate for heavy-weight materials * Please consult the JUKI dealer when you purchase the optional parts. -
Page 30: Troubles And Corrective Measures
Troubles and Corrective Measures If sewing difficulties occur, make sure the instructions are correctly followed. If a problem still exists, the re- minders below help to solve it. Troubles Case Corrective measures Page Stitches are 1. The needle is bent or the needle point •... - Page 31 Troubles Case Corrective measures Page The handwheel 1. The thread is entangled and caught in • Lubricate the hook, strongly turn the does not rotate the hook. handwheel clockwise and counterclock- smoothly or wise several times, then remove the does not turn. thread caught in the hook.
- Page 32 2-11-1, TSURUMAKI, TAMA-SHI, TOKYO, 206-8551, JAPAN PHONE : (81)42-357-2341 FAX : (81)42-357-2379 Copyright © 2020 JUKI CORPORATION All rights reserved throughout the world. 40246442 001020...
Need help?
Do you have a question about the TL-2020 PE and is the answer not in the manual?
Questions and answers