
Related Manuals for JUKI TL-98E


Summary of Contents for JUKI TL-98E
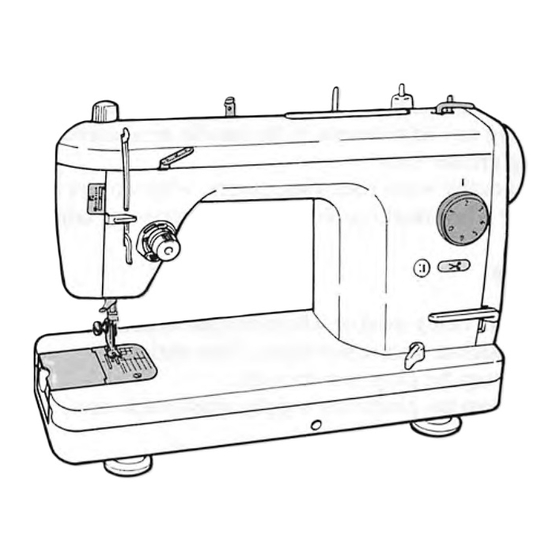
- Page 1 1-NEEDLE LOCKSTITCH SEWING MACHINE WITH AUTOMATIC THREAD TRIMMER FOR PROFESSIONAL TL-98E SERVICE MANUAL 293-27707...
- Page 2 C O N T E N T S [1] SPECIFICATIONS OF TL-98E................ 1 [2] PRINCIPLE OF ELECTRIC BRAKE ............... 2 [3] NAMES OF COMPONENTS ................3 [4] DISASSEMBLY AND ASSEMBLY ..............3 [5] PRINTED CIRCUIT BOARD DIAGRAM (CONNECTOR LAYOUT) ..... 15 [6] ADJUSTMENTS OF COMPONENTS ............
-
Page 3: Specifications Of Tl-98E
[1] Specifications of TL-98E (1) Speed control device Foot controller method 80 to 1,500 rpm (2) Table and stand components Main unit : Portable type main unit with soft case (Case is folded in two and packed with main unit.) One-touch type auxiliary table knee lifter is provided as standard. -
Page 4: Principle Of Electric Brake
[2] Principle of Electric Brake Three lead wires are drawn out from the motor. Lead wire is drwan out from the connecting point of the rotor coil and stator coil to use the electric brake. MP detection printed circuit board asm. detects the number of slits of the shield plate fixed on the motor shaft and is used to calculate the number of rotations of the motor and the phase of main shaft. -
Page 5: Table Of Contents
[3] Names of Components Arm cover asm. Thread guide base Bobbin winder shaft Thread guide No. 1 Presser spring regulator Belt cover Indicating needle of presser spring regulator Handwheel Face cover Stitch dial Pressure indicating plate Thread take-up thread guide Needle up/down switch Automatic thread trimming switch Lamp switch... -
Page 6: Outer Components
6 Convex of presser Outer Components 5 Slit of presser regulating screw spring regulator knob 4 MAIN circuit board case cover 1. Arm cover asm. 1 Arm cover setscrew SM5042005SN 3 Arm cover 2 Bobbin winder connector Disassembly Assembly Point Attach case cover of 4. -
Page 7: Bed Cover Mas. Asm
4. Bed cover mas. asm. 1 Bed cover setscrew 1 Bed cover setscrew SM5051255SN Disassembly Assembly Point Remove six setscrews of 1 and ™ Attach bed cover and tighten remove bed cover. setscrews. 5. MAIN circuit board asm. Preparation 3 MAIN circuit board 2 MAIN circuit board case setscrew A ™... -
Page 8: Handwheel And Clutch
2. Handwheel and clutch ! 0 Groove of handwheel Preparation ™ Remove belt cover. 7 Convex of handwheel bushing 9 Motor pulley 1 Handwheel setscrew 6 Groove of handwheel bushing 2 Handwheel 4 Angle portion of clutch spring 5 Hook portion of clutch spring 3 Groove of clutch spring support 8 Handwheel bushing stopper pin Disassembly... -
Page 9: Presser Bar
2 Presser spring regulator 4. Presser bar Preparation ™ Remove arm cover asm. 7 Indicating needle of ™ Remove face plate asm. presser spring regulator ™ Remove presser foot and setscrew. 4 Presser spring 6 Presser bar lifting lever 5 Presser bar connection asm. -
Page 10: Thread Take-Up
3 Thread take-up supporting shaft 6. Thread take-up 1 Thread take-up Preparation supporting shaft setscrew ™ Remove arm cover asm. 4 Needle SM8050602TP ™ Remove face plate mas. asm. bar crank ™ Remove presser bar. 6 Thread take-up ™ Remove needle bar. support 2 Needle bar crank setscrew... -
Page 11: Stitch Dial
9. Stitch dial Preparation 4 Feed regulating screw ™ Remove arm cover asm. 5 Feed regulating screw • Stopper screw • Stopper nut 2 Feed regulating 3 Feed regulating screw stopper asm. setscrew 1 Stitch dial setscrew SM8030402TP Disassembly Assembly Point Loosen two setscrews of 1 and ™... -
Page 12: Knee Lifter Lever
Disassembly Assembly Point Remove nut of 1 (left side only). ™ Lay wire in frame. ™ Pass the wire through full reverse Remove setscrew of 2 and remove ™ Assemble wire holder mas. asm. side of stitch dial. and tighten with setscrews 3. ™... -
Page 13: Hook Driving Shaft Pulley
13. Hook driving shaft pulley Preparation ™ Remove outer components. (Excluding stop solenoid) ™ Loosen idler. ™ Remove needle. 3 Hook driving shaft 9 Thread trimmer pulley 6 Hook driving shaft pulley eccentric E-ring (E-6) cam screw No. 1 shaft bushing Slit on 4 hook driving shaft pulley eccentric shaft 1 Timing belt... -
Page 14: Hand Lifter Lever
1 Hand lifter lever 14. Hand lifter lever 2 Hand lifter lever shaft 3 M4 screw Disassembly Assembly Point Enter hand lifter lever shaft 2 into Enter 3 to 4 screw threads of M4 End face of lever shaft that is fit by screw (arm cover setscrew) in the the hole on frame. -
Page 15: Automatic Thread Trimming Components
5 Looper mas. asm. Automatic Thread Trimming Components 3 Looper link asm. setscrew SM5040855SN 1. Looper mas. asm. Preparation ™ Remove bed cover. 6 Looper 2 Looper link holding shaft 1 Looper link B 4 Moving knife 7 Bobbin case (Washer A1731090000 (Center of inner hook) E-ring E-3... -
Page 16: Thread Trimming Solenoid Mas. Asm
5 Moving knife roller arm 3. Thread trimmer solenoid mas. asm. Preparation 4 Moving knife arm ™ Remove arm cover asm. ™ Remove bed cover asm. 2 Thread trimmer ™ Remove thread trimmer solenoid link B. solenoid link A (See 2 of the previous item.) 3 Thread trimmer solenoid mas. -
Page 17: Printed Circuit Board Diagram (Connector Layout)
[5] PRINTED CIRCUIT BOARD DIAGRAM (CONNECTOR LAYOUT) Thread trimmer Lamp Lamp SW solenoid Controller Controller socket Power transformer Thread (AC12V) MAIN circuit External thread CN11 trimmer SW trimmer socket board circuit board 5.6.7 External thread Bobbin winder SW Power SW trimmer (Pedal SW) AC120V... -
Page 18: General Mechanism 1. Height Of Neddle Bar Bushing
[6] ADJUSTMENT OF COMPONENTS Automatic thread trimmer mechanism General mechanism 1. Positioning of moving knife arm installing plate 1. Height of neddle bar bushing ......16 (adjustment of position of moving knife) ..21 2. Height of needle bar......... 16 2. -
Page 19: Height Of Presser Foot
3. Height of presser foot ™ Adjust the height in the state that hand lifter lever Presser foot is raised. ™ Clearance provided between top surface of throat plate and lower face of presser foot is 7.0 0.5 mm. ™ Perform adjustment with presser bar connection 7.0 0.5 mm Throat plate setscrew. -
Page 20: Clearance Between Needle And Hook
7. Clearance between needle and hook Needle (HA x 1 #14) ™ Loosen three setscrews in hook. ™ Align blade point of hook with center of needle. Blade point ™ Adjust clearance provided between blade point of hook and needle to 0.05 to 0.1 mm. 0.05 to 0.1 mm ™... -
Page 21: Bobbin Thread Tension
11. Adjustment of bobbin thread tension How to adjust Bobbin case Adjust with adjusting screw so that bobbin thread Adjusting screw tension when spun thread #60 is used becomes 0.176 0.02N. Bobbin thread 12. Position of bobbin winder clutch ™ Remove belt cover. How to adjust 1. -
Page 22: Adjustment Of Bobbin Winder
13. Adjustment of bobbin winder [Position of disengaging bobbin winder] How to adjust 1. Set bobbin presser 1 to the position where it is 16 mm away from bobbin winding shaft 2. 2. Tighten bobbin winder controller asm. with setscrew when concave portion of bobbin winding shaft base adjusting plate 3 is engaged with convex portion of bobbin winder controller asm. -
Page 23: Automatic Thread Trimmer Mechanism
Automatic Thread Trimmer Mechanism 1. Positioning of moving knife arm installing plate 2 Knee lifetr lever shaft (Adjustment of position of moving knife) Nut of setscrew 1 setscrew ™ Loosen nut 1 of setscrew ™ Loosen setscrew 2 of knee lifter lever shaft. ™... -
Page 24: Thread Trimmer Cam Timing (Needle-To-Cam Position)
3. Thread trimmer cam timing (Needle-to-cam position) 1. Loosen two setscrews in thread trimmer cam. 2. Raise machine and lower needle bar by 1.93 mm from its upper dead point. 3. Tilt machine horizontally and face setscrew No. 1 1 of thread trimmer cam to front. (Setscrew No. -
Page 25: Position And Protruding Amount Of Looper (Left/Right Position And Adjustment Of Movement)
4. Position and protruding amount of looper (Left/right position and moving amount) 4-1. Adjustment of left/right position of looper ™ Adjust with looper installing plate 2 so that center of inner hook is aligned with center of lopper 1. 2 Looper installing plate 1 Looper and inner hook 3 Looper (Convex that looper cam... - Page 26 INTERNATIONAL SALES DIVISION 8-2-1. KOKURYO-CHO. CHOFU-SHI. TOKYO 182-8655. JAPAN PHONE : 03(3480)5034 FAX : 03(3480)5037 Copyright C 1998 JUKI CORPORATION. 98 · 09 Printed in Japan (E) All rights reserved throughout the world.
Need help?
Do you have a question about the TL-98E and is the answer not in the manual?
Questions and answers
I have a Juki TL98E and the feed dogs will not drop down. The lever on the side front to drop the feed dogs will not move. Thank you
To fix feed dogs that will not drop on a JUKI TL-98E sewing machine:
1. Check if something is frozen internally. This may prevent the feed dogs from moving.
2. Open the bottom of the machine and manually flip the feed dog lever.
3. Clean and oil the moving parts in the feed dog mechanism.
4. If the issue persists, take the machine to a professional for servicing.
Regular maintenance, including cleaning and oiling, can prevent this issue.
This answer is automatically generated