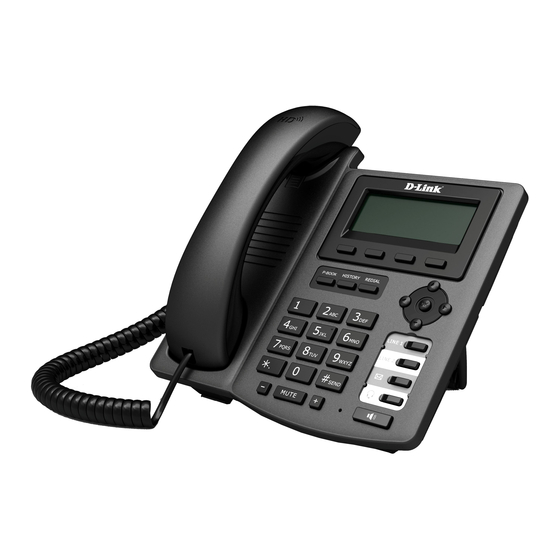
D-Link DPH-150S User Manual
Uoip
Hide thumbs
Also See for DPH-150S:
- User manual (87 pages) ,
- Quick installation manual (68 pages) ,
- Quick start manual (17 pages)
Table of Contents
Advertisement
Advertisement
Table of Contents

Related Manuals for D-Link DPH-150S


Summary of Contents for D-Link DPH-150S
- Page 1 Contents...
- Page 2 1. G ENERAL INFORMATION ....................................11 1.1. Package list ........................................11 1.2. Power supply ........................................11 1.3. Environment condition ..................................11 2. Y OUR PHONE ..........................................12 2.1. Using the keys ......................................... 12 2.1.1 Telephone appearance ....................................... 12 2.1.2 LCD ................................................
- Page 3 2.2.6 Cursor advance .......................................... 23 2.2.7 Exit edit mode ..........................................23 2.3. Using the menu ......................................23 2.3.1.Menu operation ......................................... 23 2.3.2.Menu tree view ........................................... 24 3. G ETTING STARTED ........................................ 25 3.1. Prepare network settings ..................................25 3.2. Prepare VoIP settings ....................................
- Page 4 4.2.3. Answering a call during another conversation ....................... 28 4.3. Muting a call ........................................28 4.4. Holding/resuming a call ..................................29 4.5. Switching between active line ................................. 29 4.6. Transferring a call ...................................... 29 4.7. Setting up a conference call ................................
- Page 5 5.1.5. Delete all ............................................32 5.2. Call records ........................................33 5.2.1. Missed Calls ..........................................33 5.2.2. Received calls ..........................................33 5.2.3. Dialed calls ............................................. 33 5.2.4. Delete all ............................................34 5.3. DND List ..........................................34 5.3.1. View entry ............................................34 5.3.2.
- Page 6 5.4.4. Default GW ........................................... 36 5.4.5. DNS setting ............................................ 37 5.4.6. PPPoE setting ..........................................37 5.4.7. NTP setting ............................................ 37 5.5. SIP setting ........................................... 38 5.5.1. Proxy setting ..........................................38 5.5.2. User Info ............................................38 5.6. Phone Setting ........................................39 5.6.1.
- Page 7 5.7.2. Memory key ..........................................42 5.8. Factory default ....................................... 43 5.9. Reboot ............................................. 43 6. WEB SETTING ........................................43 6.1. How to land web ......................................43 6.2. Default User name and Password .............................. 44 6.3. About Note message ....................................45 6.4.
- Page 8 6.7.1. Advanced Setting ........................................57 6.7.2. Account Setting ........................................59 6.7.3. Server Settings .......................................... 60 6.7.4. NAT Traversal ........................................... 60 6.7.5. Security ............................................... 61 6.7.6. Voice Settings ..........................................61 6.8. Phone ............................................63 6.8.1. General Settings ........................................63 6.8.2. Forward Settings ........................................
- Page 9 6.9.3. Missed Calls ..........................................73 6.9.4. Redial List ............................................73 6.9.5. Received Calls ..........................................74 6.10. Management ........................................74 6.10.1. Account Control ........................................75 6.10.2. System Log Settings ......................................75 6.10.3. Date and Time ........................................76 6.10.4. Ping Test ............................................77 6.10.5.
- Page 10 7.1.2. Transfer .............................................. 82 7.1.3. Conference ............................................. 84 7.1.4. Missed calls ............................................ 85 7.1.5. Received calls ..........................................86 7.1.6. DND ................................................ 87 7.1.7. Headset ............................................... 88 8. T ROUBLESHOOTING ......................................89...
-
Page 11: General Information
1. General information 1.1. Package list DPH-150SE (with PoE) or DPH-150S(without PoE) IP Phone unit Handset Handset Cord Power Adapter Ethernet Cable Quick Install Guide CD-ROM 1.2. Power supply Power adapter: AC/DC Input 110-220V Output 9V~12V@0.8A, with maximum power consumption of 6 Watt. -
Page 12: Your Phone
2. Your phone 2.1. Using the keys 2.1.1 Telephone appearance... - Page 13 2.1.2 LCD The information of system, user, etc., will be displayed clearly in two lines. (128x26 Dot matrix) On the LCD, there are 6 icon fields. LCD will leave 20 columns for displaying icons, 10 columns on each side. Each icon size is 10x8 . So there’re six positions, numbered from No.1 to No.6, on LCD for indication of different status.
- Page 14 When there’re new missed calls (have not read), icon will be shown at the Region No.3. DND/Mute If Mute is activated (only in talking ), icon will be shown at region 4. If DND is activated and not in talking state, icon will be shown at Region No.4.
- Page 15 2.1.3 Key board As shown in Figure DPH-150S(SE) total has 36 keys. Their definitions are given in Table Key button Key definition Function description 1 . , : ; / - _ @ & ? ¿ ! ¡ ‘ “...
- Page 16 4 g h I G H I 5 j k l J K L 6 m n o M N O 7 p q r s P Q R S 8 t u v T U V 9 w x y z W X Y Z 0 blank key .
- Page 17 Confirm or enter delete Cancel or delete menu Go to menu Redial key Redial or show dialed list mute Mute/Unmute the call Adjust volume Reduce handset/handfree/headset volume Adjust volume Enhance handset/handfree/headset volume handfree On/Off handfree P1~P14 Function key Program keys(Function/Memory keys) 2.1.4 Text input definitions The telephone has three text input methods: “ABC”...
- Page 18 2.1.4.1 “abc” character input mode In “abc” input mode, user can input lowercase characters. The input character will change according to the pressing times. For example, if user presses 2 times , it will be ‘b’. The definition of the key in “abc” method is shown in Table. Definition of the key in “abc”...
- Page 19 Input method switch key 2.1.4.2 “ABC” character input mode In “ABC” input mode, user can input uppercase characters. The input character will change according to the pressing times. For example, if user presses 2 times , it will be ‘B’. The definition of the key in “ABC” method is shown in Table. Definition of the key in “ABC”...
- Page 20 W XYZ W X Y Z 9 * + ( ) < = > % $ Space 0 Input method switch key 2.1.4.3 “123” character input mode In “123” input mode, user can input numeric characters.. The definition of the key in “123” method is shown in Table. Definition of the key in “123”...
- Page 21 PQ RS W XYZ Input method switch key 2.2. Display 2.2.1 Cursor Cursor is shown as “I”,which lies at the position where you want to input . After you input a character, the cursor should locate in the right of the inputted character where the next input position is.
- Page 22 3895499 Display in the view mode 2.2.3 Display in edit mode In edit mode, character is input from left to right. If the length exceeds the max LCD content, characters at the left of cursor should move to left side of LCD one by one.
-
Page 23: Using The Menu
Display in the insert mode 2.2.5 Rapid delete Press [Delete] key for a long time (> 2 Seconds), will cause to delete all current characters. 2.2.6 Cursor advance In abc mode or ABC mode, user can input by rapidly press the same key. If the interval >=600 ms, cursor will advance. 2.2.7 Exit edit mode When there’s no character left on LCD, press [delete] key will exit edit mode. - Page 24 2.3.2.Menu tree view The menu tree total has 9 sub-menus, just as Figure 2-1 shown. Menu tree Phone book Call records DND List Network setting SIP setting Phone setting Program key Factory default Reboot Figure 2-1 menu tree...
-
Page 25: Getting Started
3. Getting started 3.1. Prepare network settings Plug reticle to Network RJ45 interface. The other side connects the SIP server’s networks. 3.2. Prepare VoIP settings 1. Click key, LCD will display config menu. -
Page 26: Basic Functions
2. Select “SIP setting” “Proxy setting” “PxyServ”, input Proxy Server IP Address, Click to save configuration. 3. Select “SIP setting” “Proxy setting” “RegServ”, input Register Server IP Address, Click to save configuration. 4. Select “SIP setting” “User Info” “PhoneNum”, input the phone number, Click to save configuration. - Page 27 7 repertory keys can be set for the phone. Lift the handset or press the handfree key, then press the repertory key to call. Dial from phone book Enter into menu of ‘phone book’, choose ‘view entry’, use down/up to select the number you want to dial, or you can choose ‘search entry’, input the name you want to search, then dial out.
-
Page 28: Answering A Call
4.1.3. Ending a call Users can just hook on or handfree off to end the current call. If the line2 is hold, and user end the line1’s call by hooking on, the phone will automatically ring. 4.2. Answering a call 4.2.1. -
Page 29: Transferring A Call
Note: 1. If press [mute] key to mute the phone, the phone will not clear the mute function until press the [mute] key again (press [Flash]/[Conference]…keys can not unmute). 2. If Mute function is activated when talking, phone will automatically clear mute if phone go to idle state (clear mute icon display). -
Page 30: Hold A Conference Call
Or press the ‘conference’ key to hold the current call , press the number of the third party . When it is answered, three users will be in the conference status immediately. 4.7.2. Hold a conference call During the three-party conference, pressing the [CONF] key will cancel the conference, and show the two line’s phone number on the LCD, user can use the [OK], [UP] and [DOWN] keys to select an connecting line, while another line will be hold. -
Page 31: Menu Operation
5.1. Phone Book DPH-150S’s ( DPH-150SE’s ) phone book can support up to 100 entries. And all these entries can be added ,modified ,deleted or dialed. If phone book is full, ip phone will alert when user want to add new entry. -
Page 32: Search Entry
It will search through all phone book entries to find whether there exists an entry with the same name. If it is, it will prompt user whether he prefers to overwrite the old entry. Press [OK] can overwrite the old entry, press [Delete] can cancel the overwrite. 5.1.3. -
Page 33: Call Records
5.2. Call records The phone provides function to record at most 20or each of dialed /missed /received calls. And the most recent call is the first entry in the list. If the call’s number matches an entry in the phone book, then the name will be displayed instead of number. If more than one item with the same number occurs several times one by one, then only the last one is recorded. - Page 34 Delete all of the records if you don't want to save these records. 5.3. DND List DPH-150S’s ( DPH-150SE’s ) DND list can support up to 100 entries. And all these entries can be added, modified, deleted or dialed. LIST ENTRIES WILL BE SORTED BY NUM...
- Page 35 Input the corresponding call number, then press to save. 5.3.3. Search entry To search a entry, user need to input the name of entry. It will find out the most matching entry according to the searching key, and display that entry. User can press [Up] / [Down] to view other entries before or after that entry.
-
Page 36: Network Setting
5.4. Network setting 5.4.1. Set IP mode DHCP Obtain IP address using DHCP. PPPoE Obtain IP address using PPPoE. FIXED Pre-set static IP address. 5.4.2. IP address Set valid IP address.(Can noit modify in DHCP or PPPoE mode) The text input mode is ‘123’, and other input modes are not permitted. And the inputted IP address should observe IP address rules. If the inputted IP address is conflicted with other IP address on Ethernet, the phone will display “IP Conflict”... -
Page 37: Dns Setting
5.4.5. DNS setting If User set the DNS address, user can use URL address for proxy server. The text input mode is ‘123’, and other types of characters are not permitted. And the inputted IP address should observe IP address rules. Primary DNS Secondary DNS 5.4.6. -
Page 38: Sip Setting
5.5. SIP setting 5.5.1. Proxy setting PxyServ To set the proxy server address, IP address or domain name. When the input is in “domain name” type, then it is allowed to input all ASCII characters, and its max length is limit to 32. And if the input is an IP address, then it should observe IP address rules. -
Page 39: Phone Setting
The input should be digit or English character. And also it can be empty. The default edit mode is “abc”.The max length of name can be 32. Password To set the password for registration, this is not necessary. The input can be digit or English character. And it can be empty. The Max password length is 18. PhoneNum To set the line number for registration, this is necessary to fulfill. -
Page 40: Disable All
5.6.2.2. No answer Incoming call in no answer status will be forwarded to assigned phone number. If the incoming ring times are counted to 10, the phone will be considered as No answer status, and the incoming call will be forward. Activate Input the forward number and active busy forward. - Page 41 You can also ignore xxxx/xx/xx (Year/Month/date), and only set alarm time for everyday alarm. If the system time reach the alarm time when current state is on hook state, a alarm ring(ring every 30 seconds) will be emit from the speaker to inform the user, and the LCD display “Alarming”...
-
Page 42: Memory Key
his/her ring melody onto the phone through WEB setting. 5.6.6. Volume Handset volume This phone has 8 levels (1-8)to adjust volume. (2)Speaker volume This phone has 8 levels (1-8)to adjust volume. (3)Headset volume This phone has 8 levels (1-8)to adjust volume. 5.7. -
Page 43: Factory Default
Besides using the key menu on the telephone to carry on the basic configuration, but also you may use the WEB to carry on the comprehensive configuration. 6.1. How to land web DPH-150S(SE) has two network modes: Bridge and Router, We can switch DPH-150S’s ( DPH-150SE’s ) mode between the two modes.(Default mode is Bridge mode)... -
Page 44: Default Username And Password
address whether is set correctly to the same IP subnet or has the right router. 2、Router mode: User may use the network browser to visit the LAN (PC) port or WAN (Network) port IP address, landing the WEB configuration surface. The LAN port IP address is pre-set “192.168.1.254”. - Page 45 <For DPH-150S> <For DPH-150SE> 6.3. About Note message “You should reboot the system after modify these configuration.” It alarms customer to reboot phone to activate all the configurations they have changed on the web page. “Submit may interrupt current conversation, please be sure.”...
- Page 46 6.5. WIZARD <For DPH-150S> <For DPH-150SE> Installation wizard help customer to complete all basic essential configurations. It includes three steps: Network Connection mode Network Configuration SIP Configuration. Select NEXT button to step. After finishing the wizard guide, the system MUST be rebooted to activate the configurations.
-
Page 47: Static Ip Setting
When entering Network Connection WEB page, there are three network modes as follows: Static IP DHCP PPPoE. According to the mode selected, the following Network Configuration and SIP Configuration may be different. 6.5.1. Static IP setting If Static IP mode, customer needs to finish the following steps: Select Static IP and press NEXT button. - Page 48 IP Address: IP address of the phone Subnet Mask: subnet mask of the phone’s IP address. Default Gateway: default gateway of the phone Primary DNS Address: primary Domain Name Service Address Secondary DNS Address: secondary Domain name service Address (not necessary) Set SIP parameters Phone Number: Phone number used to call or be called.
-
Page 49: Dhcp Setting
Confirmed Password: Keep same with Registering Account Password SIP Server Address: SIP Server Address used to set both Register Server and Proxy Server at the same time in Account Settings. 6.5.2. DHCP setting If DHCP mode, customer needs to finish two steps: Select DHCP and press NEXT button. - Page 50 2、 Set PPPoE account name and password. PPPoE User Name: Max length is 32 characters. PPPoE Password: Max length is 18 characters. 3、 Set SIP parameters Please Refer to 6.5.1_Step 3...
-
Page 51: Bridge Mode
6.6. Network <For DPH-150S> <For DPH-150SE> DPH-150S(SE) has two network modes: Bridge and Router, We can switch DPH-150S’s ( DPH-150SE’s ) mode between the two modes. The WEB page of Bridge and Router mode are different as follows. 6.6.1. Bridge mode... - Page 52 6.6.1.1. VoIP IP In this WEB page, we can complete the following functions: 1、 Switch Bridge mode to Router mode. 2、 Change host name of the IPPhone. The first input is limited 32 characters; the second input is limited 32 characters. 3、...
-
Page 53: Quality Of Service
9、 In PPPoE mode, PPPoE username and password can changed after submit. Max Idle Time default is 600 seconds Connect Type: Keep Alive(default)/Manual On 10、There MUST be an alert to notice that the configurations will take effect after reboot. Quality of Service 6.6.1.2. -
Page 54: Router Mode
control. We can also set TOS field in order to achieve three layers control. QOS: enable or disable qos items to improve voice quality, default is disable Voice VLAN Priority: 802.1p priority in SIP transaction Voice VLAN ID: vlan id tagged in SIP transaction Data VLAN Priority: 802.1p priority in RTP flow Data VLAN ID: vlan id tagged in RTP flow SIP TOS/diffserv: TOS filed value in SIP packet... -
Page 55: Wan Settings
LAN Settings page are mainly used to setting LAN network configurations. NAT Settings page are mainly used to setting NAT network configurations. Quality of Service are used to adjust quality of service by changing parameters in the page. 6.6.2.1. WAN Settings Please Refer to 6.6.1.1 VOIP IP 6.6.2.2. - Page 56 Network Address Translation Enable(default)/Disable IPSEC Pass Through Enable(default)/Disable L2TP Pass Through Enable(default)/Disable PPTP Pass Through Enable(default)/Disable SIP ALG Enable/Disable(default) Quality of Service 6.6.2.3. Please Refer to 6.6.1.2 QOS...
-
Page 57: Advanced Setting
6.7. VOIP <For DPH-150S> <For DPH-150SE> 6.7.1. Advanced Setting The page set some basic parameters of SIP client (UA). - Page 58 SIP Port Number: The port number of SIP client (UA). Session Timer: A minimal interval of SIP session. Before the interval passes, UA should send re-INVITE or UPDATE request to other peer to keep the session alive. Media Port Start: system will select a random port to transmit RTP flow and this item configures the start range Media Port End: system will select a random port to transmit RTP flow and this item configures the end range RTCP Port: RTCP port Transport: using UDP or TCP protocol to transport control protocol data.
-
Page 59: Account Setting
6.7.2. Account Setting The page show user’s accounts of SIP register servers. Phone Number: A user part of SIP URL, usually it’s a SIP account and consists of a continuous digit string with maximum length of 32. Display name: An optional element in SIP URL. Max length is 32 characters. Authentication User Name: User name for authentication when receiving 401/407 for SIP request. -
Page 60: Server Settings
6.7.3. Server Settings This page can be used to set the server’s parameters of an account. Authentication Expired Time: when the time expires, the client must register itself on the SIP server again. Register Server Address: Assigns the SIP Register Server’s IP address. Register Server Port: Register server port of a certain SIP domain. -
Page 61: Voice Settings
6.7.5. Security Setting secure RTP call of the SIP client. User can accept SRTP call or Non-SRTP call. Secure RTP: if secure RTP be support Accept Non-SRTP Call: if Non-SRTP call can be accepted when secure RTP has been enable. SRTP Security Type: Security type of SRTP use. - Page 62 Codec Priority 1-4 Codec Priority ILBC mode: ILBC mode Packet Length: RTP payload length. Selects a length from the pull-down menu, default setting is 20 msec. DTMF Method: five DTMF Method to select Outband 2833 Payload Type Value: Outband 2833 Payload Type Value RTP Timeout: Disconnect a call after not receiving RTP packet for this time value.
-
Page 63: General Settings
Line Echo Canceller Tail Length: Tail length for line echo cancellation. Default setting is in Disable mode. Acoustic Echo Canceller Tail Length: Tail length for acoustic echo cancellation Default setting is in Disable mode. Automatic Gain Control Tx Level: Automatic voice gain control for transmitting. Default setting is in Disable mode. Automatic Gain Control Rx Level: Automatic voice gain control for receiving. - Page 64 Volume Setting set the phone ‘s volume of ringer/handset/speaker/handfree. Language Setting change the language displayed on LCD, English or Deutsch(German). Melody Setting: change the melody of ring Tone Setting: set tone of keystoke. Auto Redial Setting Auto Redial Enable: enable or disable auto redial function Auto Redial Time: set auto redial times Time Format Setting Time format: time format displayed on lcd...
-
Page 65: Forward Settings
Melody Update Object Select: select the item that will be updated. Import: import a local melody file into the phone. The file size must be less than 22000 bytes, and its format must be PCM. Restore Music of Hold: restore music of hold to default. 6.8.2. -
Page 66: Function Keys
Enable ON/OFF (Default := OFF) Target Number Phone number/SIP URI Call Forwarding on No Answer Type Enable ON/OFF (Default := OFF) Target Number Phone number/SIP URI Call Forwarding Unconditional Type Enable ON/OFF (Default := OFF) Target Number Phone number/SIP URI Call Forwarding Parallel* Type Enable... -
Page 67: Alarm Settings
A. function can only be edited; but memory can be added/deleted and edited; B. a key only can be set as a function or memory, or the alert message will pop out to customer ------”The Key you select has been occupied!” C. - Page 68 Date Value Setting: set alarm date. Empty means the alarm will be active every day. Time Value Setting: set alarm time. 6.8.5. Phone book 1、 Save phone book of the IPPhone to a local file. 2、 Import an local phone book file to IPPhone’s phone book.(overwrite the current IPPhone’s phone book) The size of import file can’t smaller than 8KB;...
- Page 69 6.8.6. DND User can add/delete Do Not Disturb List entry in the page. User name: user name to DND, Max length is 18 characters. Phone number: phone number to DND, Max length is 32 digits.
-
Page 70: System Information
6.9. Information <For DPH-150S> <For DPH-150SE> Information includes six web pages: System Information, Routing Table, Call Missed Record, Call Dialed Record, Call Received Record and System Log. They are used to display the main information of IP-Phone. But this information may be different according to different mode: Route/Bridge. The difference between the two modes includes two web pages: System Information and Routing Table, so when describing the two pages, we should divide it into two conditions. - Page 71 6.9.1.1. Bridge mode...
-
Page 72: Routing Table
6.9.1.2. Router mode 6.9.2. Routing Table The Routing Table doesn’t exit in bridge mode. Except for in router mode, the customer can not view the table at all. -
Page 73: Missed Calls
The table shows the routing information of IP-Phone. 6.9.3. Missed Calls This table shows the list of missed calls. For some Record, if the link under its Caller has been clicked by customer, its reviewed table will be displayed, else not reviewed. -
Page 74: Received Calls
6.9.5. Received Calls This table shows the list of received calls. 6.10. Management <For DPH-150S> <For DPH-150SE>... -
Page 75: Account Control
6.10.1. Account Control This page is used to display http port for remote control and to set remote administration IP address. If we set remote administration IP, only terminal with that IP can configure through web. Remote administration: enable or disable remote administration Http port for remote: http port for remote, it can not be changed on web. -
Page 76: Date And Time
System Log: enable/disable (default) the system log function. Kernel Log Level: 0(Emergence), 1(Alert), 2(Critical), 3(Error), 4(Warning)(default), 5(Notice), 6(Info), 7(Debug), Disabled(Kernel Log is disabled). VoIP Log: enable/disable (default) VOIP Log. Remote Log Server Address: assigns the remote log server’s IP address. Remote Log Server Port: assigns the remote log server’s port. - Page 77 Date Time Set: manual set date time or via ntp server Time Zone: time zone NTP Update Interval: a period to exchange ntp message. NTP Server 1: ntp server domain or IP address NTP Server 2: ntp server domain or IP address 6.10.4.
-
Page 78: Firmware Update
6.10.5. Configuration Save: save device current configuration to local file Restore: upload a local file to restore as device configuration Factory Default: set device configuration to factory default setting View Current Configuration: open a static page to show current configuration of system. 6.10.6. - Page 79 Firmware Update at each Boot: enable or disable auto provision at each phone boot Firmware Update Periodically: enable or disable periodical auto provision Provision method: select auto provision method HTTP Provision Config Server Address: IP address of http provision server which stores configuration file HTTP Provision Config Directory: directory which stores configuration file HTTP Provision Config Server Port: http provision configures server port number TFTP Provision Config Server Address: IP address of TFTP provision server which stores configuration file...
- Page 80 TFTP Provision Image Server Address: image server IP address via TFTP to update image TFTP Provision Image Directory: directory which placed the image TFTP Provision Image Server Port: TFTP provision image server port number Provision Config Type: 6.11. Logout <For DPH-150S> <For DPH-150SE>...
-
Page 81: Function Key
6.11.1. Logout We can select this page to log out. If some people want to configure this phone, he must input user name and password to log in. click the logout button to log out 6.11.2. Reboot We can use this page to reboot the system. We must reboot system after config some web pages with red remarks on bottom. Click Reboot button to restart system. - Page 82 NOTE: If only one line in talking, once you press [Flash] function key, due to the other line is free, so you will hear the dial tone. It can build the second line through dial, then press [Flash] function key to switch. 7.1.2.
- Page 83 The following procedures describe each transfer type in detail. Phone A, phone B, phone C Sending a call to another phone (attended transfer) To perform attended transfers: 1. A, as a caller, to call B, A and B in talking, A want to transfer active to C, A press the function key [Flash] button, then A hear a dial tone. 2.
- Page 84 7.1.3. Conference This phone support two kinds conference function: (1)To make a conference call, press the ‘Flash’ key to hold the current call, press the number of the third party with ‘#’ or time out 5s for ending. When the third party is answered, press the function key [Conference] to begin the conference.
- Page 85 7.1.4. Missed calls When press the function key [MissedCall], it will view missed call list. Also user can view the list by pressing [Up]/ [Down] key( key). If there is no missed call, the LCD screen will show “No Missed Call”. NOTE: When there’re new missed calls, the LED1 indicator will flash.
- Page 86 7.1.5. Received calls When press the function key [ReceivedCall], it will view received call list. If there is no received call, the LCD screen will show “No Received Call”.
- Page 87 7.1.6. DND DND means Do Not Disturb from any other call. If you want to have this function, please press [DND] function key; if you don’t want to have this function, press [DND] function key again. NOTE: If DND function is active, LED1 indicator will be turned on, in this state, you can call anyone or everybody can’t call you.
- Page 88 7.1.7. Headset This phone has headset and Mic jacks, you can connect the headset used the jacks. If you plug in the headset, whatever the current state, press [Headset] function key, and then switch voice path to the headset or close the voice path of headset to handset or handfree. NOTE: When headset is in active, LED2 indicator will be turn on.
-
Page 89: Troubleshooting
8. Troubleshooting 1. How to input ‘a, b, c…’ character or ‘1, 2, 3…’ digital number? You can press the key [#] to switch. 2. Why dial a phone number, the call dial out after a moment? This phone has two ways to dial out the call, one is wait 5 seconds then phone will dial out automatically, the other way is press [#] after you finish inputting dial number, the call will dial out immediately.
Need help?
Do you have a question about the DPH-150S and is the answer not in the manual?
Questions and answers