Advertisement
Advertisement

Subscribe to Our Youtube Channel
Related Manuals for Garage Smart Universal XL HD Lifter


Summary of Contents for Garage Smart Universal XL HD Lifter
- Page 1 User Guide Garage Smart support – support.garagesmart.com...
-
Page 2: Table Of Contents
FCC Statement ..............................6 About the Universal XL HD Lifter ......................7 Parts Identifier .............................. 7 Installation Overview............................8 Installing the Universal XL HD Lifter Kit ..................... 8 Using the MyLifter App ........................... 17 ... -
Page 3: Limited Lifetime Warranty
God, or failure to follow the Owner’s Manual. This warranty is the only one we will give on your Garage Smart Product. There are no other express warranties. - Page 4 Lifter system voids the warranty. Unauthorized repair or modification voids the warranty. The Lifter system is intended for personal, indoor, home use. Garage Smart does not warrant its lift system for commercial use, and any such use voids the warranty.
-
Page 5: Safety Information
Do not stand under the Universal XL HD Lifter or items lifted by the system. Do not use the Universal XL HD Lifter to lift people or animals. Do not use the Universal XL HD Lifter to lift or lower items when people or animals are under the system. -
Page 6: Fcc Statement
FCC Statement This device complies with Part 15 of the FCC Rules. Operation is subject to the following two conditions: This device may not cause harmful interference, and This device must accept any interference received, including interference that may cause undesired operation. Warning: Changes or modifications not expressly approved by the party responsible for compliance could void the user’s authority to operate the equipment. -
Page 7: About The Universal Xl Hd Lifter
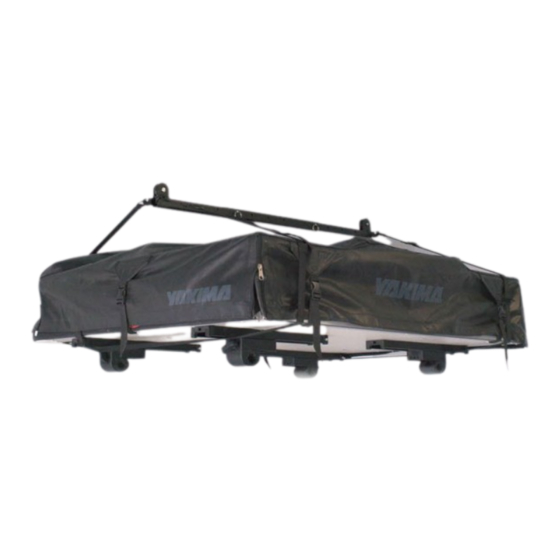
About the Universal XL HD Lifter The Universal XL HD Lifter kit is designed to let you adjust the pulley width to accommodate large, heavy items such as rooftop tents, canoes, and cargo carriers. Using two MyLifter units working in tandem, the Universal XL HD Lifter lets you easily lift objects weighing under 200 pounds that can be balanced with two strap points. -
Page 8: Installation Overview
Before you lift an item, make sure that its weight, combined with the weight of the frame pieces, does not exceed 200 pounds. Installing the Universal XL HD Lifter Kit To install the Universal XL Lifter, you will need the following tools: ... - Page 9 Part 1: Determine where to install the Universal XL HD kit To begin you want to make sure that the object you want to lift is not too big for the space where you want to lift it. 1. Place the item on the garage floor in the area where you want it to be lifted and stored.
- Page 10 6. Take the D Rings from the adjustable straps and attach one to the hooks at both ends of the Universal XL HD frame so each strap supports one side of the item. 7. Tighten the straps and lift up the frame so the straps are taut. 8.
- Page 11 Part 2: Install the Smart Track Pieces The orientation of the Universal XL HD Frame and the item you want to lift, in relation to the direction your joists run, determine how you will need to install the Smart Track. If your joists run parallel to the item and the frame, you can connect the two pieces of track and install it along one joist, or you can mount the two track pieces separately across parallel joists as shown below:...
- Page 12 1. Use a stud finder to find the joist that is nearest to the starting point that aligns with the back of the Universal XL HD Frame. 2. After you have found the nearest joist, use the stud finder and a pencil to find and mark the center of it.
- Page 13 If you are installing each section of Smart Track separately, follow the directions above for each section. WARNING Failure to mount the Smart Track and the Universal XL HD Lifter to secure ceiling joists or rafters could result in property damage, serious personal injury, or death.
- Page 14 Part 3: Installing the MyLifter units CAUTION It is very important that you place both lifters so that the cable is as vertical as possible when the item is lifted. Excessively angled or crossed cables could result in damage to the MyLifter motors and to your property. 1.
- Page 15 DC cable plug comes out of the lifter. 7. Plug in one end of each DC Power Cable into the Garage Smart Power Adapter units. 8. Install the power adapters anywhere on the Smart Track. The universal mount attached to the bottom of the power adapters lets you easily slide and snap them into place on the track.
- Page 16 11. Secure and organize the cables. a. Stow excess power cables in the empty spaces on the Smart Track. b. Snap the Track Covers onto the Smart Track to secure the stowed cables in place. 12. Use the Cable Management Clips to organize the power cord that is plugged into the nearest outlet.
-
Page 17: Using The Mylifter App
Using the MyLifter App The MyLifter app is paired with your MyLifter unit using a Bluetooth connection. Be sure to enable your mobile device’s Bluetooth capabilities before attempting to pair with your lifter. Part 1: Pair your MyLifter units with the app 1. - Page 18 Part 2: Rename the MyLifter units 1. Tap in the upper left-hand corner to go to the Home screen. 2. On the Home screen, tap Edit in the upper right-hand corner of the screen. The button name changes from Edit to Exit and the app enters Edit Mode. In Edit Mode you can rename the lifters or delete them if you need to.
- Page 19 Part 3: Group the MyLifter units 1. On the app Home page, tap Create Group in the lower left corner of the screen. You will see an option to create a Flex Group or a Locked Group. 2. Tap Locked Group to open the Select Devices screen. 3.
- Page 20 6. At the bottom of the Device Control screen, you will see the names of the lifters you added to this group. Tap each lifter in turn and adjust the cable length until each cable is the same distance from the floor. 7.
- Page 21 Part 4: Attach the cables and lift the item 1. On the Device Control screen, press and hold the Manual Lower arrow to let out the cable enough so you can: a. Run one cable under the front pulley and the other cable under the back pulley of the Universal XL HD Frame.
Need help?
Do you have a question about the Universal XL HD Lifter and is the answer not in the manual?
Questions and answers