
Related Manuals for PMA Relay S Series


Summary of Contents for PMA Relay S Series
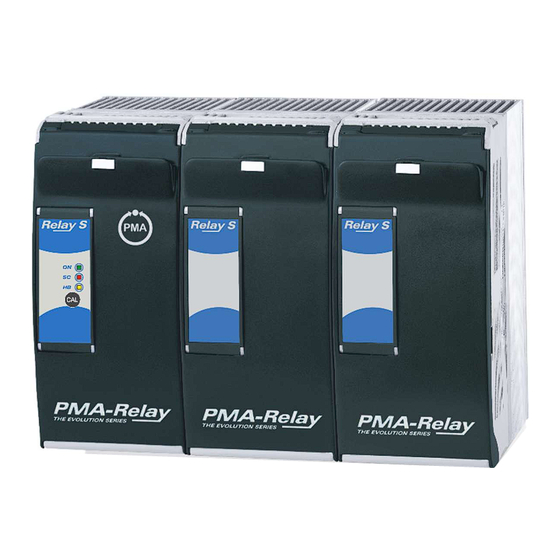
- Page 1 Thyristor-Power Controller PMA-Relay S 3PH from 60A to 210A User Manual PMA-S3-60-210A Valid from: 30.06.2019 Order number: 9499-040-96711...
- Page 2 PMA-Relay S 3PH from 60A to 210A A publication of: Prozeß- und Maschinen-Automation GmbH P.O.Box 310 229 • D-34058 Kassel • Germany All rights reserved. No part of this document may be reproduced or published in any form or by any means without prior written permission from the copyright owner.
-
Page 3: Table Of Contents
PMA-Relay S 3PH from 60A to 210A Inhalt Important warnings for safety ....................4 1.1. Safety notes .......................... 4 Maintenance ......................... 6 Basic Connections ......................... 7 Identification and Order Code ....................8 4.1. Identification of the unit ...................... 8 Order Code ........................... 9 Technical Specifications ...................... -
Page 4: Important Warnings For Safety
PMA-Relay S 3PH from 60A to 210A 1. Important warnings for safety This chapter contains important information for the safety. The not observance of these instructions may result in serious personal injury or death and can cause serious damages to the Thyristor unit and to the components system included. - Page 5 PMA-Relay S 3PH from 60A to 210A WARNING! The power controller’s protection rating is IP20 with all covers installed and closed. It must be installed in an enclosure that provides all the necessary additional protections appropriate for the environment and application.
-
Page 6: Maintenance
PMA-Relay S 3PH from 60A to 210A 2. Maintenance In order to have a corrected cooling, the user must clean the heat-sink and the protective grill of the fans. The frequency of this servicing depends on environmental pollution. Also check periodically if the screw for the power cables and safety earth are tightened correctly... -
Page 7: Basic Connections
PMA-Relay S 3PH from 60A to 210A 3. Basic Connections Star wiring with resistive load (control on three phases) �� = V = Nominal voltage of the load I = Nominal current of the load P = Nominal power of the load Delta wiring with resistive load (control on three phases) ��... -
Page 8: Identification And Order Code
PMA-Relay S 3PH from 60A to 210A 4. Identification and Order Code 4.1. Identification of the unit Caution: Before to install, make sure that the Thyristor unit have not damages. If the product has a fault, please contact the dealer from which you purchased the product. -
Page 9: Order Code
PMA-Relay S 3PH from 60A to 210A 5. Order Code x x x - x x 0 x x x Current Rathing 60 A 0 6 0 75 A 0 7 5 90 A 0 9 0 120 A 1 2 0... -
Page 10: Technical Specifications
PMA-Relay S 3PH from 60A to 210A 6. Technical Specifications 6.1. General features Cover and Socket material PolymericV2 Utilization Category AC-51 AC-55b IP Code Method of Connecting Load in Delta, Load in Star Auxiliary voltage (only with HB option) 24V dc/ac (max 70mA) Relay output for Heater Break Alarm (only with HB option) 0.5A a 125Vac... -
Page 11: Environmental Installation Conditions
PMA-Relay S 3PH from 60A to 210A 6.6. Environmental installation conditions 0-40°C (32-104°F) at nominal current. Ambient temperature Over 40°C -104°F use the derating curve. -25°C to 70°C Storage temperature -13°F to 158°F Don’t install at direct sun light, where there are conductive dust, Installation place corrosive gas, vibration or water and also in salty environmental. -
Page 12: Installation
PMA-Relay S 3PH from 60A to 210A 7. Installation Before to install, make sure that the Thyristor unit have not damages. If the product has a fault, please contact the dealer from which you purchased the product. Verify that the product is the same thing as ordered. -
Page 13: Fixing Holes
PMA-Relay S 3PH from 60A to 210A 7.2. Fixing holes Relay S 3PH 60-90A (Size SR16) Relay S 3PH120-210A (Size SR17) Installation... -
Page 14: Wiring Instructions
PMA-Relay S 3PH from 60A to 210A 8. Wiring instructions The Thyristor unit could be susceptible to interferences lost by near equipments or by the power supply, for this reason in accord to the fundamental practices rules is opportune take some precautions: •... -
Page 15: Terminals Positions 3Ph 120-210A Size
PMA-Relay S 3PH from 60A to 210A 8.2. Terminals Positions 3PH 120-210A Size Top view Down view 8.3. Power Terminals Warning: Before connecting or disconnecting the unit check that power and control cables are isolated from voltage sources. Terminal Description... -
Page 16: Command Terminals
PMA-Relay S 3PH from 60A to 210A 8.4. Command Terminals Warning: Before connecting or disconnecting the unit check that power and control cables are isolated from voltage sources. 8.4.1. Terminal block M1 for SSR Input Terminal M1 Description Not connected... -
Page 17: Connection Diagram For 3 Phases (Control On 3 Phases) From 60 To 90A
PMA-Relay S 3PH from 60A to 210A 8.5. Connection Diagram for 3 phases (control on 3 phases) from 60 to 90A Caution: this procedure must be performed only by qualified persons. Note: *1 A suitable device must ensure that the unit can be electrically isolated from the supply (electromagnetic circuit breaker or by fuse isolator), this allows the qualified people to work in safety. -
Page 18: Connection Diagram For 3 Phases (Control On 2 Phases) From 120 To 210A
PMA-Relay S 3PH from 60A to 210A 8.6. Connection Diagram for 3 phases (control on 2 phases) from 120 to 210A Caution: this procedure must be performed only by qualified persons. Note: *1 A suitable device must ensure that the unit can be electrically isolated from the supply (electromagnetic circuit breaker or by fuse isolator), this allows the qualified people to work in safety. -
Page 19: Led Status And Alarms
PMA-Relay S 3PH from 60A to 210A 8.7. Led status and alarms Status Description LED OFF Load is NOT powered LED ON (Green) Load is powered LED OFF Load OK LED ON (Red) SCR short circuit (only with HB option) S.C. -
Page 20: Hb Alarm Contact
PMA-Relay S 3PH from 60A to 210A 9.2. HB Alarm contact The Relay S unit with HB option (if available), is supplied with Heater Break alarm contact normally opened (NO): • In normal conditions (without alarm) and with auxiliary power supply, the contact to the terminals has opened (relay coil energized). -
Page 21: Input Setting
PMA-Relay S 3PH from 60A to 210A 10. Input setting The input type is already configured in line with customer requirements that are defined in the Order Code. However, if you wish to change the input type (ex. from 0÷10V to 4÷20mA) set the jumpers as below represented and then do the “Input calibration procedure”... -
Page 22: Input Calibration Procedure
PMA-Relay S 3PH from 60A to 210A 10.1. Input calibration procedure Warning this procedure can be done just by specialized personnel This procedure is needed only if you change the input type. User Manual... -
Page 23: Firing Type
PMA-Relay S 3PH from 60A to 210A 11. Firing type Choose a correct firing type allows to optimize the thyristor unit for the installed load. The firing type has already configured in line with customer requirements, Zero Crossing for SSR input and Burst firing for Analog Input. -
Page 24: Burst Firing Settings
PMA-Relay S 3PH from 60A to 210A 11.3. Burst Firing settings The Burst Firing cycles is already configured in line with customer requirements that are defined in the Order Code. However, if you wish to change the Burst Firing cycles (es. from 4 to 8) set the... -
Page 25: Internal Fuse
PMA-Relay S 3PH from 60A to 210A 12. Internal Fuse The thyristor unit have internal fuse extrarapid at low I²t for the thyristor protection of against the short-circuits. The Fuses must have I²t 20% less than thyristor’s I²t. The warranty of thyristor is null if no proper fuses are used. -
Page 26: Fuses Replacement
PMA-Relay S 3PH from 60A to 210A 12.1. Fuses Replacement Open the cover and remove the screws. User Manual... -
Page 27: Trouble Shooting
PMA-Relay S 3PH from 60A to 210A 13. Trouble shooting Small problems sometimes can be solved locally with the help of the below tab of trouble shooting. If you don’t succeed, contact us or your nearest distributor. Symptom Indication on front... - Page 28 © PMA Prozeß- und Maschinen-Automation GmbH P.O.Box. 310 229, D-34058 Kassel, Germany Printed in Germany 9499-040-96711 (06/2019)
Need help?
Do you have a question about the Relay S Series and is the answer not in the manual?
Questions and answers