
Related Manuals for PMA KS 45


Summary of Contents for PMA KS 45
- Page 1 PMA Prozeß- und Maschinen-Automation GmbH Universal controller KS 45 KS 45 KS 45 Operating manual English rail line 9499-040-71811 valid from: 06/2009...
- Page 2 Read the operating instructions Note © 2004 · PMA Prozeß- und Maschinen-Automation GmbH · Printed in Germany All rights reserved · No part of this document may be reproduced or published in any form or by any means without prior written permission from the copyright owner.
-
Page 3: Table Of Contents
Content 1. General ..........5 1.1 Application in thermal plants . - Page 4 6.8.4 Analog output forcing ......31 6.9 Maintenance manager / error list ......32 6.9.1 Error list: .
-
Page 5: General
The KS 45 has at least one universal input and two switching outputs. Optionally the controller can be fitted with an universal output or with optocoupler outputs. The universal output can be configured as continuous output with current or voltage, for triggering solid state relays or for transmitter supply. -
Page 6: Application In Thermal Plants
Application in thermal plants In many thermal plants, only the use of approved control instruments is permissible. There is a KS 45 version (KS45-1xx-xxxxx-Dxx) which meets the requirements as an electronic temperature controller (TR, type 2.B) according to DIN 3440 and EN 14597. -
Page 7: Safety Hints
For taking the unit out of operation, disconnect it from all voltage sources and protect it against accidental operation. If the controller is connected with other equipment in the same signal loop, check that other equipment in the output circuit is not affected before switch-off. If necessary, suitable protective measures must be taken. KS 45... -
Page 8: Maintenance, Repair And Modification
There are no operable elements inside the device, so the user must not open the unit Modification, maintenance and repair work may be done only by trained and authorized personnel. For this purpose, the PMA service should be contacted. Warning When opening the units, or when removing covers or components, live parts and terminals may be exposed. -
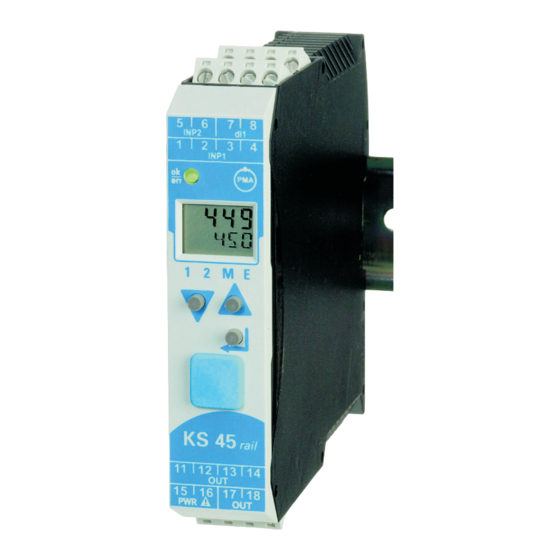
Page 9: Mounting
For mounting, simply clip the unit onto the top-hat rail from top and click it in position. To dismount the unit, pull the bottom catch down using a screwdriver and remove the unit upwards. Universal Controller KS 45 does not contain any maintenance parts, i.e. the unit need not be opened by the customer. -
Page 10: Connectors
With spring-clamp terminals, stiff and flexible wires with end crimp can be introduced into the clamping hole directly. For releasing, actuate the (or- ange) opening lever. Contact protection: Terminal blocks which are not connected should remain in the socket. Connectors KS 45... -
Page 11: Electrical Connections
(Pt100/ Pt1000/ KTY/ ...), 4-wire connection terminals: 2, 3, 5, 6 potentiometer terminals: 1, 2, 3 current (0/4...20mA) terminals: 2, 3 voltage (-2,5...115/-25...1150/-25...90/ -500...500mV) terminals: 1, 2 voltage (0/2...10V/-10...10V/ -5...5V) terminals: 2, 4 thermocouple terminals: 1, 3 KS 45 Connecting diagram... - Page 12 Opto-coupler outputs with shared positive control voltage. • OUT1 terminals: (11), 12, 13 • OUT2 terminals: (11), 12, 14 ! Connecting relay output OUT3 (optional) Relay output max. 250V/2A as nomally open contact. • OUT3 terminals: 17, 18 Terminal connections KS 45...
-
Page 13: Connecting Diagram
Example: Connecting diagram Connector 1 Description Name Process value x1 Heating current input Switch-over to SP2 Connector 2 Description Name Signal limit 1, signal INP1 fail Controller output Y2 Controller output Y1 Connector 3 Description Name KS 45 Connecting diagram... -
Page 14: Connection Examples
Example: INP2 with current trans- former and Example: heating / cooling OUT 1 /OUT2 SSR via opto-coupler INP2 INP2 INP1 INP1 OUT1 OUT2 OUT2 OUT1 Connection example: KS 45 and TB 45 TB 45 temperature limiter KS 45 Fuse Fuse Fuse INP2 INP1 INP1 Reset-... -
Page 15: Hints For Installation
The screw terminals must be tightened using a torque of 0,5 – 0,6 Nm. The instrument must be used exclusively for indoor applications. For max. ambient temperature: see technical data. Maximum operating voltage: see technical data. KS 45 Hints for installation... -
Page 16: Operation
When changing over to the parameter setting, configuration or calibration level and at the extended operating level, the parameter name and value are displayed alternately. § : To facilitate withdrawal of the PC connector from the instrument, please, press the cable left. Front view KS 45... -
Page 17: Operating Structure
After switching on the supply voltage, the instrument starts with the operating level. The operating status is as before power-off. If the device was in manual mode, when switching off the power-supply, it also starts up in manual mode with output value Y2. KS 45 Operating structure... -
Page 18: Displays In The Operating Level
1 2 M E ô Returning to the original displayed value. 450. 3 If for 30 s no key is pushed, the display automatically 450. 0 returns to the origin. äüüü 1 2 M E Displays in the operating level KS 45... -
Page 19: Extended Operating Level
1 2 M E 1 2 M E ô ô return to normal display after the last parameter Unless a key is pressed within a defined time (timeout = 30 s), the operating level is displayed again. Extended operating level KS 45... -
Page 20: Special Change-Over Functions
This can be done by assigning Conf / LOGI / C. o FF= 5 and taking the Func - value into the extended operating level. Function Func is not suitable for timer activation. Special change-over functions KS 45... -
Page 21: Selecting The Units
Text (example): TAG no. äüüü 1 2 M E 450. 3 TI451 äüüü 1 2 M E For permanent display the value signals/other/D.Unt must be set in the mode "operating level" via the engineering tool. Selecting the units KS 45... -
Page 22: Functions
Functions Functions The signal data flow of transmitter KS 45 is shown in the following diagram: Linearization The input values of input INP1 or INP2 can be linearized via a table. By means of tables, e.g. special linearizations for thermocouples or other non-linear input signals, e.g. a container filling curve, are possible. -
Page 23: Input Scaling
Parameters InL, OuL, InH and OuH are visible only with ConF / InP / Corr = 3 selected. Parameters InL and InH determine the input range. Example with mA: InL= 4 and InH = 20 means that measuring from 4 to 20 mA is required (life zero setting). KS 45 Input scaling... -
Page 24: Input Fail Detection
In this case the linearization error can increase. Procedure with resistance measurement Measure the lead resistance with an ohmmeter and subtract it from the measured value via the scaling. KS 45 Input scaling... -
Page 25: Filter
Connect the input for the lambda probe to INP1 . Use terminals I and 2. If necessary, temperature measurement is connected to INP2. Input 1 is used to adjust one of the high-impedance voltage inputs as sensor type: Filter KS 45... - Page 26 With display range overflow, “EEEE” is displayed . Example: the ppm range is selected, but the value is a % value. When exceeding the display span start, 0 is displayed. Tip: the unit can be displayed on line 2. measurement (optional) KS 45...
-
Page 27: Limit Value Processing
LED rot / red Outputs H. 1 = OFF H. 1 = OFF -1999 9999 L. 1 -1999 9999 Display range L. 1 L. 1 HYS. 1 HYS. 1 Limit value 1 Outputs LED rot / red Limit value processing KS 45... -
Page 28: Heating-Current Alarm
HC. A (as an alarm in the error list, if configured) is output. With heating current alarm output, the output is within the limits again immediately, when the heating current returns within the limits. Limit value processing KS 45... -
Page 29: Loop-Alarm
Adjusting the limit value for the number of switching cycles C.Sch can be done only via BlueControl ® ® The current counter state can be displayed in the BlueControl expert version. The number of switching cycles is saved once per hour. When switching off, intermediate values are lost. KS 45 Limit value processing... -
Page 30: Analog Output (Optional)
Out.0. Therefore, output of smaller values is also possible rather than output limiting by reference value 4mA / 2V. Configuration O.tYP = 0/1 (0/4...20mA) or 2/3 (0/2...10V) determines, which output should be used as a calibrated reference output. Analog output (optional) KS 45... -
Page 31: Logic Output
), the output can be configured for value input via interface, or by means of an input value at extended operating level (=Forcing). This setting can be used also for e.g. testing the cables and units connected in the output circuit. This function can also realize a setpoint potentiometer. Analog output (optional) KS 45... -
Page 32: Maintenance Manager / Error List
Description Cause Possible remedial action Name E. 1 Internal error, can- E.g. defective EEPROM Contact PMA service not be corrected Return device to manufacturer E. 2 Internal error, reset- E.g. EMC trouble Keep measuring and supply cables separate. Pro- table... -
Page 33: Error Status Self-Tuning
This setting is without effect on limit values Lim.1 … 3 configured for storage. 6.9.2 Error status self-tuning Self-tuning heating ( ADA. H ) and cooling ( ADA. C ) error status: Maintenance manager / error list KS 45... -
Page 34: Resetting To Factory Setting
8. 8 . 8 . 8 The copy procedure ( ) can take some seconds.Now, the #: # : # : # : # ääää transmitter is in normal operation. Afterwards the device restarts as usual. Resetting to factory setting KS 45... -
Page 35: Controlling
With controlling via programmer with external offset the setpoint is determined by the internal programmer. The programmer value can be influenced by the external (additive) offset. Timer The effective setpoint is determined by the timer depending on the chosen timermode (see chapter timer). Setpoint processing KS 45... -
Page 36: Setpoint Gradient / Ramp
Those adjustments are not valid for the second setpoint SP. 2 . 7.1.3 Second setpoint It can always be switched to the second setpoint. The switching source is defined with LOGI/SP.2. With this function a "safety setpoint" can be realised. Setpoint processing KS 45... -
Page 37: Configuration Examples
-1999...9999 setpoint limit low for SPeff SP. H i -1999...9999 setpoint limit high for SPeff For direct signaller action, the controller action must be changed ( ConF / Cntr / C. A ct = 1 ) process value setpoint output KS 45 Configuration examples... -
Page 38: 2-Point Controller (Inverse)
SPeff SP. H i -1999...9999 setpoint limit high for SPeff For direct action, the controller action must be changed ( ConF / Cntr / C. A ct = 1 ). setpoint process value output Configuration examples KS 45... -
Page 39: 3-Point Controller (Relay & Relay)
1 (heating) 0,4...9999 min. cycle time 2 (cooling) 0...9999 neutr. zone in units of phys.quantity PArA / SEtP: SP. L O -1999...9999 setpoint limit low for SPeff SP. H i -1999...9999 setpoint limit high for SPeff KS 45 Configuration examples... -
Page 40: 3-Point Stepping Controller (Relay & Relay)
SPeff For direct action of the 3-point stepping controller, the controller output action must be changed ( ConF / Cntr / C. A ct = 1 ). setpoint process value output 1 output 2 Configuration examples KS 45... -
Page 41: Continuous Controller (Inverse)
To prevent control outputs Out. 1 and Out. 2 of the continuous controller from switching simultaneously, the control function of outputs Out. 1 and Out. 2 must be switched off ( ConF / Out. 1 and Out. 2 / Y. 1 and Y. 2 = 0 ). KS 45 Configuration examples... -
Page 42: D - Y - Off Controller / 2-Point Controller With Pre-Contact
D / Y / Off in units of phys. quantity PArA / SEtP: SP. L O -1999...9999 setpoint limit low for SPeff SP. H i -1999...9999 setpoint limit high for SPeff Configuration examples KS 45... -
Page 43: Self-Tuning
Sufficient setpoint reserve: inverse controller:(with process value <setpoint-(10% of SP. H i - SP. L O) direct controller: (with process value >setpoint+ (10% of SP. H i - SP. L O) KS 45 Self-tuning... -
Page 44: Self-Tuning Start
– Display of error list at extended operating level. After acknowledgement of the error message, the controller continues control in automatic mode using the old parameters. Cancellation causes: r page 33: "Error status self-tuning heating ( ADA. H ) and cooling ( ADA. C )" Self-tuning KS 45... -
Page 45: Examples For Self-Tuning Attempts
. A . A . d . d . A . A . . A . A . d . d . A . A . . A . A . d . d . A . A . “ - “ “ - “ KS 45 Self-tuning... -
Page 46: Manual Tuning
With 2-point and 3-point con- 0,5 w K trollers, the cycle time must be 2,6 w K 6 w Tu adjusted to t1 / t2 £ 0,25 * Tu 1,7 w K 2 w Tu 3-point-stepping Manual tuning KS 45... -
Page 47: Programmer
This gradient is always effective. As the programmer starts the first segment at the real process value, the actual running time of the first segment can change (process value ¹ setpoint). Starting conditions you'll find in the following drawing. KS 45... - Page 48 Changing the segment end setpoint: Changing the set-point leads to re-calculation of the required gradient, in order to reach the new set-point during the segment rest time, whereby the polarity sign of the required gradient can change. KS 45...
-
Page 49: Timer
(x = SP. 2 _ b. t i). After time elapse the controller returns to SP. End and the set-point are dis- played alternately in the lower display line. start t. S P KS 45 Setting up the timer... -
Page 50: Tolerance Band
The timer run-time can be determined via parameter t. S P in the PArA menu. The timer run-time must be specified in minutes with one digit behind the decimal point (0,1 minutes = 6 seconds). Alternatively, the timer run-time can be determined directly at extended operating level (r chapter 9.3). Determining the timer run-time KS 45... -
Page 51: Starting The Timer
(SP.2 r SP or Y r Y2 switch-over) configured as a push-button). • • via the serial interface If the digital input is defined as a switch or if the Func function with SP/SP2 or Y/Y2 switch-over is configured, the signal change will cancel the timer. KS 45 Starting the timer... - Page 52 Das Timersignal timEwird mit Start des Timers gesetzt, mit Ende oder Abbruch zurückgesetzt. * Der Timerstart erfolgt über Umschaltung Y2 r Y, der Timer schaltet auf Y2, beim Ende wird von Y2 r Y umgeschaltet. End / cancelation of the timer KS 45...
-
Page 53: Configuration Level
After the last configuration of a group, donE is displayed and followed by automatic change to the next group Return to the beginning of a group is by pressing the ô key for 3 sec. Please check all interdependent parameters for their validity. KS 45 Configuration survey... -
Page 54: Configurations
FAIL behaviour at sensor break outputs off switch to Y2 mean correcting value rnG. L lower control range [phys] rnG. H upper control range [phys] Tuning of cycle time Adt0 automatische Optimierung keine Optimierung KS 45 Configurations... - Page 55 2-point correction scaling In. F alternative value INP OFF, -1999...9999 Ò Forcing of analog input INP1, INP2 µ (only visible with BlueControl fAI1 not active (fAI2) the value for this analog input is defined via interface. KS 45 Configurations...
- Page 56 1 not active active Lim. 2 signal limit 2 not active active Lim. 3 signal limit 3 not active active LP. A L loop alarm not active active HC. A L heating current alarm not active active KS 45 Configurations...
- Page 57 F n function of inputs direct inverse toggle key function block front (local/remote change Remote: front functions are blocked) interface only always on di1 switches Func switches Limit 1 switches Limit 2 switches Limit 3 switches KS 45 Configurations...
- Page 58 Inp1/ Inp2/ di1 interface only di1 switches Limit 1 switches Limit 2 switches Limit 3 switches Ò fDI1 forcing of the digital input (only visible with BlueControl not active the value for this analog input is defined via interface. KS 45 Configurations...
- Page 59 1 digits behind the decimal point 2 digits behind the decimal point 3 digits behind the decimal point C. d EL 0..200 modem delay [ms] Ò FrEq Switch over 50/60 Hz (only visible with BlueControl Netfrequency 50 Hz Netfrequency 60 Hz KS 45 Configurations...
- Page 60 U.LinT. For special resistance thermometer (KTY 11-6) (S.tYP = 23), specify the input values in Ohm and the output value in the temperature unit adjusted in U.LinT . Resetting to factory setting (default) r chapter 15.4 KS 45 Configurations...
-
Page 61: Parameter-Level
Stepping back to the beginning of a group is done by pressing the ô - key for 3 s. If, for 30 s no key is pressed, the controller returns to the operating level (Timeout = 30 s). KS 45 Parameter-survey... -
Page 62: Parameters
[phys] -1999...9999 (Inl. 2 ) Oul. 1 lower output value [phys] -1999...9999 (OuL. 2 ) InH. 1 upper input value [phys] -1999...9999 (InH. 2 ) OuH. 1 upper output value [phys] -1999...9999 (OuH. 2 ) KS 45 Parameters... - Page 63 L. 3 off, -1999...9999 lower limit 3 [phys] H. 3 off, -1999...9999 upper limit 3 [phys] HYS. 3 hysteresis 3 [phys] 0...9999 HC. A heat current limit [A] 0...9999 Resetting to factory setting (default) r chapter 15.4 KS 45 Parameters...
-
Page 64: Calibrating-Level
Deleting the correction values is done fastest by switching off the measured value correction Corr = 0 or setting the scaling parameters to a linear behaviour. The values InL. x and InH. x show the real measured value. The output values OuL. x and OuH. x start with the preset value. KS 45... -
Page 65: Offset-Correction
Subsequently, the input value has to be confirmed by pressing key ô . OuL: The scaling point display value is indicated. The operator can correct the display value by pressing keys ÈÌ. Subsequently, he presses key ô to confirm the display value. KS 45 Offset-correction... -
Page 66: 2-Point-Correction
Adjust the upper input value by means of the input signal simulator and confirm the input value by pressing key ô . OuH: The display value of the upper scaling point is indicated. Correct the upper display value by pressing keys ÈÌ and press key ô to confirm the dis- play value. KS 45 2-point-correction... -
Page 67: Engineering Tool Bluecontrol Ò
/ multiple licence nein wizard function extended simulation The mini version is - free of charge - at your disposal as download at PMA homepage www.pma-online.de or on the PMA-CD (please ask for). At the end of the installation the... -
Page 68: Versions
(CE-certified) certified to EN 14597 (replaces DIN 3440) * not with optocoupler outputs (KS45-1x4... und KS45-1x5...) cULus certified Documentation (please order the associated documentation) operation manual KS 45 german 9499-040-71818 operation manual KS 45 english 9499-040-71811 interface description MODBUS rail line... -
Page 69: Technical Data
ß 2 K NiCr-CuNi -100...1000°C -148...1832°F 0,1 K ß 3 K PtRh-Pt6% 0(100)...1820°C 32(212)...3308°F 0,4 K ß 0,1 % special -25..75 mV 0,01 % * Values for type B apply from 400°C upwards **Values apply from -80°C upwards KS 45... - Page 70 Thermocouples (Table 1) Configurable as direct or inverse switch or push button! Cold-junction compensation Contact input • internal, Connection of potential-free contact that is suitable for switching ß_ 0,5 K - additional error: typ.: ‘dry’ circuits. ß -2,5 K max.: KS 45...
- Page 71 A protective diode for inductive loads must be fitted externally. OUT3 UNIVERSAL OUTPUT Galvanically isolated from the inputs. Parallel current/voltage output with common ‘minus’ terminal (combined use only in galvanically isolated circuits). Freely scalable Resolution: 14 bits ß 2% Tracking error I/U: ß_1% Residual ripple: KS 45...
- Page 72 BLUEPORT® FRONT INTERFACE Version 2 Connection to the controller front via a PC adapter (see ‘Additional Accessories’). The BlueControl ® software enables the KS 45 to be system RS 485 input 1 configured, parameters set, and operated. input 2 (HC)
- Page 73 Flammability class: V2 (UL 94) for screw terminals V0 (UL 94) for spring-clamp terminals and bus connector Electrical safety Complies with EN 61 010-1 Over-voltage category II Contamination degree 2 Protection class II Electrical connections Plug-in connector strips with choice of terminal type: KS 45...
-
Page 74: Index
- Changing segment end setpoint Connectors ..... . 10 - Changing segment time - Parameter setting - Set-up - Starting/Stopping KS 45... - Page 75 Units......21 Versions ......68 KS 45...
- Page 76 Edition 06/2009 - Subject to change without notice - PMA_KS45_Rev02...
Need help?
Do you have a question about the KS 45 and is the answer not in the manual?
Questions and answers