Viessmann VITORONDENS 200-T Service Instructions Manual
Hide thumbs
Also See for VITORONDENS 200-T:
- Service instructions manual (32 pages) ,
- Installation instructions manual (28 pages) ,
- Technical manual (52 pages)

Related Manuals for Viessmann VITORONDENS 200-T


Summary of Contents for Viessmann VITORONDENS 200-T
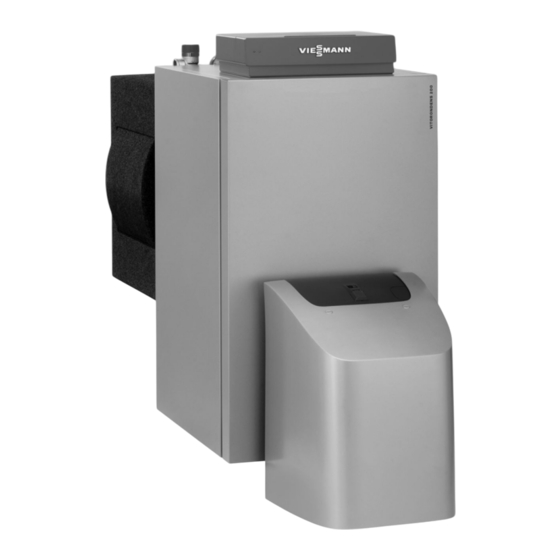
- Page 1 VIESMANN Service instructions for contractors Vitorondens 200-T Type J2RA, 67.6 to 107.3 kW Oil Unit condensing boiler VITORONDENS 200-T Please keep safe. 5831441 GB 11/2018...
- Page 2 Prior to commencing work, touch earthed lidate our warranty. objects such as heating or water pipes, to dis- For replacements, use only original spare parts charge static loads. supplied or approved by Viessmann.
- Page 3 Safety instructions Safety instructions (cont.) Safety instructions for operating the system If you smell flue gas Danger Leaking or blocked flue systems, or an inade- Danger quate supply of combustion air can cause life Flue gas can lead to life threatening poisoning. threatening poisoning from carbon monoxide in ■...
-
Page 4: Table Of Contents
Index Index Product information Intended use ..................Commissioning, inspec- Steps - commissioning, inspection and maintenance ......tion, maintenance Parts lists Parts lists ....................19 Ordering parts ..................19 ■ Overview of assemblies ................. 19 Heat exchanger assembly ..............20 Boiler body assembly ................20 Thermal insulation assembly .............. -
Page 5: Intended Use
Product information Intended use The appliance is intended solely for installation and Any usage beyond this must be approved by the man- operation in sealed unvented heating systems that ufacturer in each individual case. comply with EN 12828, with due attention paid to the associated installation, service and operating instruc- Incorrect usage or operation of the appliance (e.g. - Page 6 Commissioning, inspection, maintenance Steps - commissioning, inspection and maintenance Commissioning steps Inspection steps Maintenance steps Page • • • 1. Filling and commissioning the heating system.............. • 2. Venting the heating system • • 3. Shutting down the system • •...
-
Page 7: Filling And Commissioning The Heating System
Commissioning, inspection, maintenance Filling and commissioning the heating system Operating instructions, service instructions – control unit and burner 1. Check that the ventilation air aperture in the instal- lation room is open. 2. Check the pre-charge pressure of the expansion vessel. -
Page 8: Venting The Heating System
Commissioning, inspection, maintenance Filling and commissioning the heating system (cont.) Please note Unsuitable fill water increases the level of deposits and corrosion and may lead to appli- ance damage. ■ Flush the heating system thoroughly before filling. Only use fill water of potable water quality. ■... -
Page 9: Opening The Boiler Door
Commissioning, inspection, maintenance Opening the boiler door Note If the sound insulation set (accessories) is installed, detach the air supply hose from the burner before opening the boiler door. lÖ Fig. 4... -
Page 10: Cleaning The Boiler Heating Surfaces
Commissioning, inspection, maintenance Cleaning the boiler heating surfaces Fig. 5 Cleaning brush (accessories) 1. Clean the boiler heating surfaces with cleaning Note brush and vacuum cleaner. ■ Ensure that no cleaning agent gets between the boiler body and the thermal insulation. 2. -
Page 11: Fitting The Boiler Door
Commissioning, inspection, maintenance Fitting the boiler door lÖ Fig. 6 Note If the sound insulation set (accessories) is installed, re- attach the air supply hose to the burner. -
Page 12: Separating The Neutralising System (If Installed) From The Boiler And Connecting The Drain Hose
Commissioning, inspection, maintenance Separating the neutralising system (if installed) from the boiler and connecting the drain hose Fig. 7 1. Separate hose to the neutralising system from 2. Connect drain hose to the condensate drain of trap the trap and run to a drainage system. Checking the neutralising system (if installed) 1. -
Page 13: Checking The Connection On The Flue Gas Side For Leaks
Commissioning, inspection, maintenance Checking the connection on the flue gas side for leaks Fig. 8 Note 3. Remove mat Traces of condensate indicate a leak. 4. Check the heat exchanger fixings are firmly 1. Remove thermal insulation hood seated. 2. Remove thermal insulation strip and pull ther- 5. -
Page 14: Removing The Cover From The Heat Exchanger
Commissioning, inspection, maintenance Removing the cover from the heat exchanger Fig. 9 1. Remove heat exchanger cover by undoing the 2. Remove gasket and clean the sealing face. 4 hexagon nuts. -
Page 15: Cleaning The Heat Exchanger
Viessmann cleaning spatula. 4. Refit the heat exchanger components in reverse order. Note Note Viessmann cleaning spatula: Part no. 7840 112 Tighten the hexagon nuts on the cover of cleaning aperture evenly and diagonally. Torque: 5 Nm... -
Page 16: Cleaning The Condensate Drain Pipe And Trap And Reconnecting To The Drainage System
Commissioning, inspection, maintenance Cleaning the condensate drain pipe and trap and reconnecting to the drainage system 1. Before installation, check the stench trap and con- 3. Check the neutralising system (accessories). densate drain for contamination and clean if required. Neutralising system installation and operat- ing instructions Danger Escaping flue gas poses a risk to health. -
Page 17: Checking The Expansion Vessel And System Pressure
Commissioning, inspection, maintenance Checking the expansion vessel and system pressure Fig. 12 Pressure gauge Note 3. Top up with water until the charge pressure of the Please observe expansion vessel manufacturer's cooled system is 0.1 to 0.2 bar (10 to 20 kPa) instructions. -
Page 18: Operating And Service Documents
Commissioning, inspection, maintenance Operating and service documents 1. Complete and detach the customer registration 2. File all parts lists, operating and service instruc- card: tions in the folder and hand this over to the system ■ Hand the system user their section for safekeep- user. -
Page 19: Parts Lists
Parts lists Parts lists Ordering parts The following information is required: Standard parts are available from your local supplier. ■ Serial no. (see type plate ■ Assembly (from this parts list) ■ Position number of the individual part within the assembly (from this parts list) Overview of assemblies Fig. -
Page 20: Heat Exchanger Assembly
Parts lists Heat exchanger assembly 0001 Spring hooks (3 pce) 0016 Heat exchanger 0002 Boiler flue connection 0017 Diaphragm grommet 0003 Safety valve 0018 BF/BR distributor 0004 Silencer 0019 Heat exchanger support 0005 Trap, complete 0020 Compensator 0006 Thermal insulation, heat exchanger 0021 Corrugated pipe 0007 Automatic shut-off valve 0022 Thermal insulation mat, flue gas connection... -
Page 21: Thermal Insulation Assembly
Parts lists Boiler body assembly (cont.) 0001 0003 0002 0004 0005 0008 0009 0006 0007 0006 0006 0007 0007 0009 Fig. 15 Thermal insulation assembly 0001 Installation instructions 0010 Top panel, back 0002 Service instructions 0011 Side panel, left 0003 Spring hooks (3 pce) 0012 Top panel, front 0004 Edge protection 0013 Retaining bracket... - Page 22 Parts lists Thermal insulation assembly (cont.) 0010 0015 0012 0004 0016 0013 0004 0003 0011 0004 0008 0014 0007 0003 0001 0002 0005 0009 0017 0006 0014 Fig. 16...
- Page 23 Commissioning/service reports Commissioning/service reports Commissioning Maintenance/service Maintenance/service Date: Commissioning Maintenance/service Maintenance/service Date: Commissioning Maintenance/service Maintenance/service Date: Commissioning Maintenance/service Maintenance/service Date: Commissioning Maintenance/service Maintenance/service Date:...
- Page 24 Specification Specification Rated heating output = 50/30 °C 67.6 85.8 107.3 = 80/60 °C CE designation CE-2456 CL102 Power consumption 100 % of rated heating output ■ 30 % of rated heating output ■ Available draught mbar Flue gas temperature At a return temperature of 30 °C °C ■...
-
Page 25: Final Decommissioning And Disposal
Shutdown and disposal Final decommissioning and disposal Viessmann products can be recycled. Components For decommissioning the system, isolate the system and substances from the system are not part of ordi- from the power supply and allow components to cool nary household waste. -
Page 26: Declaration Of Conformity
This product meets the requirements of the Efficiency Directive (92/42/EEC) for condensing boilers. Manufacturer's certificate according to the 1st BImSchV [Germany] We, Viessmann Werke GmbH & Co. KG, D-35107 Allendorf, confirm that the following product meets the NO limits specified by the first BImSchV paragraph 6 (1) [Germany]:... - Page 27 Keyword index Keyword index Boiler door Manufacturer's Declaration........26 – Fitting...............11 – Opening..............9 Neutralising system............12 Disposal..............25 Parts list..............19 – Boiler body.............. 20 Expansion vessel........... 7, 17 – Heat exchanger............20 – Thermal insulation...........21 Fill water...............8 Flue gas connection........... 13 Shutdown..............
- Page 28 Viessmann Werke GmbH & Co. KG Viessmann Limited D-35107 Allendorf Hortonwood 30, Telford Telephone: +49 6452 70-0 Shropshire, TF1 7YP, GB Fax: +49 6452 70-2780 Telephone: +44 1952 675000 www.viessmann.com Fax: +44 1952 675040 E-mail: info-uk@viessmann.com...
Need help?
Do you have a question about the VITORONDENS 200-T and is the answer not in the manual?
Questions and answers