
Related Manuals for CLIVET WSN-XIN Series


Summary of Contents for CLIVET WSN-XIN Series
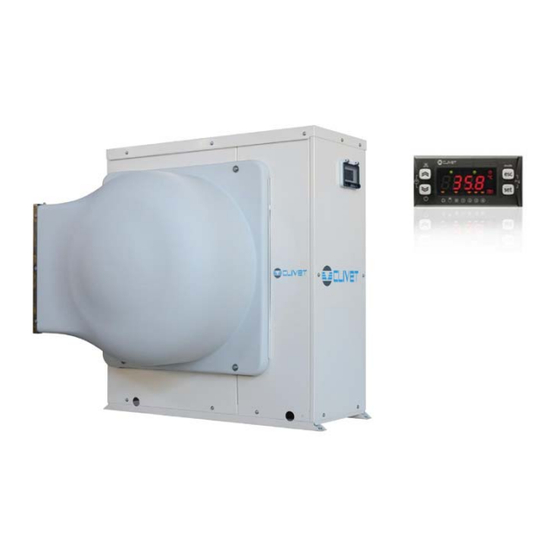
- Page 1 Installation and operating manual Air heat pump - ductable water for indoor installation WSN-XIN 21-141 M0V940M13-06 13-09-16...
- Page 2 Yours faithfully. CLIVET Spa The data contained in this manual is not binding and may be changed by the manufacturer without prior notice. Reproduction, even is part, is FORBIDDEN © Copyright - CLIVET S.p.A. - Feltre (BL) - Italia...
-
Page 3: Table Of Contents
Index of contents Installation quick guide General description Reception Positioning Water connections Electrical connections Start-up Control Maintenance Accessories Decommissioning Residual risks Dimensional drawings Technical information M0V940M13-06 WSN-XIN 21-141... - Page 4 WSN-XIN 21-141 M0V940M13-06...
-
Page 5: Installation Quick Guide
Installation quick guide chapter / page Domestic hot water module 10.5 Boiler management p. 56 Temperature probe domestic hot water 10.5 Boiler management p. 56 Boiler 10.5 Boiler management p. 56 3-way DHW valve 10.5 Boiler management p. 56 3-way valve 10.5 Boiler management p. 56 1° setpoint control 10.5 Boiler management p. 56 2°... -
Page 6: General Description
General description 2.1 Manual The manual provides correct unit installation, use and maintenance. Pay particular attention to: Warning, identifies particularly important operations or information. Prohibited operations that must not be carried out, that compromise the operating of the unit or may cause damage to persons or things. •... - Page 7 2.9 User training The installer has to train the user on: • Start-up/shutdown • Set points change • Standby mode • Maintenance • What to do / what not to do in case of breakdown 2.10 Data update Continual product improvements may imply manual data changes. Visit manufacturer web site for updated data.
-
Page 8: Reception
Reception You have to check before accepting the delivery: • That the unit hasn’t been damaged during transport • That the materials delivered correspond with that indicated on the transport document comparing the data with the identification label positioned on the packaging. In case of damage or anomaly: •... - Page 9 B - Screws 3.3 Packaging removing Be careful not to damage the unit. Keep packing material out of children’s reach it may be dangerous. Recycle and dispose of the packaging material in conformity with local regulations. M0V940M13-06 WSN-XIN 21-141...
-
Page 10: Positioning
Positioning During positioning consider these elements: • Technical spaces requested by the unit • Electrical connections • Water connections • Spaces for air exhaust and intake 4.1 Functional spaces Functional spaces are designed to: • guarantee good unit operation • carry out maintenance operations •... - Page 11 A. Obstacles or barriers which avoid the air inflow to the unit coil B. Keep the min. distances from the podestrian areas. C. Avoid the by-pass between the two air flows D. Avoid snow accumulations on batteries. Avoid the rain input Avoid the angle curves and narrowings G.
- Page 12 4.3 Direction of air supply The unit is delivered with the air supply upward. The air supply may be directed depending on the installation location. To adjust the direction: • Unscrew the fixing bolts on the fan cap.(4 for size 21-71, 10 for size 81-141). •...
- Page 13 4.5 GMX - Supply grille Accessory Fix the grille with the screws M0V940M13-06 WSN-XIN 21-141...
-
Page 14: Water Connections
Water connections 5.1 Water quality The water quality must be checked by qualified personnel. Water with inadequate characteristics can cause: • pressure drop increase • reduces energy efficiency • increased corrosion potential Acceptable water quality values: 7,5 ÷9,0 Free Chlorine <... - Page 15 5.6 Operation sequence Close all vent valves in the high points of the unit hydraulic circuit Close all drain valves in the low points of the unit hydraulic circuit: • Heat exchangers • Pumps • collectors • storage tank Carefully wash the system with clean water: fill and drain the system several times. Apply additives to prevent corrosion, fouling, formation of mud and algae.
- Page 16 Electrical connections The characteristics of the electrical lines must be determined by qualified electrica personnel able to design electrical installations; moreover, the lines must be in conformity with regulations in force. The protection devices of the unit power line must be able to stop all short circuit current, the value must be determined in accordance with system features.
- Page 17 6.4 Power input Ø mm 22 Ø mm 22 Ø mm 34 Install the isolator switch near the unit. Fix the cables: if vacated may be subject to tearing. The cable must not touch the compressor and the refrigerant piping (they reach high temparatures). M0V940M13-06 WSN-XIN 21-141...
- Page 18 6.5 Electrical panel Signals RS485 Power supply Main control module Fuse Electronic thermostatic management 230V aux. cicuit fuse Fan control module Inverter alarm auxiliary relay RS 485 module Compressor control relay (OPTIONAL) Fan capacitor Ciculation pump control relay Transformer Terminal block of the customer connections WSN-XIN 21-141 M0V940M13-06...
- Page 19 Signals RS485 Power supply Main control module FU-V Fan fuse Electronic thermostatic management 230V aux. cicuit fuse RS 485 module compressor overload protection and timer (OPTIONAL) Transformer Main isolator switch compressor overload protection and timer Compressor line protection Size 51-71 230V aux.
- Page 20 6.6 Connections performer by customer Electrical panel sizes 21÷71 - 230/1/50 Unit Remote ON-OFF 6.7 SA1 = On-Off / Standby remote p. 21 Connections perfomer by customer Remote summer/winter 6.8 SA2 = Summer - Winter remote p. 22 Only for sizes 21-41 Second setpoint enabling [Ref] p. ...
- Page 21 Electrical panel sizes 81÷141 - 400/3/50 Unit Second setpoint enabling Connections perfomer by customer AP7 Room keypad Fuses Pump use Provided by the customer Provided by the customer Isolating switch Terminal block of the customer connections Electrical panel Boiler Boiler control, max 24v/AC Remote ON-OFF ALM Cumulative fault signal,max 24v/AC Remote summer/winter...
- Page 22 6.8 SA2 = Summer - Winter remote Set parameter CL44: Keys Esc + Set Menu PAr Menu CL CL44 change Summer/Winter from keypad SA2 = disabled by SA2 change from keyboard disabled SUMMER WINTER 6.9 SA3 Second setpoint enabling switch For details see: 7.10 SA3: 2°...
- Page 23 Start-up 7.1 General description The indicated operations should be done by qualified technician with specific training on the product. Upon request, the service centres performing the start-up. The electrical, water connections and the other system works are by the installer. Agree upon in advance the star-up data with the service centre.
- Page 24 7.4 Refrigeration circuit Check carefully the refrigerating circuit: the presence of oil stains can mean leakage caused by transportation, movements or other). Verify that the refrigerating circuit is in pressure: Using the unit manometers, if present, or service manometers. Make sure that all the service outlets are closed with proper caps; if caps are not present a leak of refrigerant can be possible. Open the valves of the refrigerant circuit, if there are any.
- Page 25 7.7 Compressor crankcase heaters Connect the oil resistances on the compressor crankcase at least 8 hours before the compressor is to be starter: • at the first unit start-up • after each prolonged period of inactivity Supply the resistances switching off the unit isolator switch. To make sure that heaters are working, check the power input.
- Page 26 7.11 Water set point compensation with external temperature It is possible to automatically change the set-point according to the outside temperature. Parameter modification Keys Menu Enable the function: Par: dS00 set-point compensation of the outside temp. 0 = Disabled 1 = Proportional 2 = Fixed (by step) Cooling With low ext.
- Page 27 7.12 Water set point compensation with ambient temperature Only with ambient keyboard option. Function and parameters are the same of paragraph “Water set point compensation with external temperature” On the ambient keyboard set parameter Cr 30 = 10 It is possible enable ambient compensation OR external compensation, not ambient AND external compensation. 7.13 Minimum pump speed setting Only for units fitted with an EC circulator.
- Page 28 7.15 Circulating pump: energy saving mode Parameter modification Keys Menu Menu PI22 switch-off time of the circulating pump, with installation in temperature. PI03 switch-on time of the circulating pump, with installation in temperature. The function is enabled by default To deactivate the funcion: PI22 = 0 Pi03 pump Pi22...
- Page 29 7.17 Antifreeze function with circulating pump Parameter modification Keys Menu Menu PI51 switch-on setpoint of the circulating pump for antifreeze (5°C) PI52 hysteresis (2°C) The function is enabled by default To deactivate the funcion: PI50 = 0. pump Pi52 O inlet Pi51 7.18 Antifreeze function with heater HI12...
- Page 30 7.19 Antifreeze function with heat pump AF02 switch-off setpoint of the heat pump for antifrezze (5°C) AF03 hysteresis (3°C) The function is not enabled by default To activate the function: AF00 = 1 Heat pump AF03 O inlet AF02 7.20 Start-up report Identifying the operating objective conditions is useful to control the unit over time.
- Page 31 Control 8.1 Display Icon Fixed on Flashing Icon Alarm on progress Silenced alarm Compressor Antifreeze with active heat pump, remote Heating mode Ventilation heating mode At the start-up is performed a board automatic test: all the Cooling mode Remote cooling mode led flash for some seconds Standby from keypad Remote standby...
- Page 32 8.3 Navigation Heat Heating Cool Cooling OPERATING MODE StdBY Standaby - off Press 2 sec. Domestic hot water The unit switches to ACS mode, only by Heat mode Analogical inputs Analogical outputs Digital inputs Digital outputs STATA Clock Active alarms Compressor operating hours Setpoint PAR - parameters...
- Page 33 8.6 Change the operating mode Step Display Action Keys Menu/Variable Notes Main menu Press 2 sec. Cool Choose standby, off: STBY Cool Select cool: COOL heat: HEAT DHW: AS Heat Confirm * Off the unit is immediately stopped without respecting any timing. Stanby the antifreeze function is active ( pump ON for water temperature <...
- Page 34 8.9 Clock setting Step Display Action Keys Menu/Variable Notes Main menu Press Select CLOCK menu Access Hour Choose hour: HOUR Hour Select date: DATE year: YEAR Confirm YEAR Press 3 sec. ! Value flashing ! ! 2012 ! Press Set the value ! 2013 ! Confirm 2013...
- Page 35 8.12 Alarm reset Before resetting an alarm identify and remove its cause. Repeated resets can cause irreversible damage. Step Display Action Keys Menu/Variable Notes Main menu Press Select Press Select Press Press Back to the previous menu For details see: 8.20 Alarms p. 43 8.13 Alarm log Before resetting an alarm identify and remove its cause.
- Page 36 8.14 Alarms log reset Before resetting an alarm identify and remove its cause. Repeated resets can cause irreversible damage. Step Display Action Keys Menu/Variable Notes Main menu Press Select Press Select Press 3 sec. Press Back to the previous menu For details see: 8.20 Alarms p. 43 8.15 Setting menu...
- Page 37 8.16 Scheduling management It is possible to set 3 different schedulings. To each scheduling is possible to associate 4 events. To each day of the week is possible to associate a scheduling. To enable the hour scheduling set the parameters tE00 and CL43: Par tE00 hour scheduling 0 = disabled, 1 = enabled Par CL43 = -2...
- Page 38 Example: scheduling 1 Example with active scheduling manual modification of the heat setpoint: SP menu Heat manual modification of the heat setpoint: SP menu Heat manual modification of the DHW setpoint: SP menu Activation scheduling example activation scheduling: Keys WSN-XIN 21-141 M0V940M13-06...
- Page 39 Events parameters Sched. 1 (par.) Sched. 2 (par.) Sched. 3 (par.) Time tE10 tE38 tE66 Minutes tE11 tE39 tE67 Event 1 Mode 0= on tE12 tE40 tE68 1= standby Cooling temperature tE13 tE41 tE69 Heating temperature tE14 tE42 tE70 DHW temperature tE15 tE43 tE71...
- Page 40 ACS setpoint Keys Esc + Set Menu PAr Menu AS Heat Description Example AS01 setpoint DHW 45 °C AS04 DHW hysteresis 7 °C AS05 hysteresis disengaging DHW 4 °C Acs ON : T = 41°C AS01 45 °C Acs OFF : T = 52°C T acs T acs AS05...
- Page 41 8.18 Remote control - option The keyboard repeats all the built-in control functions. For details see: 8 Control p. 31 8.19 Ambient temperature display It is possible to set the keypad to display the ambient temperature. The probe is not used to perform the ambient thermoregulation. Follow these steps: Step Display Action...
- Page 42 Step Display Action Keys Menu/Variable Notes Main menu Press Press Select Press Ui.. Ui.. Select Ui22 Ui22 Confirm Select Confirm Press Back to the previous menu Step Display Action Keys Menu/Variable Notes Main menu Press 3 sec. Select Air1 Air1 Press Is it possible to disable the ambient keyboard: Cr00 = 0...
- Page 43 8.20 Alarms Before resetting an alarm identify and remove its cause. Repeated resets can cause irreversible damage. Code Description Type E000 General alarm AUTO E001 High pressure (digital) circuit E003 High pressure (analogical) circuit E007 Low pressure (analogical) circuit E010 Inverter alarm E020 Primary circuit flow switch...
- Page 44 8.22 Led inverter The access is riserve to the service centres. Danger of electrocution. Led: ON: normal operating Slow flashing (ON 1sec.,OFF 0.5 sec.): stanby compressor stopped Fast flashing (ON 0.2 sec.,OFF 0.2 sec.): in alarm. 8.23 Status Main menu SET Ai, di, AO, dO Ai L1 Menu Code Description...
- Page 45 Maintenance 9.1 General description Maintenance must be done by authorized centres or by qualified personnel. The maintenance allows to: • maintain the unit efficiency • increase the life span of the equipment • assemble information and data to understand the state of the unit efficiency and avoid possible damages Before checking, please verify the following: •...
- Page 46 9.5 Control check list √ intervention frequency (months) presence corrosion panel fixing fan fixing coil cleaning water filter cleaning water: quality, ph, weight of glycol (%) check the exchanger efficiency circulating pumps check of the fixing and the insulation of the power lead check of the earthing cable electric panel cleaning capacity contactor status...
- Page 47 9.8 Water filter Check that no impurities prevent the correct passage of water. 9.9 Flow Switch • controls the operations • remove incrustations from the palette 9.10 Circulating pumps Check: • the fans and the relative protection gridsare well fixed •...
- Page 48 Fan replacement WSN-XIN 21-141 M0V940M13-06...
- Page 49 10 Accessories 10.1 Remote control Electrical panel Terminal block of the customer connections AP7 Room keypad Max. = 100 mt. Cable section: Min. 0,35 Max.1 mm2 LAN net: A + B = 100 mt. Max AMACSX - Domestic hot water module M0V940M13-06 WSN-XIN 21-141...
- Page 50 10.2 CMSC2X - Serial communication module with RS485 serial converter kit 1 Install the AP6 converter 2 Connect TTL serial 3 Wire as indicated in the wiring diagram. Supervisory The unit can be connected to an external supervisory system. Enable the function: Par: CF01 protocol selection 0 = Disabled 1 = Modbus...
- Page 51 10.3 AMACSX - Domestic hot water module CMACSX Domestic hot water module + BT7 probe (L. 5mt.) L.300 x P.220 x H.120 ACS300X 300-litre domestic hot water storage tank Dimensions D.600 x 1615 mm ACS500X 500-litre domestic hot water storage tank Dimensions D.750 x 1690 mm 3DHWX...
- Page 52 Installation instructions, domestic hot water storage Provid, where necessary, a pressure reducer for the entering water. Be provided with a safety valve set according to what is reported on the “technical dates” label applied to the boiler. Be provided with an expansion tank proportioned to the boiler’s dimensions (you are advise to let the circulation be made by a thermo technician).
- Page 53 10.4 Domestic hot water with solar energy CMACSX Domestic hot water module + BT7 probe (L. 5mt.) L.300 x P.220 x H.120 ACS3SX 300-litre domestic hot water storage tank with solar coil Dimensions D.600 x 1615 mm ACS5SX 500-litre domestic hot water storage tank with solar coil Dimensions D.750 x 1690 mm 3DHWX Three-way valve for domestic hot water...
- Page 54 Installation instructions, domestic hot water storage Provid, where necessary, a pressure reducer for the entering water. Be provided with a safety valve set according to what is reported on the “technical dates” label applied to the boiler. Be provided with an expansion tank proportioned to the boiler’s dimensions (you are advise to let the circulation be made by a thermo technician).
- Page 55 Electrical diagram - Domestic hot water module - CMACSX Electrical panel DHW storage probe Heat pump Terminal block of the customer connections Electric heaters of the DHW storage (provided by the Customer) LAN serial: L max = 100 mt Storange high temperature safety thermostat Cable section: (provided by the Customer) Min.
- Page 56 10.5 Boiler management Boiler management only for installation production The configuration of the system involves 1 3-way diverting valve (E) between the heat pump and the auxiliary generator. The heat pump acts as the main generator and is activated whenever there is a request from the system. If the System set point has not been reached yet and the outdoor air temperature drops below the selected set point, the heat pump stops, switches the 3-way valve (E) and, after a 120-second delay, it activates the auxiliary generator with its own set point.
- Page 57 In this system configuration, the anti-Legionella function is carried out by the auxiliary generator and not via the electric heater inside the storage tank. Parameters to setting: Keys Esc + Set Menu PAr CL90 = 30 valve control of circuit boiler/heat pump switching CL93 = 38 boiler start-up control pi11 = 1 br00 = 3...
- Page 58 Electrical panel 3-way Boiler valve Heat pump PER90006 - PER90009 Terminal block of the customer connections DHW storage probe LAN serial: L max = 100 mt Electric heaters of the DHW storage Cable section: (provided by the Customer) Min. 0,35 Max.1 mm2 YVACS 3DHWX - 3-way valve for domestic hot water Storange high temperature safety thermostat PER90006 - PER90009...
- Page 59 10.6 Cascade units Max 4 units Automatic unit rotation Connect PE1P0008 with SA3 unit 1, SA3 units 2, etc.. enable SA3 on unit 1, unit 2, etc.. (main menu Par CL CL45 = 22) Set Tr15 and Tr16 on unit 1, unit 2, etc.. (main menu Par Tr Tr15) example of Summer set point 2 units 3 units...
- Page 60 10.7 Cabinet for Elfo-Pool WSN-XIN 21-141 M0V940M13-06...
- Page 61 Cooling operation with parameter r5 = 0 Heating operation with parameter r5 = 1 M0V940M13-06 WSN-XIN 21-141...
- Page 62 11 Decommissioning 11.1 Disconnecting Only authorised personnel must disconnect the unit. Avoid leak or spills into the environment. Before disconnecting the unit, the following must be recovered, if present: • refrigerant gas • anti-freeze solutions in the water circuit Awaiting dismantling and disposal, the unit can also be stored outdoors, if the electrical, cooling and water circuits of the unit have 100% integrity and are isolated, bad weather and rapid change in temperature will not result in any environmental impact.
- Page 63 12 Residual risks General description Electric parts In this section the most common situations are indicated,as these cannot be An incomplete attachment line to the electric network or with incorrectly controlled by the manufacturer and could be a source of risk situations for sized cables and/or unsuitable protective devices can cause electric shocks, people or things.
- Page 64 General technical data Size Radiant panels Heating Heating capacity 5,41 6,81 8,70 11,9 14,3 16,5 18,4 19,6 23,8 26,4 30,3 Total power input 1,39 1,78 2,29 3,83 4,50 4,38 4,99 5,32 6,58 7,62 9,11 COP (EN 14511:2013) 3,90 3,82 3,81 3,10 3,17 3,78...
- Page 65 2. The overall power absorbed is calculated by adding the power absorbed by the compressor + the power 10. ESEER calculated by Clivet for radiant systems with water produced at 18°C by taking into account the load absorbed by the fan - the percentage value of the fan to overcome external pressure drop + the power absorbed conditions and source water temperature as defined by EUROVENT for water at 7°C...
- Page 66 Unit sound levels Sound Sound Size pressure level power level ΔPut [Pa] dB(A) dB(A) The noise levels refer to units at full load under nominal test conditions, with ducted supply and return and available pressure of 50Pa and 80Pa as indicated in the table. The sound pressure level refers to a distance of 1m from the outer surface of the unit operating in an open field.
- Page 67 Operating range Cooling ELFOEnergy Duct Inverter 21 - 31 - 41 ELFOEnergy Duct Inverter 51-141 Twu [°C] = leaving exchanger water temperature Eat [°C]: external exchanger inlet air temperature 1. Normal operating range 2. Normal operating range, with modulating fans 3.
- Page 68 Dimensional drawings DAAV9-21-41_1 REV01 Size 21-31-41 DATA 28/01/2016 Without ducting With return vertical ducting 1. Compressor compartment 2. Electrical panel 3. Unit control keypad 4. Power input 5. Functional spaces 6. Electric fan (Supply) 7. Internal exchanger water inlet (GAS F 1”) 8.
- Page 69 Size 51-71 DAAV9-51-71_1 REV01 DATA 28/01/2016 Without ducting With return vertical ducting 1. Compressor compartment 2. Electrical panel 3. Unit control keypad 4. Power input 5. Functional spaces 6. Electric fan (Supply) 7. Internal exchanger water inlet (GAS F 1”) 8.
- Page 70 Sizes 81-91-101 DAAV9-81-101_1 REV01 DATA 19/05/2014 Without ducting With return vertical ducting 1. Compressor compartment 2. Electrical panel 3. Unit control keypad 4. Power input 5. Functional spaces 6. Electric fan (Supply) 7. Internal exchanger water inlet (GAS F 1”1/4) 8.
- Page 71 Sizes 121-131-141 DAAV9-121-141_1 REV01 DATA 19/05/2014 Without ducting With return vertical ducting 1. Compressor compartment 2. Electrical panel 3. Unit control keypad 4. Power input 5. Functional spaces 6. Electric fan (Supply) 7. Internal exchanger water inlet (GAS F 1”1/4) 8.
- Page 72 Tel. +34 91 6658280 - Fax +34 91 6657806 - info@clivet.es CLIVET GmbH Hummelsbütteler Steindamm 84, 22851 Norderstedt - Germany Tel. + 49 (0) 40 32 59 57-0 - Fax + 49 (0) 40 32 59 57-194 - info.de@clivet.com CLIVET RUSSIA Elektrozavodskaya st. 24, office 509 - 107023, Moscow, Russia Tel.
Need help?
Do you have a question about the WSN-XIN Series and is the answer not in the manual?
Questions and answers