Crestron FlipTop FT2 Series Quick Start
Cable management system
Hide thumbs
Also See for FlipTop FT2 Series:
- Quick start manual (11 pages) ,
- Quick start (2 pages) ,
- Manual (2 pages)
Table of Contents
Advertisement
Quick Links
FT2-700-MECH
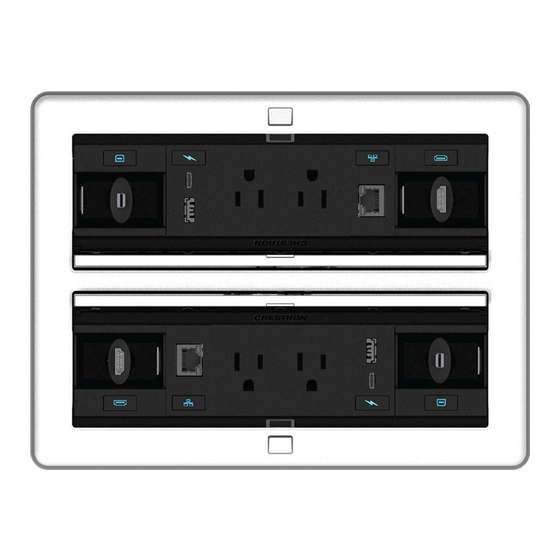
FlipTop™ Cable Management System FT2 Series, 700 Size, Mechanical
The Crestron® FT2-700-MECH FlipTop™ cable management system
device, for simplicity within this document called the FlipTop assembly,
installs into a table or other horizontal surface to provide modular
tabletop connectivity for users. The one-touch lid on the unit conceals
12 module spaces arranged in two rows of six.
The FlipTop assembly includes eight pass-through cable modules
and four blank plate modules. Each pass-through cable module
accommodates a Crestron FT2A-CBL-PT Series Pass-Through Cable
(not included) and various other third-party interface cables. Use blank
plate modules to cover any unused module spaces within the FlipTop
assembly.
The flexible modular design of the FlipTop assembly can be customized
with an assortment of Crestron accessories (not included):
•
FT2A-CBL-PT is a series of pass-through cables optimized for
the provided pass-through cable modules.
•
FT2A-CBLR-GR is a series of gravity cable retractors. Each cable
in the retractor pulls out up to 3 ft (0.9 m) and retracts gently
back into the FlipTop assembly.
•
FT2A-PLT-KEY-10 is a pack of 10 keystone plate modules.
Each module accommodates standard flush-mount keystone
connectors.
•
FT2A-CHGR-USBA-BASIC is a USB rapid charging module that
provides two USB Type-A charging ports.
•
FT2A-PWR-US is a series of AC power outlet modules that
provide one or more NEMA 5 type receptacles above the table.
The basic model provides one additional outlet below the table;
the other models provide two.
•
FT2A-UTK-SHELF is an under-table utility shelf capable of
holding HDMI® switches or HDBaseT® transmitters.
•
FT2A-PLT-BLANK-10 is a pack of 10 blank plate modules used
to supplement those provided with the FlipTop assembly. Each
module covers one unused module space within the assembly.
•
FT2A-PLT-PT-10 is a pack of 10 pass-through cable modules used
to supplement those provided with the FlipTop assembly. Each
module accommodates a Crestron FT2A-CBL-PT Series Pass-
Through Cable or a third-party interface cable.
NOTE:
For more information about FlipTop assembly
accessories, refer to the specific product manual located at
www.crestron.com/manuals.
Check the Box
Item
FT2-700-MECH
Bars, Locking, with Screws (P/N 4528906)
Module, Blank Plate (P/N 2049602)
Module, Pass-Through Cable (P/N 4526880)
Spacer, Plastic, FT2-700 (P/N 2050568)
Template, Cutout (P/N 4527491)
FT2-700-MECH-AL Only
Bezel, FT2-700, Alloy (P/N 4529321)
FT2-700-MECH-B Only
Bezel, FT2-700, Black (P/N 4529320)
Mount the FlipTop Assembly
Mount the FlipTop assembly into an existing FT-600 FlipTop assembly
installation or create a new mounting. The next three sections describe
the mounting procedure.
If replacing an the FT-600 FlipTop assembly, there is no need to cut a
new mounting hole (skip "Cut the Mounting Hole").
If this is not a replacement, cut a hole and secure the FlipTop assembly
(skip "Replace FT-600 FlipTop Assembly").
Cut the Mounting Hole
NOTE:
Before cutting the mounting hole, check underneath the table
for any obstructions that may impede the installation of the FlipTop
assembly, retractors, and accessories.
1.
Trace an outline of the mounting hole onto the table using the
included cutout template.
2.
Cut a mounting hole in the table with an appropriate saw.
Replace FT-600 FlipTop Assembly
To replace an older FT-600 FlipTop assembly with an FT2-700 FlipTop
assembly:
1.
Remove the FT-600 FlipTop assembly by loosening four socket
screws that secure two mounting plates and the FlipTop
assembly to the surface.
2.
Attach four plastic spacers (included) to each corner of the
FT2-700 FlipTop assembly prior to inserting into the mounting
hole previously cut for the FT-600 FlipTop assembly.
Location of Plastic Spacers on FlipTop Assembly Corners
(Enlarged View)
Clip a plastic spacer into two slots
on each corner of FlipTop assembly.
FT2-700
FlipTop
assembly
(top front)
Qty
1
3
4
8
Secure the FlipTop Assembly
4
To secure the FlipTop assembly:
1.
Ensure that all four swiveling dogs are positioned inside of
1
the FlipTop assembly, and then insert the assembly into the
mounting hole until the top lip is flush with the table surface.
1
CAUTION:
Set the screwdriver torque to its lowest setting to
avoid stripping the swiveling dogs and damaging the table.
If removing the FlipTop assembly from the table, ensure that
1
the screwdriver rotation is set correctly before loosening the
swiveling dogs.
2.
Carefully tighten the four swiveling dogs in each corner of the
FlipTop assembly clockwise until the assembly is secured in place
against the table. Do not overtighten the swiveling dogs.
Location of Swiveling Dogs
Swiveling
Retractable
dogs (4)
lid
Install the Modules
NOTE:
Installation procedures for most modules are available in
separate product documentation. For more information, refer to the
specific product manual located at www.crestron.com/manuals.
The following section provides best practices and includes installation
procedures for pass-through cable modules and blank plate modules.
Position the Modules
NOTE:
The FlipTop assembly includes eight FT2A-PLT-PT
pass-through cable modules and four FT2A-PLT-BLANK blank plate
modules. No other modules are included.
Follow the best practices below when performing module installation:
•
Perform module installation in the following order:
1.
AC Power Outlet Modules (FT2A-PWR-US)
2.
Retractor modules (FT2A-CBLR-GR)
Flat portion
must face
3.
All other modules (FT2A-PLT-KEY, FT2A-PLT-PT, and
upward.
FT2A-PLT-BLANK)
•
Place the FT2A-CBLR-GR modules only at the ends of a module
Plastic
row.
spacer (4)
•
Dress all cables after installing each module.
NOTE:
FT2A-CBLR-GR modules are compatible with electrical and
mechanical FlipTop assemblies; however, the LED indicators on the
front of these modules do not light when installed into an
FT2-700-MECH.
Install the Pass-Through Cable Module
Each pass-through cable module is packaged with one nylon grommet
and one cable plate. One empty module slot is required for installation.
To assemble and install the pass-through cable modules into the
FlipTop assembly:
1.
Separate the grommet.
2.
Insert the cable into the grommet with the connector facing up
toward the end user.
NOTE:
The grommet is optional. It fits 10mm or smaller cables
(non-4K cables such as USB, CAT6, VGA, and audio). Omit the
grommet if installing larger cables (such as Crestron 4K video
cables) into the module.
3.
Press the grommet back together to secure the cable inside.
4.
Push the grommet and cable into the hole in the cable plate.
5.
Insert the cable plate into one of the three slots in the
pass-through module. The top of the cable connector should sit
flush with the top of the module.
NOTE:
If the cable connector extends past the top of the
pass-through module, the FlipTop assembly lid cannot close.
Location of Cable Plates within the Pass-Through Cable Module
Pass-through
module (with side
plate removed)
6.
Attach the side plate to the module by snapping the plastic clips
on the plate into the two slots on the module.
NOTE:
Ensure that the cable moves freely in the module prior to
FlipTop
attaching the side plate, as the plate is difficult to remove once
assembly
it is attached. If the side plate must be removed, use a small,
flat object (such as a flat-head screwdriver) to carefully pry the
plastic clips on the side plate off of the module near the two
slots.
Location of Plastic Clips on Side Panel
Snap to attach
(or pry to remove)
the plastic clips
from the slots on
a pass-through
module.
7.
Feed the other end of the cable through an empty module slot in
the FlipTop assembly.
8.
Slide the pass-through cable module into the empty module slot
in the FlipTop assembly. Use the guide ribs on the front and rear
of each module to help position the module in the assembly.
Install the Blank and Keystone Plate Module
Two blank plate modules are included to fill empty slots in the module
rows. A keystone plate module allows for cables terminated with
standard keystone jacks to be installed in the FlipTop assembly. The
blank and keystone plate modules each require one empty module slot
for installation.
Blank and Keystone Plate Modules
Blank plate module
Keystone plate module
To install a blank or keystone plate module into the FlipTop assembly:
•
Slide the blank plate module down into the appropriate module
slot. Use the guide ribs on the front and rear of each module to
help position it in the assembly.
•
For the keystone plate module, complete the following.
1.
Snap the cable's keystone jack into the keystone opening in
the keystone plate module.
2.
Feed the cable down through the empty module slot.
Quick Start
The cable plate
with the nylon
grommet may be
installed in one of
these three slots.
Advertisement
Table of Contents

Subscribe to Our Youtube Channel
Related Manuals for Crestron FlipTop FT2 Series


Summary of Contents for Crestron FlipTop FT2 Series
- Page 1 (non-4K cables such as USB, CAT6, VGA, and audio). Omit the Carefully tighten the four swiveling dogs in each corner of the grommet if installing larger cables (such as Crestron 4K video • For the keystone plate module, complete the following.
- Page 2 Crestron disclaims any proprietary interest in the marks and names of others. Crestron is not communications. However, there is no guarantee that interference will not occur in a responsible for errors in typography or photography.
Need help?
Do you have a question about the FlipTop FT2 Series and is the answer not in the manual?
Questions and answers