Table of Contents
Advertisement
Advertisement
Table of Contents

Related Manuals for PRESIDIUM PGI


Summary of Contents for PRESIDIUM PGI
- Page 3 User Handbook for Presidium Gem Indicator (PGI)
- Page 5 I. Disclaimers, Exclusions and Limitations pg. 05 of Liability II. About this book pg. 06 III. About your Presidium Gem Indicator (PGI) pg. 07 1. GETTING STARTED with your PGI pg. 11 2. PERFORMING A TEST with your PGI pg. 17 3.
- Page 6 The tester or Presidium Gem Indicator (PGI) referred to in this handbook is provided and/or sold on an “as is” basis. Except as required by applicable law, no warranties of...
- Page 7 II. About this book Thank you for purchasing the Presidium` Gem Indicator (“PGI” or “tester” or “unit”). This handbook is designed to help you set up your tester and describes all you need to know about how to use your tester accurately and take care of it in line with its requirements.
- Page 8 31 gemstones compared to the previous desktop Presidium Gemstone Tester/Colored Stone Estimator. It is to be noted that PGI still does not distinguish between natural and synthetic gemstones, including diamonds against moissanites, as they have similar physical properties (thermal conductivity and color).
- Page 9 The Presidium Gem Indicator (PGI) features the following: • Thermal conductivity testing of gemstones • Color separation function with user input • Clear quality OLED display screen • Industry’s thinnest probe tip (0.45mm) for testing gemstones as small as 0.02ct •...
- Page 10 Included in your package: • Presidium Gem Indicator • 2 pieces of Built-in Calibration disks – Disk 1 (Gray) and Disk 2 (Black) • USB cable • User handbook • Warranty card • Protective carrying case Fig. 1 Protective Cap...
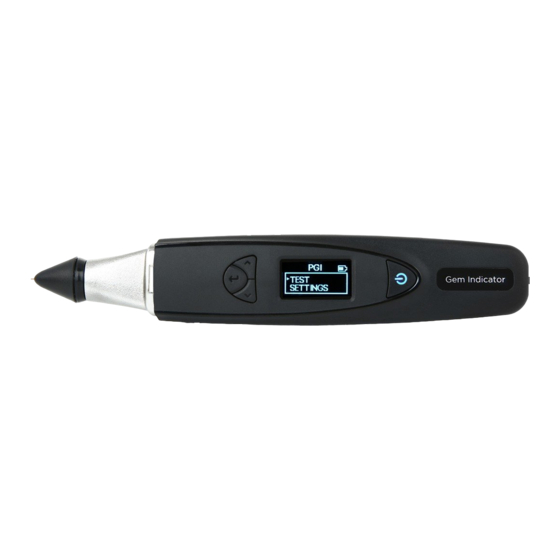
- Page 11 Functions of your Presidium Gem Indicator Your Presidium Gem Indicator has 4 functional options on the main screen menu as follows: Test Settings Calibrate Library You may toggle between these options using the “Up” and “Down” buttons. To activate a function, press “Select”...
- Page 12 Remove the battery cover lid on the side of the tester. This is the side of the tester with the Presidium logo wording on the top (Fig 1.2). Fig. 1.2...
- Page 13 3 hours of continuous operation, while the use of ordinary batteries will give a shorter operating life. Fig. 1.3 Turning on your PGI Press and hold the [ON/OFF] button (Fig. 1.4.1) on the tester. Fig. 1.4.1 “SYS CHECK” will appear on the display screen as you wait for about 3 seconds for the tip to warm up to programmed pre-determined tip temperature.
- Page 14 In such situations, it is recommended for you to remove, re-insert and recalibrate the tip. If the error persists, please contact Presidium. Fig. 1.4.3 Cleaning of gemstone prior to testing Prepare a clean tissue or jewelry cloth. Carefully retrieve the gemstone with tweezers and place the gemstone face down on its table facet.
- Page 15 Gently rub the table of the gemstone against the tissue/ jewelry cloth (Fig. 1.5b). Fig. 1.5b If your stone is mounted in jewelry, please carefully clean the stone (Fig 1.6). Fig. 1.6...
- Page 16 Operating Conditions The gemstone should be clean and dry before testing. Elaborate cleaning procedures normally necessary. Recommended Normal Operating Conditions The recommended testing temperature is between 23°C – 27°C or 73°F – 80°F. Please allow the gemstone or jewelry piece to adjust to room temperature prior to testing.
- Page 17 Battery Information Battery life is indicated by the icon at the top right-hand corner of the display screen. Fig. 1.17 4 Bars Battery life is at least 75% or full 100%. Tester may be used as indicated. 3 Bars Tester may be used as indicated. 2 Bars Battery life is about 25 –...
- Page 18 2. PERFORMING A TEST with your Presidium Gem Indicator > Test Settings Calibrate Library Toggle the navigation and Select “Test” to begin testing (Fig 2.1) Fig. 2.1 When prompted on the screen, depress the probe tip against the gemstone for about 5 seconds. Testing will begin.
- Page 19 For mounted jewelry or gemstones: Hold the jewelry or mounted gemstone with one hand and the tester with the other hand (Fig. 2.3). For proper operation of the tester, the thumb and index nger must always be placed on the metal grip of the tester.
- Page 20 The probe tip must be placed at a right angle or perpendicular to the facet of the gemstone for an accurate reading. Tests should be conducted on the table of the gemstone. In the event of any doubt, you may also test on the girdle of the gemstone.
- Page 21 Cleaning of probe tip Please note that if the tester is being used for the rst time, or if the tester has not been used for more than a week, it is advisable to clean the probe tip using a piece of paper.
- Page 22 Quick Tips for using your PGI • If the tester is being used for the rst time, or if the tester has not been used for a week, it is advisable to clean the probe tip using a piece of paper to attain consistent and accurate reading.
- Page 23 3. READING TEST RESULTS on your Presidium Gem Indicator Based on the test and color input selected for the tested gemstone, the possible types of gemstone will be displayed on the LED screen (Fig. 3.1). If you have disabled the Color input function in Settings, the tester will indicate the Results based only on thermal conductivity.
- Page 24 “Metal Detect” will display on the screen and an audible sound is emitted (if ‘Sound” is enabled at Settings) if the probe tip touches metal or conductive material. (Fig. 3.2) Fig. 3.2...
- Page 25 PGI can test for up to 31 types of gemstones and their ranges of individual thermal conductivity readings based on the analogue to digital (ADC) values illustrated in Fig. 3.3. References: 1) Almandine, Pyrope & Spessartite 2) Aventurine, Amethyst, Brown Quartz, Citrine, Colorless Quartz 3) Hessonite, Tsavorite &...
- Page 29 4. OTHER FUNCTIONS of your Presidium Gem Indicator 4.1 Settings Function Test > Settings Calibrate Library Navigate downwards to the second option “Settings” and select. In the Settings function, you may adjust Sound and Color. Settings – Sound Press “Select” at the option “Sound” to either turn it on or off.
- Page 30 Settings – Color Press “Select” at the option “Color” to either turn it on or off. (Fig. 4.2) By selecting “Color On”, you will be switching on the Color separation function. The tester will automatically prompt you for your color input after a test is done, so you may input the color, thereby narrowing down the possible results.
- Page 31 4.3 Library Function Test Settings Calibrate > Library The Library function displays all the 31 types of gemstones and its corresponding possible colors, that the tester is able to test for. Select the name of the gemstone you wish to nd out more about and the screen will display the list of possible known colors that this type of gemstone can exist in.
- Page 32 5. CALIBRATING your Presidium Gem Indicator All testers have been calibrated during the manufacturing process and usually no further adjustment or user intervention to the tester is required. However in situations as stated below, calibration will be warranted: i. Existing probe tip becomes bent/broken and needs to be replaced with a new probe tip, ii.
- Page 33 To insert new probe tip, align the tip guide 1 which is found on the body of the tip with guide 2 which is found on the metal grip of the tester (Fig. 5.1b). Guide 1 Guide 2 Fig. 5.1b Push in and turn clockwise to lock the probe tip (Fig 5.1c).
- Page 34 When Calibrate is selected, the tester will go into calibration mode and you may follow the instructions as they appear on the display screen. (Fig. 5.2) Fig. 5.2 After “Calibrate” is selected, the tester will do an automatic pre-programmed calibration that will take about 6-8 seconds.
- Page 35 When the probe tip is pressed against the Calibration Disk (Fig. 5.5a), the display screen will show the process of calibration (Fig. 5.5b). Calibration is done for each Calibration Disk when the display screen shows the completed calibration meter and the word “Successful” appears on the screen (Fig.
- Page 36 You will be prompted to perform the same calibration process with Disk 2 (Fig. 5.6a) by pressing the probe tip against Disk 2. Fig. 5.6b Fig. 5.6c Fig. 5.6a Fig 5.6 (a), (b) & (c) exhibit the steps of calibration using Disk 2 (black disk) When calibration on both disks are done, you will be prompted on the screen to press “Select”...
- Page 37 Caution should be taken so as not to damage the probe and wire tip. Your PGI is a product of extensive design and craftsmanship, please treat it with care. Thank you for taking time to go through the user handbook which will enable you to understand your recent purchase better.
- Page 38 Thank you for taking time to go through the user handbook which will enable you to understand your recent purchase better. Presidium also recommends that you register your warranty by sending the warranty registration card to us or registering online at http://www.presidium.com.sg/...
Need help?
Do you have a question about the PGI and is the answer not in the manual?
Questions and answers