
Related Manuals for Hoover zenith


Summary of Contents for Hoover zenith
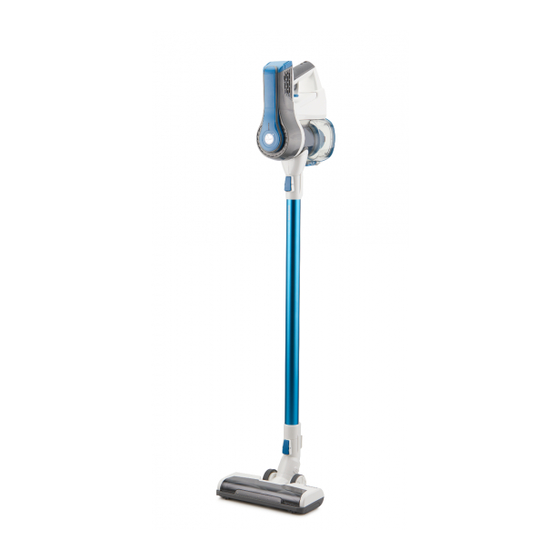
- Page 1 Cordless Handstick Brushless Motor Lithium Performance Cordless Convenience zenith...
- Page 3 5230 Zenith Congratulations on the purchase of your new HOOVER vacuum cleaner. There are many useful features built into your cleaner and we recommend that you carefully read this instruction manual to take the best advantage of these features. Features:...
-
Page 4: Before You Begin
Before You Begin This cleaner must be operated in accordance with these instructions and used only for domestic household cleaning to remove DRY dirt and dust from household carpets, flooring, walls and fabrics. This cleaner is not fit to be used as an industrial cleaner and will void the manufacturer’s warranty if used inappropriately. -
Page 5: Safety Precautions And Warnings
Safety Precautions & Warnings IMPORTANT! Always switch off the appliance before cleaning, when not in use or attempting any maintenance task. The charger must only be connected to an AC power supply at the voltage shown on the rating label. This cleaner should only be used for its intended purpose as described in this instruction manual. - Page 6 Battery use and care 15. Never operate or use the appliance without the filters in place. The appliance is only to be used with the charger 16. Before vacuuming, remove any large or sharp uniquely provided with the appliance. objects from the floor or cleaning surface in order Only charge the battery inside the product and to prevent damage to the filter.
- Page 7 Assembly IMPORTANT! Always remove the battery from the appliance before fitting or removing accessories. Insert the powerhead into the rod. You will hear a “click” sound when it is securely in place. Insert the opposite end of the rod into the air inlet of the cleaner. You will hear a “click”...
- Page 8 Instructions for Use On/Off Button Press the On/Off Button to turn On or Off the cleaner. Continuous Mode The cleaner can be operated without needing to continuously depress the On/Off Button. To enable Continuous Mode press the Continuous Mode Switch, as shown, until it clicks into place. To disable Continuous Mode, push the switch in the opposite direction until it clicks into place.
- Page 9 Accessories Charging Insert the charger into the charging port on the vacuum cleaner. When the charging indicator light is flashing blue, the vacuum cleaner is being charged. When the charging indicator light turns Off, the vacuum cleaner battery is fully charged. NOTE: The cleaner requires up to 4 hours to be fully charged.
- Page 10 Accessories CAUTION! To reduce the risk of personal injury, always switch off the cleaner before changing accessories. NOTE: As a safety feature, the powerhead and mini motorized pet brush will not switch on when it is inserted into the cleaner during operation. Powerhead Ideal for daily cleaning on carpets and hard floors.
-
Page 11: Maintenance
Maintenance Flexible Adaptor Clicks into different angles and positions for cleaning ceilings, corners, cupboard tops and other areas that traditional attachments can’t reach. Mini Motorised Pet Brush Ideal for picking up pet hair from furniture & upholstery. Safety Precautions: 1. Keep hair, hands and feet away from rotating brush while the motorised brush is running. - Page 12 Maintenance (continued) Storage Place the cleaner onto the wall storage bracket, as shown. NOTE: If the cleaner will not be used for a long period of time, please remove the battery from the machine to maintain the battery life. IMPORTANT! Always remove the battery from the cleaner before preforming any maintenance. It is recommended to clean the dust bin after each use or when dust reaches the “Max”...
- Page 13 Cleaning the Cyclone Separator Press the Dust Bin Lid Release Button to access the cyclone separator. Turn the cyclone separator to unlock and remove it from the dust bin, as shown. NOTE: The cyclone separator can be washed using lukewarm water. The cyclone separator need to air dry for 24 hours before reinstalling.
-
Page 14: Spare Parts
Spare Parts Please contact Hoover Customer Care: 1300 360 845, NZ: 0800 387 442 to find your local spare parts provider. Part Part Number Dust Bin Filter Cone 32201629 Battery 33201619 33201618 Charger Roller Brush 33788103 Exhaust Filter 32201627... -
Page 15: Troubleshooting
Troubleshooting Problems and solutions If you come across a problem, please use the checklist of troubleshooting tips before contacting Hoover Customer Care. Fault Cause Solution Cleaner doesn’t start - Flat battery - Charge the vacuum cleaner Reduced suction - The dust canister is full of dust... - Page 16 Cordless Handstick Conditions of warranty Your Hoover cleaner, in the case of domestic use, has a two year* Electrical Home-Aids Pty Ltd is unable to accept responsibility under parts and labour warranty against product defects and failures when this warranty for any repair work not carried out by an authorised the product is used in accordance with the terms and conditions of Hoover Service Agent or from the use of non-genuine parts.
Need help?
Do you have a question about the zenith and is the answer not in the manual?
Questions and answers
How much does the download cost