ARAG Visio Installation, Use And Maintenance Manual
Application rate monitor version
Hide thumbs
Also See for Visio:
- Manual (31 pages) ,
- Manual (34 pages) ,
- Installation, use and maintenance manual (20 pages)

Subscribe to Our Youtube Channel
Related Manuals for ARAG Visio


Summary of Contents for ARAG Visio
- Page 1 APPLICATION RATE MONITOR VERSION 4670610 Software rel. 2.0.x INSTALLATION, uSe ANd mAINTeNANce...
- Page 2 This manual is an integral part of the equipment to which it refers and must accompany the equipment in case of sale or change of ownership. Keep it for any future reference; ARAG reserves the right to modify product specifications and...
-
Page 3: Table Of Contents
CONTENTS • Product description ................................4 1 Intended use ..................................4 2 Content of the package ..............................4 3 Precautions ..................................4 4 Risks and protections before assembly .......................... 4 Positioning ..................................4 Power supply and sensor connection .........................5 5 Assembly diagrams ................................5 6 Controls in the menu ................................. 6 First switch-on ................................6 Controls in the menu ..............................6 Menu structure ................................7 7 Preliminary setup for use.............................. -
Page 4: Product Description
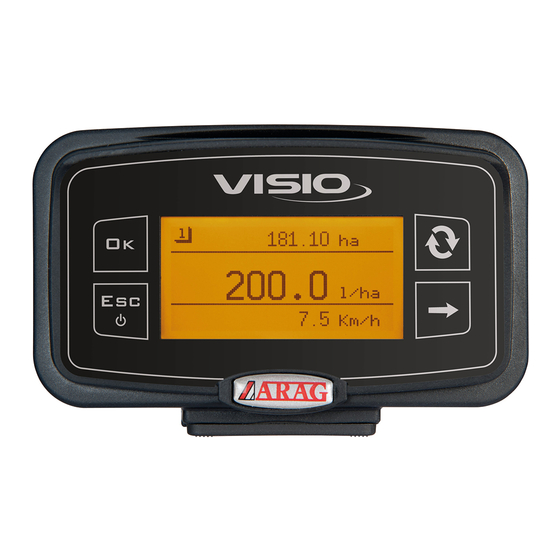
• Product descriPtion VISIO is a very compact and accurate top-notch multifunction display, able to display any kind of information concerning agricultural treatments. Operator can select the required function via software. It can display several types of values, which change according to set operating mode and type of connected sensors. -
Page 5: Power Supply And Sensor Connection
INSTALLATION 4.2 Power supply and sensor connection Sensors and power supply must be installed and connected by qualified personnel. VISIO must be exclusively connected to ARAG equipment. WHEN ARC WELDING IS REQUIRED, MAKE SURE THAT EQUIPMENT POWER IS SWITCHED OFF; DISCONNECT POWER CABLES IF NEEDED. ARAG is not liable for damage to the system, persons, animals or property caused by VISIO wrong or unsuitable assembly. Failure to observe the above instructions automatically voids the warranty. sensors power supply Wire color Connection (power cable) positive black negative green counting abort Tab. 1 Fig. 3 assembly diagrams Legend: 1) Power cable 2) Connection cable for double sensor 3) Speed sensor 4) Flowmeter Fig. -
Page 6: Controls In The Menu
CONTROLS controls in the menu 6.1 First switch-on At first switch-on, VISIO will run a guided procedure allowing user to set the device's basic settings. Press to scroll through items, to save and move on to next setting, or to go back to previous setting. WARNING: Before changing operating mode, make sure that all sensors are DISCONNECTED from the device. 6.2 Controls in the menu In the following pages, according to the set operating mode, some menu items could slightly differ from the shown ones. sWitching on a Press for 1 second. b Press the key a few times to view the various values in extended mode, (on display central part). -
Page 7: Menu Structure
MENU 6.3 Menu structure... -
Page 8: Preliminary Setup For Use
SETUP Preliminary setuP for use 7.1 Alarms 7.1.1 Flowrate alarms Set minimum and maximum flowrate thresholds for alarm message. 1) Open Alarm menu (Setup menu > Alarms). Minimum and maximum rate alarms are set in the same way. The display will show the current setting below the selected item. Press to edit the selected menu item. Fig. 9 2) To activate the alarm, press at the same time until message OFF goes off and rate alarm value is displayed instead. -
Page 9: Application Rate Alarms
SETUP 7.1.3 Application rate alarms Set the desired alarm display thresholds for minimum and maximum application rate. 1) Open Alarm menu (Setup menu > Alarms). Minimum and maximum application rate alarms are set in the same way. The display will show the current setting below the selected item. Press to edit the selected menu item. Fig. 15 2) To activate the alarm, press at the same time until message OFF goes off and application rate alarm value is displayed instead. -
Page 10: Flowmeter Calibration
Viewing the fluid quantity read by flowmeter during the calibration procedure. If equipment does not detect any flow after calibration is started (and displayed value remains 0), press to quit the calibration procedure without saving. If the device continues to detect flow after was pressed, the error message Stop flow!will be displayed after a few seconds. As soon as flow is stopped, reading will stabilize, as per standard procedure. In case VISIO calculates a value out of the range that can be set by means of the manual calibration, the calculated value will not be set. 7.3.2 Manual calibration In order to manually set rate constant, calculate and set suitable constant using the following formula: [quantity measured by equipment] x [constant indicated on flowmeter body] [actually sprayed quantity] 1) Open manual calibration menu (Setup menu >... -
Page 11: Speed Sensor Calibration
SETUP 7.4 Speed sensor calibration VISIO calculates the information concerning the speed thanks to pulses received by the sensor installed on the wheel. To perform calibration, proceed as follows: - Measure a straight path at least 100 m (300 feet) long. The longer the distance traveled, the more accurate the wheel constant calculation. -
Page 12: Manual Calibration
SETUP 7.4.2 Manual calibration Manual calibration allows to enter the wheel constant value calculated with the suitable formula: distance traveled (cm) Kwheel = no. of detection points x wheel rpm <distance traveled> distance expressed in cm covered by the wheel along measurement travel; <no. of measurement points> number of measurement points (e.g., magnets, bolts, etc.), mounted on wheel;... -
Page 13: Language
SETUP 7.4 Language Set the desired language. Open language setting menu (Setup menu > Options > Language). The display will show the current setting below the selected item. Press to select the language. Fig. 31 1) Select a language through key. 2) Press to save, or to quit without saving. Fig. -
Page 14: Speed Units Of Measurement
SETUP 7.5.3 Speed units of measurement Open speed unit of measurement setting menu (Setup menu > Options > Units of measurem. > Speed). The display will show the current setting below the selected item. Press to select speed unit of measurement. Fig. 37 1) Select a unit through 2) Press to save, or to quit without saving. -
Page 15: Application Rate Units Of Measurement
SETUP 7.5.6 Application rate units of measurement Open application rate unit of measurement setting menu (Setup menu > Options > Units of measurem. > Application rate). The display will show the current setting below the selected item. Press to select application rate unit of measurement. Fig. 43 1) Select a unit through key. -
Page 16: Display Contrast
SETUP 7.6 Display contrast Set display contrast. Open display contrast menu (Setup menu > Options > Display contrast). The display will show the current setting below the selected item. Press to edit the selected menu item. Fig. 47 1) Set a value through key. Every time you press it, value will increase by 5% up to 100%. -
Page 17: Display Settings
SETUP 7.9 Display settings The main page shows the display divided into three horizontal parts. Every sector can be assigned the desired value. Open Display settings menu (Setup menu > Options > Display settings). Press to edit the selected menu item. Fig. -
Page 18: Operating Mode
Fig. 58 7.11 Setup management VISIO settings can be loaded from or saved on a USB pen drive in order to restore them if required, fix problems or set another VISIO with no need to repeat all manual operations. Once installation is completed, check VISIO operation and it is recommended to save all settings onto a USB pen drive. To be able to use the following functions it is necessary to insert a USB pen drive in the relevant port at the bottom of VISIO. -
Page 19: Test Menu
SETUP 7.12 Test menu This menu allows user to view some data and carry out an operation test of VISIO: - Firmware version: the display shows the firmware version installed. - Battery voltage: the display shows the power voltage of the device. 7.12.1 Display test Display test checks the device display correct operation. -
Page 20: Sensors Test
2) Press to quit. Fig. 67 In the 3 areas of the monitor, VISIO will display the parameters set in the Display settings menu. Press key several times to view a value in extended mode until value is on display central part. -
Page 21: Maintenance / Diagnostics / Repairs
Troubleshooting fault cause remedy No power supply • Check power supply connection (Par. 4.2). VISIO is off or does not switch on Device is OFF • Press the ON key. Wrong setup • Check displayed data setup. VISIO shows wrong data Sensor fault •... -
Page 22: Guarantee Terms
1. ARAG s.r.l. guarantees this apparatus for a period of 360 days (1 year) from the date of sale to the client user (date of the goods delivery note). The components of the apparatus, that in the unappealable opinion of ARAG are faulty due to an original defect in the material or production process, will be repaired or replaced free of charge at the nearest Assistance Center operating at the moment the request for intervention is made. - Page 23 Via Palladio, 5/A 42048 Rubiera (RE) - Italy P.IVA 01801480359 Dichiara che il prodotto descrizione: Visualizzatore multifunzione modello: Visio serie: 4670610 risponde ai requisiti di conformità contemplati nella seguente Direttiva Europea: 2004/108/CE e successive modificazioni (Compatibilità elettromagnetica) Riferimenti alle Norme Applicate: UNI EN ISO 14982 (Macchine agricole e forestali - Compatibilità...
- Page 24 Only use genuine ARAG accessories or spare parts to make sure manufacturer guaranteed safety conditions are maintained in time. Always refer to ARAG spare parts catalogue. 42048 RUBIERA (Reggio Emilia) - ITALY Via Palladio, 5/A Tel. +39 0522 622011 Fax +39 0522 628944 www.aragnet.com...
Need help?
Do you have a question about the Visio and is the answer not in the manual?
Questions and answers