Advertisement
Quick Links
Read Carefully !
1
This manual contains safety information that if ignored can
endanger life or result in serious injury. They are indicated
by this icon.
Keep the instrument protected from sun and water.
Avoid water splashes.
OP E RATI NG INST RUCT IONS
FO R "LDSP H PLUS" INST RUMENT SE RIE S
ERMES COMMUNICATION SYSTEM
www.ermes-server.com
ENGLISH Version
R5-03-19
Advertisement

Related Manuals for Emec LDSPH PLUS Series


Summary of Contents for Emec LDSPH PLUS Series
- Page 1 This manual contains safety information that if ignored can endanger life or result in serious injury. They are indicated by this icon. Keep the instrument protected from sun and water. Avoid water splashes. OP E RATI NG INST RUCT IONS FO R “LDSP H PLUS”...
-
Page 2: General Safety Guidelines
NORME CE EC RULES(STANDARD EC) NORMAS DE LA CE ⎬ Direttiva Bassa Tensione Low Voltage Directive 2014/35/UE Directiva de baja tensión ⎬ Direttiva EMC Compatibilità Elettromagnetica EMC electromagnetic compatibility directive 2014/30/UE EMC directiva de compatibilidad electromagnética GENERAL SAFETY GUIDELINES Danger! In emergencies the instrument should be switched off immediately! Disconnect the power cable from the power supply! When installing always observe local regulations! - Page 3 1. Introduction LDSPH PLUS is a microprocessor based digital regulator for pH with temperature reading / compensation and mA module (feed forward). On/Off, impulsive proportional, proportional PWM or fixed PWM, Water Meter and PID are main working modes. Also available FEED FORWARD setting for mA module. Pulses per minute can be set for outputs. Working ranges are: 0 to 14 pH.
-
Page 4: Mainboard Connections
3. Mainboard Connections Unplug instrument from main power supply then perform connections by following the above picture. pH probe input USB or GSM or ETHERNET modules 3 0 3 1 3 2 3 3 3 4 3 5 3 6 3 7 (see this manual “Appendix”) L 1 2 3 4 5 2 2 2 3 2 4 2 5 2 6 2 7 2 8 2 9... -
Page 5: Main Screen
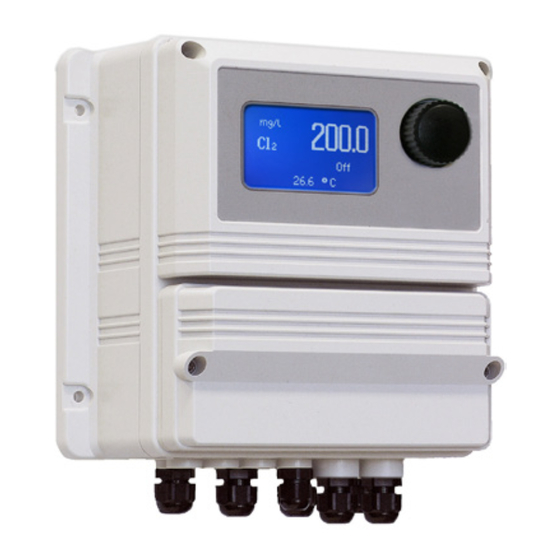
4. Main Screen When into normal operating mode, LDSPH shows the following main screen: GSM Signal* UNIT (1) Connection Status LAN CONNECTION OK - ERMES CONNECTION OK VALUES (2) LAN CABLE DISCONNECTED LAN CABLE CONNECTED - ERMES NOT AVAILABLE WARNING MESSAGES OUTPUTS STATUS (3) NOTIFICATION AREA CONNECTED TO USB PEN-DRIVE... - Page 6 5. Quick status check From main screen completely rotate clockwise the wheel to review main instrument parameters and current outputs status. Local Time Local Date pH probe reading Temperature probe reading Dosing alarm condition Probe failure status Alarm contact status Flow contact status Tank Level status Last pH calibration result...
- Page 7 6. Password To grant access into “Main Menu” press the wheel from main screen and enter the passcode. If this is the first time here then the passcode is 0000 (factory preset). Press wheel 5 times to enter into “Main Menu”.
-
Page 8: "Main Menu" List
7. “Main Menu” list To grant access into “Main Menu” enter the passcode (as described in previous chapter). Once into “Main Menu” rotate the wheel to scroll through all the options available. “Setpoint” (see page 9) “Calibration” (see page 14) “Parameters”... - Page 9 8.1 “Set-Point”, pH (On/Off) “pH pulse” and “pH pulse 2” outputs can be set to operate within: On/Off, Proportional (%) or disabled (OFF) modes. “pH relay” and “pH relay 2” outputs can be set to operate within: On/Off, Proportional PWM, Fixed PWM or disabled (OFF) modes.
- Page 10 8.2 “Set-Point”, pH proportional & proportional water meter (pulse) This mode is valid for “pH pulse” and “pH pulse 2” outputs only. Proportional mode set the instrument to operate using a calculated percentage between two set values that enable or disable the Chlorine pump. To use this mode move cursor on “Working Mode”. Press the wheel and select it.
- Page 11 8.3 “PWM” proportional pH & proportional water meter (relay) This mode is valid for “pH relay” and “pH relay 2” outputs only. Pulse-width modulation (PWM) of a signal or power source involves the modulation of its duty cycle, to either convey information over a communications channel or control the amount of power sent to a load.
- Page 12 8.5 “PWM” (fixed), pH This mode is valid for “pH relay” and “pH relay 2” outputs only. Pulse-width modulation (PWM) of a signal or power source involves the modulation of its duty cycle, to either convey information over a communications channel or control the amount of power sent to a load.
- Page 13 8.5 “PID”, pH A proportional-integral-derivative controller (PID controller) is a control loop feedback mechanism (controller) widely used in industrial control systems. A PID controller calculates an error value as the difference between a measured process variable and a desired setpoint. The controller attempts to minimize the error by adjusting the process through use of a manipulated variable.
- Page 14 9. “Probe Calibration”, pH Full pH calibration procedure involves two calibration points and it requires two buffer solutions. Default buffer solutions are pH 4.00 and pH 7.00. pH reading value can be also compensated from “pH compensation” menu. From “Menu Calibration” choose “pH probe”. Fast Calibration procedure involves one point calibration (choose value closest to real field application).
- Page 15 9.1 “Probe Calibration”, °C - Temperature A professioanl thermometer is required to obtain a reliable calibration. From “Menu Calibration” choose “Temp probe”. Note: This procedure assumes that instrument is correctly installed and configured, connected to a working PT100.. Calibrate using plant’s temperature otherwise unattended results may occur. Using an external thermometer read actual temperature and edit related field “Cal.
- Page 16 10. “Parameters” From “Menu Calibration” choose “Parameters”. This menu allows to set a delay (max 60 minutes) before pumps begin to feed. Furthermore use this menu to set pH pump startup priority and to change default passcode. Feeding Delay. Move on “Feeding Delay” then press wheel. Choose a value between 0 (disabled) and 60 minutes (maximum delay time).
- Page 17 11. “Output Manager” From “Menu Calibration” choose “Output Manager”. This menu allows to manually operate all outputs for a settable time. Set to “AUTO” for normal operating mode. Set to “OFF” to permanently disable outputs. Press wheel to move cursor on “TIME” field. Once here, choose a working time between 0 (disabled) or 199 minutes.
- Page 18 12. “Instrument Reset” “Instrument Reset” menu allows user to reset several parameters (channel, temperature, instrument and setpoint) Press wheel then change value to restore (multiple choises are allowed) to “ON”, press wheel again, move on “OK” then finally press wheel. The instrument will go back to main menu and values will be restored.
- Page 19 13. “Dosing Alarm” Use this menu to assign a maximum time to the pumps for reaching the setpoint. If set time ends and the pumps are still dosing, within this menu is possible to STOP them or just to show an alarm message. Function can be disabled selecting “OFF”...
- Page 20 14. “International” Use this menu to set international parameters as UNIT FORMAT (Europe IS or USA), Local Time and Date. Format. Use this option to use European or USA units format. See table for differencies. EUROPE IS (Internationl Standard) Date (DD/MMM/YY) Date (MMM/DD/YY) Time 24h Time AM / PM...
- Page 21 15. “Probe Failure” Use this menu to assign a maximum time for connected probes to stay in “stuck” condition. A stuck probe (it remains on same reading value for some time) means that probably probe itself is damaged. Within this menu is possible to STOP pumps or just to show an alarm message (DOSE, probe failure) .
- Page 22 16. “Flow Contact” Flow contact (see “SEPR” blocks on page 4) can be enabled to stop a dosing procedure using a N.O. contact mode (normally open) or N.C. contact mode (normally closed) when status on blocks changes. Rotate wheel to choose between: “DISABLE”, “REVERSE”...
- Page 23 18. “mA Outputs” This menu allows to configure mA current otputs for pH, Temperature channels and PID mA mode. Options to set are: MODE (selectable between 0-20 or 4-20 mA current output) Max mA: maximum probe’s reading value at 20 mA current Min mA: minimum probe’s reading value at 0 or 4 mA current Disable / Enable on alarm: enable or disable output on alarm condition (flow, level, probe failure, dosage, out of range) Note: The outputs available for the PID mA are those set in the menu SETPOINT.
- Page 24 19. “Out of range alarm” “Out of range alarm” menu defines the minimum and maximum pH and pH probe read value before to stop dosing activity and to show an alarm message. Move wheel on “Min/Max pH Range” to set “out of range” condition for pH probe then click on wheel to enter into “Min/Max Range menu”.
- Page 25 20. “Self Clean” To obtain reliable results, the instrument can be connected to a cleaning apparatus (eg .: Probe Cleaning). This menu enables the functionality to blocks 4-E-N (see page 8). Options are: Cycle Time: time between cleaning procedure and next procedure (adjustable from 6 hours to 10 days) Clean Time: time required to complete probe cleaning procedure (adjustable from 0 to 999 seconds)
- Page 26 21. “Circulator Pump” This feature allows you to power a pump for water circulation inside the intake pipeline, increasing the pressure. To activate the circulation pump connected to terminals 5-E-N (see terminal) set option to “ENABLED” To disable set the tool to “DISABLED”.
-
Page 27: Technical Information
22. Technical information. Power supply: 85÷264 VAC pH range: 0 ÷14 Environment Temperature: -10 ÷ 45°C (14 ÷ 113°F) Chemical Temperature: 0 ÷ 50°C (32 ÷ 122°F) Installation Class: II Pollution Level: 2 Packaging and Transporting Temperature: -10 ÷ 50°C (14 ÷ 122°F) Protection degree: IP 65... - Page 28 23. SEPR configuration SEPR “Flow Sensor” configuration for two instruments 16 17 16 17 SEPR Configuration of a Flow Switch with a voltage free contact and two instruments 16 17 16 17 N.C. contact (OK) N.O. contact (Alarm) NPED4...
- Page 29 24. “Water Meter” Enter into “Water Meter” menu to setup Flow Meter configuration type, see total amount of liters passed through water meter, reset totalizer and setup a timeout alarm for no water flow. The alarm will be notified into main screen and water meter status (see page 6).
- Page 30 25 “Feed Forward”, PID loop The PID controller algorithm involves three separate constant parameters, and is accordingly sometimes called three- term control: the proportional, the integral and derivative values, denoted P, I, and D. Simply put, these values can be interpreted in terms of time: P depends on the present error, I on the accumulation of past errors, and D is a prediction of future errors, based on current rate of change.
- Page 31 26. NOTES intentionally left blank page...
- Page 32 Appendix “Temp. Compensation” - Temperature compensation pH measurements are temperature dependent. The degree to which temperature affects mV readings varies from solution to solution and can be calculated using the following graphic. Instrument has either fixed or adjustable automatic temperature compensation referenced to a standard temperature of 25°C.
-
Page 33: Appendix - Dimensions
Appendix - Dimensions... - Page 34 Appendix Communication HARDWARE - “SMS/GSM” Module Located under mainboard cover there is a four pins connector that can be used to install USB, ETHERNET or MODEM modules. Modules come pre-installed upon request and may appear different as shown (different configurations). “SMS/GMS module”...
- Page 35 Appendix Communication HARDWARE - “LOG USB” Module Located under mainboard cover there is a four pins connector that can be used to install “USB data log module” or “SMS module”. Modules come pre-installed upon request and may appear different as shown (different configurations).
- Page 36 Appendix Communication - Software “RS485” menu. Prior to install the instrument into an RS485 local system a unique ID NUMBER (from 1 to 30) and ID NAME (station name) must be set. Rotate wheel and edit fields. If ID number has already assigned an error message will follow after ID Check (move cursor on CHECK and press wheel).
- Page 37 Appendix Communication - Software “TCP/IP” menu. The instrument may be remotely operated using a standard ethernet connection (sold as option). A static or dynamic IP address and a CAT5 ethernet cable is required. According to your network capacity connection speed is 10/100Mbps. To obtain a valid IP address and subnet mask contact your net administrator.
- Page 38 Appendix Communication - Software “GPRS” menu. Instrument may be remotely operated using an embedded standard GPRS modem (sold as option). In order to activate this service please ensure that the following steps are correctly completed: - Make certain the antenna location is not shielded by metal objects or near sources of electrical ‘noise’. - Make certain the distance from the antenna to the “Instrument”...
- Page 39 Appendix Communication - Software “LOG” menu. This function records instrument acitvity (date, hour, temperature, uS, totalizer I/O, alarms, outputs). It starts for selected frequency period (every) at requested time (time). SET DATE & TIME BEFORE TO ENABLE LOG. IF NOT POWERED FOR ABOUT 30 DAYS THE INSTRUMENT WILL LOOSE DATE/TIME Set ACTIVE to “enabled”...
- Page 40 Appendix - MODBUS Modbus is a serial communications protocol originally published by Modicon (now Schneider Electric) in 1979 for use with its programmable logic controllers (PLCs). Simple and robust, it has since become a de facto standard communication protocol, and it is now a commonly available means of connecting industrial electronic devices. From main menu select COMMUNICATION then MODBUS to access the options.
- Page 41 Appendix - WIFI Connection Within Communication Menu choose “WIFI” to bring wireless sub-menu. Wait until desired wireless network appears, move wheel on it then click. Otherwise click on “SCAN” to restart the search. Enter WEP / WPA / WPA2 password (if required) and wait until connection has been estabilished and WiFi signal strength appears.
- Page 43 Index 1. Introduction ..................3 2. The wheel .................... 3 3. Board connectiones ................4 4. Main view ................... 5 5. Status check ..................6 6. Password ..................... 7 7. “Main Menu” ..................8 8 “Set-Point”, Cl (On/Off)................ 9 8.1 “Set-Point”, Cl (on/off) ..............9 8.2 “Set-Point”, Cl (proportional) ............
- Page 44 When dismantling this instrument please separate material types and send them according to local recycling disposal requirements. We appreciate your efforts in supporting your local Recycle Environmental Program. Working together we’ll form an active union to assure the world’s invaluable resources are conserved.
Need help?
Do you have a question about the LDSPH PLUS Series and is the answer not in the manual?
Questions and answers