Table of Contents
Advertisement
DRAFT Clinician's User Manual
Rhythm Express
Rx only
CAUTION: U.S. FEDERAL LAW RESTRICTS THIS DEVICE TO SALE ON OR BY THE
ORDER OF A PHYSICIAN.
CAUTION: Carefully read all instructions prior to use. Observe all warnings and
precautions noted in these directions. Failure to do so may result in patient
complications.
Copyright 2018 VivaQuant. All rights reserved. No part of this manual may be reproduced, translated, transcribed, or
transmitted in any form or by any means manual, electronic, electromagnetic, chemical, or optical without the written
permission of VivaQuant.
One or more of the following patents may be applicable: US 8,632,465, US 8,478,389, US 8,433,395, US 9,050,007, U.S.
8,632,465, U.S. 8,543,195, U.S. 9,294,074, U.S. 9,314,181, and U.S. 9,339,202. Other US and foreign patents are pending.
Model RX‐1
TM
For Research Only.
This device is not cleared for sale by FDA.
VivaQuant
4339 Nancy Place, Suite 100
St. Paul, MN 55126
Tel. 1‐866‐ECG‐TRUE (1‐866‐324‐8783)
Advertisement
Table of Contents
Troubleshooting

Related Manuals for VivaQuant Rhythm Express RX-1

Summary of Contents for VivaQuant Rhythm Express RX-1
- Page 1 Copyright 2018 VivaQuant. All rights reserved. No part of this manual may be reproduced, translated, transcribed, or transmitted in any form or by any means manual, electronic, electromagnetic, chemical, or optical without the written permission of VivaQuant.
-
Page 2: Table Of Contents
Indications for Use ................................ 7 Safety Information .................................. 8 Cautions and Warnings ............................... 8 Using the RX-1 to Monitor a Patient ............................ 1 0 Rhythm Express RX-1 ............................... 10 Device Components ................................ 10 Overview of RX‐1 Device Operation ............................ 11 Connecting to the Cellular Network and Signal Strength ..................... 1 1 Device Settings ................................... 1 2 ... - Page 3 Features and Specifications .............................. 24 Rhythm Express Model RX-1 Features ........................ 2 4 Arrhythmia Detection ................................ 24 Specifications .................................. 2 5 VivaQuant Limited Warranty .............................. 2 7 Obtaining Warranty Repairs ............................. 2 7 Wireless Compliance ................................ 28 FCC Regulations Compliance Statement .......................... 28 Federal Communication Commission (FCC) Radiation Exposure Statement: ............... 2 8 FCC RF Radiation Exposure Statement: .......................... 2 8 ...
-
Page 4: Manual Overview
Explanation of Symbols Used in this Manual Symbol Meaning Follow instructions for use Caution! IP64 Resistant to water and dust ingress (RX‐1) Protected from condensation and touch by objects greater IP21 than 12 mm (charger) Type BF Applied Part. Avoid contact between conductive parts of electrodes and other conductive parts, including earth. device is not defibrillator proof Charger Class II equipment, For indoor use only (AC/DC adapter charger) Rx only Caution: Federal law restricts this device to sale by or on the order of a physician Manufacturer: VivaQuant, 4339 Nancy Place, Suite 100, St. Paul, MN 55126 Tel. 1‐866‐ECG‐TRUE (1‐866‐324‐8783), Web: www.vivaquant.com This is the FCC logo indicating compliance with the FCC rules for wireless devices. 4 ... -
Page 5: Glossary
Chapter 1: Manual Overview Emits non‐ionizing radiation Direct current Up/down arrows used to scroll through menu Red PTE Button used to enter recording mode and Patient Triggered Events Glossary Auto trigger: The ability to automatically detect an arrhythmia. ECG (Electrocardiogram): The heart’s electrical activity recorded from electrodes on the surface of the body. Event Recorder: A system for continuous monitoring of the ECG. Arrhythmias are detected, and the patient can report the occurrence of symptoms. Mobile Cardiac Telemetry: A system for continuous monitoring of the ECG. Arrhythmias are detected, the patient can report the occurrence of symptoms, and heart rate is measured continuously for reporting to a physician. Heart rate: The number of times the heart beats in a minute, measured in beats per minute. Holter monitor: A device worn by a patient for recording continuous ECG, typically for diagnosing brief temporary arrhythmias Monitoring center: The monitoring center is responsible for reviewing clinical data transmissions and reporting them to the physician. Patient Triggered Event (PTE): Occurs when a patient reports the occurrence of symptoms by pressing the large button on the keyboard of the RX‐1. Routine Event: An autodetected event that matches the event notification criteria established by the physician for a routine clinical event. ECG strips corresponding to these events are transmitted to the monitoring center during scheduled and ad hoc connections. WARNING: Indicates a potential hazard or unsafe practice which, if not avoided, could result in death or serious injury. CAUTION: Indicates a potential hazard or unsafe practice which, if not avoided, could result in minor personal injury or damage to the product or property. NOTE: Indicates additional information or tips to help you get the most out of your equipment. Urgent Event: An autodetected event that matches the event notification criteria established by the physician for an urgent clinical event. These events are of high clinical significance. ECG strips corresponding to these events are transmitted within a few minutes of onset of the event. 5 ... -
Page 6: Overview
Overview This chapter provides an overview of the Rhythm Express RX‐1 ECG Monitor and Arrhythmia Detector. The following information can be found in this chapter: Device description Intended use Indications for use Device Description RX‐1 is a portable battery‐powered wearable recorder for use by trained clinical staff to collect ECG from patients in a home, clinical, or outpatient setting for up to 30 consecutive days. The device can capture patient activated and auto‐ triggered cardiac events such as bradycardia, tachycardia, pause, and atrial fibrillation via an on‐board ECG waveform analysis algorithm. The device can automatically deliver the data wirelessly to a server using a built‐in wireless cellular data modem where it can be reviewed by a physician or other qualified professional. A medical professional can adjust the device notification criteria and auto triggering parameters using the server and securely communicate the updated device notification criteria to the device using the cellular network. Device notification parameters include arrhythmia detection thresholds, monitoring duration, and operating mode. The RX‐1 consists of a monitor, DIN 40 standard lead wires, and a wall battery charger. The RX‐1 device is intended to be used only with lead wires supplied by VivaQuant. High quality FDA‐cleared lead electrodes designed for long‐term ambulatory monitoring should be used, such as 3M 2259 or equivalent. RX‐1 can record ECG as either an Event Recorder (ER), Mobile Cardiac Telemetry (MCT) or Wireless Holter (WH) device. As an Event Recorder, the device continuously detects arrhythmias and transmits them at a predetermined interval. Upon feeling symptoms, as directed by a physician, the patient can press the Red Patient Triggered Event (PTE) button on the device to mark the time symptoms occurred. The device then prompts the patient to assign a symptom type and will immediately connect with the cellular network. Once a secure connection is established on the cellular network, the device will transmit an ECG strip overlapping the time at which the red PTE button was pressed. Once received at a monitoring center or clinic, the ECG can be evaluation by a physician or other trained professional to aid in diagnosis. When operating as an MCT device, RX‐1 functions the same as ER mode with the addition that the RX‐1 detects the location of each heart beat and transmits to the monitoring center for reporting to the physician as an aid in diagnosis. In addition, while in MCT mode, the server provides for retrieval of any ECG strip during the recording session. When operating as a WH device, RX‐1 functions the same as MCT mode except that the server automatically retrieves all ECG strips recorded by the device. When not actively monitoring a patient, the RX‐1 can be placed in Standby Mode to save battery charge. Standby Mode essentially puts the device to sleep to preserve the battery and uses only about 1% of remaining battery capacity for each week the device is in Standby Mode. The device can be charged when in Standby Mode. 6 ... -
Page 7: Intended Use
Chapter 2: Overview Intended Use Comment [bp1]: Changes here must be made everywhere. The indications are publicly approved The Rhythm Express remote cardiac monitoring system is intended for use by patients who either have or are at risk of during the 510(k). The ymust be consistent in all having cardiac disease and those that demonstrate intermittent symptoms indicative of cardiac disease and require cardiac labelling and requirements. monitoring on a continuing basis. The device continuously records ECG data and upon detection by an ECG analysis algorithm or manually initiated by the patient, automatically delivers the recorded cardiac activity to the server where it is presented and can be reviewed by a medical professional. The data received from the Rhythm Express device can be used by another device for arrhythmia analysis, reporting and signal measurements. The Rhythm Express remote cardiac monitoring system is not intended to sound any alarms. The device does not deliver any therapy, administer any drugs, provide interpretive or diagnostic statements or provide for any life support. Contraindications Patients under the age of 18 Patients with potentially life‐threatening arrhythmias who require inpatient monitoring. Patients who the attending physician thinks should be hospitalized. Indications for Use The RX‐1 ECG monitor with arrhythmia detection is intended for use in the following indications: Adult patients who have a demonstrated need for cardiac monitoring. These may include but are not limited to patients who require monitoring for: a) non‐life‐threatening arrhythmias such as supraventricular tachycardias (e.g. atrial fibrillation, atrial flutter, PACs, PSVT) and ventricular ectopy; b) evaluation of Brady arrhythmias and intermittent bundle branch block, including after cardiovascular surgery and myocardial infarction; and c) arrhythmias associated with co‐morbid conditions such as hypothyroidism or chronic lung disease. Patients with symptoms that may be due to cardiac arrhythmias. These may include but are not limited to symptoms such as: a) dizziness or lightheadedness; b) syncope of unknown etiology in which arrhythmias are suspected or need to be excluded; and c) dyspnea (shortness of breath). Patients with palpitations with or without unknown arrhythmias to obtain correlation of rhythm with symptoms. ... -
Page 8: Safety Information
Chapter 3: Safety Information 3 Safety Information This chapter provides warnings and cautions relating to use of the RX‐1 device. All personnel that use this device should read and be familiar with the content of this section prior to use. VivaQuant asserts that the product covered by this manual is safe, reliable, and effective provided that the product is used in accordance with the instructions for use, as provided in this manual. Observance of all safety messages will help protect the user and the patient against those hazards. Cautions and Warnings WARNING: Wear the device and lanyard under a shirt or other garment to avoid becoming entangled in your surroundings. WARNING Disconnect Patient leads from electrodes before defibrillation. Exposure to defibrillation may damage the RX‐1 device or may interfere with operation of the defibrillator. WARNING: RX‐1 is not intended for use as an emergency medical response system. WARNING: Keep out of reach of children. This device includes use of small parts and long cords which could pose a choking or strangulation hazard to unattended children. CAUTION: This device captures and presents data reflecting a patient’s physiological condition that, when reviewed by a trained medical professional, can be useful in determining a diagnosis. However, the data should not be used as the sole means for determining a patient’s diagnosis. CAUTION: The RX‐1 device is designed for use with standard electrodes. Some people are sensitive to the materials used in skin electrodes. If a reaction occurs, remove the device and electrodes from the body. CAUTION: This device is not intended for use during an MRI. CAUTION: Use only specified parts and accessories to maintain operator and patient safety. CAUTION: The RX‐1 is designed to meet or exceed requirements for electromagnetic compatibility, however, some environmental electrical interference may cause an artifact in the ECG. The quality of ECG signals may be adversely affected by electromagnetic interference from heavy machinery, electric blankets, and similar apparatus, resulting in non‐physiological waveforms with the potential for misinterpretation. CAUTION: Do not allow electrodes or ECG leads to contact an electrical power source. Contact could cause electrocution of the patient. CAUTION: Disconnect the lead wires from the electrodes prior to charging. Although the charger has been tested to assure that it meets safety standards, failure could result in electrical shock. 8 ... - Page 9 Chapter 3: Safety Information CAUTION: Use only the specified, charger for this device (AC/DC adapter), as listed in the system components of this manual. Using another AC adapter may damage the device and may create a safety hazard. CAUTION: Do not expose the device or lead wires to autoclaving or steam cleaning, as damage could result. Recommended cleaning procedure is to wipe the exterior surfaces with a cloth dampened with warm water and mild detergent solution and then dry with a clean, soft cloth. CAUTION: There are no user‐serviceable parts inside. Opening the case will void all warranties and could result in permanent damage. CAUTION: The RX‐1 device has been designed to tolerate normal drops and shocks. However, excessive impact and shocks should be avoided to prevent damage to the device. CAUTION: The RX‐1 device uses a Lithium Ion battery. This battery may present a fire or chemical burn hazard if mistreated. Do not disassemble, heat above 70° C (160° F), or incinerate. Dispose of the device in accordance with applicable local regulations. CAUTION: The user of this product is responsible for routine maintenance. Failure to do so may cause undue failure and possible health hazards. CAUTION: VivaQuant equipment is identified by the UDI, Model, and serial number on the back of the device. Take care not to deface these numbers. CAUTION: This equipment is not suitable for use in the presence of a flammable anesthetic mixture with air, oxygen, or nitrous oxide. CAUTION: This equipment is resistant to water but should not be submerged in water. Remove device prior to entering a pool or bath and do not submerge device during cleaning and maintenance procedures. Submerging the device in water could result in damage. CAUTION: This equipment should not be exposed to environmental conditions outside the listed specifications. If the RX‐1 is result in a change in performance contact customer support at 1‐866‐ECG‐TRUE (1‐866‐324‐8783). 9 ...
-
Page 10: Using The Rx-1 To Monitor A Patient
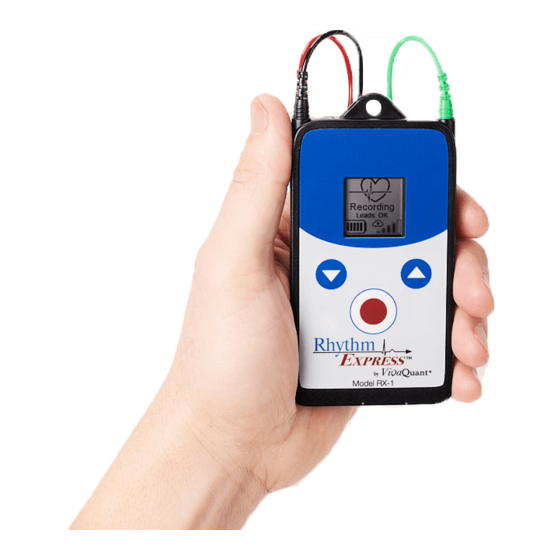
ECG lead wires These 4 leads conduct the signal from the electrodes on the patient’s skin to the device. Use only the electrodes provided by VivaQuant. RX-1 may not meet the required performance if other leads are used. Display The LCD display provides the user with feedback on device operation. -
Page 11: Overview Of Rx-1 Device Operation
Chapter 4: Using the RX‐1 to Monitor a Patient Overview of RX‐1 Device Operation The device acquires a two‐channel ECG, continuously evaluates the incoming signals to remove noise, and detects bradycardia (brady), tachycardia (tachy), pause, and atrial fibrillation (AF) using an on‐board embedded algorithm. RX‐1 can also mark patient triggered events and offers the patient the ability to select from a menu of common symptoms to aid in assessment of symptom‐rhythm correlation. RX‐1 uses standard DIN40 ECG lead wires to connect to standard commercially available skin electrodes to sense the patient’s ECG. A cellular modem embedded within the RX‐1 is used to establish a secure communications link to a server that is accessible from a monitoring center or clinic. Auto‐ and patient‐ triggered ECG arrhythmia strips are communicated to the server for viewing and incorporation into a report by a medical professional. Connecting to the Cellular Network and Signal Strength To maximize cybersecurity, all communications with the server are originated by the device. The device attempts to communicate with the server upon the following conditions: (Note that for a connection to be established, cellular service must be available. If no cell service is available, the device will retry until a connection is established.) Expiration of the server connection interval timer. This timer, built into the device, causes the device to attempt a connection ... - Page 12 Chapter 4: Using the RX‐1 to Monitor a Patient Device Notification Criteria To set up the device prior to the start of a recording session, monitoring center or clinic staff are required to select criteria for arrhythmia detection and other usefulinformationon the portal. This information is then communicated to the device via the wireless cellular link on the next connection. Table 1 below shows selectable criteria. Table 1. Device notification criteria. Parameter Description Mode Selects either WH, MCT, or ER as the operating mode for recording Time zone Selects the time zone where the patient resides Tachycardia rate threshold – urgent event Specifies heart rate threshold necessary to trigger an urgent event Tachycardia rate threshold – routine event Specifies heart rate threshold necessary to trigger a routine event Tachycardia Number of beats The number of beats in a consecutive run above the tachycardia rate threshold required to trigger detection of a tachycardia event Bradycardia rate threshold – urgent event Specifies heart rate threshold necessary to trigger an urgent event Bradycardia rate threshold – routine event Specifies heart rate threshold necessary to trigger a routine event Bradycardia Number of beats The number of consecutive beats that must fall below the bradycardia rate threshold to trigger an event. Pause threshold – urgent event Specifies minimum pause duration necessary to trigger an urgent event Pause event threshold – routine event Specifies minimum pause duration necessary to trigger a routine event Atrial fibrillation event – urgent ...
- Page 13 Chapter 4: Using the RX‐1 to Monitor a Patient Table 2. Actions provided by PTE button vs. Operating State. Shown on Display Action Taken Result Press PTE for more Device transitions to Ready, provided than 5 seconds that the device solid state drive has been erased and the device has been configured for the next patient to be monitored. Press PTE for more Device transitions directly to recording than 5 seconds mode, provided that the remaining battery capacity is at least 3 bars and Hookup mode is disabled. Press PTE for more Device transitions to Hookup mode (if than 5 seconds enabled) and displays an ECG trace for each channel. If PTE is not pressed for 60 seconds, the device starts recording ECG. Press PTE for more Device transitions to Recording mode than 5 seconds ...
-
Page 14: Recording Symptoms
Chapter 4: Using the RX‐1 to Monitor a Patient Press PTE to tag this Press Up Arrow to select Chest Pain as patient triggered symptom. Press Down Arrow to select event with Other as Short of Breath as symptom. the symptom NOTE: We suggest that Hookup be disabled unless a clinician is present during hookup. Recording Symptoms 1.When a physician requested symptom is experienced, press and hold the Red PTE button on the device for 1‐2 seconds. 2. One of the symptom icons shown below will appear on the display. 3. The Up or Down Arrow buttons can now be pressed to step through the possible selections. 4. Once the symptom that best describes what the patient is feeling is displayed, press the Red PTE button again. This will capture the symptom for later viewing by a medical professional. Note: Another symptom may not be recorded for 3 minutes. If none of the symptoms match what you are experiencing, select “Other.” If no symptom is selected within 30 seconds, the screen will return to show that it is recording, and no symptom will be recorded. After pressing the Red PTE button to record a symptom, the Short of breath icon appears. The Up and Down arrow keys will skip between icons to allow selection of the symptom icon that matches the patients symptom. 14 ... -
Page 15: Battery Charging And Status
Chapter 4: Using the RX‐1 to Monitor a Patient Battery Charging and Status Battery status is provided on the display in most operating modes. Battery displays Battery Charge (number of bars) 5 Fully charged 4 75‐95% 3 50‐75% 2 20‐50% 1 5‐20% 0 Less than 5% remaining Once the battery icon displays 0 bars, the device allows for one communication attempt with the server to indicate that the battery is near the end of its life then the device will stop acquiring data. It is recommended that the device be connected to a charger once the device displays 1 bar on the battery icon. Full charge will be reached in approximately 2 hours. Battery life for MCT mode is about 14 days. Remove leads from electrodes then plug RX-1 into charger. Caution: Disconnect the lead wires from the patient electrodes before charging. Use only the charger provided with the device to charge the battery. 15 ... -
Page 16: Notifications
NOTE: We strongly suggest that all lead wires be connected to the device by a clinician. Leads are designed to be difficult to remove and may require the use of a tool (e.g. pliers or forceps). Connecting the ECG Leads to the Patient The quality of the ECG signal depends on the contact between the electrode and the patient’s skin. We recommend the use of electrodes 3M 2259 or Ambu BlueSensor VLC, designed for long‐term ambulatory monitoring. Use only the ECG leads provided by VivaQuant, plug the ECG leads into the device according to the label next to the connectors as shown below. The color of each lead wire plugged into the four connectors on the RX‐1 should be as follows: RL - - - - Green LA - - - - Black RA - - - - White LL - - - - ... - Page 17 Chapter 4: Using the RX‐1 to Monitor a Patient 17 ...
-
Page 18: Initiating A Recording
Chapter 4: Using the RX‐1 to Monitor a Patient Preparation of the patient’s skin is important to obtain a good quality ECG recording. It is best to refer to your electrode manufacturer for instructions on proper skin preparation techniques. However, the following points can assist in obtaining good quality ECG recordings: Identify the locations of the electrodes. For a two‐lead recording, use the location shown in the figure below. Placing electrodes over bone structures will reduce artifact and noise. Select a lead wire length to comfortably reach from the electrode location to the device. Use a white lead for the right arm (RA) electrode, a black lead for the left arm (LA) electrode, red lead for the left leg (LL) electrode, and green for the driven right leg (DRL) electrode. At each electrode location, shave hair if necessary. Using the 3M 2259 electrode, use the abrasive patch on the back of the ECG electrode to mildly abrade the skin at the location of each electrode by gently rubbing the abrasive patch over the area three or four times. If you are using a different electrode, follow the manufacturer’s recommendations for skin preparation. Attach the ECG lead snap to each electrode and attach the electrode to the skin. If the electrode is mistakenly attached to the wrong location, use a new electrode to correct the mistake. Reusing an electrode can result in poor quality signals. Note: Make a short loop in the lead wire near each electrode and tape the loop to the skin. This will prevent the lead wire from tugging on the electrode during movement and can improve the recording quality. ECG lead placement. Initiating a Recording If Hookup Mode is enabled: When the display shows Ready, press the red PTE button for 5 seconds. If the ECG electrodes and lead wires are connected, the patient’s ECG will scroll across the display. Once confirmed that the electrodes are connected correctly, press the red PTE button again for 5 seconds to start recording. If the red PTE button is not pressed within 120 seconds, the device will automatically start recording. If Hookup Mode is disabled: When the display shows Ready, press the red PTE button for 5 seconds to start recording. 18 ... -
Page 19: Charging The Battery During A Recording Session
We recommend replacing the electrodes at this time by following the instructions in Connecting the ECG Leads to the Patient. For comfort, reposition the location of each electrode slightly to avoid placing it at the same location. Formatted: List Paragraph, Bulleted + Level: 1 Use only the ECG leads provided by VivaQuant and follow the instructions in the above section, NOTE: We strongly + Aligned at: 0.25" + Indent at: 0.5" suggest that all lead wires be connected to the device by a clinician. Leads are designed to be difficult to remove Formatted: Font: Bold, No underline, Font and may require the use of a tool (e.g. pliers or forceps). color: Auto Connecting the ECG Leads to the Patient NOTE: We strongly suggest that all lead wires be connected to ... -
Page 20: Terminating A Recording
Chapter 4: Using the RX‐1 to Monitor a Patient Caution: Use only the specified, charger for this device (AC/DC adapter), as listed in the system components of this manual. Using another AC adapter may damage the device and may create a safety hazard. Time to recharge the battery. Battery fully charged. Terminating a Recording The recording is automatically terminated upon expiration of the recording duration timer set when configured by the server.. Alternately, the recording can be terminated via a command from the monitoring center provided upon physician orders. Upon termination, the device will automatically transmit remaining patient data on the next connection with the server. When the recording is complete, the RX-1 will transition from Recording Mode (left above) to Standby. -
Page 21: Maintenance, Service, And Troubleshooting
Chapter 5: Maintenance, Service, and Troubleshooting 5 Maintenance, Service, and Troubleshooting Storing the RX-1 The RX‐1 may be stored for about 2 months without significantly depleting the battery charge level. Store the device in a clean, dry environment at a temperature between 10° and 25° C. Under no circumstances should the device be stored above 70° C. Damage to the device could result. The device will connect with the server, and automatically confirm that all data have been transferred to the monitoring center, before it erases the RX‐1 solid state drive. Once this is complete, the device will show Standby on the display. The device can be charged while in Standby Mode. If you wish to configure the device for the next patient prior to storing, configure the device on the server prior to placing the device in Standby Mode. Cleaning the RX-1 The device must be cleaned after each patient. To clean the RX‐1 and lead wires, use a soft cloth dampened with a mixture of warm water and mild detergent solution or 10% bleach, and then dry with a clean, soft cloth. Caution: Do not use alcohol or acetone to clean the device or lead wires as this can damage the material. Do not expose the device or lead wires to steam cleaning, as damage could result. Recommended cleaning procedure is to wipe the exterior surfaces with a cloth dampened with warm water and mild detergent solution and then dry with a clean, soft cloth. Service If you experience a problem with the RX‐1, review the troubleshooting section for a listing of problems and solutions. If additional assistance is required with setting up, using or maintaining the equipment or if you notice changes in the performance of the RX‐1 device contact customer support at 1‐866‐ECG‐TRUE (1‐866‐324‐8783) Please, have the serial number of the device and description of the problem available when you call. Disposal This device contains electronic components and a lithium battery. Dispose of this device in compliance with local, state, and national regulations. 21 ... -
Page 22: Troubleshooting
Chapter 5: Maintenance, Service, and Troubleshooting Troubleshooting Problem Possible cause Solution Screen is blank Battery is dead Charge the device Device is in recording mode, but Battery is near full depletion. Charge the device. data are not being collected. Recording has been paused to prevent battery from going completely dead. Device is in recording mode, but Both leads have been disconnected for Check electrodes and lead wires. data are not being collected. more than 30 minutes Reconnect device to electrodes. High level of noise and/or artifact Electrodes have come loose or poor Remove electrodes, prep skin at new on the recording skin preparation location near old electrodes, and replace. Move to a new location (e.g. near a window). If you are inside a building, go outside if possible. To initiate a new connection without having to wait for the Device does not connect to the a scheduled connection, press the red PTE cellular network and the cloud Cell signal may be too weak button and the up arrow for 5 seconds icon does not display until thecloud icon appears on the display. Battery does not last the ... -
Page 23: Service 2
Chapter 5: Maintenance, Service, and Troubleshooting If you observe unexpected operation or events, we encourage you to report them via email, letter, or telephone to: VivaQuant customer service 4339 Nancy Place, Suite 100 St. Paul, MN 55126 Tel. 1‐866‐ECG‐TRUE (1‐866‐324‐8783) support@vivaquant.com Email Please provide a detailed description of the circumstances, the serial number of the device, and the date the issue was observed. 23 ... -
Page 24: Features And Specifications
Features and Specifications Rhythm Express Model RX-1 Features • Combination device—operates as a Wireless Event Recorder, Wireless Holter or Mobile Cardiac Telemetry Device. • Operating mode and settings can be changed wirelessly • Long‐life rechargeable Lithium Ion battery. • Designed for maximum patient compliance. Reliable and simple operation in a one‐piece device. • Protected against water spray and brief water immersion. • Significantly less expensive to operate than other devices. • Employs VivaQuant MDSP technology to reduce cellular data volume by > 95%, improve connectivity, and improve arrhythmia detection accuracy under typical ambulatory conditions. • High‐reliability design and simple operation reduce customer support calls. • Automatic detection of brady, tachy, pause, and AF in Event Recorder and MCT Mode. Arrhythmia Detection The RX‐1 incorporates a real‐time embedded arrhythmia detection algorithm. The processing steps employ VivaQuant’s proprietary MDSP technology to remove noise, described in US Patent 8,632,465 (other patents issued and pending). MDSP noise reduction technology has been shown to reduce noise by up to 26 dB (about 95%). Following noise reduction, QRS complexes are detected using a proprietary technique described in US Patent 9,408,549 and beat‐to‐beat (btb) RR intervals and btb heart rate (HR) are subsequently computed. Pause events are identified by the absence of a detected QRS for longer than the pause threshold defined by the Device Notification Criteria settings. Tachycardia (tachy) is detected based upon N consecutive beats exceeding the rate threshold setting. Bradycardia (brady) is detected if X consecutive beats are below the brady threshold. Tachy and brady rate thresholds as well as N and X are defined in the Device Notification Criteria settings. ... -
Page 25: Specifications
Chapter 6: Features and Specifications Database AF Sens. AF PPV MIT‐BIH AF 100 96 Specifications Characteristic Condition Min. Typ. Max. Unit Physical Length Width 63 mm Thickness 12.9 Weight Without lead wires Dust & water ingress (RX‐1) IP64 Dust & water ingress (charger) ... - Page 26 Chapter 6: Features and Specifications Storage & transport ‐25 Deg. C temperature Relative humidity Non‐condensing 10 Atmospheric pressure 700 1060 hPa Accessories The following accessories are provided with the RX-1 device and are available for purchase: Part Number Description ECG lead wires available in sets of 4 of 30, 45, 60, and 100 cm lengths Length (cm) Part Number 30 50‐0235 45 ...
-
Page 27: Vivaquant Limited Warranty
Chapter 7: Warranty 7 VivaQuant Limited Warranty Products are warranted to be free from manufacturing material defects for a period of one (1) year from the date of shipment from VivaQuant to the original purchaser. This warranty does not apply to any product which VivaQuant determines has been modified or damaged by the customer. Excluded from this warranty are expendable supply items including, but not limited to, electrodes, and lead wires. Except for the express warranties stated above, VivaQuant disclaims all warranties including implied warranties of merchantability and fitness. The stated express warranties are in lieu of all obligations of liabilities on the part of ... -
Page 28: Wireless Compliance
Chapter 8: Wireless Compliance 8 Wireless Compliance Contains FCC ID: 2AQ8D‐RX‐1‐SQVZ Formatted: Font: (Default) +Body (Calibri), 11 pt, Not Bold Formatted: Space After: 10 pt, Line spacing: Multiple 1.15 li FCC Regulations Compliance Statement Formatted: Font: (Default) +Body (Calibri), 11 Formatted: Font: (Default) +Body (Calibri), 11 This device complies with part 15 of the FCC Rules. Operation is subject to the following two conditions: (1) This device may not cause harmful interference, and (2) this device must accept any interference received, including interference that ... -
Page 29: Rf Statement
Medical Electrical Equipment needs special precautions regarding EMC and needs to be installed and put into service according to the EMC information provided in this manual. NOTE: VivaQuant is not responsible for any changes or modifications made to the device or charger. Such modifications could void the user’s warranty and authority to operate the ... -
Page 30: Publication Information
Publication Information The information in this manual only applies to the VivaQuant Model RX‐1 device. Due to ongoing product improvements, specifications in this manual are subject to change without notice. VivaQuant and Rhythm Express are trademarks of VivaQuant. All other marks referenced in this guide are owned by their respective owners. Contact Information For General Information and Customer Service VivaQuant 4339 Nancy Pl. St. Paul, MN 55126 www.vivaquant.com 1‐866‐ECG‐TRUE (1‐866‐324‐8783) Email: support@vivaquant.com Part number (this manual) ‐ LP‐002 Revision B1 Part number (RX‐1) – 51‐0019 VivaQuant shall not be liable for errors contained herein or for incidental or consequential damages in connection with the furnishing, performance, or use of this material. VivaQuant makes no warranty of any kind regarding this material, included, but not limited to, the implied warranties or merchantability and fitness for particular purpose. This device complies with the FDA Unique Device Identification (UDI) system. Information identifying this device is provided in the label adhered to the back of the device and on the device packaging. Device ID/SN is set by the manufacturer and is secured from accidental modification. Global Medical Device Nomenclature (GMDN) GMDN 41651 ...
Need help?
Do you have a question about the Rhythm Express RX-1 and is the answer not in the manual?
Questions and answers