Advertisement
Advertisement
Table of Contents

Related Manuals for Shimano BR-C6000


Summary of Contents for Shimano BR-C6000
- Page 1 (English) DM-HRB001-05 Dealer's Manual Hub roller brake BR-C6060-F BR-C6000 BR-C3000 BR-C3010 BR-IM81 BR-IM86 BR-IM31 BR-IM35 BL-C6000 BL-C6010 BL-IM60-A...
-
Page 2: Table Of Contents
CONTENTS IMPORTANT NOTICE ..................4 TO ENSURE SAFETY ..................5 INSTALLATION ................... 10 List of tools to be used ..........................10 Installation of the lever ..........................11 Installing the INTER M brake to the hub body ..................11 Installation of the hub to the frame ......................12 Installation of the brake cable ........................16 ADJUSTMENT .................... - Page 3 List of DM-compatible models Parts / Series INTER-8 INTER-7 INTER-5 INTER-3 SG-C6010-8R SG-5R30 SG-C3000-7R SG-3R40 SG-C6000-8R SG-5R35 Internal hub gear BL-IM45 BL-C6010 BL-IM65 BL-IM60-A BL-IM60 Brake lever BL-C6000 BR-C3000 BR-IM31 BR-C3010 BR-IM35 BR-C6000 BR-IM81 Hub roller brake BR-C6060-F BR-IM86 Brake cable...
-
Page 4: Important Notice
• Do not disassemble or modify the product other than as stated in the information contained in this dealer’s manual. • All dealer’s manuals and instruction manuals can be viewed on-line on our website (http://si.shimano.com). • Please observe the appropriate rules and regulations of the country, state or region in which you conduct your business as a dealer. -
Page 5: To Ensure Safety
• You need to use the Shimano front INTER M brake body and the hub as a set (excluding BR-C6060). The hub of the Shimano front INTER M brake has a built-in power modulator. This system controls the braking force so that excessive force is not applied if the braking force reaches the specified value. - Page 6 Use a lock nut with a nylon insert (self-locking nut) for the clip nut. It is recommended that standard Shimano parts be used for the clip screw, clip nut and brake arm clip.
- Page 7 If it is used on a bicycle which is smaller than 26 inch”, the braking force may be too great, which could cause accidents. • In order to get the best performance from the Shimano front INTER M brake, be sure to use Shimano brake cables and brake levers as a set.
- Page 8 • Products are not guaranteed against natural wear and deterioration from normal use and aging. • For maximum performance we highly recommend Shimano lubricants and maintenance products. The actual product may differ from the illustration because this manual is intended chiefly to explain the procedures for...
-
Page 9: Installation
INSTALLATION... -
Page 10: List Of Tools To Be Used
INSTALLATION List of tools to be used INSTALLATION „ List of tools to be used The following tools are needed for installation, adjustment, and maintenance purposes. Tool Tool Tool 17 mm spanner Adjustable wrench Screwdriver[#1] 10 mm spanner 5 mm hexagon wrench Mode switching Use the screwdriver[#1] to loosen the screw. -
Page 11: Installation Of The Lever
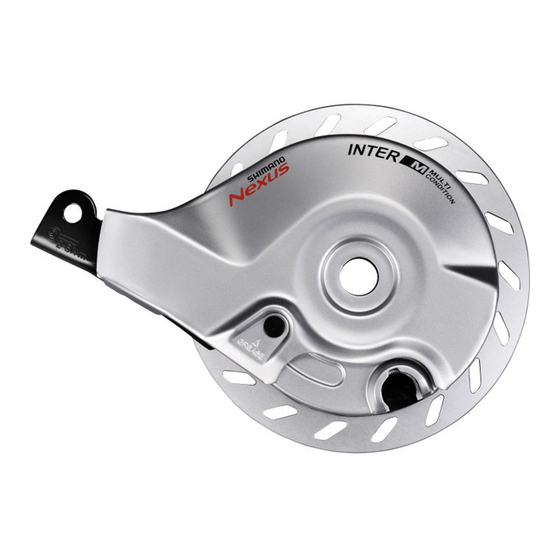
INSTALLATION Installation of the lever „ Installation of the lever ɸ22.2 mm Clamp bolt Grip 5 mm hexagon wrench Tightening torque 6 - 8 N·m „ Installing the INTER M brake to the hub body Engage the serrations on the hub body INTER M brake (B) with the serrations on the INTER M Hub body... -
Page 12: Installation Of The Hub To The Frame
INSTALLATION Installation of the hub to the frame „ Installation of the hub to the frame Rear side The hub installation is an example. Also refer to the manual for the hub. Mount the chain on the sprocket, and Hub axle then set the hub axle (A) into the Dropouts dropouts (B). - Page 13 INSTALLATION Installation of the hub to the frame Attach the brake arm of the INTER M Brake unit fixing nut/Brake unit brake to the chainstay with the brake fixing washer arm clip (J). Clip nut Brake arm clip Then temporarily fix the clip screw (K) Clip screw (M6×16 mm) and clip nut (I) by lightly tightening them.
- Page 14 INSTALLATION Installation of the hub to the frame Fix the brake arm (M) securely to the Brake arm chainstay (N) with the brake arm clip Chainstay (O). Brake arm clip Check that the brake arm is securely fastened to the chainstay by the brake Tightening torque arm clip.
- Page 15 INSTALLATION Installation of the hub to the frame Front side <For quick release type> Check that the front brake unit (A) is Brake unit firmly secured to the hub with the Brake unit fixing nut brake unit fixing nut (B). With notches (The side with Tightening torque notches is the front.)
-
Page 16: Installation Of The Brake Cable
INSTALLATION Installation of the brake cable „ Installation of the brake cable Rear side After checking that the cable Adjustment nut adjustment barrel (B) and adjustment Cable adjustment barrel nut (A) are fully tightened, insert the Outer holder unit outer holder unit (C) into the inner cable in the direction shown in the illustration. - Page 17 INSTALLATION Installation of the brake cable Align the red mark on the inner cable Groove in the winder unit fixing washer (H) so that it faces in the Red mark on inner cable fixing direction of the groove in the winder washer unit (G), and then insert the inner Inner cable fixing bolt unit...
- Page 18 INSTALLATION Installation of the brake cable After pressing the lever, check that the red marks on the inner cable fixing washer with the inner cable mounting bolt unit press-fit into the winder unit When detaching the cable, perform in reverse order. are in the right direction as shown in the illustration.
- Page 19 INSTALLATION Installation of the brake cable Place the components as shown in the Inner cable fixing nut following figure and tighten the inner TL-IM21 cable fixing nut (E). Use (b) 109 mm of TL-IM21 (F) to Tightening torque tighten the inner mounting nut as shown in the illustration.
- Page 20 INSTALLATION Installation of the brake cable Hook the inner cable (M) over the Cable hook cable hook (L). Inner cable Insert the outer holder unit (O) into Brake arm the hole of the brake arm (N) from Outer holder unit underneath and slide it to the lower section of the hole.
- Page 21 INSTALLATION Installation of the brake cable <For BR-IM31/35> Place the cable adjustment barrel (A) Cable adjustment barrel so that it is (a) 13 to 15 mm from the Outer casing holder end of the outer casing holder (B), and Hole in the inner cable fixing bolt then pass the inner cable through the cable adjustment barrel and then through the hole (C) in the inner...
-
Page 22: Adjustment
ADJUSTMENT... -
Page 23: Adjusting The Brake Cable
ADJUSTMENT Adjusting the brake cable ADJUSTMENT „ Adjusting the brake cable Rear side NOTE After checking that the wheel does not easily turn while the brake cable is If the brake cable is not run in, it will need being pulled, depress the brake lever to be adjusted again after only a short about 10 times as far as the grip in period of use. - Page 24 ADJUSTMENT Adjusting the brake cable Front side NOTE After checking that the wheel does not easily turn while the brake cable is If the brake cable is not run in, it will need being pulled, depress the brake lever to be adjusted again after only a short about 10 times as far as the grip in period of use.
-
Page 25: Maintenance
MAINTENANCE... -
Page 26: Applying Grease
MAINTENANCE Applying grease MAINTENANCE „ Applying grease Before applying grease for roller Grease hole cap brakes (B), remove the grease hole cap Grease for roller brakes (A) and press-fit the tube into the back Cable unit of the hole 12 mm or more. Apply an appropriate amount of grease (approx. - Page 27 Please note: specifications are subject to change for improvement without notice. (English) © Nov. 2018 by SHIMANO INC. ITP...
Need help?
Do you have a question about the BR-C6000 and is the answer not in the manual?
Questions and answers