Table of Contents

Related Manuals for General WDCFM8912


Summary of Contents for General WDCFM8912
- Page 1 WDCFM8912 USER’S MANUAL DIGITAL AIR FLOW METER WITH CFM, BTU, TEMP, HUMIDITY, DP, FPM, MPH, KPH, MPS, KNOTS & WET BULB 99 Washington Street Melrose, MA 02176 Phone 781-665-1400 Toll Free 1-800-517-8431 Visit us at www.TestEquipmentDepot.com...
-
Page 2: Material Supplied
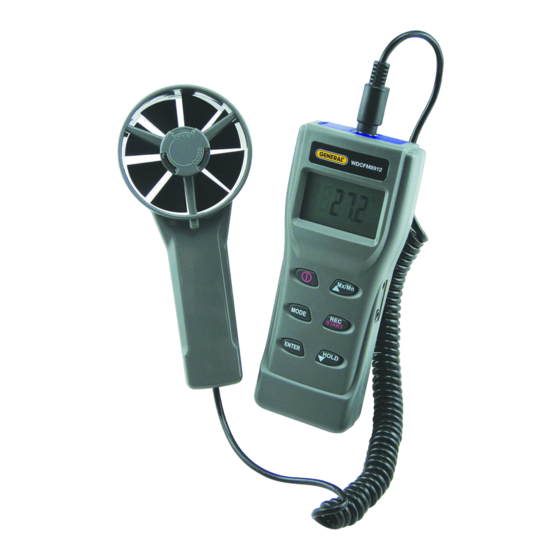
INTRODUCTION Thank you for purchasing this digital Anemo-Psychrometer. This unique meter is designed with 7 H.V.A.C &R that must have parameters in 1. The meter is designed as battery operated for Humidity, Air Temp., Dew Point, Wet Bulb, Air Velocity, Air Volume and BTU. - Page 3 REMINDER IMPORTANT: 1. Rotate the cover before measurement to ensure the measured data is correct. 2. The fan and meter are sold as a kit and are calibrated together. When you need to replace the fan, please see page 11 for details on fan replacement.
- Page 4 3. ENTER: - To confirm the setting & calibration. 4. Mx/Mn/Up L Mx/Mn - Pressing to view MAX/MIN/AVG value. - Press to select the value of each digit in cycle. 5. REC/START: - To start measuring volume or capacity without waiting. 6.
-
Page 5: Basic Measurements
BASIC MEASUREMENT Basic measured parameters of this model: BASIC MEASUREMENTS • Air temp. • Humidity • Dew Point • Wet Bulb • Air Velocity EXTENDED MEASUREMENTS • Air Volume • Sum of Volume • Capacity • Sum of Capacity When powered on, the air temperature is the default value to show on the LCD. - Page 6 AIR VOLUME: OUTLET SIZE While in normal MODE , long pressing key to enter air volume MODE mode. To measure the volume, the outlet size needs to be input first. There are three choices to enter the size: • Length & Width: This is the default choice.
- Page 7 displayed on top left corner and meter also beeps when time is up. (Fig. F) If no need to wait for 20 seconds, just press START key to start measuring the volume right away. (Fig. F) After starting measuring the volume, the meter will automatically count the volume for 60 seconds to give a average value.
-
Page 8: Capacity: Measurement
• Diameter: While in default outlet setting mode (length), pressing for over two seconds to choose diameter setting. Press M ENTER HOLD to select the setting digit first, then press L Mx/Mn key to select the appropriate value (0-9) (Fig. I) (Fig. -
Page 9: Low Battery
During this 60 second time, the vane should move along the whole outlet to cover each area so the measured data could be more accurate. The count down number displayed on the top-left corner as a reminder and meter also beeps when 60 seconds is up. After time is up, 60 seconds average volume will display on the LCD as Fig O. -
Page 10: Troubleshooting
RS232 SOFTWARE SOFTWARE We have compatible software and cable which is design for the meter, please contact your supplier for details. INTERFACE OF RS232 A. 9600 bps, 8 data bits, no parity. B. Format: Tx. ASCII code by every sec. while meter is on VXXX.XMPS(FTM):TXXX.XC(F):HXX.X%: dXXX.XC(F):wXXX.XC(F): vXXXXX.XCMM(CFM):... -
Page 11: Specification
6. E 6 a) the value is not calculated completely. 7. E 11 a) Humidity Calibration error. SPECIFICATION TEMPERATURE: -4º to 140ºF (-20º to 60ºC) Accuracy: ±1ºF (±0.6ºC), Resolution: 0.1ºF (0.1ºC) RELATIVE HUMIDITY: 0 to 100% RH Accuracy: ±3% at 10 to 90%RH (cal. temp.) ±5% at other range Resolution: 0.1 % DEW POINT: -90º... - Page 12 2. If the saved S value is different from your paper, press M HOLD to move to the digit which you want to edit and then use L Mx/Mn key to change the value. 3. Press key to save new input S value and then meter will ENTER enter second value input automatically.
-
Page 13: Return Authorization
User should also input four digits before decimal. All the Z is a negative value but LCD will not appear the negative icon. Example: 1. If the Z value is -928.8683, user should input 09 28868 2. If the Z value is -1928.868, user should input 19 28868 3. - Page 14 NOTES ______________________________________________________ ______________________________________________________ ______________________________________________________ ______________________________________________________ ______________________________________________________ ______________________________________________________ ______________________________________________________ ______________________________________________________ ______________________________________________________ ______________________________________________________ ______________________________________________________ ______________________________________________________ ______________________________________________________ ______________________________________________________ ______________________________________________________ ______________________________________________________ ______________________________________________________ ______________________________________________________ ______________________________________________________ ______________________________________________________ ______________________________________________________ ______________________________________________________ ______________________________________________________...
- Page 15 ______________________________________________________ ______________________________________________________ ______________________________________________________ ______________________________________________________ ______________________________________________________ ______________________________________________________ ______________________________________________________ ______________________________________________________ ______________________________________________________ ______________________________________________________ ______________________________________________________ ______________________________________________________ ______________________________________________________ ______________________________________________________ ______________________________________________________ ______________________________________________________ ______________________________________________________ ______________________________________________________ ______________________________________________________ ______________________________________________________ ______________________________________________________ ______________________________________________________ ______________________________________________________ ______________________________________________________...
- Page 16 99 Washington Street Melrose, MA 02176 Phone 781-665-1400 Toll Free 1-800-517-8431 Visit us at www.TestEquipmentDepot.com WDCFM8912 User’s Manual Specifications subject to change without notice ©2008 GENERAL TOOLS & INSTRUMENTS ™ NOTICE - WE ARE NOT RESPONSIBLE FOR TYPOGRAPHICAL ERRORS. MAN#WDCFM8912 7/08...
Need help?
Do you have a question about the WDCFM8912 and is the answer not in the manual?
Questions and answers