Table of Contents

Related Manuals for Invacare Motion Concepts Ultra Low Maxx


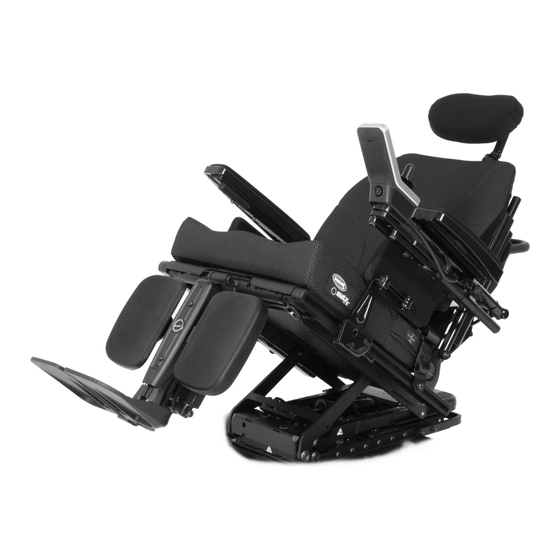
Summary of Contents for Invacare Motion Concepts Ultra Low Maxx
- Page 1 Invacare® Ultra Low Maxx by Motion Concepts Supplement to power wheelchair service manual en Modular Power Positioning System Service Manual PROVIDER: Keep this manual. The procedures in this manual MUST be performed by a qualified technician.
- Page 2 All rights reserved. Republication, duplication or modification in whole or in part is prohibited without prior written permission from Invacare. Trademarks are identified by ™ and ®. All trademarks are owned by or licensed to Invacare Corporation or its subsidiaries unless otherwise noted.
-
Page 3: Table Of Contents
Contents 9 Armrests ........55 9.1 Replace Armrest Receiver . - Page 4 Invacare® Ultra Low Maxx by Motion Concepts 10.5.7 Unlocking and swivelling the calf pad backward 14 Secondary Inputs — Attendant..... . . 94 when alighting .
-
Page 5: General
CE marking of the product. Symbols and signal words are used in this manual and Find the user manual on Invacare’s website or contact apply to hazards or unsafe practices which could result in your Invacare representative. See addresses at the end personal injury or property damage. -
Page 6: Abbreviations
Invacare® Ultra Low Maxx by Motion Concepts 1.7 Abbreviations Meaning Abbreviation = Center of Gravity = Drive Lockout = Extended Shear Reduction = Power Elevating Seat = Power Positioning System = Seat-To-Floor Height 1586649-F... -
Page 7: Safety
Safety 2 Safety CAUTION! Injury hazard if the mobility device starts moving unintentionally during repair work 2.1 Safety and Fitting Instructions – Switch the power supply off (ON/OFF key). – Engage the drive. These safety instructions are intended to prevent accidents –... - Page 8 Invacare providers. connecting plugs during operation. To release the – Invacare supplies all mobility devices with a connecting plugs the safety locks must be pressed standard drive program ex-works. Invacare in.
-
Page 9: Overview
Overview 3 Overview Backrest, see 3.1.2 Backrest Styles, page 9 Armrest, see 3.1.3 Armrest Styles, page 10 3.1 Components Cushion Seat plate 3.1.1 Overview of Seating System Side rail Remote bracket, see 3.1.4 Remote Brackets, page 11 Remote bracket for attendant, see 3.1.4 Remote Brackets, page 11 Fig. -
Page 10: Armrest Styles
Invacare® Ultra Low Maxx by Motion Concepts Backrest Frame Backrest Style Fig. 3-3 Standard Rehab Back Fig. 3-2 Manual Recline Fig. 3-5 High Back Fig. 3-4 Powered Recline with ESR Fig. 3-6 Matrx Backs 3.1.3 Armrest Styles The Ultra Low Maxx seat is available with different armrest styles. For remote brackets that can be mounted to armrest, see 3.1.4 Remote Brackets, page 11. -
Page 11: Remote Brackets
Overview Desk Armpad Full Length Armpad Ergonomic Armtrough Flat Hand Pad Fig. 3-13 Fig. 3-11 Fig. 3-10 Fig. 3-12 3.1.4 Remote Brackets Ultra Low Maxx can be fitted with different brackets for remotes: • Primary Remotes for Users, page 11 •... - Page 12 Invacare® Ultra Low Maxx by Motion Concepts Nucleus Midline Holder for REM500 Fig. 3-19 Fig. 3-18 Ultra Low Maxx with nucleus midline holder can carry additional brackets, remotes and switches. An adapter is needed to install nucleus midline holder to slot at the armrest.
-
Page 13: Mounting Positions Of Linx Modules
Overview Attendant Remote Bracket for Primary Attendant Remote Bracket for Attendant Remote Bracket for IDC Remotes Secondary Inputs Fig. 3-28 Fig. 3-29 Fig. 3-27 Remote bracket can be mounted in a variety of positions. 3.1.5 Mounting Positions of LiNX Modules This chapter only shows the mounting positions of modules installed on the backrest. -
Page 14: Imperial To Metric Conversion Chart
Invacare® Ultra Low Maxx by Motion Concepts The tightening torques stated in the following list are IMPERIAL METRIC based on the thread diameter for the nuts and bolts for inch which no specific values have been determined. All values assume dry and de-greased threads. - Page 15 Overview DX2–ACT2 or DX2–ACT4 Fig. 3-32 1586649-F...
-
Page 16: Wiring Diagrams Ultra Low Maxx With Tdx Sp2
Invacare® Ultra Low Maxx by Motion Concepts 3.4.2 Wiring diagrams Ultra Low Maxx with TDX SP2 Wiring diagram tilt/recline (TDX SP2) 1586649-F... - Page 17 Overview Wiring diagram lifter/tilt/recline (TDX SP2) 1586649-F...
- Page 18 Invacare® Ultra Low Maxx by Motion Concepts Wiring diagram tilt/recline and attendant control (TDX SP2) 1586649-F...
- Page 19 Overview Wiring diagram lifter/tilt/recline and attendant control (TDX SP2) 1586649-F...
-
Page 20: Wiring Diagrams Ultra Low Maxx With Storm
Invacare® Ultra Low Maxx by Motion Concepts 3.4.3 Wiring diagrams Ultra Low Maxx with Storm Wiring diagram tilt/recline (Storm 1586649-F... - Page 21 Overview Wiring diagram lifter/tilt/recline (Storm 1586649-F...
- Page 22 Invacare® Ultra Low Maxx by Motion Concepts Wiring diagram tilt/recline and attendant control (Storm 1586649-F...
- Page 23 Overview Wiring diagram lifter/tilt/recline and attendant control (Storm 1586649-F...
-
Page 24: Service
Invacare® Ultra Low Maxx by Motion Concepts 4 Service • Check power legrest function (if applicable). Ensure there is appropriate ground clearance in the retracted position, and check for interference over the full range of travel. 4.1 System Review Checklist •... -
Page 25: Lubrication
– Changes to the drive program may only be carried out by trained Invacare providers. – Invacare can only give a warranty for safe mobility device driving behaviour — especially the tipping stability — for unaltered standard drive programs. - Page 26 Invacare® Ultra Low Maxx by Motion Concepts When a powered adjustment option is retrofitted, such as powered legrests, then this option needs to be activated in the driving program as well if you have an ACS2 remote. For more information, refer to the user manual of the...
- Page 27 Service • For option lifter with tilt/recline and LNX legrest: • For option tilt/recline and Pivot Plus legrest: 1586649-F...
- Page 28 Invacare® Ultra Low Maxx by Motion Concepts • For option lifter with tilt/recline and Pivot Plus legrest: • For LNX legrest with telescoping footboard: 1586649-F...
-
Page 29: Settings And Adjustments
Settings and Adjustments 5 Settings and Adjustments 5.1 Measuring correctly When measuring dimensions such as the seat depth, you need to measure from defined points to ensure that you get correct values. Fig. 5-1 Note that measured values may vary up to ± 10 –... -
Page 30: Center Of Gravity (Cg) Adjustments (Forward And Aft)
Invacare® Ultra Low Maxx by Motion Concepts Trigger parameter in the wheelchair setup. See Modifying Seating Parameters with PC tool or iOs tool in the LiNX service manual. After the angle has been set, ensure the drive lockout is tested. Readjustment may be required. -
Page 31: Adjusting Center Of Gravity
Settings and Adjustments 5.3.2 Mounting positions for TDX SP2 • The Ultra Low Maxx system is fitted with drive lockouts. Make sure this is set so as not to Depending on the seat depth, the system is mounted in compromise the user’s stability while driving. different positions. -
Page 32: Mounting Positions For Storm
Invacare® Ultra Low Maxx by Motion Concepts Mounting positions of seat plate for TDX SP2 380 mm seat depth 405 mm seat depth Mounting positions of system 430 mm seat depth The brackets are shown from above and laid side by side for a better view. - Page 33 Settings and Adjustments Mounting positions of seat plate 405 mm seat depth 430 mm seat depth 455 mm seat depth 480 mm seat depth 505 mm seat depth 530 mm seat depth 555 mm seat depth 580 mm seat depth 380 mm seat depth 1586649-F...
-
Page 34: Chassis
Invacare® Ultra Low Maxx by Motion Concepts Removing the suspension strut 6 Chassis 1. Remove the rear and the center battery compartment cover as described in the service manual of Storm 6.1 Replacing the rear suspension strut 2. Remove the drive wheel as described in the service... -
Page 35: Seat
Seat 7 Seat 7.1 Remove/Install Seat Frame Shrouds Fig. 7-1 Fig. 7-3 1. Remove the four mounting screws F and washers G that secure the front seat pans in place. 2. Remove the four mounting screws A and washers B that secure the right rear seat pan C and left rear seat pan D to the center frame E. -
Page 36: Replacing Positioning System Hardware
Invacare® Ultra Low Maxx by Motion Concepts 9. Install the hardware removed in STEP 3 into the seat rails. 10. Secure the items noted in STEP 2 to the new seat rails. 11. Install the seat pans as described above. -
Page 37: Removing/Installing Seat
Seat 6. Bottom fixing bolt (1) secured with snap rings: Remove a snap ring using a screwdriver and remove bolt. 7. Top fixing bolt (2) with slot: Loosen fixing bolt with screwdriver. 8. Remove bolt. 9. Replace actuator. 10. Reassembly takes place in reverse order. 11. -
Page 38: Adjusting Seat Depth
Invacare® Ultra Low Maxx by Motion Concepts Installing module • Legrest crossbrace • Backrest crossbrace 1. TDX SP2 only: Align module for desired seat depth • Push bar side parts range. The Ultra Low seat side frames are used to adjust the •... -
Page 39: Adjusting Seat Height (Tdx Sp2)
16. Reinstall front seat plates and adjust to new seat For Storm with seat depths 480 - 580 mm, the 5° anterior width. tilt can be set. This is offered as a special only. Contact 17. Insert screws and tighten. Invacare for details. 1586649-F... -
Page 40: Replacing Posture Belt
Invacare® Ultra Low Maxx by Motion Concepts Orientation of tilt wedge 1. Remove the front cover as described in the service manual of TDX SP2. Fig. 7-19 5° posterior Fig. 7-17 5° anterior Fig. 7-18 10° tilt tilt anterior tilt... -
Page 41: Backrests
Backrests 6. If applicable, install privacy flap onto new back pan 8 Backrests using the hook and loop strips located on the back pan. 7. Install back cover/foam assembly onto new back pan 8.1 Replacing High Back Assembly or by performing the following: Back Cover/Foam Assembly a. -
Page 42: Removing/Installing The Matrx® Back Assembly-Recline
Invacare® Ultra Low Maxx by Motion Concepts 8.3 Removing/Installing the Matrx® Remove back mount. Back Assembly—Recline 1. Remove hardware C securing the back mount D to Fig. 8-3 the back canes. 2. The hardware C passes through the upper clamping 1. -
Page 43: Replacing Seat Back Mounting Hardware
Backrests 3. Secure the back cane M to the base with hardware I. Remove back mount. 4. Ensure back cane is secure. Installing back mount. 1. Insert the lower clamping bar H into the back mount 2. Place the back mount onto the back cane and secure the back mount to the spreader bar with the hardware 3. -
Page 44: Replace Elan Headrest Assembly
Invacare® Ultra Low Maxx by Motion Concepts 8.7 Replace Elan Headrest Assembly Fig. 8-4 Remove screw/hand screw A and backrest shroud B. 2. Disconnect power module cable from actuator module. Fig. 8-7 Fig. 8-5 Remove screws A, unhook clamp strap B, and remove clamp C. -
Page 45: Adjusting Backrest Height - Manual Backrest
Backrests 8.8 Adjusting Backrest Height — Manual Backrest The backrest plates are available in different heights. In addition, the overall height can be adjusted by adjusting the gap between backrest plate and seat. • 10 mm wrench Possible Combinations Backrest Finished Backrest Height Plate 455 mm/... - Page 46 Invacare® Ultra Low Maxx by Motion Concepts Backrest Finished Backrest Height Plate 455 mm/ 485 mm/ 505 mm/ 535 mm/ 555 mm/ 585 mm/ 610 mm/ 635 mm/ 18 in 19 in 20 in 21 in 22 in 23 in...
- Page 47 Backrests Adjusting Standard Rehab Back Fig. 8-9 Standard Rehab Backs are always installed with the bottom hole of the backrest plate to the bottom hole A on the backrest tube except for: • Finished backrest height of 635 mm (25 in): installed with the bottom hole of the backrest plate to the second hole B on the backrest tube •...
- Page 48 Invacare® Ultra Low Maxx by Motion Concepts Fig. 8-11 Adjust distance from profile A to shroud B as defined in table below: Height of Backrest Plate Finished Backrest Height Distance from Profile to Shroud 355 mm / 14 in 455 mm / 18 in 30 mm / 1.18 in...
- Page 49 Backrests Fig. 8-13 Align bottom hole of backrest plate to hole of desired height on backrest tube: • A = 127 mm (5 in) gap • B = 102 mm (4 in) gap 3. Insert screws and washers and tighten. Adjusting Matrx Height The Matrx Elite TR Back shown in this section serves as an example.
-
Page 50: Adjusting Backrest Height - Powered Recline
Invacare® Ultra Low Maxx by Motion Concepts Fig. 8-15 Remove screws and washers A. 4. Adjust hanger plate to desired gap height. See graphics below for details: Gap Height Screw Position Hanger Plate 152 mm / 6 in Fig. 8-16 178 mm / 7 in Fig. - Page 51 Backrests Backrest Finished Backrest Height Plate 505 mm / 535 mm / 555 mm / 585 mm / 610 mm / 635 mm / 660 mm / 685 mm / 20 inch 21 inch 22 inch 23 inch 24 inch 25 inch 26 inch 27 inch...
- Page 52 Invacare® Ultra Low Maxx by Motion Concepts Backrest Finished Backrest Height Plate 505 mm / 535 mm / 555 mm / 585 mm / 610 mm / 635 mm / 660 mm / 685 mm / 20 inch 21 inch...
-
Page 53: Adjusting Extended Shear Reduction
Backrests Fig. 8-20 Align bottom hole of backrest plate to hole of desired height on backrest tube: • A = 178 mm (7 inch) gap • B = 152 mm (6 inch) gap 3. Insert screws and washers and tighten. 8.10 Adjusting Extended Shear Reduction Tools:... -
Page 54: Adjusting Angle Of Preset Backrest
Invacare® Ultra Low Maxx by Motion Concepts 5. Replace ESR crankarm B with precline ESR crankarm. 6. Insert screws, washers and nuts and tighten. 8.12 Adjusting Angle of Preset Backrest • 10 mm wrench • 13 mm wrench 1. Remove screws and washers A. -
Page 55: Armrests
Armrests 9.2 Replacing the Cantilever Flip-Up 9 Armrests Armrest 9.1 Replace Armrest Receiver Fig. 9-1 Fig 3–19 shows right armrest receiver. Left armrest receiver replaces in the same manner. For tightening torques on hardware, refer to Fig. 9-2 Tightening Torques. Fig 3–22 shows curved cantilever arm. -
Page 56: Replacing The Cantilever Seat Mount Armrest
Invacare® Ultra Low Maxx by Motion Concepts 9.4 Replacing the Cantilever Seat Adjust armrest height Mount Armrest Tools: • 13 mm open-ended wrench 1. Loosen screws A. 2. Adjust armrest B to desired height. 3. Tighten screws. Adjust armrest angle Tools: •... -
Page 57: Installing Multi Axis Upper Extremity Support
Armrests 1. Loosen screws A. Do not remove them. 2. Adjust armrest to desired position. 3. Tighten screws. Adjusting Height 1. Loosen clamping lever A. 2. Adjust armrest to desired height. Loosen and remove screws A to unlock strap plate B. 3. -
Page 58: Adjust Armpad With Multi Axis Upper Extremity Support (Maces)
Invacare® Ultra Low Maxx by Motion Concepts 9.7 Adjust armpad with Multi Axis Upper Extremity Support (MACES) Fig. 9-5 1. Mount bracket B of elbow block to armrest tube C. 2. Tighten screws A. 9.9 Adjusting Elbow Block Adjusting Depth of Elbow Block 1. -
Page 59: Arm Pad Installation/Adjustment
Armrests 1. Loosen screw A. Arm Pad Orientation Do not remove it. 2. Adjust elbow block to the desired height. 3. Tighten screw. Adjusting Width of Elbow Block • 3 mm Allen key • 4 mm Allen key Fig. 9-6 You can switch the arm pad orientation from taper forward to taper rearward. -
Page 60: Installing/Adjusting Trough Arm Pad
Invacare® Ultra Low Maxx by Motion Concepts Adjusting Width 1. Remove screws E that secure trough arm pad C to armrest tube D. 2. Remove nut plates A from channel B of trough arm pad. 3. Re-insert two nut plates into desired channel of trough Fig. -
Page 61: Installing/Adjusting Buttons Or Toggles
Armrests shows only a basic installation of the components on an arm pad. According to the user needs other components may be required. • Phillips screwdriver, size 2 1. Remove screw A and slide the inner pivot arm Fig. 9-17 Lateral mounting of dual button serves as an example. up/down to the desired height. -
Page 62: Legrests
Invacare® Ultra Low Maxx by Motion Concepts 10 Legrests Removing 1. Powered Pivot Plus only: Disconnect actuator. 10.1 Pivot Plus legrests 10.1.1 Swing away Pivot Plus legrests The Pivot Plus legrests use a user friendly lever handle that locks and unlocks the legrest, allowing the legrest pin to pivot/rotate about the legrest receiver. -
Page 63: Adjusting Width- And Angle-Adjustable
Legrests Lowering Pivot Plus legrest 1. Unlock manual legrest lever A. 2. Lower legrest to desired angle. 3. Lock manual legrest lever. 10.1.4 Adjusting Width- and Angle-Adjustable Fig. 10-5 Footplate 1. Turn off power wheelchair. Tools: 2. Unplug actuator at phono connector directly under •... -
Page 64: Replacing Footplate Roller
Invacare® Ultra Low Maxx by Motion Concepts 10.2 Center-mounted legrests — For tightening torques on hardware, refer to manually adjustable Tightening Torques. 1. Remove the two mounting screws A and washers B 10.2.1 Installing/Removing Center Mounted that secure the mount plate C to the calf pad D. -
Page 65: Replacing Cable Release Footrest Brace
Legrests 10.2.2 Replacing Cable Release Footrest Brace 6. Perform one of the following: a. If only replacing cable release footrest brace, perform the following: Remove the mounting screws F, washers G and locknuts H that secures the cable release footrest brace I to the right side brace and left side brace J. -
Page 66: Setting The Angle Of The Leg Rest
Invacare® Ultra Low Maxx by Motion Concepts 10.2.7 Setting Angle of Foot Plate • 5/32 inch Allen key Fig. 10-12 Remove removable axle (1). 1. Fold the foot plates up in order to access the adjusting screws (1). 2. Set the adjusting screws using the Allen key. -
Page 67: Setting Angle And Height Of Calf Pad
10.3.2 Replacing LNX powered center-mounted legrest with telescoping footboard Fig. 10-15 Replacing the complete legrest must be done by Invacare. There are several settings to observe to ensure correct Right footrest is not shown for clarity. functioning. Contact Invacare for details. -
Page 68: Replacing Independent Mounting Foot Plate Hardware And/Or Foot Plates
Invacare® Ultra Low Maxx by Motion Concepts 4. Replace actuator with new one. 5. Re-insert screws and nuts and tighten. Replacing footboard actuator Tools: • 8 mm Allen key • 16 mm wrench Fig. 10-16 Loosen screws A on footboard B. -
Page 69: Replacing Foot Platform Assembly
Legrests Illustration reflects the center mount support for the LNX power footrest only. The foot platform assembly replaces in the same manner for the fixed center mount. The front cover will look slightly different when calf pad assemblies are used. For tightening torques on hardware, refer to Tightening Torques. -
Page 70: Adjusting Basic Angle Of Lnx Legrest
Invacare® Ultra Low Maxx by Motion Concepts 3. If calf pad(s) needs to be replaced, perform the following: Fig. 10-22 Loosen and remove screws of front seat plates A. 2. Remove front seat plates. Fig. 10-21 Calf pad assembly components are exploded Fig. -
Page 71: Setting Angle Of Foot Plate
Legrests 10.3.10 Setting Angle of Footboard The legrest with foot platform is adjusted the same way. • 5/32 inch Allen key Fig. 10-25 1. Fold the foot platform up in order to access the adjusting screw A. 2. Set the adjusting screw using the Allen key. 3. -
Page 72: Setting The Angle
Invacare® Ultra Low Maxx by Motion Concepts unlocked, it can be swivelled inward or outward when 4. Set the desired angle. getting into the wheelchair as well as being removed 5. Re-tighten the screw. completely. 10.4.3 Setting the end stop of the footrest •... -
Page 73: Adjusting The Length Of The Footrest
Legrests 10.5 Vari-A legrests 10.5.1 Swivelling the footrest/legrest outward and/or removing The small unlocking button is located on the upper section of the footrest/legrest. When the footrest/legrest is unlocked, it can be swivelled inward or outward when getting into the wheelchair as well as being removed completely. -
Page 74: Setting The End Stop Of The Legrest
Invacare® Ultra Low Maxx by Motion Concepts Set the desired angle. Hit the knob to release the locking mechanism. Turn the knob clockwise to tighten it. 10.5.3 Setting the end stop of the legrest Swivel the legrest upward in order to access the •... -
Page 75: Adjusting The Length Of The Legrest
Legrests 10.5.4 Adjusting the length of the legrest CAUTION! Risk of injury due to incorrect adjustment of the footrests and legrests – Before and during every journey it is imperative to ensure that the legrests contact neither the castor wheels nor the ground. •... -
Page 76: Plate
Invacare® Ultra Low Maxx by Motion Concepts 1. Use the Allen key to loosen both set screws on the Raising foot plate. 2. Adjust to the desired angle. 3. Re-tighten the screws. 10.5.9 Adjusting the angle– and depth–adjustable foot plate •... -
Page 77: Adjusting The Height Of The Calf Pad
Legrests 10.6.6 Unlocking and swivelling the calf pad • 10 mm wrench backward when alighting Press the calf pad straight down. 1. Use the wrench to loosen the nut (1) and remove. 2. Adjust to the desired depth. Observe that the round holes are intended for the calf pad retaining screw and the oblong holes for the aglet without thread. -
Page 78: Powered Elevating Legrests (Ade Legrests)
Invacare® Ultra Low Maxx by Motion Concepts 10.7.3 Adjusting the length of the legrest CAUTION! Risk of injury due to incorrect adjustment of the footrests and legrests – Before and during every journey it is imperative to ensure that the legrests contact neither the castor wheels nor the ground. -
Page 79: Unlocking And Swivelling The Calf Pad Backward When Alighting
Legrests 10.7.7 Adjusting the angle–adjustable foot 1. Use the Allen key to loosen the screws (1). 2. Adjust to the desired position. plate 3. Re-tighten the screws. • 5 mm Allen key 10.7.6 Unlocking and swivelling the calf pad backward when alighting 1. -
Page 80: Positioning Options
Invacare® Ultra Low Maxx by Motion Concepts 11 Positioning Options 11.1 Hip support with quick release Adjusting position of hip support • 5 mm Allen key 1. Loosen screws A. 2. Adjust hip support to desired angle. 3. Tighten screws. -
Page 81: Lateral Trunk Support Adjustments
Positioning Options Remove hip pad bracket from mounting slot via cut-out B. 3. Insert hip pad bracket in other mounting slot. 4. Tighten screws. Via bracket • 5 mm Allen key 1. Loosen nuts/screws (x2) A to adjust pad angle. Width adjustment When adjusting both laterals, the width can be adjusted to total of 89 mm (3.5”). -
Page 82: Installing Headrest Adapter For Elite And High
Invacare® Ultra Low Maxx by Motion Concepts CAUTION! Risk of injury during use of the mobility device as a vehicle seat if a headrest is wrongly adjusted or not installed This can cause the neck to be hyperextended during collisions. -
Page 83: Adjusting Multi-Axis Headrest Hardware
Positioning Options Adjusting Depth and Angle The headrest can be further adjusted for depth and angle via the articulating hardware. • 4 mm Allen key • 5 mm Allen key Fig. 11-1 Upper multi-angle • 360° rotation rotational pivot • 80°... - Page 84 Invacare® Ultra Low Maxx by Motion Concepts Adjusting depth and angle The headrest and horizontal rod can be further adjusted for depth and angle via the triangular multi-offset bracket. • 5/32” Allen key 1. Loosen hardware in multi-offset bracket A.
-
Page 85: Primary Remotes
Primary Remotes 12 Primary Remotes 12.1 Adjustment Possibility for Remote The following information is valid for all seating systems. CAUTION! Risk of the remote being pushed backwards during an accidental collision with an obstacle, such as a doorframe or table, and the joystick being jammed against the armpad if the position of the remote is adjusted and all Fig. -
Page 86: Adjusting Swing-Away Display Holder
Invacare® Ultra Low Maxx by Motion Concepts Insert screws E, washers B and nuts C into adapter 1. Loosen screws A. A and swing–away remote holder D and tighten. 2. Adjust holder orientation. 3. Tighten screws. Adjusting Display Orientation The display can be turned through 360 degrees. -
Page 87: Reversing Mounting Position Of Remote
Primary Remotes 3. Remove remote mount. 4. Install remote mount onto opposite arm tube. 5. Tighten three upper screws to secure remote mount to arm tube. 6. Install remote mounting tube into remote mount. 7. Turn adjustment lock lever to secure remote mounting tube at desired position. -
Page 88: Securing The Remote Cable
Invacare® Ultra Low Maxx by Motion Concepts 12.3.4 Installing LiNX Remote onto Quad Link Repositioning Remote Fig. 12-14 1. Install remote A on adapter B with screws C. 2. Install remote and adapter onto Quad Link D with Fig. 12-13 lock washer G and Nord-Lock washer E. -
Page 89: Adjusting Remote Height
Primary Remotes 12.3.6 Adjusting remote height Repositioning Quad Link Fig. 12-16 Left Mount Fig. 12-17 Right Mount In the following instructions, the right mount version of Quad Link is shown as an example. Steps are the same for the left mount. 1. -
Page 90: Nucleus Midline Holder
Invacare® Ultra Low Maxx by Motion Concepts • Adjust it together with the armrest height. Refer to corresponding armrest chapters. • Adjust the height of the nucleus midline holder only. Refer to section below. • 3/16 inch Allen key 1. Swivel Quad Link to side to access magnets. - Page 91 Primary Remotes DLX-CR400 and DLX-CR400LF • 4 mm Allen key Fig. 12-28 Graphic serves as an example. 1. Loosen screw A. 2. Position joystick on nucleus. 3. Tighten screw. ASL Components on Nucleus Only Fig. 12-26 1. Loosen screws A. •...
-
Page 92: Secondary Inputs - User
Invacare® Ultra Low Maxx by Motion Concepts 1. Loosen screws A. 13 Secondary Inputs — User 2. Position joystick on holder. 3. Tighten screws. 13.1 Adjusting Manual Chin Control Adjusting Depth and Height Refer to 13.4 Adjusting Swing-Away Mechanism, page 93. -
Page 93: Adjusting Swing-Away Mechanism
Secondary Inputs — User 1. Loosen screw A. 2. Adjust pad position. 3. Tighten screw. Adjusting Position of Sip and Puff Tube Adjusting Depth 1. Loosen screw A. 2. Adjust rod to desired depth. 1. Bend flexible sip and puff tube A to desired position. 3. -
Page 94: Installing Bracket For Attendant Remote Holder
Invacare® Ultra Low Maxx by Motion Concepts 14 Secondary Inputs — Attendant 14.1 Installing Bracket for Attendant Remote Holder Used for: • Attendant Remote • DLX-ACU200 on powered backrests • 5 mm Allen key Fig. 14-2 • 10 mm wrench Install gripper clamp A to pushbar using screws B and nuts C. -
Page 95: Auxiliary Modules
Auxiliary Modules 8. Connect new module to system by performing the 15 Auxiliary Modules following: • Replacement module: Connect cables removed in 15.1 Replacing Input Module DLX-IN500 STEP 3 to module. • New module: Connect module to actuator module and ACU (if present). 9. -
Page 96: Replacing Actuator Module Dlx-Act400
Invacare® Ultra Low Maxx by Motion Concepts 4. Remove nuts and washers: • Manual backrest: Remove two nuts E and washers F securing existing module to electronics mounting bracket G. • Powered backrest: Remove nut and washer securing existing module to electronics mounting bracket. - Page 97 Notes...
- Page 98 Notes...
- Page 99 Notes...
- Page 100 Invacare Sales Companies Australia: Canada: Ireland: New Zealand: Invacare Australia Pty. Ltd. Invacare Canada L.P. Invacare Ireland Ltd, Invacare New Zealand Ltd 1 Lenton Place, North Rocks NSW 570 Matheson Blvd East, Unit 8 Unit 5 Seatown Business Campus 4 Westfield Place, Mt Wellington 1060 2151 CDN Mississauga, On.
Need help?
Do you have a question about the Motion Concepts Ultra Low Maxx and is the answer not in the manual?
Questions and answers