Table of Contents
Advertisement
(Fixed type and Type AGR-12B Overcurrent Protective Device)
Be sure to read this manual before installing, operating, servicing, or inspecting the ACB.
Please retain this manual for future reference.
Electrical work must be done by competent persons.
ACB maintenance, inspection, parts replacement, OCR field tests and setting changes must be performed by competent
persons.
INSTRUCTION MANUAL FOR
AR-E AIR CIRCUIT BREAKERS
AR206E
Types:
AR208E
AR210E
AR212E
AR216E
Notice
KRB-5368c
Advertisement
Table of Contents

Subscribe to Our Youtube Channel
Related Manuals for TERASAKI TemPower2 AR-E Series


Summary of Contents for TERASAKI TemPower2 AR-E Series
- Page 1 INSTRUCTION MANUAL FOR AR-E AIR CIRCUIT BREAKERS (Fixed type and Type AGR-12B Overcurrent Protective Device) AR206E Types: AR208E AR210E AR212E AR216E Notice Be sure to read this manual before installing, operating, servicing, or inspecting the ACB. Please retain this manual for future reference. ...
-
Page 3: Table Of Contents
TABLE OF CONTENTS 1. SAFETY NOTICES 2. RECEIVING AND HANDLING 2-1. Transportation Precautions 2-1-1. Transporting the ACB 2-2. Storage Precautions 2-3. Installation Precautions 3. GENERAL 3-1. Types and Descriptions 3-2. Parts and Functions 3-3. Circuits and Ratings 4. OPERATION 4-1. Charging and Opening operation 4-1-1. - Page 4 KRB-5368c...
-
Page 5: Safety Notices
1. SAFETY NOTICES Thank you for purchasing the TERASAKI AR-series Air Circuit Breaker (TemPower2). This chapter contains important safety information. Be sure to carefully read these safety notices, instruction in this manual, and other documents accompanying the Air Circuit Breaker (hereinafter referred to as the ACB) to familiarize yourself with safe and correct procedures or practices before installing, operating, or servicing the ACB. - Page 6 Operation Precautions (continued) CAUTION Repeated open/close operation by the motor charging mechanism without pause should not exceed 15 times. If repeated continuous open/close operation is inevitable, a pause of at least 20 minutes should be provided after the repetitions of 15 times.
-
Page 7: Receiving And Handling
2. RECEIVING AND HANDLING Upon receipt of your ACB, check the following. If you have any question or problem, contact us at the indicated on the back cover of this manual. Check that the ACB received is as ordered and that the accessories are as specified. ... -
Page 8: Storage Precautions
2-2. Storage Precautions It is recommended that the ACB be used as soon as you have received it. If it is necessary to store the ACB, note the following: Store the ACB in a dry indoor location to prevent condensation due to sudden changes in ambient temperature. Condensation has a harmful effect on the ACB insulation. - Page 9 Use a support to hold conductors securely at distance L as shown in Fig. 2 and Table 2. Such a support will help preventing the conductors and main circuit terminals from being deformed or damaged due to a large electromagnetic force caused by any fault current.
-
Page 10: General
3. GENERAL 3-1. Types and Descriptions TemPower2 is available in types shown in Tables 3. Table 3 Ratings Frame size (A) 1000 1250 1600 Type AR206E AR208E AR210E AR212E AR216E Max. rated current [I ] (A) JIS,IEC,EN,AS *5 1000 1250 1600 *1, *2 N-phase rated current (A) - Page 11 Table 5 shows the dielectric withstand voltage and the insulation resistance of the ACBs. CAUTION Do not perform dielectric withstand/insulation resistance tests under other conditions than specified. Doing so may cause a malfunction. Table 5 Dielectric withstand voltage and insulation resistance Insulation Impulse withstand resistance...
-
Page 12: Parts And Functions
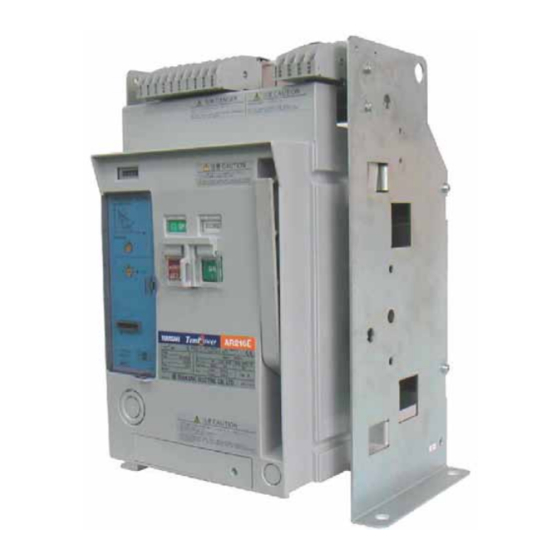
3-2. Parts and Functions Fig. 4 provides a general views of the ACB. Lifting hole (ø20mm) ◯ Front cover ◯ ON-OFF cycle counter ◯ Charge indicator ◯ ON-OFF indicator ◯ Charging handle ◯ OFF button ◯ ON button ◯ ON-OFF button cover ◯ ON-OFF button cover ◯... - Page 13 ACB body ◯ OFF button Push to open the ACB. ◯ ON button Push to close the ACB. ◯ ON-OFF indicator Shows “OFF” when the ACB is open and “ON” when it is closed. ◯ Shows “CHARGED” when the closing springs are charged and “DISCHARGED” when it Charge indicator ◯...
- Page 14 Vertical terminals Horizontal terminals Front terminals Fig. 6 Main circuit terminals Lifting hole (ø20mm) Allows lifting attachments or wire ropes to be used for lifting the ACB. ◯ -14- KRB-5368c...
-
Page 15: Circuits And Ratings
3-3. Circuits and Ratings Fig. 7 shows an ACB circuit diagram and Table 8 and Fig. 8 show the function of each terminal and the meaning of each sign in the diagram. Fig. 7-1 Breaker circuits 1 Table 8-1 Terminal functions and circuit symbols 1 (Applicable to both 50 and 60Hz for AC. mean the polarity for Terminal No. - Page 16 Fig. 7-2 Breaker circuits 2 Table 8-2 Terminal functions and circuit symbols 2 Symbol Meaning Symbol Meaning Instantaneously rated Instantaneously- – CT CT for OCR *6 rated shunt trip device *5 Magnet hold trigger Undervoltage trip device Spring charging motor Hand connector Control relay User wiring...
- Page 17 Fig. 9 provides the terminal arrangement of the ACB. Fig. 9 Terminal arrangement Tables 9 - 14 show the ratings of the operation power supply, the Instantaneously-rated shunt trip device (SHT), the undervoltage trip device (UVT), auxiliary switches, operation indication contacts, and the N-phase CT. Table 9 Ratings of operation power supply Ratings of operation power supply Permissible...
- Page 18 Table 11 Ratings of undervoltage trip device (UVT) Rated voltage Opening voltage Attraction voltage Coil exciting Power consumption (VA) Coil resistance (ohm) * range (V) current (A) Normal Attraction AC100 35 - 70 AC110 38.5 - 77 93.5 AC120 42 - 84 AC200 70 - 140 AC220...
-
Page 19: Operation
4. OPERATION 4-1. Charging and Opening operation DANGER Never touch live terminal parts. Otherwise, electric shock may result. CAUTION Do not force down the charging handle after completion of manual charging operation. Doing so may cause a malfunction. ... -
Page 20: Closing Operation
Motor charging When the charge indicator (Fig. 10 ◯ ) changes to “DISCHARGED” while the specified operation voltage is applied to the control circuit terminals □ and □ , the charging motor is activated to start charging the closing springs. Upon completion of the charging operation, the charge indicator shows “CHARGED”... -
Page 21: Motion Of Operation Mechanisms
4-1-5. Motion of operation mechanisms Figs. 11 - 14 illustrate the motion of the charging and ON-OFF mechanisms. For manual closing operation, ON button ◯ rotates counterclockwise. For electrical closing operation, push rod ◯ ' protrudes downward from the latch release coil (LRC) and charge latch trigger ◯... - Page 22 The charging handle or the charging motor provides a counterclockwise rotation to charging cam ◯ . This rotates closing release lever ◯ and closing tripper lever ◯ counterclockwise and a semicircular pawl engages with closing release lever ◯ . And closing spring ◯...
-
Page 23: On-Off Button Cover Locking Procedure
4-2. ON-OFF Button Cover Locking Procedure Lock the button cover using a padlock with ø6 shackle (up to 3 padlocks can be used) as shown in Fig. 15. The ON-OFF button cover is locked and the ON and OFF buttons cannot be operated. ON-OFF button cover ON-OFF button cover OFF button... -
Page 24: Ocr Cover Locking Procedure
4-4. OCR Cover Locking Procedure Lock the OCR cover using a padlock with ø6 shackle as shown in Fig. 17. The OCR cover cannot be opened, which prevents OCR settings from being changed. OCR cover Padlock OCR cover padlock hole Fig. -
Page 25: Characteristics
5-2. Characteristics 5-2-1. L characteristic for general feeder A general view, characteristic settings, and characteristic curves of the type AGR-12BL OCR (with L characteristic) are shown in Fig. 18, Table 17, and Fig. 19 respectively. ◯ ◯ ◯ ◯ ◯ ◯... - Page 26 Protection characteristic Note 1: The operating time (t) at a long time delay, N-phase protection or Pre-trip alarm pickup current setting is given by Long time delay t = -27.94×t { 1 - ( 1.125I } ±20% +0.15 –0 [sec] ×log = Long time delay pickup current setting, i = Overcurrent, t...
-
Page 27: Ocr Setting Procedure
5-3. OCR Setting Procedure CAUTION OCR setting changes must be performed by competent persons. After setting changes are made, the settings be checked with e.g., a type ANS2S OCR test interface unit (optional). After completion of OCR tests, be sure to return the settings to the original values. Failure to do so may cause a fire or burnout. -
Page 28: Operation Indication
5-4. Operation Indication The OCR has LEDs on the front panel to provide operation indications as shown in Fig. 22 and Table 18. It also outputs operation signals to contacts. (Red) ◯ Fig. 22 LEDs Table 18 Operation indication Contact output Control State State... -
Page 29: Maintenance, Inspection And Parts Replacement
Normal inspection includes inspection and actions that can be done only with removing the arc chamber, contacts, front cover and the like. Normal inspection can be performed by the user. Terasaki also provides normal inspection service. Detailed inspection includes inspection, actions, and parts replacement that will be done to prevent functional degradation caused by ... -
Page 30: Inspection Procedures
6-1. Inspection Procedures CAUTION ACB maintenance, inspection and parts replacement must be performed by competent persons. Do not touch ACB current carrying parts and ACB structural parts close to a current carrying part immediately after the ACB trips open. Remaining heat may cause a burn. ... - Page 31 Table 21 Normal inspection procedure Check point Check item Description Discoloration Check connection conductors, main circuit terminals, and current carrying parts for heat of conductors discoloration. If such a symptom is found, contact us. Check that screws, bolts, nuts, washers, springs, retainers and the like are not missing. If any parts 2 Parts missing are missing, contact us.
- Page 32 Table 22 Detailed inspection procedure Check point Check item Description Disconnect hand connector (green) that is closer to coil than the other and, using tester, measure coil 1 Coil resistance resistance between terminals and make sure it is within range specified in Table 9. (*3) If not so, replace LRC.
-
Page 33: Parts Replacement Procedure
6-2. Parts Replacement Procedure CAUTION ACB maintenance, inspection and parts replacement must be performed by competent persons. Do not touch ACB current carrying parts and ACB structural parts close to a current carrying part immediately after the ACB trips open. - Page 34 (3) Remove the terminal block fixing screws as shown in Fig. 24, and move the terminal block. Take care to prevent the link lever of auxiliary switches from bending. Terminal block fixing screws, Hex head M5 x 10 (4) with spring and flat washers Tightening torque: 2.7 - 3.5 N·m Terminal block Link lever of auxiliary switches...
- Page 35 (5) Reinstall each part or component in reverse order of removal after inspection. When installing the UVT, make sure the nameplate on the UVT can be viewed from the front of the ACB. and make sure the link lever pin of auxiliary switches is position specified in Fig.26.
-
Page 36: Arc Chambers
6-2-2. Arc chambers The following describes how to replace arc chambers. 1) Make preparations for parts replacement. Refer to section 6-2-1. 2) If the ACB is not equipped with the undervoltage trip device, turn the cover mounting screws five or six turns to loosen as shown in Fig. -
Page 37: Latch Release Coil (Lrc)
6-2-3 Latch release coil (LRC) The following describes how to replace the latch release coil (LRC). 1) Make preparations for parts replacement. Refer to section 6-2-1. 2) If the ACB is not equipped with the undervoltage trip device, turn the cover mounting screws five or six turns to loosen as shown in Fig. -
Page 38: Instantaneously-Rated Shunt Trip Device (Sht)
6-2-4. Instantaneously-rated shunt trip device (SHT) The following describes how to replace the Instantaneously-rated shunt trip device(SHT). 1) Make preparations for parts replacement. Refer to section 6-2-1. 2) Turn the cover mounting screws five or six turns to loosen as shown in Fig. 23. If the ACB is equipped with side covers, first remove the side covers and then loosen the front cover mounting screws. -
Page 39: Control Relay
6-2-5. Control relay The following describes how to replace the control relay. 1) Make preparations for parts replacement. Refer to section 6-2-1. 2) If the ACB is not equipped with the undervoltage trip device, turn the cover mounting screws five or six turns to loosen as shown in Fig. - Page 40 6) Raise the OCR to unlatch from other parts, remove the OCR and place it on the top of the breaker body. See Fig. 37. 7) Remove the OCR connector . OCR connector Latch Fig. 37 Removing the OCR connector 8) Remove the relay retainer shown in Fig.
-
Page 41: Magnet Hold Trigger (Mht)
6-2-6. Magnet hold trigger (MHT) The following describes how to replace the magnet hold trigger (MHT). 1) Make preparations for parts replacement. Refer to section 6-2-1. 2) Remove the Hand connector (red) as shown in Fig. 39. 3) Remove the OCR. Refer to items 2) – 8), section 6-2-5. 4) Unscrew the MHT mounting screws shown in Fig. -
Page 42: Auxiliary Switches
6-2-7. Auxiliary switches The following describes how to replace auxiliary switches. 1) Make preparations for parts replacement. Refer to section 6-2-1. 2) If the ACB is not equipped with the undervoltage trip device, turn the cover mounting screws five or six turns to loosen as shown in Fig. -
Page 43: Troubleshooting Flowcharts
7. TROUBLESHOOTING FLOWCHARTS Figs. 43 - 46 are troubleshooting flowcharts where typical troubles and remedial actions are shown. Closing springs Contact Terasaki. Contact Terasaki. cannot be charged Check the charging Is manual charging Is manual charging mechanism. See No. 9... - Page 44 Unlock mechanism. See No. 9 Repair lock active? in Table 21. Is the SHT trip Is manual closing Deactivate Contact Terasaki. command active? Possible? Check the UVT Supply correct voltage. Check the operation voltage. Supply correct voltage. attraction voltage. Check...
- Page 45 Correct/adjust Repair See No. 10 in Table 21. as specified? Check the tripping Is the load current as operation. See No. 24 Contact Terasaki. specified? in Table 22. Are main circuit Check terminal screws loose? See Retighten contacts. See Nos.
- Page 46 Circuit Breaker Division 6-13-47 Kamihigashi, Hiranoku, Osaka 547-0002, Japan TEL +81-6-6791-2763 FAX +81-6-6791-2732 www.terasaki.co.jp kiki-info@terasaki.co.jp Published in January 2006 Revised in December 2008 Revised in February 2017 Revised in June 2018 The contents of this manual may be subject to change without notice.
Need help?
Do you have a question about the TemPower2 AR-E Series and is the answer not in the manual?
Questions and answers