Table of Contents
Advertisement
Quick Links
Advertisement
Table of Contents

Subscribe to Our Youtube Channel
Related Manuals for Quickie GP Series


Summary of Contents for Quickie GP Series
- Page 1 T I O N E N G L I S H QUICKIE GP SERIES Quickie ® GP Series Supplier: This manual must be given to the rider of this wheelchair. O w n e r ’ s M a n u a l...
-
Page 2: Introduction
ENGLISH I. INTRODUCTION SUNRISE MEDICAL LISTENS Thank you for choosing a Quickie wheelchair. We want to hear your questions or comments about this manual, the safety and reliability of your chair, and the service you receive from your Sunrise supplier. -
Page 3: Table Of Contents
ENGLISH II. TABLE OF CONTENTS I. INTRODUCTION ............... J. Rear Wheels ..............II. TABLE OF CONTENTS ............K. Rear Wheel Locks ............III. YOUR CHAIR AND ITS PARTS ........L. Modified Seat Systems ............. IV. NOTICE - READ BEFORE USE ......... M.Seat and Back Upholstery .......... -
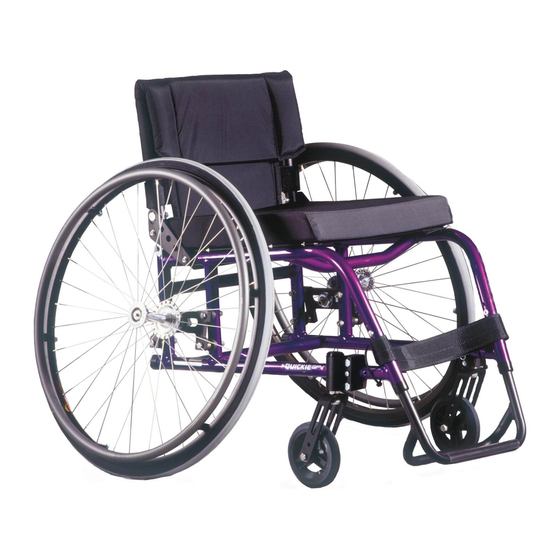
Page 4: Your Chair And Its Parts
4. Quick Release Axle 10. Axle Plate 5. Spokes 11. Seat Sling 6. Caster wheel 12. Backrest Bracket QUICKIE GP SERIES SPECIFICATIONS Chair Parts Casters Tire size Standard Black Standard - 5" polyurethane Standard - 24", Option - 22", 26"... -
Page 5: Notice- Read Before Use
Sunrise Medical may change the chair structure. This will void B. INTENDED USE the warranty and may cause a safety hazard. The GP Series wheelchair's intended use is to provide mobility to persons Some problems that may occur, but are not limited to: limited to a sitting position. -
Page 6: Reduce The Risk Of An Accident
ENGLISH V. GENERAL WARNINGS F. REDUCE THE RISK OF AN ACCIDENT J. TERRAIN WARNING WARNING 1. BEFORE you begin riding, you should be trained in the safe use of 1. Based on ANSI/RESNA testing, Sunrise Medical recommends the use of a caster wheel with a minimum diameter of 5”, if the wheel- this chair by your health care advisor. -
Page 7: M.when You Need Help
ENGLISH V. GENERAL WARNINGS M. WHEN YOU NEED HELP WARNING For The Rider: Make sure that each person who helps you reads and fol- lows all warnings and instructions that apply. For Attendants: 1. Work with the rider’s doctor, nurse or therapist to learn safe methods best suited to your abilities and those of the rider. -
Page 8: Safety Warnings: Falls & Tip-Overs
ENGLISH VI. WARNINGS: FALLS & TIP-OVERS A. CENTER OF BALANCE 7. Keep both of your hands on the handrims as you go over an obsta- cle. WARNING 8. Never push or pull on an object (such as furniture or a doorjamb) to propel your chair. -
Page 9: G.escalators
ENGLISH VI. WARNINGS: FALLS & TIP-OVERS G. ESCALATORS WARNING NEVER use this chair on an escalator, even with an attendant. If you do, a fall or tip-over is likely. If you fail to heed this warning you and others that may be assisting you, are at a high risk of severe injury. -
Page 10: Transfer
ENGLISH VI. WARNINGS: FALLS & TIP-OVERS Optimum Transfer position I. TRANSFER WARNING It is dangerous to transfer on your own. It requires good balance and agility. Be aware that there is a point dur- ing every transfer when the wheelchair seat is not below you. To avoid a fall: 1. -
Page 11: Climbing A Curb Or Single Step
ENGLISH VI. WARNINGS: FALLS & TIP-OVERS K. CLIMBING A CURB OR SINGLE STEP WARNING For Attendant: follow these steps to help the rider climb a curb or single step going FORWARD 1. Stay behind the chair. 2. Face the curb and tilt the chair up on the rear wheels so that the front casters clear the curb or step. 3. -
Page 12: Warnings: Components & Options
Quickie sling seats and standard foam cushions are not designed for 3. Low pressure in any of the tires may cause the chair to veer to one the relief of pressure. -
Page 13: Positioning Belts Option
ENGLISH VII. WARNINGS: COMPONENTS & OPTIONS G. POSITIONING BELTS (Option) J. REAR WHEELS WARNING WARNING The positioning belt is predominately used to support your posture. It can A change in set-up of the rear wheels will affect the center of balance of also be used to limit slipping and/or sliding that you might experience when your chair. -
Page 14: M.seat And Back Upholstery
ENGLISH VII. WARNINGS: COMPONENTS & OPTIONS M. SEAT AND BACK UPHOLSTERY O. FOLDING LOCK DOWN ANGLE ADJUSTABLE BACKREST WARNING WARNING 1. Replace worn or torn fabric of seat and seat back as soon as you can. If you fail to do so, the seat or seat back may fail. Only adjust backrest angle when in a safe and stable position. -
Page 15: Use And Maintenance
ENGLISH VIII. USE AND MAINTENANCE WARNING D. SAFETY CHECKLIST The owner of this chair is responsible for making sure that it has been set up and adjusted by a trained service professional under the advice of a healthcare professional. The chair may require periodic safety and function checks or certain tool-free adjustments that can be performed by the owner, caregiver or authorized dealer if desired. -
Page 16: To Mount And Remove Rear Wheels
ENGLISH VIII. USE AND MAINTENANCE F. TO MOUNT & REMOVE REAR WHEELS WARNING Do not use this chair UNLESS you are sure both quick-release axles are locked. An unlocked axle may come off during use and cause a fall. NOTE - Setting the wheelchair on a flat surface, such as a workbench or table, helps make these procedures easier. -
Page 17: Single Post Height Adjustable Armrests
ENGLISH VIII. USE AND MAINTENANCE I. SINGLE POST HEIGHT-ADJUSTABLE ARMRESTS (Option) 1. Installation a) Slide the outer armpost into the receiver mounted to the wheelchair frame. b) The armrest will automatically lock into place. 2. Height Adjustment a) Rotate release lever to second stop. b) Slide armrest pad up or down to desired height. -
Page 18: Swing In/Out Hangers And Footrests
ENGLISH VIII. USE AND MAINTENANCE L. SWING AWAY IN/OUT HANGERS AND FOOTRESTS (GPSA pnly) Make sure that your Sunrise dealer has correctly adjusted your footrests and/or legrests with the advice of a healthcare professional. The original setup should not be changed without first checking with that advisor. The footrest position is key to keeping your body in the proper alignment, and providing a stable support for your legs and torso. -
Page 19: Sideguard
ENGLISH VIII. USE AND MAINTENANCE N. SIDE GUARD Inserting and Removing the Side Guard a. Insert the Side Guard into Side Guard outer receiver hardware b. To Remove, grip the top of the Side Guard and pull upward. NOTE – After installing receiver hardware and inserting the side guard, check for interference. Don’t operate the wheelchair if the sideguard interferes with any of the other components. -
Page 20: Dealer Service And Adjustment
E. REAR AXLES The most important adjustment on your Quickie wheelchair is the position of the rear axle. The center of Gravity, Wheel camber and Wheelbase are all determined by the axle adjustment. -
Page 21: Wheel Locks
ENGLISH IX. DEALER SERVICE AND ADJUSTMENT 3. Wheel base width adjustment a) Loosen two axle nuts (A). b) Reposition the axle sleeve (B) in the desired slot. c) Retighten nuts. d) Adjustment must be exactly the same on both sides of the wheelchair. NOTE: To achieve the narrowest chair possible, axle plates can be mounted on inside frame tubes. -
Page 22: H.single Post Armrest Receiver
ENGLISH IX. DEALER SERVICE AND ADJUSTMENT H SINGLE-POST ARMREST RECEIVER 1. Mounting the receiver a. Place the two receiver clamps (A) onto the top portion of the rear side frame tube. Align with the preferred location of the single post height-adjustable armrest. b. -
Page 23: Angle Adjustable Footplate
ENGLISH IX. DEALER SERVICE AND ADJUSTMENT L. ANGLE ADJUSTABLE FOOTPLATES 1. Aluminum Angle Adjustable Footplate a. Loosen screws (B) that attach the footplate to the angle adjustment bracket found under the footplate (not visible in illustration). b. Adjust footplate (B) to desired angular position. c. -
Page 24: Caster Forks
ENGLISH IX. DEALER SERVICE AND ADJUSTMENT P. CASTER FORKS NOTE– Two-hole caster forks allow interchanging 5" and 6" casters and adjusting seat height. 1. Caster Fork Adjustment a) Loosen the bolt (C) and remove the caster. b) Either change caster size and/or position caster upward or downward in predrilled holes (1 inch apart) on caster fork. -
Page 25: R.backrest Tension Adjustable
Install backrest cover at desired level and fold over rear of Velcro strapping system (D). The Quickie patch should be upright on the rear of the chair. e. Finish installation by placing vanity flap (center panel) down onto Velcro on the seat sling to secure attachment (E). -
Page 26: Backrest
® 2. Back angle adjustment (Folding Backrest) An 8° (+/- 5°) angle adjustment is standard on this Quickie wheelchair. a) Turning the eccentric bolt (G) on the backrest hinge plate will increase or decrease the back angle. - Page 27 ENGLISH NOTES MK-100309 Rev. B...
-
Page 28: Sunrise Limited Warranty
ENGLISH XI. SUNRISE LIMITED WARRANTY A. FOR LIFETIME C. LIMITATIONS 1. We do not warrant: Frame and cross-brace (if applicable) warranty: a. Tires and tubes, upholstery, pads and push-handle grips. 1. Although the anticipated useful service time of this wheel- b. - Page 29 ©2017 Sunrise Medical (US) LLC 4/17 MK-100309 Rev. B...
Need help?
Do you have a question about the GP Series and is the answer not in the manual?
Questions and answers