
Related Manuals for otometrics Madsen OTOflex 100


Summary of Contents for otometrics Madsen OTOflex 100
- Page 1 MADSEN OTOflex 100 & OTOsuite Immittance Module User Guide Doc. No.7-50-1590-EN/03 Part No.7-50-15900-EN...
- Page 2 Copyright notice © 2015, 2019 Natus Medical Denmark ApS. All rights reserved. ® Otometrics, the Otometrics Icon, AURICAL, MADSEN, Otoscan, ICS and HORTMANN are registered trademarks of Natus Medical Denmark ApS in the U.S.A. and/or other countries. Version release date 2019-06-18 (214183) Technical support Please contact your supplier.
-
Page 3: Table Of Contents
Table of Contents Description Intended use Unpacking Installation Handling and switching MADSEN OTOflex 100 on and off OTOsuite toolbar icons and test controls The MADSEN OTOflex 100 keypad The MADSEN OTOflex 100 menu The MADSEN OTOflex 100 text editor 10 Preparing for testing... -
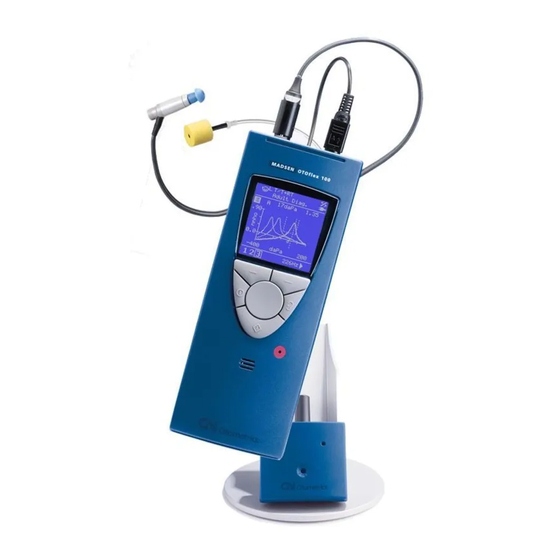
Page 4: Description
This makes it ideal for use with children and adults. MADSEN OTOflex 100 can be configured for a wide variety of tests, and it can be operated entirely manually or pro- grammed for the user’s own combination of manual and automatic operation. In user-programmable tests the user can select the default parameters of a particular test, and combine tests to form a sequence of preset tests. -
Page 5: Unpacking
3. Check with the packing list to make sure that you have received all necessary parts and accessories. If your package is incomplete, contact your local distributor. Installation Install OTOsuite on the PC before you connect to MADSEN OTOflex 100 from the PC. For OTOsuite installation instructions, see the OTOsuite Installation Guide, on the OTOsuite installation medium. •... - Page 6 2. Insert rawl plugs. 3. Insert the screws with the washers mounted, through the backplates of the wall mount. A. 2 screws B. 2 washers C. 2 rawl plugs D. washer wall mount backplate plastic shelf Otometrics - MADSEN OTOflex 100...
- Page 7 B. Charger base C. Hexagonal screws D. Hexagonal key A. Base B. Hexagonal key Powering the device MADSEN OTOflex 100 is powered by batteries. • Rechargeable NiMH batteries The device is delivered with rechargeable NiMH batteries. • Alkaline batteries If needed, the device can be powered by non-chargeable Alkaline batteries.
- Page 8 1. If you are in doubt of the setting, or if you are using Alkaline batteries, check the battery type and the setting in the device: When MADSEN OTOflex 100 is ready for use, switch it on: Press and hold the key on the keypad.
- Page 9 Power indicator An icon in the the top right corner of MADSEN OTOflex 100 shows the type of powering used. MADSEN OTOflex 100 receives power from the charger. MADSEN OTOflex 100 is powered by batteries.
- Page 10 Connecting MADSEN OTOflex 100 to OTOsuite When you use MADSEN OTOflex 100 for the first time, run the Configuration Wizard to set up the connection between MADSEN OTOflex 100 and OTOsuite. After you have configured OTOsuite for the first time, if MADSEN OTOflex 100 is turned on when you open the Control Panel in OTOsuite, then MADSEN OTOflex 100 will connect to OTOsuite auto- matically.
-
Page 11: Handling And Switching Madsen Otoflex 100 On And Off
C. Screen D. Keypad Handling To operate MADSEN OTOflex 100, hold it with one hand (left or right). Use your thumb to press the keys on the keypad and turn the scroll wheel. Switching on MADSEN OTOflex 100 Press and hold the key on the keypad until the start-up screen appears. - Page 12 Starts stimulus to present a single stimulus intensity. Stops the test immediately. Pauses the progress of a sequence. When this button flashes, click again to resume testing. Skips the ongoing measurement and continues with the next. Controls pressure in ETF-P. Otometrics - MADSEN OTOflex 100...
-
Page 13: The Madsen Otoflex 100 Keypad
7 The MADSEN OTOflex 100 keypad The MADSEN OTOflex 100 keypad MADSEN OTOflex 100 has 1 scroll wheel and 5 keys. Scroll wheel • – Turn the scroll wheel to the right or left to highlight areas on the screen. -
Page 14: The Madsen Otoflex 100 Menu
8 The MADSEN OTOflex 100 menu Function Softkeys • Press these keys to select whatever is shown on the screen directly above the key. Example: – is shown above the left key, press this key to toggle between curves 1, 2, or 3. -
Page 15: The Madsen Otoflex 100 Text Editor
Advanced.. For selecting advanced features. The MADSEN OTOflex 100 text editor If you are testing using MADSEN OTOflex 100 as a stand-alone device, use the text editor to enter patient data in MADSEN OTOflex 100. Entering data In some screens you can enter text and numeric values. - Page 16 9 The MADSEN OTOflex 100 text editor 7. If you need to move the cursor to insert or delete letters/digits in the data field, see below for editing entered data. Editing data You can edit data in the Patient & User screen.
-
Page 17: Preparing For Testing
If this is the first test of the day, make a probe check. • Connect the probe, and, if needed, the insert phone. • Prepare MADSEN OTOflex 100 and the Immittance module: select the patient and test setup. See the OTOsuite User Guide. • Prepare the patient. - Page 18 If your test environment changes, for instance if there is an increase in humidity, or if you are going to test at • an altitude different from the one set in MADSEN OTOflex 100, adjust the altitude setting and make another probe check.
- Page 19 Choking hazard! Do not leave eartips unsupervised within the reach of children. • Note • Accurate testing is only guaranteed if you use the eartips approved specifically for MADSEN OTOflex 100 by Otometrics. Note • Check the sound channels in the probe tip every time you have used the probe.Even small amounts of cerumen or vernix can block the sound channels.
- Page 20 1. When you switch on the device, a new patient folder is created automatically. Patient & User 2. The screen is shown. Enter the patient and user data . 3. Set up MADSEN OTOflex 100 to facilitate the process of testing, handling patient data, and continuing with the next patient: Menu Procedure options..
- Page 21 • a blocked wax filter Probe status MADSEN OTOflex 100 OTOsuite Description The probe seal is OK The probe is blocked There is a probe leak The probe is not fully inserted Otometrics - MADSEN OTOflex 100...
-
Page 22: Fast Routine Testing
3. Select the user (if the device is not connected to OTOsuite). 4. Insert first the contralateral insert phone and then the MADSEN OTOflex 100 probe. 5. Press the right softkey for 1 second to start the sequence (automatic or manual). -
Page 23: Screening
Procedure The test starts automatically with tympanometry testing and continues automatically to reflex screening. 1. In order to prepare MADSEN OTOflex 100 to start measuring as soon as seal is achieved, do the following: If you are using OTOsuite: –... -
Page 24: Diagnostic Tympanometry
14 Diagnostic Tympanometry Procedure If you are using MADSEN OTOflex 100: – Select Menu > Procedure options.. > T + RS – Without applying the eartip to the patient’s ear press the right-hand softkey. Ear Selector 2. If needed, toggle the to select the ear on which you wish to start the test. - Page 25 Start – In the screen, click on the Control Panel. If you are using MADSEN OTOflex 100: – Press the right-hand softkey. Warning If the patient is troubled by the test, stop the test. The test is interrupted and the •...
-
Page 26: Acoustic Reflex Testing
It is recommended that you perform a tympanometric test before making any acoustic reflex measurement, and determine the acoustic reflex threshold before making a reflex decay measurement. With MADSEN OTOflex 100, automatic or semi-automatic testing automatically determines acoustic reflexes using dif- ferent stimulus levels. - Page 27 Procedure Note • To avoid automatic testing being interrupted because of high stimulus intensity levels when reaching the warn- ing limits, it is recommended that you set the max. intensity to 95 dB HL. Otometrics - MADSEN OTOflex 100...
- Page 28 If you are using OTOsuite: – In the Reflex Threshold screen, click Start on the Control Panel. If you are using MADSEN OTOflex 100: – Press the right-hand softkey. The test runs a fully automatic threshold search for the preset stimuli. Semi-automatic RT testing...
- Page 29 If a field is crossed out, this indicates that no threshold has been detected at this highest test level. • If a field is marked by an asterisk, the threshold has been manually determined. • Blank fields indicate that the test has not been performed. Otometrics - MADSEN OTOflex 100...
- Page 30 15.2 Reflex Decay testing Note With MADSEN OTOflex 100, automatic or semi-automatic testing automatically determines acoustic reflexes • using different stimulus levels. The decay test stimulus level pre-supposes that there is a reflex threshold available for the ear, stimulus type and stim- ulus ear (ipsi- or contralateral) that is chosen for reflex decay testing.
- Page 31 Start – In the Reflex Decay screen, click on the Control Panel. If you are using MADSEN OTOflex 100: – Press the right-hand softkey. The test runs a fully automatic reflex decay measurement for the preset stimuli. Manual RD testing...
- Page 32 2. Ask the patient to sit very still and quiet during the test, without moving head or jaw. Ear Selector 3. If needed, toggle the to select the ear on which you wish to start the test. Otometrics - MADSEN OTOflex 100...
-
Page 33: Managing Test Results In Madsen Otoflex 100
MADSEN OTOflex 100 Reference Manual. Managing test results in MADSEN OTOflex 100 The following applies to managing test results in MADSEN OTOflex 100. If you wish to perform these actions in OTOsuite, see the OTOsuite User Guide or OTOsuite Reference Manual Otometrics - MADSEN OTOflex 100... - Page 34 1. In the Immittance module click the icon. If Bluetooth communication is enabled in MADSEN OTOflex 100, OTOsuite automatically connects to MADSEN OTOflex 100 to get data and then disconnects. If online, it uses the already established connection. 2. Select from the dialog box shown.
-
Page 35: Other References
Changes made in patient folders, either in MADSEN OTOflex 100 or in the Immittance module, will be synchronized. The most recent change, regardless of whether it was made in MADSEN OTOflex 100 or in the Immittance module, will be applied or synchronized. - Page 36 Do not use a defective device. 18.2 Cleaning the device Prerequisites • Before cleaning, switch off MADSEN OTOflex 100 and disconnect it from any external power source. • Unplug the probe from MADSEN OTOflex 100. The device • Remove dust using a soft brush.
- Page 37 The probe tip is designed to withstand up to 3,000 autoclaving cycles in which tem- peratures typically reach 134°C. Make sure that the probe tip has not been deformed by the autoclaving process. Procedure Note • Always comply with local hygienic standards for disinfection. Otometrics - MADSEN OTOflex 100...
- Page 38 Caution Never clean the • sound channels in the probe body, as this may cause dam- age to the probe. Otometrics - MADSEN OTOflex 100...
- Page 39 If the test cavity has been contaminated with debris from the probe tip, use gas cleaning according to local hygienic stand- ards (i.e. with ethyleneoxide, at a temperature of 55°C, at a pressure of 0.8 to 1.0 bar). 18.5 Calibration The device and the probes are delivered fully calibrated. Otometrics - MADSEN OTOflex 100...
-
Page 40: Technical Specifications
• The probe calibration values are saved in the probe assembly and follows the probe. The probe can be plugged to any MADSEN OTOflex 100 and used right away. This also applies to the contra insert phone. Annual calibration The immittance device and probes must be calibrated once a year by your authorized service department. - Page 41 Positive to negative or negative to positive Safety: Separate safety +530 daPa and -730 daPa. ±70 daPa Software safety +450 daPa and -650 daPa. ±70 daPa. Unit of admittance graph Y-axis ml, cc, mmho, µl Unit of graph X-axis daPa, s Otometrics - MADSEN OTOflex 100...
- Page 42 20 cm x 4.9 cm x 7.8 cm (7.9” x 1.9” x 3.0”) Charger unit (HxWxD): 18 cm x 4.9 cm x 7.8 cm (6.9” x 1.9” x 3.0”) Weight MADSEN OTOflex 100: 0.6 kg/1.3 lb Charger unit: 0.23 kg/0.5 lb Otometrics - MADSEN OTOflex 100...
- Page 43 Equipment should be calibrated regularly according to EN 61027 and ANSI S3.39 Essential performance MADSEN OTOflex 100 has no essential performance and accordingly, the applicable requirements are as stated in the fol- lowing: 1. Impedance/admittance as defined by EN 61027 Type 1, ANSI S3.39 Type 1.
- Page 44 Guidance and manufacturer's declaration - electromagnetic emissions for all equipment and systems MADSEN OTOflex 100 is intended for use in the electromagnetic environment specified below. The user of MADSEN OTOflex 100 should ensure that it is used in such an environment.
- Page 45 Guidance and manufacturer's declaration - electromagnetic immunity - for equipment and systems that are NOT life-supporting MADSEN OTOflex 100 is intended for use in the electromagnetic environment specified below. The user of MADSEN OTOflex 100 should ensure that it is used in such an environment.
- Page 46 Recommended separation distances between portable and mobile RF communications equipment and MADSEN OTOflex 100 The MADSEN OTOflex 100 is intended for use in an electromagnetic environment in which radiated RF disturbances are controlled. The customer or the user of the MADSEN OTOflex 100 can help prevent electromagnetic interference by maintaining a minimum distance between portable and mobile RF communications equipment (transmitters) and the MADSEN OTOflex 100 as recommended below, according to the maximum output power of the communications equipment.
-
Page 47: Definition Of Symbols
This device must accept any interference received, including interference that may cause undesired operation. Refer to Notes 5 through 7 in the section Warning notes - 215 for more details. The term”IC” before the certification/registration number signifies that the Industry Canada technical spe- cifications were met. Otometrics - MADSEN OTOflex 100... - Page 48 This requirement applies in the European Union. Do not dispose of these products as unsorted municipal waste. You can return your device and accessories to Natus Medical Denmark ApS, or to any Natus Medical Denmark ApS supplier. You can also contact your local authorities for advice on disposal. Otometrics - MADSEN OTOflex 100...
- Page 49 Symbols on buttons to operate OTOflex 100, see the section Controls and menu selections - 23 and 7 test- ing with MADSEN OTOflex 100- 63. Otometrics - MADSEN OTOflex 100...
-
Page 50: Warning Notes
Use only rechargeable batteries when MADSEN OTOflex 100 is placed in the charger unit. If you are using alkaline batteries, do not attempt to charge your MADSEN OTOflex 100. Your alkaline batteries may be damaged and leak, and this may in turn cause damage to MADSEN OTOflex 100. - Page 51 15. If the device is not to be used for a period of time, remove the batteries from the device in order to prevent battery leakage. Otometrics - MADSEN OTOflex 100...
-
Page 52: Manufacturer
The equipment is used in accordance with the instructions for use. The manufacturer reserves the right to disclaim all responsibility for the operating safety, reliability and performance of equipment serviced or repaired by other parties. Otometrics - MADSEN OTOflex 100...
Need help?
Do you have a question about the Madsen OTOflex 100 and is the answer not in the manual?
Questions and answers