Table of Contents
Advertisement
Quick Links
Advertisement
Table of Contents

Related Manuals for HMS Ixxat iPC-I 320


Summary of Contents for HMS Ixxat iPC-I 320
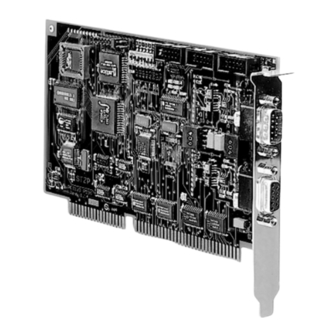
- Page 1 iPC-I 320 Intelligent PC/CAN Interface HARDWARE MANUAL ENGLISH...
- Page 2 Tel.: +49 751 56146-0 Fax: +49 751 56146-29 Internet: www.hms-networks.de E-Mail: info-ravensburg@hms-networks.de Support For problems or support with this product or other HMS products please request support at www.ixxat.com/support. Further international support contacts can be found on our webpage www.ixxat.com Copyright...
-
Page 3: Table Of Contents
Content Introduction ..................5 1.1 Overview .................. 5 1.2 Features ................... 5 1.3 Block Diagram ................. 6 Installation ..................7 2.1 Hardware Installation .............. 7 2.2 Software Installation ............... 7 Configuration ................. 8 3.1 Jumper Settings ..............8 3.1.1 Setting the Base Address ............11 3.1.2 Setting the PC Interrupt ............ - Page 4 Content 4.4 CAN Controllers ..............23 4.5 Serial Interfaces ..............24 Appendix ..................... 25 Appendix A ................... 25 Technical Data ................25 Appendix B ................... 26 Factory Settings ................26 Appendix C ................... 27 Supply Sources for Data Sheets ..........27 EC Declaration of Conformity .............
-
Page 5: Introduction
If you are using the interface with the IXXAT VCI driver or other IXXAT software, you can leave out Section 4. For information concerning the development of own software running on the interface, please contact HMS or take a look on the support area of the HMS homepage (www.ixxat.com). -
Page 6: Block Diagram
Introduction 1.3 Block Diagram iPC-I 320 Manual, Version 2.8... -
Page 7: Installation
Installation 2 Installation 2.1 Hardware Installation For all work on the PC and interface, you must be statically discharged. The work must be carried out on an earthed, anti-static work-mat. Carry out the following work in sequence: (1) Establish a free memory segment on the PC of at least 8 kbyte in the range <... -
Page 8: Configuration
Configuration 3 Configuration 3.1 Jumper Settings The diagrams Fig. 3-1 (PC/104), Fig. 3-2 (ISA Slot) and Fig. 3-3 (AT/ISA96) show the positions of the plugs and jumpers on the various interfaces. Fig. 3-1: iPC-I 320 PC/104 interface for PC/104 computer iPC-I 320 Manual, Version 2.8... - Page 9 Configuration Fig. 3-2: iPC-I 320 interface for ISA slot bus iPC-I 320 Manual, Version 2.8...
- Page 10 Configuration Fig. 3-3: iPC-I 320 AT/ISA96 interface iPC-I 320 Manual, Version 2.8...
-
Page 11: Setting The Base Address
Configuration 3.1.1 Setting the Base Address For the base address, switches 1 to 5 of the DIP switch SW1 are used (jumper board SW1 with PC/104, ON = jumper plugged in). The following table shows the possible settings (default = factory setting). Base address SW1-1 SW1-2... -
Page 12: Setting The Pc Interrupt
Configuration 3.1.2 Setting the PC Interrupt The required PC interrupt is set with the jumper board JP27 by closing the jumper belonging to the required IRQ. Only one interrupt may be selected for the iPC-I 320! If no interrupt is required, no pin may be bridged by JP27. The factory setting of the interface is IRQ 5. -
Page 13: Selection Of The Eprom Size
Configuration 3.1.3 Selection of the EPROM Size With the ISA and AT/ISA96 versions, there is a PLCC32 socket with EPROM (IC6) on the interface. The sizes 27C256 (32 kbytes x 8) and 27C512 (64 kbytes x 8) are supported. The EPROM may have an access speed of max. 90 ns. The solder jumper JP35 defines the setting of the EPROM size: EPROM type Solder strap on JP35... -
Page 14: Providing Current Supply Via Can Plug
Configuration 3.1.6 Providing Current Supply via CAN Plug With the solder jumpers JP29, JP30, JP31, JP32, JP33 and JP36, the VCC (5V) or GND signals can be connected to the CAN plug of the two CAN circuits. For this, the jumpers given in the following table have to be closed. Pin board JP15/JP25 Default Pin Signal... -
Page 15: Design Of The Can Plugs
Configuration 3.2 Design of the CAN Plugs One (common) or two isolated high-speed bus transceivers according to ISO/IS 11898 may be present on the interface. The signals of the first bus transceiver connect with the 9-pin sub-D-pin/bush CON2/3. With the PC/104 version the signals are available via the pin board JP36. -
Page 16: Connection Between Can Controllers And Bus Transceivers
Configuration 3.3.1 Connection between CAN Controllers and Bus Transceivers The signals of the CAN controllers 1/2 and up to four port pins of the microcontroller connect with JP14/JP24. Pin no. Signal JP14/JP24 Port 1.3* Port 3.4 Port 1.2* Port 3.5 * Adjustment via JP42 and JP43 as described in 3.1.9 JP15 leads the signals of the first bus transceiver to the 9-pin CON2 plug (male) and the 9-pin plug (female) CON3 (at the PC/104 version to JP36). -
Page 17: Serial Rs232 Interface
Configuration JP25 leads the signals of the second bus transceiver to the 10-pin header JP34. Pin no. Pin no. JP34 Signal JP25 CAN Low GND (via JP32) GND (via JP33) CAN High VCC (via JP36) With electrically isolated bus transceivers the signals GND and VCC are also electrically isolated from the GND and VCC signals of the interface. -
Page 18: Architecture
Architecture 4 Architecture 4.1 PC Side Memory Assignment Communication with the PC is made via a 7 kbyte memory zone in which the 4 kbyte DPRAM, eight semaphore registers and 2 flags (Reset and µC-interrupt) are placed. Offset 1BFFh INT µC (INT2) 1800h Reset iPC-I 320 1400h... -
Page 19: Reset Of The Μc From The Pc
Architecture 4.1.3 Reset of the µC from the PC By writing a defined value (reset value) in a random address of the memory range from 1400h to 17FFh, a reset of the microcontroller is triggered on the interface. The value written in the memory cell states in which memory architecture the interface should be switched after the reset. -
Page 20: Program Memory
Architecture 4.2.1 Program Memory The program code for the interface can either be loaded into the RAM or directly executed from the EPROM (depending on the memory mode selected). The size of the code memory depends on the selected memory mode: •... -
Page 21: Harvard-Mode
Architecture FFFFh not used FF00h F300h Semaphores F200h DPRAM F000h EPROM 7FFFh 0000h 0000h CODE XDATA Fig. 4-2: Storage assignment in loader-mode (DIP SW1-8 OFF) FFFFh not used FF00h not used FE00h Sel. BANK 1 FD00h Sel. BANK 0 FC00h CAN 2 F800h CAN 1... -
Page 22: Von-Neumann Mode
Architecture FFFFh FFFFh not used FF00h FF00h not used FC00h CAN 2 F800h CAN 1 F400h F300h Semaphores F000h F000h DPRAM E000h 0000h 0000h CODE XDATA Fig. 4-4: Storage assignment in Harvard-mode 4.2.5 Von-Neumann Mode The Von-Neumann mode provides applications with the smallest usable storage area (see Fig. -
Page 23: Triggering An Interrupt On The Pc
Architecture 4.3 Triggering an Interrupt on the PC The microcontrollers can trigger an interrupt on the PC by writing a low impulse of min. 50ns length onto the port pin 1.7. The electronics on the interface convert this into an impulse of approx. 1.5 µs length (triggering occurs on the falling side of the impulse of the port pin). -
Page 24: Serial Interfaces
Architecture register (corresponds to 6 wait states when accessing the XDATA area). Depending on the application, it is helpful to set the wait states only when accessing the CAN controller. If parts of a program is only working with data from the RAM, the wait states should be cancelled. -
Page 25: Appendix
Appendix Appendix Appendix A Technical Data The following data refer to the basic version of the interface (one Philips SJA1000 CAN controller, one bus transceiver according to ISO/IS 11898, loader EPROM 27C256) Dimensions: • ISA slot version: 107 x 178 mm (without slot plate) 127 x 193 mm (total) 22 mm overall height Weight: approx. -
Page 26: Factory Settings
Appendix Appendix B Factory Settings The factory settings of the interface are given in the following table. For special versions of the interface, individual settings may differ. Base address: D000h SW1-1 ON SW1-2 OFF SW1-3 ON SW1-4 ON SW1-5 ON PC-interrupt: IRQ5 JP27 IRQ 5 bridged... -
Page 27: Supply Sources For Data Sheets
Appendix Appendix C Supply Sources for Data Sheets Dual-port-RAM IDT 71342LA: http://www.idt.com CAN controller Philips SJA1000: http://www.philips-semiconductors.com CAN controller Intel 82527: http:/www.intel.com Microcontroller Dallas 80C320 http://www.dalsemi.com iPC-I 320 Manual, Version 2.8... -
Page 28: Ec Declaration Of Conformity
Appendix EC Declaration of Conformity IXXAT Automation hereby declares that the product: iPC-I 320 with the article numbers: 1.01.0040.10100 1.01.0040.10200 1.01.0040.11110 1.01.0040.11220 do comply with the EC directives 2004/108/EC. Applied harmonized standards in particular: EN 55022:2006 + A1:2007 EN 61000-6-2:2005 22.08.2011, Dipl.-Ing.
Need help?
Do you have a question about the Ixxat iPC-I 320 and is the answer not in the manual?
Questions and answers