Table of Contents
Advertisement
Advertisement
Table of Contents

Related Manuals for jcb 48Z-1


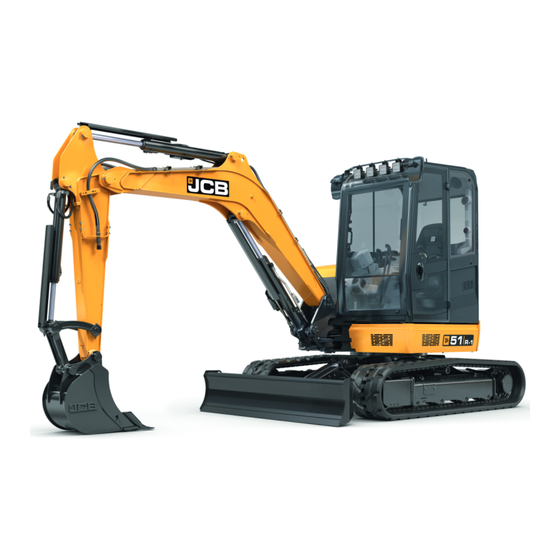
Summary of Contents for jcb 48Z-1
- Page 1 Quick Start Guide Compact Excavators...
-
Page 2: Table Of Contents
Quick Reference Guide. This machine should not be operated by any person who isn’t appropriately qualified or had the appropriate training. Operation of this machine without periodic maintenance could cause it to malfunction. For more information please contact your JCB Dealer. Please see operator manual for full details. -
Page 3: Intended Use
The machine should not be operated by any person without appropriate qualifications, training or experience of using this type pf machine > Prior to use, the machines suitability should be considered with regards to the intended applications and any hazards which may be present 48Z-1, 51R-1, 55Z-1, 57C-1... -
Page 4: Dimensions
Dimensions Fig 1 Machine model Sprocket idler centres 1985 Track length on ground 1985 Undercarriage overall length – rubber 2490 Undercarriage overall length – steel 2490 Kingpost clearance Tailswing radius 1040 1000 1300 Overall width of superstructure 1820 1850 1845 Height over cab 2551 2561... -
Page 5: Tie Down Points
A Rear track tie-down points D Angle = 43 ± 1.5º B Front track tie-down points E Length = 2,100 ± 400mm C Angle = 44.7 ± 5º F Length = 2,200 ± 100mm 48Z-1, 51R-1, 55Z-1, 57C-1 48Z-1, 51R-1, 55Z-1, 57C-1... -
Page 6: Lifting Points
Lifting Points Fig 5 Description Boom Lift Point Dozer Lift Point 35° 2400 2480 2320 2220 4800 4850 4820 4700 1003 *COG = Centre of Gravity Fig 6 The correct lifting positions are identified on the machine by their labels: Lifting point Position label. -
Page 7: Cab Layout & Controls
F Auto idle on/off switch (opt) G Worklights on/off switch H Beacon on/off switch (opt) J Wiper & washer on/off switch (opt) K Q-hitch sequence switch (opt) L Auto-hydraulic warming switch M Blank (opt) – Option 48Z-1, 51R-1, 55Z-1, 57C-1... -
Page 8: Instrument Panel
Instrument Panel Fig 9 A LCD screen B Warning and indicator lamps C Fuel level gauge D Coolant temperature gauge E Engine speed F Back button G Up button H Home button J Down button K Select button Fig 10 A Travel speed status B Power band status C Auto idle status... - Page 9 A Home button B Return button Lift overload warning Hydraulic oil temperature C Toggle through menus (rotate) D Info screen button E Toggle menu mode button F Enter button G Blank Hydraulic pressure Fuel statistics (Kohler only) 48Z-1, 51R-1, 55Z-1, 57C-1...
- Page 10 Joystick & Dozer Lever Joysticks Fig 15 Fig 16 Auxiliary Controls A Tilt/grab changeover for tilt-rotator Swing Controls B Swing/Aux change over button A Swing left C Thumb wheel control – Aux 2 (Low flow) B Swing right D Continuous flow button – Hammer circuit C Swing thumb wheel control E Thumb wheel control –...
-
Page 11: Start Up Sequence
Instrument panel will illuminate to use. Note: If 2 GO enabled go to step 8, if not go to step 9 (B) when active. A Handle B LH arm rest 48Z-1, 51R-1, 55Z-1, 57C-1... -
Page 12: Setting Auxiliary Flows
Setting Auxiliary Flows Enter Menu Mode Navigate Menus Enter Aux Menu Press Menu mode button (A) Scroll through menus using the To enter aux setting menu on rotary dial to access menus, rotary dial (A) until on the aux press rotary dial (A). Orange icons will illuminate when active. -
Page 13: Hydraulic Hitch Unlock
(A) until the hitch unlocks then When using a specialised for 5 seconds. remove attachment. attachment that requires this process to be followed, replace No.4 above with No.4 a & b then continue to follow steps 5 and 6 to finish. 48Z-1, 51R-1, 55Z-1, 57C-1... -
Page 14: Auxiliary Venting & Shutdown
Shutdown and Auxiliary Venting Shutdown Sequence Park Machine Up Leave & Secure Isolate Machine Park machine on solid level Switch off all switches. Leave Turn isolator key anti-clockwise ground with the attachment (A) machine using the handrails and remove key. and dozer (B) on the ground. -
Page 15: Maintenance Position
A Attachment flat on the ground B Dozer blade lowered to ground Stop the engine Discharge the hydraulic pressure (see aux venting operation) Isolate the controls and remove ignition key Isolate the battery to prevent accidental operation of the engine 48Z-1, 51R-1, 55Z-1, 57C-1... -
Page 16: Service/Maintenance
Service/Maintenance Daily Checks (10h) Check Check condition of attachments / optional equipment Visual Check Grease attachments / optional equipment as required Lubricate Clean bodywork and framework Clean Check condition of bodywork and framework Visual Check Check condition of cab/canopy including seat belt Visual Check Check engine for leaks and oil level Visual Check... -
Page 17: Access Covers
F Fuel filler cap G Refuelling pump (option) H Fuel filter J Battery isolator Fig 20 Fig 21 P Relays / fuses K Coolant expansion bottle L Washer bottle M Engine fuel filter N Engine oil dipstick Fig. 18 48Z-1, 51R-1, 55Z-1, 57C-1... - Page 18 Access Covers – Perkins Engine Fig 22 A Coolant expansion bottle B Radiator C Hydraulic oil level indicator D Battery E Hydraulic oil filler cap F Fuel filler cap G Refuelling pump (option) H Fuel filter J Battery isolator Fig 23 Fig 24 P Relays / fuses K Air filter...
-
Page 19: Fluids & Lubricants
JCB Special Slew Pinion Grease 4003/1619 0.4kg All Other Grease As required JCB MPL-EP Grease 4003/1501 0.4kg JCB part numbers are liable to change and may also vary by region. For the latest information, always check with your dealer/distributor. 48Z-1, 51R-1, 55Z-1, 57C-1... -
Page 20: Machine Attachments
Machine Attachments Weight Hydraulic Description Intended Use (kg) Requirements Mechanical Quickhitch 29.3 Quick change of attachments None Hydraulic Quickhitch Quick change of attachments Quickhitch circuit Bucket GP 250mm 60.2 General excavation / Bulk loading loose material None Bucket GP 300mm 55.4 General excavation / Bulk loading loose material None... -
Page 21: Troubleshooting/Faqs
Can I disable the lift overload warning To disable lift overload warning indicator when not object handling press button indicator when not object handling? no 4 on switch panel 48Z-1, 51R-1, 55Z-1, 57C-1... - Page 22 Troubleshooting/FAQs Issue / FAQ Resolution/Answer 500hrs Greasing – Does it matter if No, this only prolongs the life further greased every day? 500hrs Greasing – Do the bush need to be No, just grease and continue work replaced at 500hrs? 500hrs Greasing –...
- Page 23 • High flow – 90l/min Auxiliary circuits? • Low flow – 40l/min Engine Power Band % Max Aux Flow Aux Flow L/min What are the auxiliary flow settings when in Aux 1 double acting mode 1? 100% 48Z-1, 51R-1, 55Z-1, 57C-1...
- Page 24 Download the very latest information on this product range at: www.jcb.com The JCB logo is a registered trademark of J C Bamford Excavators Ltd. ©2009 JCB Sales. All rights reserved. No part of this publication may be reproduced, stored in a retrieval system, or transmitted in any form or by any other means, electronic, mechanical, photocopying or otherwise, without prior permission from JCB Sales.
Need help?
Do you have a question about the 48Z-1 and is the answer not in the manual?
Questions and answers
Main control does not turn on
hOW CAN i OPEN THE HATCH UNSER THE FLOOR MAT ON MY 48Z