Jura X10 Instructions For Use Manual
Hide thumbs
Also See for X10:
- Instructions for use manual (36 pages) ,
- Instructions for use manual (34 pages)

Subscribe to Our Youtube Channel
Related Manuals for Jura X10


Summary of Contents for Jura X10
- Page 1 X10 Instructions for Use Original instructions for use Before using the machine read the instructions for use. JURA Type 754...
-
Page 2: Table Of Contents
Filling the bean container ..........................11 Determining the water hardness .......................11 First-time use ..............................11 Connecting milk ............................13 Settings by the JURA service technician ....................13 Connect accessory (with wireless connection) ..................13 2 Preparation Ways of preparing a beverage ........................15 Preparing speciality coffees ........................16 Preparing two speciality coffees ........................17... - Page 3 CAUTION draws your attention to potential damage to the machine. Symbols used Prompt to take action. This symbol means that you are being prompted to perform some action. Information and tips to make it even easier to use your X10. Display ‘Coffee’...
-
Page 4: Control Elements
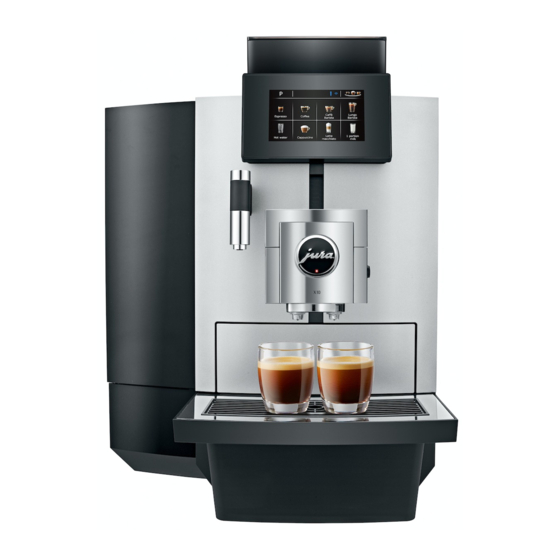
Control elements Control elements Bean container with aroma preservation cover Touchscreen display (lockable) Height-adjustable dual spout Water tank cover (lockable) Insert for drip tray Water tank Cup grille Hot-water spout Drip tray Mains cable (permanently connected or plug-in) (back of the machine) Coffee grounds container... - Page 5 Control elements Cover On/Off button Q Filler funnel for cleaning tablet Grinder adjustment wheel Back of the machine: Service socket with JURA Smart Connect Accessories Spanner for aroma preservation Container for milk system cleaning cover, water tank cover and grinder adjustment wheel...
-
Page 6: Important Information
Keep these instructions for use close to the machine and pass them on to the next user. The X10 may only be operated by instructed per- sons. Non-professionals must be supervised dur- ing use. - Page 7 JURA or from authorised JURA service centres. Make sure that the X10 and the mains cable are not located close to hot surfaces. Be careful to ensure that the mains cable is not trapped and does not rub against sharp edges.
- Page 8 Do not immerse the X10, mains cable or con- nections in water. Do not put the X10 or any individual parts in the dishwasher. Before cleaning, switch the X10 off with the On/Off button Q. Always wipe the X10 with a damp cloth rather than a wet one, and protect it from prolonged exposure to water splash.
- Page 9 Important information Switch the machine off with the On/Off but- ton Q if you are going to be absent for a longer period of time and remove the mains plug from the power socket. Children may not clean or service the machine unless supervised by a responsible person.
-
Page 10: Preparing And Using For The First Time
Setting up the machine When setting up your X10, please note the following: Place the X10 on a horizontal surface that is not sensitive to water (minimum height of 80 cm). Choose a spot for your X10 which protects the machine against overheating. -
Page 11: Filling The Bean Container
1 Preparing and using for the first time Filling the bean container The aroma preservation cover of the bean container is lockable (spanner supplied as standard). CAUTION Coffee beans which have been treated with additives (e.g. sugar), ground coffee or freeze-dried coffee will damage the grinder. T ... - Page 12 T For machines with a plug-in mains cable: Connect the mains cable to the machine. T Insert the mains plug into a power socket. T Press the On/Off button Q to switch the X10 on. ‘Sprachauswahl’ ‘Deutsch’ E To display more languages, move your finger either down- wards or upwards in the selection list until the desired lan- guage comes into focus (e.g.
-
Page 13: Connecting Milk
Coffee grounds disposal / drip drain set Fresh water kit Connect accessory (with Your X10 is equipped with the JURA Smart Connect. This allows you wireless connection) to connect the machine wirelessly to a compatible JURA accessory (e.g. the Cool Control milk cooler). - Page 14 ‘Switch off after’ T Move your finger across the display until ‘Connect acces- sory’ is displayed in the centre. T Touch ‘Connect accessory’. ‘Connect accessory’ T Now follow the instructions on the display to connect the accessory to the X10.
-
Page 15: Preparation
(see Chapter 4 ‘Permanent settings in programming mode – Adjusting the product settings’). Ways of preparing a The X10 offers various ways of preparing a speciality coffee, milk or beverage hot water. Preparation using the start screen: Simply touch the desired prod- uct. -
Page 16: Preparing Speciality Coffees
E You can move any of the standard products programmed in your X10 to your preferred position on the start screen and make it one of your favourites. You can duplicate and person- alise your favourite speciality coffees by giving them a new product name and individual settings (e.g. -
Page 17: Preparing Two Speciality Coffees
Preparation stops automatically. The start screen is displayed. Preparing speciality Your X10 prepares latte macchiato, cappuccino, flat white and other coffees with milk speciality coffees with milk at the touch of a button. There is no need to move the glass or cup. -
Page 18: Espresso Doppio
The result is an extra full-bodied and aromatic speciality coffee. Caffè Barista and lungo For the ‘caffè Barista’ and ‘lungo Barista’, the X10 blends the coffee Barista with hot water using a special preparation method. This results in a full-bodied speciality coffee which is particularly easy to digest. -
Page 19: Hot Water
2 Preparation Hot water The X10 allows you to prepare different variants of hot water: ‘Hot water’ ‘Hot water for green tea’ ‘Hot water for black tea’ CAUTION There is a danger of scalding from hot water splashes. T Avoid direct contact with the skin. -
Page 20: Daily Operation
T Fill the water tank with fresh, cold water and reinsert the tank. T Close the water tank cover. Switching on the machine T Place a receptacle under the dual spout. T Press the On/Off button Q to switch the X10 on. ‘Welcome to JURA’. ‘Machine is heating’. ‘Machine is rinsing’, the system is rinsed. -
Page 21: Daily Maintenance
3 Daily operation Daily maintenance To ensure that you get many years of reliable service out of your X10 and to guarantee the optimum coffee quality, the machine requires daily maintenance. T Pull out the drip tray. T Empty the coffee grounds container and the drip tray. Rinse them both with warm water. -
Page 22: Switching Off The Machine
Traces of milk and coffee may stick to the top and bottom of the cup grille. If this happens, clean the cup grille. Switching off the When the X10 is switched off, the system is automatically rinsed if a machine speciality coffee has been prepared. -
Page 23: Permanent Settings In Programming Mode
‘Clean the milk system’, ‘Rinse’, ‘Maintenance information’ ‘Lock display’ ‘Machine settings’ ‘Switch off after’ T Set the time after which the X10 should (‘2/4’) switch off automatically. ‘Save energy’ T Activate energy-saving mode. ‘Lock/enable’ T Disable various machine functions of the X10. -
Page 24: Product Settings
4 Permanent settings in programming mode Programme item Sub-item Explanation ‘Product settings’ T Select your settings for speciality coffees (‘3/4’) and hot water. ‘Information’ ‘Product counter’, T Keep track of all products prepared and (‘4/4’) ‘Day counter’, view the number of maintenance pro- ‘Maintenance counter’... - Page 25 4 Permanent settings in programming mode Product Coffee Amount More settings strength ‘Espresso 10 levels Water: 30 ml – 160 ml Temperature (low, normal, high), product doppio’ (2 strokes) name, delete/replace/copy product ‘Jug of coffee’ 10 levels Water: 25 ml – 240 ml Number of strokes (1–5), Temperature Bypass water: (low, normal, high), product name, delete/ 0 ml – 240 ml...
-
Page 26: Automatic Switch-Off
Automatic switch-off By instructing your X10 to automatically switch itself off, you can cut down your energy consumption. If this function is activated, your X10 switches off automatically after the preset time following the last action on the machine. -
Page 27: Energy-Saving Mode
‘Save energy’ you can set an energy-saving mode: ‘Save energy’ ‘1’ Soon after the last preparation, the X10 stops heating up. The ‘ESM’ symbol (Energy Save Mode, E.S.M. ) is displayed. © Before you can prepare a speciality coffee, speciality coffee with milk, or hot water, the machine must heat up. -
Page 28: Restore Factory Settings
Restore factory settings In the programme item ‘Machine settings’ ‘Werkseinstellung’ machine can be reset to its factory setting. Your X10 then switches off. Precondition: The start screen is displayed. T Touch ‘ P ’. ‘Maintenance status’ T Move your finger across the display until ‘Machine settings’... -
Page 29: Unit For Amount Of Water
4 Permanent settings in programming mode Unit for amount of water In the programme item ‘Machine settings’ / ‘Unit’ you can select the unit used for the amount of water. Example: Proceed as follows to change the unit for the amount of water from ‘ml’... -
Page 30: Setting The Water Hardness
Setting the water The harder the water is, the more frequently the X10 needs to be hardness descaled. It is therefore important to set the water hardness accu- rately. -
Page 31: Adapting The Start Screen
4 Permanent settings in programming mode T Touch ‘ P ’. ‘Maintenance status’ T Move your finger across the display until ‘Machine settings’ is displayed in the centre. T Touch ‘Machine settings’. ‘Switch off after’ T Move your finger across the display until ‘Choose language’... -
Page 32: Maintenance
‘Machine is rinsing’, ‘Milk system is being rinsed’, water flows out of the dual spout. The rinse stops automatically. Your X10 is once more ready for use. Automatic milk system 15 minutes after milk preparation, the milk system is automatically rinsing rinsed. -
Page 33: Cleaning The Milk System
T Use only original JURA maintenance products. E JURA milk system cleaner is available from specialised dealers. E To clean the milk system, use the container supplied. Precondition: The start screen is displayed. -
Page 34: Dismantling And Rinsing The Dual Spout
T Rinse all the parts under running water. If there are severely dried-on milk residues, firstly immerse the individual parts in a solution of 250 ml cold water and 1 capful of JURA milk system cleaner. Then rinse the parts thoroughly. -
Page 35: Inserting/Changing The Filter
T Fit the cover of the dual spout. T Connect the milk pipe to the dual spout. Inserting/changing the Your X10 no longer has to be descaled if you are using the CLARIS filter Pro Smart filter cartridge. E Once the filter cartridge stops working (depending on the water hardness setting), the X10 will prompt you to change the filter. -
Page 36: Cleaning The Machine
‘Empty drip tray’ T Empty the drip tray and coffee grounds container and put them back into the machine. The start screen is displayed. Your X10 is once more ready for use. Cleaning the machine After 180 preparations or 80 switch-on rinses, the X10 will prompt you to clean it. -
Page 37: Descaling The Machine
Cleaning is now complete. The start screen is displayed. Descaling the machine The X10 builds up deposits of limescale over time and automatically prompts you to descale it when necessary. The degree of calcifica- tion depends on the hardness of your water. - Page 38 If the descaling agent comes into contact with sensitive surfaces (e.g. marble), damage cannot be ruled out. T Clean up any splashes immediately. E The descaling programme lasts approximately 45 minutes. E JURA descaling tablets are available from specialised dealers. Precondition: The start screen is displayed. ‘Decalcify machine’ displayed.
-
Page 39: Cleaning The Bean Container
T Remove the water tank. T If you use a CLARIS Pro Smart filter cartridge, remove this. T Completely fill the water tank and dissolve 3 JURA descaling tablets in it. - Page 40 5 Maintenance T Leave the water tank with the descaling solution for several hours (e.g. overnight). T Empty the water tank and rinse it thoroughly. T If you use a CLARIS Pro Smart filter cartridge, insert this again. T Fill the water tank with fresh, cold water and reinsert the tank.
-
Page 41: Display Messages
‘Preparing and using for the first time – speciality coffees, but you can Filling the bean container’) prepare hot water and milk. ‘Clean the milk The X10 prompts you to clean T Perform milk system cleaning (see system’ the milk system. Chapter 5 ‘Maintenance – Cleaning the milk system’). -
Page 42: Troubleshooting
Other ‘Error’ messages – T Switch the X10 off with the On/Off button Q. are displayed. Contact customer support in your country (see Chapter 11 ‘JURA contact details / Legal information’). E If you were unable to solve the problem, contact customer support in your country (see Chapter 11 ‘JURA contact details /... -
Page 43: Transport And Environmentally Friendly Disposal
8 Transport and environmentally friendly disposal 8 Transport and environmentally friendly disposal Transport / Emptying the Keep the packaging for your X10. It should be used to protect the system machine during transport. In order to protect the X10 from frost during transport, the system must be emptied. -
Page 44: Technical Data
9 Technical data 9 Technical data Voltage 220 – 240 V ~, 50 Hz Power 1450 W Ambient conditions Humidity max. 80% Ambient temperature 10 – 35 °C ≤ 70 dB Sound pressure level Conformity mark Pump pressure static, max. 15 bar Holding capacity of water tank 5 l (without filter) Holding capacity of bean container 1000 g Holding capacity of coffee grounds... -
Page 45: Index
10 Index 10 Index Adapting the start screen 31 Daily maintenance 21 Addresses 48 Descaling Adjusting the product settings 24 Machine 37 Aroma preservation cover Water tank 39 Bean container with aroma preservation Disable cover 4 Message display 27 Automatic switch-off 26 One-off settings 27 Product selector view 27 Product settings 27... - Page 46 Lungo Barista 18 Insert for drip tray 4 Pot of coffee 16 Internet 10 Ristretto 16 Two coffees 17 JURA Two espressi 17 Contact details 48 Two ristretti 17 Internet 10 Two speciality coffees 17 Using the product selector 15...
- Page 47 10 Index Settings Permanent settings in programming mode 23 Setting up Setting up the machine 10 Short operating instructions 10 Smart Connect 5, 13 Spout Height-adjustable dual spout 4 Hot-water spout 4 Switching off 22 Switching on 20 Switch-off Automatic switch-off 26 Symbol description 3 Technical data 44 Tel 48...
-
Page 48: Jura Contact Details / Legal Information
J73926/X10/en/201811 11 JURA contact details / Legal information 11 JURA contact details / Legal information Your JURA service partner JURA Elektroapparate AG Kaffeeweltstrasse 10 CH-4626 Niederbuchsiten Tel. +41 (0)62 38 98 233 www.jura.com Directives The machine complies with the following directives: 2006/42/EC – Machinery Directive 2014/30/EU –...
Need help?
Do you have a question about the X10 and is the answer not in the manual?
Questions and answers