Table of Contents
Advertisement
Advertisement
Table of Contents

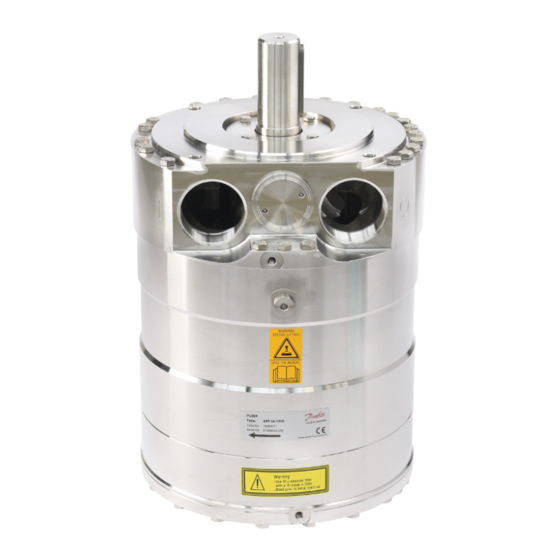
Summary of Contents for Danfoss APP 21-43
- Page 1 Service guide APP pumps APP 21-43 Disassembling and assembling hpp.danfoss.com...
-
Page 2: Table Of Contents
M8 mm nut • M8 x 70 mm screw WARNING: Do not reuse disassembled O-rings or shaft seal as they might be damaged. Always use new O-rings. 2 | 180R9121 | 521B1018 | DKCFN.PI.013.A6.02 © Danfoss | DCS (im) | 2017.06... -
Page 3: Disassembling The Pump
Service guide | Disassembling and Assembling, APP 21-43 Disassembling the pump 2. Using a 10 mm combination wrench, unscrew the four bolts from shaft seal 1. Disconnect the pump and motor from the flange. system. Remove non-return valve and If shaft seal flange is stuck, screw in two connector from the pump. - Page 4 WARNING: Note: As the retainer ball is not attached Do not use any tools. to the retainer plate, it might fall out. 4 | 180R9121 | 521B1018 | DKCFN.PI.013.A6.02 © Danfoss | DCS (im) | 2017.06...
- Page 5 Service guide | Disassembling and Assembling, APP 21-43 15. Mount a 8 mm eye bolt in the cylinder barrel. Pull straight upwards. A continuous lift will elevate the cylinder barrel out of housing. This can only be done if shaft seal is removed.
-
Page 6: Assembling The Pump
O-ring. If O-ring is damaged, the Ensure that two screw holes can be pump will leak. reached from below. 7. Screw in at least two screws. 6 | 180R9121 | 521B1018 | DKCFN.PI.013.A6.02 © Danfoss | DCS (im) | 2017.06... - Page 7 Service guide | Disassembling and Assembling, APP 21-43 9. Place pump vertically. Place 10.5 mm pins 8. Place housing horizontally. Screw in the in port flange. rest of the screws on port flange. Tighten 10. Position port plate by using the two pins.
- Page 8 23. Screw in the rest of the bolts and cross straight downwards as possible. Be careful tighten all screws to a torque according to not to squeeze O-ring. exploded view. 8 | 180R9121 | 521B1018 | DKCFN.PI.013.A6.02 © Danfoss | DCS (im) | 2017.06...
- Page 9 Service guide | Disassembling and Assembling, APP 21-43 Shaft seal 25. Lubricate shaft with clean filtered water. 26. Place stop for shaft seal on shaft. WARNING: Ensure that carbon ring is pointing 24. Place pump horizontally to get access to shaft.
-
Page 10: Disassembling And Assembling Of The Swash Plate
Finally check the surface on the swash plate for any marks or foreign 3. Change the O-ring on the mounting particles. flange. 5. Mount the assembled part on the pump. 10 | 180R9121 | 521B1018 | DKCFN.PI.013.A6.02 © Danfoss | DCS (im) | 2017.06... -
Page 11: Disassembling And Assembling Of Cylinder Barrel And Valve Plate
Service guide | Disassembling and Assembling, APP 21-43 Disassembling and assembling of cylinder barrel and valve plate Mount backup rings first Mount then O-rings 1. Push a screwdriver into the hole between cylinder barrel and valve plate. Carefully push downward the screwdriver so that it 2. -
Page 12: Changing Pistons
12 | 180R9121 | 521B1018 | DKCFN.PI.013.A6.02 © Danfoss | DCS (im) | 2017.06... - Page 13 Service guide | Disassembling and Assembling, APP 21-43 Drain plug 5. If the flange does not move forward - 6. Remove the flange when the remaining loosen the drain plug to empty the pump three screws have been loosened. The from water by releasing vacuum.,...
- Page 14 It is recommended to place the pistons upside down on an even and clean base/surface. 13. Inspect the piston liners. Replace any worn parts. 14 | 180R9121 | 521B1018 | DKCFN.PI.013.A6.02 © Danfoss | DCS (im) | 2017.06...
- Page 15 Service guide | Disassembling and Assembling, APP 21-43 7.2 Assembling 1. Carefully push the retainer ring in place. 2. Lubricate pistons with clean filtered water. Insert the pistons arbitrarily. 3. Remove the stop for retainer ball. 4. Place the retainer ring in an old angle corresponding to the orientation of the swash plate.
- Page 16 9. Connect the pump to the rest of the system and bleed the pump. 16 | 180R9121 | 521B1018 | DKCFN.PI.013.A6.02 © Danfoss | DCS (im) | 2017.06...
-
Page 17: When Should The Pistons Be Replaced
This section provides guidance on, how to deter- pistons be replaced If the pistons break down, the pump will mine whether the parts of APP 21-43 are worn suffer a disastrous breakdown. and should be replaced. In case of doubt - the pistons must be replaced. -
Page 18: Exploded View App 21-26 And App 30/1,500
Disassembling and Assembling, APP 21-43 Service guide | Exploded view APP 21-26 and APP 30/1,500 18 | 180R9121 | 521B1018 | DKCFN.PI.013.A6.02 © Danfoss | DCS (im) | 2017.06... -
Page 19: Exploded View App 30/1,200, App 38/1,500, App 43/1,700
Service guide | Disassembling and Assembling, APP 21-43 10. Exploded view APP 30/1,200, APP 38/1,500, APP 43/1,700 © Danfoss | DCS (im) | 2017.06 180R9121 | 521B1018 | DKCFN.PI.013.A6.02 | 19... - Page 20 Danfoss A/S High Pressure Pumps DK-6430 Nordborg Denmark 180R9121 | 521B1018 | DKCFN.PI.013.A6.02 | 20 © Danfoss | DCS (im) | 2017.06...


Need help?
Do you have a question about the APP 21-43 and is the answer not in the manual?
Questions and answers